Digital Check CheXpress CX30 User Manual
Hide thumbs
Also See for CheXpress CX30:
- Service manual (59 pages) ,
- User manual (22 pages) ,
- Setup (2 pages)
Table of Contents
Advertisement
Advertisement
Table of Contents

Related Manuals for Digital Check CheXpress CX30


Summary of Contents for Digital Check CheXpress CX30
- Page 1 ® CheXpress CX30 User Manual April 2015_Rev 041715...
-
Page 2: Table Of Contents
CheXpress CX30 Features ..........................6 External View of the CheXpress CX30 ......................6 Bottom View of the CheXpress CX30 ......................6 Exit Door Positions of the CheXpress CX30 ....................7 CheXpress CX30 Initial Setup ......................... 8 New User Notice ............................8 Unboxing the CheXpress CX30 ........................ - Page 3 Image Quality ............................... 21 MICR Errors ..............................21 Using the Diagnostic Pop Up ........................21 CheXpress CX30 Frequently Asked Questions ................... 22 How Many Checks Per Minute Should My CX30 Scan? ................22 Why Am I Getting Skewed or Short Images? ....................22 What is the LED Status Light Sequence? .....................
-
Page 4: About The Chexpress Cx30
‘Reset Button’ that can be pressed to reset the scanner, if needed. The CheXpress CX30 is powered off when the PC powers down, as it senses the loss of power to the ‘USB’ port. -
Page 5: Chexpress Cx30 Included Equipment
CX30 User Manual Rev 041715 CheXpress CX30 Included Equipment The CheXpress CX30 includes the following equipment in the box: CheXpress CX30 check scanner 100V-240V 50/60Hz voltage sensing external power supply USB 2.0 cable with mini B connector ... -
Page 6: Chexpress Cx30 Features
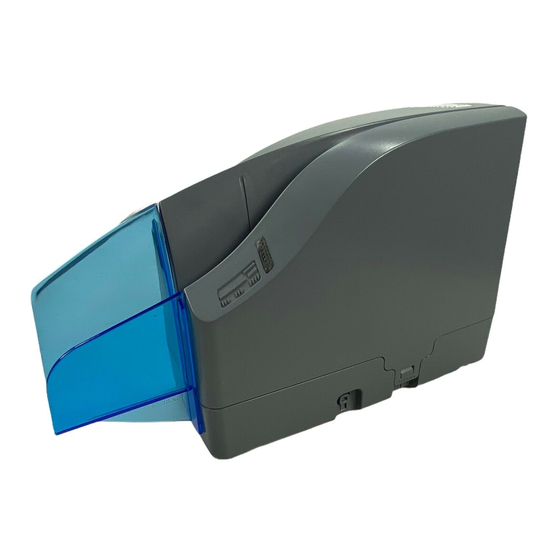
® CheXpress CX30 User Manual Rev 041715 CheXpress CX30 Features External View of the CheXpress CX30 Bottom View of the CheXpress CX30 Page | 6... -
Page 7: Exit Door Positions Of The Chexpress Cx30
CX30 User Manual Rev 041715 Exit Door Positions of the CheXpress CX30 Located at the rear of the scanner is an exit door that can be opened to enable the ‘Pass Through’. See the ‘Exit Door Function and Optional Scan Modes’ section for details about how the exit door can be used to enable additional scanning modes. -
Page 8: Chexpress Cx30 Initial Setup
Do not connect the ‘USB’ cable from the scanner to your PC before installing the ‘drivers’ or PLEASE NOTE: the ‘scanning application / software’. Digital Check does not provide scanning software. Please contact your bank or other solution provider for further assistance with installing the driver or getting the scanning software set up or installed. -
Page 9: Cable Connections And Scanner Placement
Disconnecting the USB and Power Supply Cables When removing or disconnecting the ‘USB’ or ‘Power Supply’ cables from the CheXpress CX30, be sure to pull straight back on the cable and remove as shown below. Do not remove the cable by pulling up, vertically or at an angle. Doing so can damage the connector. The cables must be removed by gently pulling straight back on the cable from the connector. -
Page 10: Installing The Ink Cartridge
® CheXpress CX30 User Manual Rev 041715 Installing the Ink Cartridge Note: This step only applies to CheXpress CX30s that have the optional inkjet configuration. Follow these instructions when installing the ink cartridge for the first time, or when replacing an empty cartridge. Inkjet platform style might vary based on production. -
Page 11: Installing The Ink Cartridge (Continued)
® CheXpress CX30 User Manual Rev 041715 Installing the Ink Cartridge (continued) Step 3: Insert the nozzle end of the cartridge into the platform first, while keeping the reservoir end of the cartridge tilted slightly upward. Push the cartridge downward until it snaps into position. The cartridge should be level with the baseplate when it is fully seated. -
Page 12: Installing The Franker Roller
® CheXpress CX30 User Manual Rev 041715 Installing the Franker Roller Note: This step only applies to CheXpress CX30s that have the optional franker configuration. Follow these instructions when installing the franker roller for the first time, or when replacing an empty franking roller. Step 1: Remove the Main Scanner Cover. -
Page 13: Testing The Scanner
The scanner is ready to be used with a ‘scanning application’ or a Digital Check demo program. Installing ScanLite2 The Digital Check demo program (ScanLite2) is a basic utility that allows you to scan and view images and test the various scanner functions. ‘ScanLite2’ is also useful for cleaning the scanner. See the ‘Cleaning the CX30 Drive Rollers’... -
Page 14: Getting Started With The Chexpress Cx30
CheXpress CX30 User Manual Rev 041715 Getting Started with the CheXpress CX30 LED Status Indicator Off or No LED: The ‘USB’ cable is not connected and/or no power to the scanner. Red LED: Scanner ‘USB’ and ‘Power Supply’ cables are properly connected. This is the default state when an application is not controlling the scanner or has not yet acquired the scanner. -
Page 15: Led Status Indicator (Continued)
Green LED: The scanning application has successfully acquired the scanner and it is ready to be used. Additional LED Information: After the CheXpress CX30 is synchronized with the application; the LED is used to detect the presence of documents in the entry pocket and will turn ‘Orange’ when a document has been loaded. -
Page 16: Inserting An Item Into The Scanner
® CheXpress CX30 User Manual Rev 041715 Inserting an Item into the Scanner The manual “drop and slide” style feeder takes just one item at a time. Use the following directions: Step 1: Remove all rubber bands, staples, paper clips, pins, etc. Step 2: Load the item by sliding it into the ‘Entry Tray’... -
Page 17: Accessing The Chexpress Cx30
Accessing the CheXpress CX30 Removing the Cover The CheXpress CX30 has a removable cover. Gently pull up on the ‘Locking Tabs’ located at the base of the scanner to provide access to the interior of the scanner. Page | 17... -
Page 18: Accessing The Cameras
Accessing the Internal Document Path The document path of the CheXpress CX30 offers a straight-through or ‘U’ path that can be accessed by opening the swing-out style, hinged doors located near the cameras and at the rear of the scanner. To open the track, locate the tab and pinch it together to unlock the door. -
Page 19: Chexpress Cx30 Routine Maintenance
Cleaning the CX30 Cameras To clean the cameras, use a Digital Check cleaning swab or a clean cloth to wipe the camera glass. Be careful not to scratch the glass when cleaning or accessing the camera for any reason. See the ‘Accessing the Cameras’... -
Page 20: Cleaning The Cx30 Drive Rollers (Continued)
® CheXpress CX30 User Manual Rev 041715 Cleaning the CX30 Drive Rollers (continued) Note: The cleaning card is only effective for 1-2 minutes after being removed from the pouch. Insert a cleaning card and feed the card through around 6-8 times. Allow the card to scan all of the way through, flipping the card between cycles, top to bottom or to a clean side after each pass though the scanner. -
Page 21: Chexpress Cx30 Troubleshooting
If a jam occurs, the paper path must be cleared. If the document does not exit the track, grab the document with both hands and carefully wiggle the document back and forth while lifting up. See the ‘Accessing the CheXpress CX30’ section for additional information on how to open up and access the scanner. Image Quality If you notice either streaking or fading on the images, the camera glass might require cleaning. -
Page 22: Chexpress Cx30 Frequently Asked Questions
However, the rated character yield on the inkjet cartridge is between 5-7 million characters. Do not shake or drop the cartridge which can cause the printing to fail. Digital Check recommends keeping a spare cartridge on hand in case the current cartridge cannot be used. -
Page 23: Chexpress Cx30 Specifications
® CheXpress CX30 User Manual Rev 041715 CheXpress CX30 Specifications Unit Size: Image Resolution Optical: Height: 7.47” (18.97 cm) 300 x 300 dpi - 8 bit grayscale Width: 3.92” (9.96 cm) 300 x 300 dpi - 24 bit color Length: 9.38” (23.83 cm) Image Resolution by Software Scaling: Weight: 3.95 lbs. -
Page 24: Digital Check Contact Information
Digital Check Corp. 10231 Trademark Street Technical Support and More Rancho Cucamonga, CA 91730 Phone: (909) 945-5106 Fax: (909) 948-3788 CheXpress is a trademark of Digital Check Corp. All other trademarks are the property of their respective owners. Page | 24...
Need help?
Do you have a question about the CheXpress CX30 and is the answer not in the manual?
Questions and answers