Furuno GP-7000F Operator's Manual
Color gps/plotter/sounder
Hide thumbs
Also See for GP-7000F:
- Operator's manual (132 pages) ,
- Installation manual (52 pages) ,
- Operator's manual (4 pages)
Table of Contents
Advertisement
Quick Links
Download this manual
See also:
Installation Manual
Advertisement
Table of Contents
Troubleshooting

Related Manuals for Furuno GP-7000F


Summary of Contents for Furuno GP-7000F
- Page 1 OPERATOR'S MANUAL COLOR GPS/PLOTTER/SOUNDER GP-7000F MODEL www.furuno.co.jp...
- Page 2 www.reelschematic.com www.reelschematic.com *00014913712* *00014913712* *00014913712* *00014913712*...
- Page 3 • Store this manual in a convenient place for future reference. • FURUNO will assume no responsibility for the damage caused by improper use or modification of the equipment (including software) by an unauthorized agent or a third party.
- Page 4 A warning label is attached to the equip- ment. Do not remove the label. If the Grounding may result. label is missing or illegible, contact a FURUNO agent or dealer. About the TFT LCD Name: Warning Label (1) WARNING The TFT LCD is constructed using the...
- Page 5 Please carefully read and fol- low the recommended procedures for operation and maintenance. Features The GP-7000F provides a totally integrated GPS receiver, color video plotter and color video sounder. The GPS receiver tracks up to 13 satellites (GPS: 12, WAAS: 1) simultaneously, and an 8-state Kalman filter ensures optimum accuracy in determination of vessel position, course and speed.
-
Page 6: Table Of Contents
www.reelschematic.com www.reelschematic.com TABLE OF CONTENTS SYSTEM CONFIGURATION ..............viii 1. OPERATIONAL OVERVIEW ..............1-1 Display Unit Controls ....................1-1 Loading an SD Chart Card ..................1-2 Turning the Power On/Off..................1-3 Adjusting Brilliance and Contrast................1-4 Selecting a Display ....................1-5 Soft Keys ........................1-5 MOB Mark .........................1-6 1.7.1 Entering the MOB mark, setting MOB as destination ........1-6 1.7.2 Deleting the MOB mark ..................1-7 Menu Operation ......................1-7... - Page 7 www.reelschematic.com www.reelschematic.com 4. WAYPOINT..................4-1 Entering Waypoints ....................4-1 4.1.1 Entering a waypoint at own ship position or cursor position ......4-1 4.1.2 Entering a waypoint from the waypoint list............. 4-3 4.1.3 Entering a waypoint/MOB mark with an external event switch ...... 4-4 Editing Waypoint Data....................
- Page 8 www.reelschematic.com www.reelschematic.com 9. DATA TRANSFER ................9-1 Memory Card Operations ..................9-1 9.1.1 Selecting the card slot to use .................9-1 9.1.2 Formatting memory cards ................9-2 9.1.3 Saving data to a memory card ...............9-2 9.1.4 Playing back data from a memory card ............9-3 Sending/Receiving Data ....................9-3 9.2.1 Sending/receiving waypoints data ..............9-3 9.2.2 Sending/receiving route data................9-5...
- Page 9 www.reelschematic.com www.reelschematic.com 12. AIS OPERATION................12-1 12.1 Turning AIS Feature On/Off ..................12-1 12.2 AIS Symbols......................12-2 12.3 Displaying Target Data.................... 12-2 12.4 Lost Target ......................12-3 12.5 CPA and TCPA ....................... 12-3 APPENDIX..................... AP-1 Menu Tree ........................AP-1 What is WAAS? ......................AP-5 World Time Chart ......................
-
Page 10: System Configuration
SYSTEM CONFIGURATION ANTENNA UNIT GPA-017 DISPLAY UNIT GP-7000F NMEA1 and NMEA2 ports: Radar, autopilot, video sounder, temperature indicator, etc. PC/NMEA IN port: PC, NMEA device, buzzer Distributor MB-1000* Power Source 12-24 VDC * Required when using Speed/Water 1 kW transducer. -
Page 11: Operational Overview
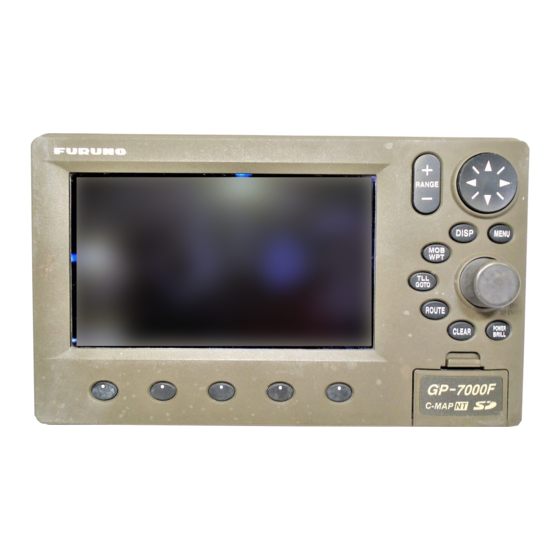
www.reelschematic.com www.reelschematic.com OPERATIONAL OVERVIEW This chapter acquaints you with the basics of your unit-from turning on the power to the soft key menu operation. Display Unit Controls RANGE key Cursor pad RANGE See below. DISP MENU SAVE ENTER knob GOTO PUSH TO ENTER POWER... -
Page 12: Loading An Sd Tm Chart Card
www.reelschematic.com www.reelschematic.com 1. OPERATIONAL OVERVIEW Loading an SD Chart Card Your unit reads C-MAP NT /NT MAX charts, stored on SD cards. Insert the ap- propriate chart card for your area before turning the power on to show chart data au- tomatically. -
Page 13: Turning The Power On/Off
Note 2: If the message "SYSTEM HAS FAILED START UP TEST. PLEASE CON- TACT A LOCAL FURUNO REPRESENTATIVE FOR REPAIR. PRESS ANY KEY TO CONTINUE." appears, contact your dealer for advice. Note 3: At the very first time you turn on your unit, the simulation mode window ap- pears. -
Page 14: Adjusting Brilliance And Contrast
www.reelschematic.com www.reelschematic.com 1. OPERATIONAL OVERVIEW Adjusting Brilliance and Contrast You can adjust display brilliance and contrast as shown below. 1. Press the [POWER/BRILL] key momentarily. The BACKLIGHT window appears. BACKLIGHT ENTER TO SET Backlight window 2. Rotate the [ENTER] knob to adjust. Rotate clockwise to raise the setting or counterclockwise to decrease it. -
Page 15: Selecting A Display
www.reelschematic.com www.reelschematic.com 1. OPERATIONAL OVERVIEW Selecting a Display Fourteen screen displays are available as shown figure in below. 1. Press the [DISP] key to show the DISPLAY MODE screen. DISPLAY MODE TURN KNOB TO SELECT DISPLAY MODE AND PRESS KNOB TO ENTER. Display mode screen 2. -
Page 16: Mob Mark
www.reelschematic.com www.reelschematic.com 1. OPERATIONAL OVERVIEW MOB Mark 1.7.1 Entering the MOB mark, setting MOB as destination The MOB (Man Overboard) mark functions to mark man overboard position. You can inscribe this mark from any mode. mark Range, bearing MOB information Current 162.5°M Distance and range... -
Page 17: Deleting The Mob Mark
www.reelschematic.com www.reelschematic.com 1. OPERATIONAL OVERVIEW 1.7.2 Deleting the MOB mark 1. Operate the cursor pad to place the cursor on the MOB mark, and then press the STOP soft key to cancel the navigation to the MOB mark. 2. Press the DELETE soft key to show the confirmation window. 3. - Page 18 www.reelschematic.com www.reelschematic.com 1. OPERATIONAL OVERVIEW 4. Rotate the [ENTER] knob to choose the option desired and then press the [ENTER] knob. To cancel, press the [CLEAR] key. 5. To close all menus and option windows, press the [MENU] key. To close option windows one by one, press the [CLEAR] key. Using the cursor pad 1.
-
Page 19: Simulation Mode
www.reelschematic.com www.reelschematic.com 1. OPERATIONAL OVERVIEW Simulation Mode The simulation mode, which is for use by service technicians for demonstration pur- poses, provides simulated operation to help acquaint users with the functions of the unit. All keys are operative. "SIMUL" appears at the bottom of the display when the simulation mode is active. Plotter Own ship's mark moves from the default or selected position at the speed and course set. - Page 20 www.reelschematic.com www.reelschematic.com 1. OPERATIONAL OVERVIEW 13.Push the [ENTER] knob to move the own ship mark on the cursor. 14.Press the [CLEAR] key. Echo sounder 1. Press the [MENU] key to show the menu bar on the plotter display. 2. Rotate the [ENTER] knob to choose ADVANCE and then push the [ENTER] knob. 3.
-
Page 21: Plotter Displays
www.reelschematic.com www.reelschematic.com PLOTTER DISPLAYS Presentation Modes The plotter display mainly shows chart, ship's track, waypoints, and navigation data. Three types of display presentations are provided for the normal plotter display: north- up, course-up and auto course-up. To change the mode, use the presentation mode selection soft key, which is the leftmost soft key. -
Page 22: Course-Up
www.reelschematic.com www.reelschematic.com 2. PLOTTER DISPLAYS 2.1.2 Course-up Press the COURSE UP soft key to show the course-up display. When destination is set, it is at the top of the screen and the north mark appears at the upper right side of the screen and points to north. -
Page 23: Cursor
www.reelschematic.com www.reelschematic.com 2. PLOTTER DISPLAYS Cursor 2.2.1 Turning on the cursor, shifting the cursor Press the cursor pad to turn the cursor on, and the cursor appears at the own ship's position. Operate the cursor pad to shift the cursor. The cursor moves in the direction of the arrow or diagonal pressed on the cursor pad. -
Page 24: Displaying Data
www.reelschematic.com www.reelschematic.com 2. PLOTTER DISPLAYS 2.2.3 Displaying data Besides its fundamental functions of providing position data, the cursor can also pro- vide data for chosen caution area, depth area, source of data, etc. Further, you can display information about an icon by placing the cursor on it. 1. -
Page 25: Navigation Data Display
www.reelschematic.com www.reelschematic.com 2. PLOTTER DISPLAYS Navigation Data Display The navigation data display provides generic navigation data, and it is shown in com- bination displays. Appropriate sensors are required. Bars (- -) appear when corresponding sensor is not connected. Course Position LATITUDE LONGITUDE 22º03.730N... -
Page 26: Compass Display
www.reelschematic.com www.reelschematic.com 2. PLOTTER DISPLAYS Compass Display The compass display, shown in combination displays, provides steering information. The compass rose shows two triangles: the red triangle shows own ship's course and the black triangle, which moves with ship's course, shows the bearing to destination waypoint. -
Page 27: Highway Display
www.reelschematic.com www.reelschematic.com 2. PLOTTER DISPLAYS Highway Display The highway display, shown in combination display with the plotter screen, provides a graphic presentation of ship's track along intended course. It is useful for monitoring ship's progress toward a waypoint. The own ship marker shows the relation between your vessel and intended course. -
Page 28: Gps Status Display
www.reelschematic.com www.reelschematic.com 2. PLOTTER DISPLAYS GPS Status Display The GPS status display provides data on the GPS satellites. Position LONGITUDE LATITUDE ACQUIRING 33 18.426N 131 48.608W HDOP TIME DATE 1.00 Apr/02/04 12:09 AM 12.5 DOP value Receive signal level: Estimated position in the sky, Bars show satellite and satellite number in brown circle signal level. -
Page 29: Tide, Celestial Display
www.reelschematic.com www.reelschematic.com 2. PLOTTER DISPLAYS Tide, Celestial Display Your plotter provides for calculation of the tide heights for any date. Additionally it dis- plays the time of sunrise, sunset, moonrise and moonset. Nearest Tide Station: - - - - - - . -
Page 30: Graph Display
www.reelschematic.com www.reelschematic.com 2. PLOTTER DISPLAYS Graph Display Four graphs can be displayed alternately on the half-screen of the LCD: depth, wind, water temperature and SOG (speed). Press the GRAPH TYPE soft key to choose display graphs in the sequence shown below. -
Page 31: Wind Display
www.reelschematic.com www.reelschematic.com 2. PLOTTER DISPLAYS 2.10 Wind Display Your plotter can show the graphical wind indicator when the appropriate data is input. HEAD WIND TRUE 7º M 15.2 kt 47.8 STBD Wind display Selecting the wind direction indication format The wind direction can be selected to true or apparent. 1. -
Page 32: Navdata Window
www.reelschematic.com www.reelschematic.com 2. PLOTTER DISPLAYS 2.11 NAVDATA Window The second soft key from the left functions to control the NAVDATA window. Each press of the key changes this soft key label in the sequence of NAV DATA, NAV+CUR and OFF. 34 44.448N 135 21.218E 007 M... -
Page 33: Track
www.reelschematic.com www.reelschematic.com TRACK Your ship's track is plotted on the screen using navigation data fed from the internal GPS navigator. This chapter shows you what you can do with track, from turning it on or off to changing its plotting interval. In the default setting, own ship's track is turned on and is displayed in black. -
Page 34: Displaying Track
www.reelschematic.com www.reelschematic.com 3. TRACK 5. Rotate the [ENTER] knob to choose ACTIVE TRACK and then push the [ENTER] knob. 6. Rotate the [ENTER] knob to choose the desired number of own ship tracks to use, from among 1 to 5. 7. -
Page 35: Hiding The Track
www.reelschematic.com www.reelschematic.com 3. TRACK Hiding the Track The track lines can be hidden (but recorded). This function is useful when there are too many tracks to distinguish on the screen and it is hard to distinguish one from an- other. 1. -
Page 36: Track Plotting Interval
www.reelschematic.com www.reelschematic.com 3. TRACK 3.6.2 Track plotting interval 1. Choose TRACK from the PLOTTER menu. 2. Choose DISTANCE or TIME as appropriate and then push the [ENTER] knob. 1sec 5 sec 0.01 10 sec 0.05 30 sec 1 min 5 min 10 min 30 min 10.0... -
Page 37: Waypoint
www.reelschematic.com www.reelschematic.com WAYPOINT In navigation terminology, a waypoint is a particular location on a voyage whether it be a starting, intermediate or destination point. A waypoint is the simplest piece of in- formation your equipment requires to get you to a destination, in the shortest distance possible. - Page 38 www.reelschematic.com www.reelschematic.com 4. WAYPOINT 4. Rotate the [ENTER] knob to choose the desired alphanumeric character. You can clear all digits in the field by pressing the CLR FLD soft key. 5. Press to move the cursor to the next digit, and then rotate the [ENTER] knob to choose the character desired.
-
Page 39: Entering A Waypoint From The Waypoint List
www.reelschematic.com www.reelschematic.com 4. WAYPOINT 4.1.2 Entering a waypoint from the waypoint list You can manually enter waypoint position from the waypoint list as follows. 1. Press the [MENU] key to show the menu bar. 2. Rotate the [ENTER] knob to choose PLOTTER and then push the [ENTER] knob to show the PLOTTER menu. -
Page 40: Entering A Waypoint/Mob Mark With An External Event Switch
www.reelschematic.com www.reelschematic.com 4. WAYPOINT 4.1.3 Entering a waypoint/MOB mark with an external event switch If the equipment is equipped with an external event switch you may choose what mark is inscribed on the screen when the switch is pressed. The choices are Waypoint, MOB mark or Off (no event switch is connected). -
Page 41: Editing Waypoint Data
www.reelschematic.com www.reelschematic.com 4. WAYPOINT Editing Waypoint Data Waypoint data may be edited from the waypoint list or directly from the plotter display. 4.2.1 Editing waypoint data from the waypoint list 1. Press the [MENU] key to show the menu bar. 2. -
Page 42: Erasing Waypoints
www.reelschematic.com www.reelschematic.com 4. WAYPOINT Erasing Waypoints Waypoints can be erased from the waypoint list or directly from the plotter display. 4.3.1 Erasing a waypoint directly from the plotter display 1. Press the cursor pad to place the cursor on the waypoint you want to delete. 2. -
Page 43: Searching, Sorting Waypoints
www.reelschematic.com www.reelschematic.com 4. WAYPOINT Searching, Sorting Waypoints You can search and sort waypoints on the waypoint list as follows. Searching by waypoint name 1. Open the WAYPOINT LIST. 2. Rotate the [ENTER] knob to choose SEARCH at the bottom of the screen. 3. -
Page 44: Other Waypoint List Functions
www.reelschematic.com www.reelschematic.com 4. WAYPOINT Other Waypoint List Functions This section shows you how to execute the various functions available on the WAY- POINT LIST. 4.5.1 Filtering waypoints by mark shape You may filter waypoints in the waypoint list by mark shape. This is useful when you are looking for waypoints of a specific shape. -
Page 45: Hiding Or Showing Waypoints
www.reelschematic.com www.reelschematic.com 4. WAYPOINT 4.5.2 Hiding or showing waypoints Waypoints can be shown or hidden individually or collectively on the plotter display as below. 1. Open the WAYPOINT LIST. 2. Press the cursor pad ( ) to choose the waypoint you want to show or hide. All waypoints can also be shown or hidden. - Page 46 www.reelschematic.com www.reelschematic.com 4. WAYPOINT This page is intentionally left blank. 4-10...
-
Page 47: Route
www.reelschematic.com www.reelschematic.com ROUTE Often a trip from one place to another involves several course changes, requiring a series of route points (waypoints) which you navigate to, one after another. The se- quence of waypoints leading to the ultimate destination is called a route. Entering Routes You can store up to 200 routes and a route may consist of 35 points. -
Page 48: Changing The Route Name/Comment
www.reelschematic.com www.reelschematic.com 5. ROUTE Range between two waypoints ROUTE NAME:0001RT______ Route name and 00 73WP______ 34 41.895 ’N COMMENT : 17:33_ JUL1003 comment 14:09_APR0403 135 21.109 ’W 0001WP______ 34 43.776 ’N 09:21_JAN1903 135 17.883 ’W NISHINOMIYA_ 34 46.007 ’N 10:34_JAN1903 135 19.521 ’W 0008WP______ 34 80.398 ’N... -
Page 49: Connecting Routes
www.reelschematic.com www.reelschematic.com 5. ROUTE Connecting Routes Two routes which you have created can be connected as follows to form a new route. 1. Open the route menu. 2. Rotate the [ENTER] knob to choose CONNECT at the bottom of screen and then push the [ENTER] knob. -
Page 50: Inserting Waypoints
www.reelschematic.com www.reelschematic.com 5. ROUTE Inserting Waypoints Waypoints can be inserted in a route as follows: Inserting a waypoint from the route list 1. Show the route list. 2. Press the cursor pad ( ) to choose a route. 3. Rotate the [ENTER] knob to choose EDIT at the bottom of screen and then push the [ENTER] knob to show the route menu. -
Page 51: Removing Waypoints From A Route
www.reelschematic.com www.reelschematic.com 5. ROUTE Inserting a waypoint from the plotter display You can insert a waypoint in a route directly on the screen. 1. Press the cursor pad to place the cursor on the desired line between waypoints in a route. The window below appears. -
Page 52: Information On Route Report
www.reelschematic.com www.reelschematic.com 5. ROUTE Information on Route Report The route report provides various information about routes, such as time distance and necessary fuel to go to a waypoint in route. 1. Open the route list. 2. Press the cursor pad ( ) to choose the route desired. -
Page 53: Changing The Color Of Route Line
www.reelschematic.com www.reelschematic.com 5. ROUTE Entering the speed for TIME column Enter speed to be used for TIME calculation. 1. Show the route report. 2. Rotate the [ENTER] knob to choose SPEED at the bottom of screen and then push the [ENTER] knob to show the SPEED window. SPEED 0.0 kt You can change the digit by pressing the cursor pad (... -
Page 54: Searching Routes
www.reelschematic.com www.reelschematic.com 5. ROUTE Searching Routes You can search for a route through the route list or on the plotter display. Searching a route through the route list 1. Open the route list. 2. Rotate the [ENTER] knob to choose SEARCH at the bottom of screen. 3. -
Page 55: Navigation
www.reelschematic.com www.reelschematic.com NAVIGATION This chapter shows you how to get to a desired destination by using "quick points", waypoints, port services and routes. Navigating to Quick Points The quick points feature allows you to navigate to a cursor-selected location. Each time a quick point is entered, the previous quick point is written over. - Page 56 www.reelschematic.com www.reelschematic.com 6. NAVIGATION Navigating a quick route 1. Press the cursor pad to place the cursor at the position where you want to enter a waypoint. 2. Press the [ROUTE] key to show the new waypoint window. 3. If necessary, arrange the waypoint data. 4.
- Page 57 www.reelschematic.com www.reelschematic.com 6. NAVIGATION EXPANDING SQUARE This route is created with a spiral pattern. 006QW 002QW 007QW 003QW 005QW 001QW 004QW Example of EXPANDING SQUARE pattern To set an expanding square route, do the following: 1. Press the [ROUTE] key followed by SAR PATTERN soft key to show the pattern window.
- Page 58 www.reelschematic.com www.reelschematic.com 6. NAVIGATION 5. Rotate the [ENTER] knob to choose the number of waypoints to use in a route and then press the SAVE soft key. (Setting range: 1 to 35 points) The cursor moves to ROTATION setting automatically. 6.
- Page 59 www.reelschematic.com www.reelschematic.com 6. NAVIGATION (North) Bearing set at "DIRECTION" The cursor moves to the first digit of SPACE automatically. 4. Rotate the [ENTER] knob to set the range between two waypoints in longitudinal direction at SPACE and then press the SAVE soft key. (Setting range: 0 to 999.9 Range set at "SPACE"...
- Page 60 www.reelschematic.com www.reelschematic.com 6. NAVIGATION CIRCULAR The route is created with a "flower" pattern. The shape of a CIRCULAR pattern may be adjusted by changing the setting of "SECTOR". The following shows the examples of routes when SECTOR is set to "90°" and "38°". 002QW 005QW 002QW...
- Page 61 www.reelschematic.com www.reelschematic.com 6. NAVIGATION 002QW 003QW Degree set at "SECTOR" 001QW Note: The number of waypoints used in a route will be "n/360+2 (n=SECTOR set- ting)". The cursor moves to the first digit of LENGTH automatically. 5. Rotate the [ENTER] knob to set the radius for the circle and then push the [ENTER] knob.
- Page 62 www.reelschematic.com www.reelschematic.com 6. NAVIGATION Navigating to ports, port service C-MAP NT+/NT MAX chart cards have a port service list which shows services available at ports and harbors. You can use the list to set destination as follows. 1. Press the [MENU] key to show the menu bar. 2.
-
Page 63: Navigating To Waypoints
www.reelschematic.com www.reelschematic.com 6. NAVIGATION Navigating to Waypoints You can select an existing waypoint as destination by cursor, by name or through the WAYPOINT LIST. To cancel the navigation, locate the cursor on the destination waypoint, and then press the STOP soft key. Selecting waypoint by cursor 1. -
Page 64: Following A Route
www.reelschematic.com www.reelschematic.com 6. NAVIGATION Following a Route You can follow a route as follows. Setting a complete route as destination This method enables you to navigate from the first waypoint of a route. 1. Press the cursor pad to place the cursor at the location not occupied by waypoint. 2. -
Page 65: Cancelling Navigation
www.reelschematic.com www.reelschematic.com 6. NAVIGATION Skipping route waypoints In some instances you may want to "skip" waypoints while following a route. In the fig- ure below, for example, the vessel has decided to navigate from waypoint 05 to 03, skipping waypoint 04. Waypoint 1 Waypoint 2 PORT 1... -
Page 66: Affecting The Destination Set At Primary Unit To Secondary
www.reelschematic.com www.reelschematic.com 6. NAVIGATION Affecting the Destination Set at Primary Unit to Secondary When multiple GP-7000 series plotters are connected, the C-LINK feature may be ac- tivated to duplicate at the secondary plotter the destination set at the primary plotter. With C-LINK not turned Off, destination may also only be set at the primary plotter. -
Page 67: Alarms
www.reelschematic.com www.reelschematic.com ALARMS The plotter section has seven conditions which generate both audio and visual alarms: arrival, XTE, temperature, depth, anchor, STW and grounding alarms. When an alarm is violated both audio and visual alarms are released. You may silence the audio alarm with the [CLEAR] key. -
Page 68: Audible Alarm On/Off
www.reelschematic.com www.reelschematic.com 7. ALARMS Audible Alarm On/Off Audio and visual alarms are released whenever an alarm setting is violated. You can enable or disable the audio alarm as follows: 1. Press the [MENU] key to show the menu bar. 2. Rotate the [ENTER] knob to choose ALARMS and then push the [ENTER] knob to show the ALARMS menu. -
Page 69: Xte (Cross-Track Error) Alarm
www.reelschematic.com www.reelschematic.com 7. ALARMS XTE (Cross-Track Error) Alarm The XTE alarm warns you when your boat is off its intended course. Note that this alarm is available only when a destination is set. Own ship Destination Alarm position waypoint setting Intended course : Alarm... -
Page 70: Temperature Alarm
www.reelschematic.com www.reelschematic.com 7. ALARMS Temperature Alarm Note: This alarm requires water temperature data. There are two types of water alarms: Within Range and Out of Range. The Within Range alarm sounds when the water temperature is within the range set, and the Out of Range sounds when the water temperature is higher or lower than the range set. -
Page 71: Anchor Alarm
www.reelschematic.com www.reelschematic.com 7. ALARMS Anchor Alarm The anchor alarm informs you that your boat is moving when it should be at rest. Own ship's Setting range position : Alarm How the anchor watch alarm works 1. Open the ALARMS menu. 2. -
Page 72: Depth Alarm
www.reelschematic.com www.reelschematic.com 7. ALARMS Depth Alarm The depth alarm sounds when the depth is within the alarm range set. 1. Open the ALARMS menu. 2. Rotate the [ENTER] knob to choose DEPTH ALARM and then push the [ENTER] knob. Depth 0000.0 Ft Range 0010.0 Ft 3. -
Page 73: Grounding Alarm
www.reelschematic.com www.reelschematic.com 7. ALARMS Grounding Alarm The grounding alarm sounds when there is an object on chart data which is within the range and depth set. Further, you can know what kind of object is causing the alarm when it enters in the range. 1. - Page 74 www.reelschematic.com www.reelschematic.com 7. ALARMS This page is intentionally left blank.
-
Page 75: Customizing Your Unit
www.reelschematic.com www.reelschematic.com CUSTOMIZING YOUR UNIT This chapter describes the various options which allow you to customize the plotter section to suit your needs. GENERAL Menu The GENERAL menu provides the basic setup for the unit. LANGUAGE English KEYPAD BEEP PALETTE Normal TIME LINE Infinite... - Page 76 www.reelschematic.com www.reelschematic.com 8. CUSTOMIZING YOUR UNIT TIME FORMAT Chooses time notation; 12 hours or 24 hours. DATE FORMAT Chooses date notation; MM-DD-YY or DD-MM-YY. AUTO INFO Chooses what data is available with the cursor; Off, On Points or On All. On Points: Data for selected chart symbol, for example, lighthouse or harbor.
-
Page 77: Map Menu
www.reelschematic.com www.reelschematic.com 8. CUSTOMIZING YOUR UNIT MAP Menu The MAP menu sets up the map display. ZOOM TYPE Standard FONTS SYMBOLS NORMAL PERSPECTIVE VIEW DYNAMIC NAV-AIDS MIXING LEVELS SAFETY STATUS BAR NAV AIDS PRESENTATION CURRENTS PREDICTION MAP CONFIGURATIONS Map menu ZOOM TYPE Chooses the zoom type between Standard and Flexi-Zoom. - Page 78 www.reelschematic.com www.reelschematic.com 8. CUSTOMIZING YOUR UNIT BEST MAP Shown in red when the unsuitable chart scale is selected. DATA OFF Mixing levels can be turned on when the electronics chart coverage area does not pro- vide enough coverage to completely fill the display screen. When the cursor or own ship mark is placed in the area with coverage, the chart data is shown as below.
- Page 79 www.reelschematic.com www.reelschematic.com 8. CUSTOMIZING YOUR UNIT MAP CONFIGURATION DISPLAY MODE Chooses the map to display; Full, Medium, Low, Tides or Custom. "Full" shows all data in the chart card. Note that data can be arranged only when Cus- tom is chosen here. As for each items, refer to the handbook for C-MAP. Settings of Display modes Display mode Partition...
- Page 80 www.reelschematic.com www.reelschematic.com 8. CUSTOMIZING YOUR UNIT Settings of Display modes (con’t) Display mode Partition Items Full Medium Tides LAND ELEVATIONS LAND ELEVATION VALUES LAND SETTINGS ROADS POINTS OF INTEREST LAT/LON GRID CHART Auto BOUNDARIES CHART SETTINGS VALUE ADDED DATA CHART LOCK Setting details Menu Item...
- Page 81 www.reelschematic.com www.reelschematic.com 8. CUSTOMIZING YOUR UNIT (con’t) Menu Item Settings 07, 16, 33 ft 01, 03, 06 fa DEPTH RANGE MIN 02, 05, 10 m 01, 03, 06 pb DEPTH SETTINGS 16, 33, 66 ft 03, 06, 11 fa DEPTH RANGE MAX 05, 10, 20 m 03, 06, 12pb LAND ELEVATIONS...
-
Page 82: Advanced Menu
www.reelschematic.com www.reelschematic.com 8. CUSTOMIZING YOUR UNIT ADVANCED Menu The ADVANCED menu calibrates data. Item Settings GPS-generated position may be off by some seconds because of various factors. In this FIX CORRECTION case, you can automatically correct GPS position by selecting On. Corrects the GPS antenna position. - Page 83 www.reelschematic.com www.reelschematic.com 8. CUSTOMIZING YOUR UNIT NAVIGATE Item Settings Choose the coordinate display method among COORDINATE SYSTEM ddd mm ss, ddd mm.mm, ddd mm.mmm and ddd.ddddd for latitude, or TD. Geodetic datum is a reference for geodetic sur- vey measurements consisting of fixed latitude, longitude and azimuth values associated with a defined station of reference.
-
Page 84: Info Menu
www.reelschematic.com www.reelschematic.com 8. CUSTOMIZING YOUR UNIT INFO Menu This menu shows the detailed information for the location selected by the cursor. Choose a location, and then open the INFO menu and select item. FIND Menu You can find objects on the chart data in use dividing with the category of TIDE STA- TION, WRECKS and OBSTRUCTIONS. -
Page 85: Data Transfer
www.reelschematic.com www.reelschematic.com DATA TRANSFER This chapter provides information for saving and replaying data to and from memory cards, and uploading and downloading data. Memory Card Operations The memory cards store these data: waypoints, routes and track. 9.1.1 Selecting the card slot to use There are two card slots, upper and lower. -
Page 86: Formatting Memory Cards
www.reelschematic.com www.reelschematic.com 9. DATA TRANSFER 9.1.2 Formatting memory cards Before you can use a memory card it must be formatted. This prepares the card for use with the system. Note that formatting a memory card erases all data from the card. 1. -
Page 87: Playing Back Data From A Memory Card
www.reelschematic.com www.reelschematic.com 9. DATA TRANSFER 9.1.4 Playing back data from a memory card Data (track, waypoints, routes) can be loaded from a memory card and displayed on the screen. This feature is useful for observing past data. 1. Insert the memory card to play back into the selected slot. 2. - Page 88 www.reelschematic.com www.reelschematic.com 9. DATA TRANSFER 4. When receiving data, follow steps shown below. 1) Choose NMEA 1 INPUT, NMEA 2 INPUT or RS232 3 INPUT appropriately, and then push the [ENTER] knob. 2) Communication format between this unit and PC (or GP-7000/F) should be the same.
-
Page 89: Sending/Receiving Route Data
www.reelschematic.com www.reelschematic.com 9. DATA TRANSFER 9.2.2 Sending/receiving routes data You may sending/receiving routes as follows. When sending data, set the connected equipment for receiving. Note: All waypoints in a route can be transported with the route. 1. Connect the PC or another GP-7000/F to the equipment. 2. -
Page 90: Waypoint, Route Format
You may transfer waypoint and route data to another GP-7000 series unit or a PC in Standard or Furuno format, via the NMEA1 port, NMEA2 port or PC NMEA IN port. 1. Press the [MENU] key to show the menu bar. -
Page 91: 10. Video Sounder Operation
www.reelschematic.com www.reelschematic.com 10. VIDEO SOUNDER OPERATION This chapter covers video sounder operation. The procedures in this chapter assume that a full screen video sounder display is selected. Principle of Operation The video sounder determines the distance between its transducer and underwater objects such as fish, lake bottom or seabed and displays the results on screen. -
Page 92: Sounder Display
www.reelschematic.com www.reelschematic.com 10. VIDEO SOUNDER OPERATION 10.1 Sounder Display 10.1.1 Description of sounder display Depth scale Minute mark er Time Color bar Zero line Temp 0'30" scale Depth to VRM 50.0 Fish echo Time Water marker temp graph 200k Tx frequency Depth Bottom echo Indications on the single frequency display... - Page 93 www.reelschematic.com www.reelschematic.com 10. VIDEO SOUNDER OPERATION 1. Press the [DISP] key to show the DISPLAY MODE menu. DISPLAY MODE TURN KNOB TO SELECT DISPLAY MODE AND PRESS KNOB TO ENTER. Display mode menu 2. Rotate the ENTER knob to choose the icon.
-
Page 94: Selecting A Sounder Display
www.reelschematic.com www.reelschematic.com 10. VIDEO SOUNDER OPERATION AUTO MODE PRESET MANUAL DISPLAY MODE NORMAL FREQUENCY 50 KHz PICTURE ADVANCE 1/1 TEMPERATURE GRAPH ZOOM MARKER A-SCOPE SOUNDER SETUP SENSOR SETUP Sounder menu 3. Rotate the [ENTER] knob to choose FREQUENCY and then push the [ENTER] knob. - Page 95 www.reelschematic.com www.reelschematic.com 10. VIDEO SOUNDER OPERATION Bottom lock, Bottom zoom, Marker zoom, Bottom discrimination Using the soft key 1. Press the DISP MODE soft key to show the display mode window. NORMAL BOTTOM LOCK BOTTOM ZOOM MARKER ZOOM BOTTOM DISCRIMINATION Display mode window 2.
- Page 96 www.reelschematic.com www.reelschematic.com 10. VIDEO SOUNDER OPERATION Bottom-lock display The bottom-lock display provides a compressed normal picture on the right half of the screen and a 15 or 30 feet (5 or 10 meter) wide layer in contact with the bottom is ex- panded onto the left half of the screen.
- Page 97 www.reelschematic.com www.reelschematic.com 10. VIDEO SOUNDER OPERATION Marker-zoom display The marker-zoom display expands a selected area of the normal sounder picture to full vertical size of the screen on the left-half window. You may specify the portion to expand by operating the VRM (Variable Range Marker), which you can shift with the [ENTER] knob.
-
Page 98: Automatic Sounder Operation
www.reelschematic.com www.reelschematic.com 10. VIDEO SOUNDER OPERATION A-scope display The A-SCOPE display, which can be enabled or disabled on the SOUNDER menu, shows echoes at each transmission with amplitudes and tone proportional to their in- tensities. It is useful for estimating fish specifies and seabed composition. Ex. -
Page 99: Types Of Automatic Sounder Mode
www.reelschematic.com www.reelschematic.com 10. VIDEO SOUNDER OPERATION 10.2.2 Types of automatic sounder mode Two types of automatic sounder modes are available: CRUISE and FISH. CRUISE is for tracking the bottom, and FISH is for searching fish schools. CRUISE uses a higher clutter rejection setting than FISH therefore it is not recommended for fish detection - weak fish echoes may be erased by the clutter suppression circuit. -
Page 100: Manual Sounder Operation
www.reelschematic.com www.reelschematic.com 10. VIDEO SOUNDER OPERATION 10.3 Manual Sounder Operation Manual operation is useful for observing fish schools and bottom using a fixed gain setting. The gain, range and range shift functions used together give you the means to select the depth you can see on the screen. -
Page 101: Adjusting The Gain
www.reelschematic.com www.reelschematic.com 10. VIDEO SOUNDER OPERATION 10.3.3 Adjusting the gain Normally, set the gain to the point where excessive noise does not appear on the screen. Use a higher gain setting for greater depths and a lower setting for shallower water. -
Page 102: Measuring Depth, Time
www.reelschematic.com www.reelschematic.com 10. VIDEO SOUNDER OPERATION 10.4 Measuring Depth, Time The VRM measures the depth and the time marker, time. 1. Rotate the [ENTER] knob to shift the VRM; counterclockwise to shift it upward, clockwise to shift it downward. You may also use the cursor pad ( ) to shift the VRM. -
Page 103: Reducing Interference
www.reelschematic.com www.reelschematic.com 10. VIDEO SOUNDER OPERATION 10.5 Reducing Interference Interference from other acoustic equipment operating nearby or other electronic equipment on your boat may show itself on the display as shown below. Interference from Electrical interference other sounder Types of interference To reduce interference, do the following: 1. -
Page 104: Reducing Low Level Noise
www.reelschematic.com www.reelschematic.com 10. VIDEO SOUNDER OPERATION 10.6 Reducing Low Level Noise Light-blue dots may appear over most of the screen. This is mainly due to sediment in the water, or noise. This noise can be suppressed by adjusting CLUTTER on the SEN- SITIVITY menu. -
Page 105: Erasing Weak Echoes
www.reelschematic.com www.reelschematic.com 10. VIDEO SOUNDER OPERATION 10.7 Erasing Weak Echoes Sediments in the water or reflections from plankton may be painted on the display in green or light-blue. These weak echoes may be erased as below. Weak echoes Appearance of weak echoes 1. -
Page 106: White Marker
www.reelschematic.com www.reelschematic.com 10. VIDEO SOUNDER OPERATION 10.8 White Marker The white marker functions to display a particular echo color in white. For example, you may want to display the bottom echo in white to discriminate fish echoes near the bottom. 1. -
Page 107: Picture Advance Speed
www.reelschematic.com www.reelschematic.com 10. VIDEO SOUNDER OPERATION 10.9 Picture Advance Speed The picture advance speed determines how quickly the vertical scan lines run across the screen. When selecting a picture advance speed, keep in mind that a fast advance speed will expand the size of the fish school horizontally on the screen and a slow ad- vance speed will contract it. -
Page 108: 10.10 Alarms
www.reelschematic.com www.reelschematic.com 10. VIDEO SOUNDER OPERATION 10.10 Alarms The sounder section has two conditions which generate audio and visual alarms: fish (normal) and fish (bottom lock) alarms. You may set up the sounder alarms on the ALARMS menu, which may be displayed by choosing ALARMS from the menu bar. -
Page 109: 10.10.2 Fish Alarm
www.reelschematic.com www.reelschematic.com 10. VIDEO SOUNDER OPERATION 10.10.2 Fish alarm The fish alarm sounds when a fish echo is within the preset alarm range. Note that the sensitivity of the fish alarm can also be set. 1. Open the ALARMS menu. 2. -
Page 110: 10.11 Water Temperature Graph
www.reelschematic.com www.reelschematic.com 10. VIDEO SOUNDER OPERATION 10.11 Water Temperature Graph The water temperature graph (appropriate sensor required) plots water temperature on the sounder display. It can be turned on or off as below. 1. Open the SOUNDER menu. 2. Rotate the [ENTER] knob to choose TEMPERATURE GRAPH and then push the [ENTER] knob. -
Page 111: 10.13 Displaying Nav Data
www.reelschematic.com www.reelschematic.com 10. VIDEO SOUNDER OPERATION 10.13 Displaying Nav Data You can show the navigation data at the left-hand side of the screen by pressing the NAVDATA ON soft key. Own ship position (L/L) 34 40.209N 135 17.485E 0'30" 316 M 50.0 12.0 kt --.- nm... -
Page 112: 10.14 Sounder Setup Menu
www.reelschematic.com www.reelschematic.com 10. VIDEO SOUNDER OPERATION 10.14 SOUNDER SETUP Menu The SOUNDER SETUP menu sets up the sounder section. 1. Press the [MENU] key to show the main menu. 2. Rotate the [ENTER] knob to choose SOUNDER and then push the [ENTER] knob to show the SOUNDER menu. - Page 113 www.reelschematic.com www.reelschematic.com 10. VIDEO SOUNDER OPERATION ECHO OFFSET (50 kHz, 200 kHz) If the on-screen echo level appears to be too weak or in manual operation too strong and the level cannot be adjusted satisfactorily with the gain control on the display unit, adjust echo offset to compensate for too weak or too strong echoes.
-
Page 114: 10.15 Interpreting The Sounder Display
www.reelschematic.com www.reelschematic.com 10. VIDEO SOUNDER OPERATION 10.15 Interpreting the Sounder Display This section provides, using typical examples, information necessary for interpreting the display. Zero line Surface noise Color bar Fish school Bottom 49.6 Typical display Color bar The color bar shows the relation between echo intensity and echo color on the screen. The top color (reddish brown) is the strongest color and the lower colors the weakest. - Page 115 www.reelschematic.com www.reelschematic.com 10. VIDEO SOUNDER OPERATION Zero line The zero line represents the transducer's position. It moves off the screen when a shifted range is used, or is shown at draft depth when ship's draft is entered. Zero line Range shifted Zero line Bottom echoes Bottom echoes are normally strongest and displayed in reddish brown or red, but col-...
- Page 116 www.reelschematic.com www.reelschematic.com 10. VIDEO SOUNDER OPERATION Bottom nature The nature of the bottom is known from the intensity and length of the bottom tail. Gen- erally, when observing the bottom nature, the lower sounding frequency is used, the pulselength is set to long, and the gain setting is not disturbed. In the hard and craggy bottom, the bottom appears in reddish brown with a long tail.
- Page 117 www.reelschematic.com www.reelschematic.com 10. VIDEO SOUNDER OPERATION Fish school density If two schools appear with the same color at different depth, the one in deeper water is denser because the ultrasonic wave attenuates as it propagates and the fish school in deep water tends to be displayed in a weaker color. Less Reddish Strong (Sparse echo)
- Page 118 www.reelschematic.com www.reelschematic.com 10. VIDEO SOUNDER OPERATION Surface noise When the sea is rough or the ship passes over a wake, surface noise may appear at the top of the screen. Surface noise Surface noise Aerated water When the sea is rough or the ship makes a quick turn, gaps in the bottom echo on the screen may appear.
-
Page 119: Maintenance & Troubleshooting
www.reelschematic.com www.reelschematic.com 11. MAINTENANCE & TROUBLESHOOTING 11.1 Maintenance Regular maintenance is important for continued performance. Important points to be checked from time to time are shown below. WARNING NOTE Do not open the equipment. Do not apply paint, anti-corrosive sealant or contact spray to coating or plastic Hazardous voltage which can cause parts of the equipment. -
Page 120: Replacement Of Fuse
www.reelschematic.com www.reelschematic.com 11. MAINTENANCE & TROUBLESHOOTING 11.2 Replacement of Fuse CAUTION Use the correct fuse. Use of a wrong fuse can cause fire or damage the equipment. The fuse on the power cable protects the system from reverse polarity of the ship's mains and equipment fault. -
Page 121: Simple Troubleshooting
www.reelschematic.com www.reelschematic.com 11. MAINTENANCE & TROUBLESHOOTING 11.4 Simple Troubleshooting This section provides simple troubleshooting procedures which the user can follow to restore normal operation. If you cannot restore normal operation do not attempt to check inside the unit. Any trouble should be referred to a qualified technician. General troubleshooting If ... - Page 122 www.reelschematic.com www.reelschematic.com 11. MAINTENANCE & TROUBLESHOOTING Sounder troubleshooting If ... Then ... check if STOP is not selected at PICTURE ADVANCE on the SOUNDER menu. picture does not move although marks check for loosened transducer connector. and characters appear on SOUNDER SETUP menu, set TRANS- MISSION POWER to High.
-
Page 123: Diagnostics
www.reelschematic.com www.reelschematic.com 11. MAINTENANCE & TROUBLESHOOTING 11.5 Diagnostics This section provides the procedures for testing the equipment for proper operation. Four tests are provided: RAM menu, Dim menu, Cartridges and Serial ports. To ac- cess the test menu, do the following: 1. -
Page 124: Dim Menu
www.reelschematic.com www.reelschematic.com 11. MAINTENANCE & TROUBLESHOOTING 11.5.2 Dim menu The Dim menu checks the contrast and backlight control circuits for proper operation. 1. Rotate the [ENTER] knob to choose "Dim menu" on the SYSTEM TEST. 2. Push the [ENTER] knob to show the Dim window. Contrast Backlight Dim window... -
Page 125: Serial Ports
www.reelschematic.com www.reelschematic.com 11. MAINTENANCE & TROUBLESHOOTING 11.5.4 Serial ports You can confirm the signal input. 1. Rotate the [ENTER] knob to choose Serial port from the SYSTEM TEST. 2. Push the [ENTER] knob to show the Serial port window. Change parameters Input data display Serial port 3. -
Page 126: Clearing The Memory
www.reelschematic.com www.reelschematic.com 11. MAINTENANCE & TROUBLESHOOTING 11.7 Clearing the Memory The memory can be cleared to restart operation with default settings. All tracks, way- points and routes are deleted and all default menu settings are restored. 1. Turn the power on while holding the [CLEAR] key down. 2. -
Page 127: 12. Ais Operation
www.reelschematic.com www.reelschematic.com 12. AIS OPERATION Connected to an AIS transponder which outputs data in RS-232C format, your plotter can show the name, position and other nav data of AIS transponder equipped ships. 12.1 Turning AIS Feature On/Off To activate the AIS feature, do the following. 1. -
Page 128: Ais Symbols
www.reelschematic.com www.reelschematic.com 12. AIS OPERATION 12.2 AIS Symbols AIS-equipped ships are marked on the display at their current position with the appro- priate AIS symbol as shown below. AIS symbols Symbol Description Heading Activated automatically or manually. The dashed line shows ship's COG. -
Page 129: Lost Target
www.reelschematic.com www.reelschematic.com 12. AIS OPERATION 12.4 Lost Target A target is declared a lost target when no data is received for three to five reporting intervals. When this occurs, the target is marked with the lost target symbol. The lost target will be erased automatically if no data is received within 10 minutes. 12.5 CPA and TCPA When the predicted CPA of any target becomes smaller than a preset CPA (Closest... - Page 130 www.reelschematic.com www.reelschematic.com 12. AIS OPERATION Activating CPA/TCPA alarm To activate CPA/TCPA alarm you set, do the following. 1. Choose AIS SETUP from the ADVANCED menu and then push the [ENTER] knob. 2. Rotate the [ENTER] knob to choose CPA ALARM or TCPA ALARM appropriately and then push the [ENTER] knob.
-
Page 131: Appendix
www.reelschematic.com www.reelschematic.com APPENDIX Menu Tree Plotter MENU BAR GENERAL LANGUAGE ( English , others) KEYPAD BEEP (Off, On ) PALETTE ( Normal , SunLight, Night, NOAA) TIME LINE ( Infinite , Off, 2 min, 10 min, 30 min, 1 hour, 2 hours) TIME REFERENCE ( UTC , -19:30 to +19:30 (in 30 min. - Page 132 RS232 3 OUTPUT (GLL, VTG, BWR, DBT, DPT, MTW, VHW, WCV, APA, APB, HDG, BOD, XTE, RMA, RMB, RMC, GGA, HSC, AAM, GTD, MWV, ZDA, WPL, RTE, TLL Out) INPUT 3 MODE (RS232, NMEA) WPL/RTE FORMAT (Standard, Furuno) EXTERNAL EVENT (Off, WPT, MOB) C-LINK (Secondary Station, Primary Station, Off)
- Page 133 www.reelschematic.com www.reelschematic.com GPS SIMULATION SIMULATION MODE (Off, On) COURSE (0° to 359 ) SPEED (0 to 539 kt, 1.0) DATE TIME CURSOR CONTROL (Off, On) SELECT POSITION ECHO SOUNDER SIMULATION (Off, On) AIS SETUP DISPLAY (Off, On) ACTIVATION RANGE (0.1 to 50.0, 5.0 nm) CPA ALARM (Off, On) CPA LIMIT (0.5 to 50.0, 0.5 nm) TCPA ALARM (Off, On)
- Page 134 www.reelschematic.com www.reelschematic.com Sounder MENU BAR GENERAL (See page AP-1.) AUTO MODE PRESET ( MANUAL , FISH, CRUISE) SOUNDER DISPLAY MODE ( NORMAL , BOTTOM LOCK, BOTTOM ZOOM, MARKER ZOOM, BOTTOM DISCRIMINATION) FREQUENCY ( 50 kHz , 200 kHz) PICTURE ADVANCE (STOP, 1/16, 1/8, 1/4, 1/2, 1/1 . 2/1) TEMPERATURE GRAPH ( Off , On) ZOOM MARKER ( Off , On) A-SCOPE ( Off , On)
-
Page 135: What Is Waas
www.reelschematic.com www.reelschematic.com What is WAAS? WAAS, available in North America, is a provider in the worldwide SBAS (Satellite Based Augmentation System) navigation system. CBAS provides GPS signal correc- tions to SBAS users, for even better position accuracy, typically better than three meters. -
Page 136: World Time Chart
www.reelschematic.com www.reelschematic.com World Time Chart AP-6... -
Page 137: Specifications
SPECIFICATIONS OF GPS PLOTTER/SOUNDER GP-7000F GENERAL Display 7-inch wide color TFT color LCD, 480 (W) x 234 (H) dots Projection Mercator Usable Area 80° latitude or below Display Mode Plotter, Nav Data, Highway display, Compass display Alarms Arrival and Anchor watch, Cross track error, Temperature, Depth, Grounding, Ship’s speed alarms... - Page 138 www.reelschematic.com www.reelschematic.com INTERFACE Input data sentences IEC61162-1 and NMEA 0183 Ver2.0 DBT, DPT, MTW, TLL*, VHW, HDT, HDG, DSC*, MWV, DSE*, GGA, GLL, RMA, RMC, VTG, ZDA *: Output with Ver3.0 format. Output data sentences IEC61162-1 or NMEA 0183 Ver2.0 selected on menu $GPAAM, $GPAPB , $GPBOD, $GPBWR , $GPGLL...
- Page 139 www.reelschematic.com www.reelschematic.com COATING COLOR Antenna Unit N9.5 (white) Display Unit Cover: 2.5GY5/1.5, Panel: N3.0 SP - 3 E4429S00D...
- Page 140 www.reelschematic.com www.reelschematic.com...
-
Page 141: Index
www.reelschematic.com www.reelschematic.com INDEX AIS ............12-1 Event switch ..........4-4 Alarms ..........7-1, 10-18 Expanding square ........6-3 anchor ..........7-5 arrival ..........7-2 audible ..........7-2 FISH ............10-9 depth ........... 7-6 Fix ............. 8-8 fish ..........10-19 Fuse ............11-2 fish (B/L).......... - Page 142 www.reelschematic.com www.reelschematic.com INDEX sorting ..........4-7 White marker..........10-16 Palette ............8-1 Wind display..........2-11 Picture advance speed ......10-17 Wind graph..........8-2 Port ............6-8 Port service ..........6-8 Quick point ..........6-1 RAM menu ..........11-5 Route ............5-1 color .............5-7 connecting..........5-3 erasing ..........5-8 report............5-6 reversing ..........5-8 searching ..........5-8 SAR function ..........6-2 Serial ports ..........11-7 Ship icon ............8-2...
Need help?
Do you have a question about the GP-7000F and is the answer not in the manual?
Questions and answers