
Related Manuals for Furuno GP-1650


Summary of Contents for Furuno GP-1650
- Page 1 Back COLOR DGPS/PLOTTER COLOR GPS/PLOTTER GP-1650D, GP-1650 FURUNO/NAVIONICS GP-1650D, GP-1650 FURUNO/C-MAP NT...
- Page 2 9 - 5 2 , A s h i h a r a - c h o , N i s h i n o m i y a , J a p a n T e l e p h o n e : 0 7 9 8 - 6 5 - 2111 T e l e f a x : 0 7 9 8 - 6 5 - 4 2 0 0...
-
Page 3: Safety Instructions
100 meters. A warning label is attached to the equip- ment. Do not remove the label. If the label is missing or illegible, contact a FURUNO agent or dealer. Name: Warning Label (1) WARNING Type: 86-003-1011-0 To avoid electrical shock, do not Code No.: 100-236-230... -
Page 4: Table Of Contents
FOREWORD ... iv SYSTEM CONFIGURATION 1. OPERATIONAL OVERVIEW 1.1 Display Unit Controls ... 1-1 1.2 Inserting Mini Chart Card... 1-2 1.3 Turning the Power On/Off ... 1-2 1.4 Adjusting Tone and Brilliance ... 1-3 1.5 Plotter Displays ... 1-3 1.6 Menu Operation, Soft Keys ... 1-4 1.7 Demonstration Display ... - Page 5 10. CUSTOMIZING YOUR UNIT 10.1 CHART SETUP OPTIONS menu .. 10-1 10.2 DISPLAY OPTIONS menu ... 10-2 10.3 GPS/DGPS/TD OPTIONS menu ... 10-4 10.4 CONFIGURATION menu ... 10-7 11.USING C-MAP NT MODEL 11.1 Inserting Chart Card ...11-1 11.2 Cussor and Data Display ...11-1 11.3 Tidal Information ...
-
Page 6: Foreword
Owners Congratulations on your choice of the FURUNO GP-1650D COLOR DGPS/PLOT- TER, GP-1650 COLOR GPS/PLOTTER. We are confident you will see why the FURUNO name has become synonymous with quality and reliability. For over 50 years FURUNO Electric Com- pany has enjoyed an enviable reputation for innovative and dependable marine electron- ics equipment. -
Page 7: System Configuration
SYSTEM CONFIGURATION (GP-1650D) 1.2 m Whip Antenna (option) ANTENNA UNIT GPA-017 (GP-1650) Ship’s mains 10.8—31.2 VDC External equipment (Autopilot, etc.) DGPS beacon receiver GP-1650 only ANTENNA UNIT Receives signal from GPS satellite and beacon reference station (GP-1650D only). - Page 8 This page is intentionally left blank.
-
Page 9: Operational Overview
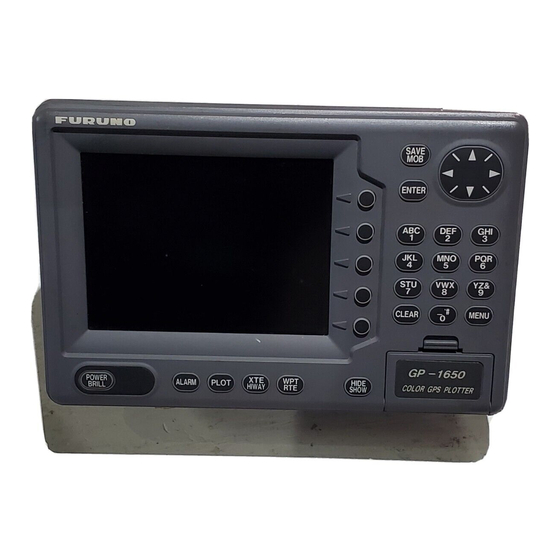
This chapter acquaints you with the basics of your unit - from turning on the power to the soft key menu operation. 1.1 Display Unit Controls Registers items on menus. Soft key's functions change depending on the display. POWER ALARM PLOT BRILL Displays the alarm menu. -
Page 10: Inserting Mini Chart Card
When the unit is turned on, it proceeds in the sequence shown in Figure 1-3, after displaying the FURUNO information display. Displayed for about five seconds. START UP TEST... -
Page 11: Adjusting Tone And Brilliance
1.4 Adjusting Tone and Brilliance 1. Press the [POWER/BRILL] key with a touch-and-release action. The tone and brilliance setting menu appears. TONE BRILL Tone and display brilliance setting menu Figure 1-4 Tone and brilliance adjustment screen 2. Press t or s to adjust display tone. 3. -
Page 12: Menu Operation, Soft Keys
Steering display, Highway display Press the [XTE/HIWAY] key to display the Steering display, Highway display alternately. Q P < 0 1 > 2 4 5 . 0 2 3 4 . 5 1h 59m 0.1NM 000 .0 2nm DGPS 3D [Steering Display] 9 4 . -
Page 13: Track Color
4. Use the cursor pad to select item, and then press the soft key EDIT. For example, select TRACK COLOR. The track color window appears. TRACK COLOR ™ YELLOW ™ GREEN ™ LIGHT BLUE ™ PURPLE ™ BLUE ™ WHITE Figure 1-10 Track color window 5. - Page 14 This page is intentionally left blank.
-
Page 15: Plotter Displays
2.1 Presentation Modes The plotter display mainly shows chart, ship’s track, waypoints, and navigation data. Three types of display presentations are pro- vided for the normal plotter display: north-up, course-up and auto course-up. To change the mode, use the presentation mode selection soft key, which is the 3rd soft key from the top. -
Page 16: Cursor
2.2 Cursor Turning on the cursor, shifting the cursor Press the cursor pad to turn the cursor on, and the cursor appears at the own ship’s po- sition. Operate the cursor pad to shift the cursor. The cursor moves in the direction of the arrow or diagonal pressed on the cursor pad. - Page 17 • When scrolling the chart outside the indi- ces. When this happens, select proper chart scale. Chart symbols FURUNO mini chart card The table below shows FURUNO mini chart symbols and their meanings. Table 2-2 FURUNO chart symbols Symbol Description...
- Page 18 Table 2-3 Comparison of FURUNO and Nav-Charts™ chart cards n i l l i b y t i t i s . . . *1 Nav-Charts™ chart may not center the cursor perfectly. *2 Nav-Charts™ chart may not center own ship's position perfectly.
-
Page 19: Navigation Data Display
Emergency Fueling station medical service Water Traveler’s supply station service station Customer Marine service station equipment service Information center Port Figure 2-9 Port service icons 2.6 Navigation Data Display The navigation data display provides generic navigation data and DPGS/GPS information. Press the [PLOT] several times to show the navigation data display. -
Page 20: Steering Display
Beacon information display Equipped with a DGPS beacon receiver, your unit can show DGPS reference station infor- mation. Press the soft key BEACON INFO to show the DGPS reference station informa- tion. DGPS reference station information Receive data status Beacon receiver setting status MODE AUTO SEARCH FREQ... -
Page 21: Highway Display
How to read the XTE scale The black boat-shaped mark shows own boat’s movement and direction, and amount to steer to return to course. Using Figure 2- 13 as an example, you would steer right by 000.02 nautical miles to return to course. When this mark is out of range of the XTE scale, the mark color changes from black to yellow. -
Page 22: Changing Operation Mode
2.9 Changing Operation Mode Operation mode can be changed between PLEASURE and FISHING. FISHING mode provides mark/line entry on the PLOTTER display. The mark can be entered up to 5000 points together with tracks. The apportion between track and mark memory can be changed at menu. -
Page 23: Track
3.1 Displaying Track 1. Press the [MENU] key to open the main menu. CHART SETUP OPTIONS DISPLAY OPTIONS GPS/DGPS/TD OPTIONS CONFIGURATION DGPS 3D Figure 3-1 Main menu 2. Press the soft key CHART SETUP OP- TIONS to open the chart setup menu. CHART OFFSET TRACK CONTROL CHART DETAILS... -
Page 24: Stopping/Restarting Plotting Of Track
3.4 Track Plotting Method, Interval In drawing the track, first the ship’s position (fed from the DGPS/GPS receiver) is stored into the unit’s memory at an interval of time or distance. A shorter interval provides bet- ter reconstruction of the track, but the stor- age time of the track is reduced. -
Page 25: Changing Track Memory Capacity
PLOT TIME ™ DISTANCE Figure 3-5 Plot window 4. Press to select TIME or DIS- TANCE. Distance is useful for conserv- ing track memory, since no track is recorded when the boat is stationary. 5. Press the soft key ENTER or the [ENTER] key. -
Page 26: Erasing All Track
3.6 Erasing All Track You can erase all track. Be absolutely sure you want to erase all track; erased track can- not be restored. 1. Press the [MENU] key followed by the soft keys CHART SETUP OPTIONS and TRACK CONTROL. 2. -
Page 27: Mark
4.1 Entering Marks Select the fishing mode to enable entry of marks on the PLOTTER display. Select the location desired with the cursor, or turn off the cursor to enter the mark at own ship po- sition. Pressing the [HIDE/SHOW] key changes the function of the soft keys. -
Page 28: Changing Mark Attributes
4.2 Changing Mark Attributes You can select shape, line and color of mark/ line on the TRACK display. 1. Press the [HIDE/SHOW] key to show the soft key MARK EDIT. 2. Press the soft key MARK EDIT to show the MARK/LINE window. MARK SHAPE MARK LINE MARK COLOR... -
Page 29: Changing Mark Size
4.3 Changing Mark Size Mark size can be selected from STD (stan- dard) and SMALL. 1. Press the [MENU] key to display the main menu. 2. Press the soft key CHART SETUP OP- TIONS. 3. Press the soft key CHART DETAILS to open the CHART DETAILS menu. - Page 30 This page is intentionally left blank.
-
Page 31: Waypoints
5.1 Entering Waypoints In navigation terminology, a waypoint is a par- ticular location on a voyage whether it be a starting, intermediate or destination point. A waypoint is the simplest piece of information your equipment requires to get you to a des- tination, in the shortest distance possible. -
Page 32: Mark Shape
ADD/EDIT/MOVE WAYPOINTS LOCAL LIST ALPHA/NUMERIC LIST WAYPOINT BY CURSOR WAYPOINT BY RANGE & BEARING DGPS 3D Figure 5-4 waypoint menu 3. Press the soft key WAYPOINT BY CUR- SOR. The plotter display appears. 4. Operate the cursor pad to place the cur- sor on the location desired. -
Page 33: Entering Waypoints By Range And Bearing
Changing waypoint name, comment, proximity alarm radius 1. If necessary, you can change the name (1 to 6 characters), comment (13 charac- ters), L/L position and the proximity alarm radius (explained in detail in Chapter 8) as follows: a) Select the NAME, COMMENT or PROXIMITY ALARM RADIUS field. -
Page 34: Erasing Individual Waypoints
BRG. 23.8 FISH01 RNG. 1.75nm 33 12.345' N ABCDEFGHIJKL 135 23.456' W BRG. 90.0 WPT001 RNG. 2.51nm 33 23.456' N 12:30 29SE97 135 23.567' W BRG. 180.0 ABCDEF RNG. 5.07nm 34 12.345' N 15:21 01OCT97 135 54.321' W BRG. 359.9 BRIDGE RNG. -
Page 35: Waypoint Mark Size
5.4 Waypoint Mark Size You may change the size of all waypoint marks to small or large (default), or turn them off. 1. Press the [MENU] key to open the main menu. 2. Press the soft key CHART SETUP OP- TIONS. - Page 36 This page is intentionally left blank.
-
Page 37: Routes
Often a trip from one place to another involves several course changes, requiring a series of route points (waypoints) which you navi- gate to, one after another. The sequence of waypoints leading to the ultimate destination is called a route. Your unit can automatically advance to the next waypoint on a route, so you do not have to change the destination waypoint repeatedly. -
Page 38: Connecting Routes
Entering routes by the cursor This method allows you to construct a route directly on the plotter display, using existing waypoints or new locations. Any new loca- tion will be saved as a waypoint, under the next consecutive waypoint number. 1. -
Page 39: Removing Waypoints From Routes
ROUTE NAME: ABCDEF COMMENT: ABCDEFGHIJKL 34 12.345’N WPT001 135 54.321’W 204.8 33.83nm 34 23.456’N WPT002 136 10.255’W 22.0 34.27nm 35 11.222’N WPT003 136 55.889’W 35.1 2.89nm 35 22.878’N WPT004 136 44.333’W 125.6 34 15.279’N 31.25nm WPT005 135 34.111’W DGPS 3D Figure 6-4 Edit route menu 5. -
Page 40: Creating Track-Based Routes
Removing route waypoints from the plotter display 1. Press the [WPT/RTE] key followed by the soft key ROUTES to open the route menu. 2. Press to select the route desired. 3. Press the soft key EDIT ROUTE. 4. Press the soft key PLOT to show the plot screen. -
Page 41: Erasing Routes
DGPS 3D SAVE icon Figure 6-9 SAVE icon appearance on the plotter display 7. Press the [SAVE/MOB] key with a touch- and-release action to enter a waypoint mark at own ship position. A new waypoint is created under the next consecutive waypoint number and that waypoint is added to the route. - Page 42 This page is intentionally left blank.
-
Page 43: Navigation
7.1 Navigating to “Quick Points” The “quick point” feature allows you to navi- gate to point(s) without retaining the data in- definitely in your unit’s memory. Each time a quick point is entered the previous quick points having the same quick point numbers are written over. -
Page 44: Navigating To Waypoints (Waypoint List)
7.2 Navigating to Waypoints (waypoint list) 1. Press the [WPT/RTE] key to open the waypoint & route menu. 2. Press the soft key WAYPOINTS to open the waypoint menu. 3. Press the soft key LOCAL LIST or ALPHA/ NUMERIC LIST to show corresponding waypoint list. -
Page 45: Following A Route
8. If you selected PORT in step 7, use the cursor pad to select a port and press the [ENTER] key. Make a route using the soft keys and press the [ENTER] key. (If you want to go directly to that port, simply press the soft key ADD QP followed by the [ENTER] key.) If you selected NEAR SERVICE in step... -
Page 46: Restarting Navigation
Restarting navigation When you steer to avoid an obstacle or the vessel drifts, you may go off your intended course (Line 1 in Figure 7-7). Use the steer- ing or highway display to return to course. Also, if you don’t need to return to the origi- nal course, you can go directly to the waypoint (Line 2 in Figure 7-7) using the restart func- tion as on the next page. -
Page 47: Cancelling Navigation
To select waypoint switching method do the following: 1. Press the [MENU] key. 2. Press the soft key DISPLAY OPTIONS. 3. Select WAYPOINTS SW. 4. Press the soft key EDIT to show the waypoint sw window. 5. Select appropriate waypoint switching method. - Page 48 This page is intentionally left blank.
-
Page 49: Plotter Alarms
8.1 Introduction There are five plotter-related alarms which generate both audible and visual alarms: Ar- rival alarm, Anchor Watch alarm, XTE (Cross Track Error) alarm, Proximity alarm, and Speed alarm. When an alarm setting is violated the buzzer sounds, and the speaker icon ( in red. -
Page 50: Anchor Watch Alarm
8.4 Anchor Watch Alarm The anchor watch alarm informs you that your boat is moving when it should be at rest. When the anchor watch is active, a red dashed circle marks the anchor watch area. Alarm setting Your ship’s position where you start the anchor watch alarm. -
Page 51: Speed Alarm
8.6 Speed Alarm The speed alarm warns when your boat’s speed is within, over/under or under the speed range set. 1. Press the [ALARM] key to open the alarm menu. 2. Press to select SPEED ALARM. 3. Press the soft key EDIT to display the speed alarm window. -
Page 52: Alarm Information
8.8 Alarm Information When an alarm setting has been violated the buzzer sounds and the speaker icon (shown in red) appears. You can see which alarm has been violated, as well as silence the buzzer, on the alarm menu display. 1. -
Page 53: Saving And Loading Data To/From Memory Card
9. SAVING AND LOADING DATA The following data can be saved to memory card: • Mark/line • Waypoints/routes • Track • Configration (menu settings) 9.1 Formatting Memory Cards Before you can use a memory card it must be formatted. Note that formatting a used card erases all saved data. -
Page 54: Error Message
Error message Memory card not inserted Press the [ENTER] key to return to the SAVE DATA display. MEMORY CARD NOT INSERTED. INSERT CARD PRESS "ENTER" key TO CONTINUE. Figure 9-3 NOT INSERTED message Unformatted memory card Press the [ENTER] key to return to the SAVE DATA display. - Page 55 6. After you select all items desired, press the soft key LOAD DATA to load data. The following message appears. NOW LOADING DATA FROM MEMORY CARD. DO NOT TURN OFF THE POWER UNTIL LOADING COMPLETE. Figure 9-8 LOAD DATA message After loading is completed, the following message appears.
- Page 56 This page is intentionally left blank.
-
Page 57: Customizing Your Unit
10. CUSTOMIZING YOUR UNIT This section describes the various options which allow you to set up your unit to suit your needs. 10.1 CHART SETUP OPTIONS menu The chart offset options menu provides three menus: chart offset, track control, and chart details. -
Page 58: Display Options Menu
ON. When OFF is selected, symbols are displayed and information is not. SECTOR INFO: Turns lighthouse viewable CHART angle indication on FURUNO charts on/off. DETAIL Viewing angle is shown as an arc extending EDIT from lighthouse position. Arc color, white or green, is the color of the light beam. - Page 59 RANGE/SPEED UNIT Selects the unit for range and speed; nm/kt (default setting), km/ km/h, sm/ sm/h. DEPTH UNIT Selects unit of depth measurement among, feet, fathoms, and meters. The default set- ting is feet. TEMP UNIT Selects unit of water temperature measure- ment between Celsius or Fahrenheit.
-
Page 60: Gps/Dgps/Td Options Menu
+<-->- to switch from plus to minus and vice versa. GEODETIC DATUM The GP-1650D, GP-1650 is preprogrammed with most of the major chart systems of the world. Although the WGS-84 system, the GPS standard, is now widely used other cat- GPS/DGP egories of charts still exist. - Page 61 POS SMOOTHING When the DOP or receiving condition is un- favorable, the GPS fix may change greatly, even if the vessel is dead in water. This change can be reduced by smoothing the raw GPS fixes. A setting between 000 to 999 is available.
- Page 62 DGPS SETUP OPTIONS menu This menu sets parameters for the DGPS beacon receiver. (GP-1650D, or GP-1650 equipped with DGPS beacon receiver.) To display it, press the [MENU] key followed by the soft keys GPS/DPGS/TD OPTIONS and DGPS SETUP OPTIONS. DGPS MODE...
-
Page 63: Configuration Menu
Displaying DECCA TDs 1. Select DEC CHAIN and press the soft key EDIT to show the chain sta. pair window. CHAIN STA. PAIR 20 s P-R FRENCH Figure 10-12 Chain sta. pair window 2. Press to select Decca chain num- ber. - Page 64 SETUP NMEA/DGPS PORT 2 menu description This menu should be set according to the specifications of the equipment connected to connectors PORT 1 (NMEA) and PORT 2 (DGPS) at the rear of the display unit. The menu can be displayed by pressing the [MENU] key followed by the soft keys CON- FIGURATION and SETUP NMEA PORT 2.
- Page 65 4 NC 5 SD (RED) 6 SG (BLUE) 7 SHIELD Figure 10-17 Connection of GP-1650D/GP-1650 to PC Upload waypoint/route from PC Note that all waypoint and route data stored in your unit will be deleted when data is up- loaded.
- Page 66 Waypoint data format PFEC, GPwpl, llll.llll, a, yyyyy.yyy, a, c----c, c, c----c, a <CR><LF> 4 5 6 7 7 Figure 10-18 Waypoint data format 1: Waypoint latitude 2: N/S 3: Waypoint longitude 4: E/W 5: Waypoint name (Number of characters is fixed to 6 and space code is placed when the number of characters are less than 6: Waypoint color...
-
Page 67: System Menu
SYSTEM menu This menu provides testing facilities, dem- onstration mode setup and memory/trip clear. You may display it by pressing the [MENU] key followed by the soft keys CONFIGURA- TION and SYSTEM MENU. SYSTEM MENU SELF TEST DEMONSTRATION MODE MEMORY/TRIP CLEAR DGPS 3D RETURN Figure 10-23 System menu... - Page 68 This page is intentionally left blank.
-
Page 69: Using C-Map Nt Model
The GP-1650D/1650 C-MAP NT series uses FURUNO mini chart card and C-MAP NT-FP chart card. These charts show accurate coastlines, depth contours, place names, aids to navigation such as buoys and lighthouses, and other navigational marks. 11.1 Inserting Chart Card Insert an appropriate chart card before turning on the power. -
Page 70: Tidal Information
4. Press ! or " to select the item desired. 5. Press the soft key ENTER or the [ENTER] key to display details for object selected Objects. Caution area Information LEUCHTFEUER DIE KARTE ENTHAEL T NUR DIE LAGEN DER WICHTIGEN FEUER. -
Page 71: Navigation To Ports, Port Services
2. Press the [ENTER] key to open the Objects window. Objects Tide height Depth contour Caution area Depth area Source of data Figure 11-9 Objects window Press to select Tide height. Press the soft key ENTER or the [ENTER] key to open the TIDE window. Time: 12:00 1.32... - Page 72 6. Press the soft key GO TO. Soft key titles change as in Figure 11-10. If GO TO key is not displayed, press the cursor pad. 40˚45.971'N FROM 0.26 nm 13˚57.462'E 180.2˚ PUNTA CORNACCHIA ACCO AMENO ISCHIA PORTO CASAMICCIOLA I. ISCHIA DGPS 3D Figure 11-13 Plotter display 7.
-
Page 73: Setting Chart Setup Options
d) Press the [ENTER] key to finish. A line connects between own ship and the port service. And the range and bearing from own ship to first waypoint appears. Note: Destination is automatically cancelled if there is no port for service selected. 11.5 Setting Chart Setup Options CHART DETAILS menu... -
Page 74: Selecting Chart Scale/Range
DEPTH INFO soft key: Turns the DEPTH INFO display on/off and sets it color in FURUNO chart, or selects the depth areas limit and spot sounding & bathymetric range in C-MAP NT-FP chart. While displaying chart details menu, press the soft key DEPTH INFO to show the following display. -
Page 75: Displaying Program Number
11.7 Displaying Program Number 1. Press the [MENU] key to open the main menu. 2. Press the soft key CONFIGURATION to show the configuration menu. 3. Press the soft key SYSTEM MENU to open the system menu. 4. Press the soft key SELF TEST to open the test menu. - Page 76 This page is intentionally left blank.
-
Page 77: Maintenance And Troubleshooting
12. MAINTENANCE & TROUBLESHOOTING 12.1 Maintenance Regular maintenance is essential for good performance. A maintenance program should be established and should at least include the items listed in Table 12-1. Table 12-1 Recommended maintenance program l a i . t i l a i . -
Page 78: Replacement Of Fuse, Battery
12.2 Replacement of Fuse, Battery The fuse on the power cable protects the system from reverse polarity of the ship’s mains and equipment fault. If the fuse blows, find the cause before replacing it. Use only a 3A fuse. Using the wrong fuse will damage the unit and void the warranty. -
Page 79: Error Messages
12.4 Error Messages This equipment displays the following error messages on the alarm menu to alert you to possible trouble. Table 12-4 Error messages 12.5 Diagnostic Tests Memory, I/O port test This test conducts a general check of the dis- play unit and the antenna unit. -
Page 80: Keyboard Test
Keyboard test This test checks all controls for proper op- eration. 1. Press the [MENU] followed by the soft keys CONFIGURATION, SYSTEM MENU and SELF TEST to display the self test menu. 2. Press the soft key KEYBOARD TEST to display the screen for testing the key- board. -
Page 81: Clearing Memories
12.6 Clearing Memories The memory, which stores marks, tracks and initial settings, can be cleared to start afresh. When this done all default settings are re- stored. 1. Press the [MENU] key followed by the soft keys CONFIGURATION and SYSTEM MENU. - Page 82 This page is intentionally left blank.
-
Page 83: Menu Tree
MENU key CHART SETUP OPTIONS Default settings shown in bold italic. Soft key DEPTH INFO FURUNO chart DEPTH < 10m (ON, OFF; RED) DEPTH = 10m (ON, OFF; YELLOW) DEPTH > 10m (ON, OFF; LIGHT BLUE) DEPTH INFO (ON, OFF; RED) - Page 84 SETUP NMEA PORT 1 CONFIGURATION SETUP NMEA/DGPS PORT 2 SELECT SNTNC. soft key UPLOAD/DOWNLOAD DATA SYSTEM MENU WPT/RTE key WAYPOINTS LOCAL LIST ALPHA/NUMERIC LIST WAYPOINT BY CURSOR WAYPOINT BY RANGE & BEARING ROUTES CREATE VOYAGE BASED ROUTE ALARM key AUDIO ALARM (ON, OFF) ARRIVAL ALARM (ON, OFF) ANCHOR ALARM (ON, OFF) PROXIMITY ALARM (ON, OFF)
-
Page 85: Loran C Chains
c i f c i f c i f c i f Ø t l y Loran C Chains – – – – – – – – – – – – – – – – – – – – – –... -
Page 86: Decca Chains
c i t s i t a l l s i t c i t s i l s i t y i l " " " " " " " " " " " c i t " " "... -
Page 87: World Time
World Time... -
Page 88: Geodetic Chart List
Geodetic Chart List 001: WGS84 002: WGS72 003: TOKYO : Mean Value (Japan, Korea & Okinawa) 004: NORTH AMERICAN 1927 : Mean Value (CONUS) 005: EUROPEAN 1950 : Mean Value 006: AUSTRALIAN GEODETIC 1984 : Australia & Tasmania 007: ADINDAN-MN : Mean Value (Ethiopia &... -
Page 89: Gps Receiver
900 kts Warm start: 12 seconds, Cold start: 90 seconds 1 second RTCM SC-104 Ver 2.1 formatted (External DGPS data required for GP-1650) 115.2 84.2 mm 234 320 dots Latitude/longitude or Loran C LOP or DECCA LOP Plot interval: by time (0 to 99 min. 59 sec.) or by distance (0 to 99.99 nm) - Page 90 8. COATING COLOR (1) Display Unit (2) Antenna Unit 1 point 1 course FURUNO chart card or NAVIONICS chart card available C-MAP chart card also available for C-MAP NT Model IEC61162-1 adopted $**DBT, $**DPT, $**MTW, $**TLL, $GPWPL IEC61162-1 adopted $GPAAM, $GPAPB, $GPBOD, $GPBWR/GPBWC, $GPGLL,...
-
Page 91: Index
Alarm information window 8-4 Alarm messages 8-4 Alarms alarm information window 8-4 alarm message 8-4 anchor watch alarm 8-2 arrival alarm 8-1 audio alarm 8-1 DGPS alarm 10-6 proximity alarm 8-3 speed alarm 8-3 XTE alarm 8-2 Anchor watch alarm 8-2 Antenna height 10-5 Arrival alarm 8-1 Audio alarm 8-1... - Page 92 Memory card formatting 9-1 saving data 9-1 loading 9-2 Memory/trip clear 12-5 Memory, I/O port test 12-3 MENU key 1-4 Menu tree A-1–A-2 Mini chart cards aids to navigation data 2-4 background color 10-2 buoy data 2-4 chart scale 2-2 chart symbol color 10-2 chart symbols 2-3 depth info 10-2...
- Page 93 Track color 3-2 displaying 3-1 erasing all 3-3 plotting interval 3-2 stopping/restarting plotting of 3-1 Track based route 6-4 Track and markpoints 4-2 Troubleshooting 12-2 Upload/download data menu 10-8 Uploading data 10-9 Waypoints changing data 5-4 changing position at entry 5-3 changing position on plotter screen 5-5 color 5-2 comments 5-3...
Need help?
Do you have a question about the GP-1650 and is the answer not in the manual?
Questions and answers