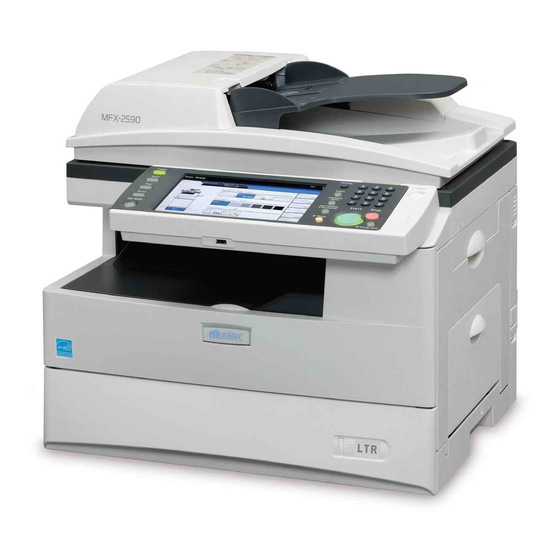
Muratec MFX-2590 User Manual
Plain-paper digital fax/copier/printer/scanner
Hide thumbs
Also See for MFX-2590:
- Quick manual (317 pages) ,
- Administrator's manual (165 pages) ,
- Copier manual (45 pages)

Related Manuals for Muratec MFX-2590


Summary of Contents for Muratec MFX-2590
- Page 1 Plain-paper digital Fax/Copier/Printer/Scanner User’s Guide Please read this guide before operating this machine. After you finish reading this guide, keep it handy for easy reference.
-
Page 2: Introduction
Introduction Thank you for choosing the MFX-2590. This User’s Guide describes the functions, operating procedures, and precautions for the MFX-2590. Before using this machine, be sure to read the User’s Guide thoroughly in order to ensure that you use the machine efficiently. After you have gone through the manual, keep it... -
Page 3: Regulatory Information
Customer information United States of America The MFX-2590 hereafter referred to as “product”, complies with Part 68 of the FCC rules and the requirements adopted by the ACTA. On the rear panel of the product is a label that contains, among other information, a product identifier in the format US: DKUFA23B004C. -
Page 4: Canada
Cet appareil numérique de la classe A est conforme à la norme NMB-003 du Canada. ® ENERGY STAR ® As an ENERGY STAR partner, Muratec has determined that this ® product meets the ENERGY STAR guidelines for energy efficiency. ®... -
Page 5: Quadaccess
For example, even if the machine is (1) printing a copy, (2) transmitting from memory and (3) scanning documents for a different memory transmission, you can still (4) program the machine. Trademarks Muratec and OfficeBridge are registered trademarks, ScanTag is a trademark of MURATA MACHINERY, LTD. ® QuadAccess is a trademark of Muratec America, Inc. -
Page 6: Limited Warranty
1. This warranty will be honored only on presentation of the original dated authorized Muratec bill of sale or Muratec dealer bill of sale or sales slip to an authorized Muratec service representative or service center. For the name of your authorized service center, contact Muratec (from the United States, call 1-469-429-3350;... - Page 7 4. Muratec will not be required to make adjustments, repairs or replacements if the product is installed or used at a location deemed by Muratec to be hazardous to health or safety, or if Muratec is not provided with free and reasonable access to the product and a telephone during service availability hours, or if the product location is not accessible by an authorized Muratec service vehicle.
-
Page 8: How To Read This Manual
How to Read This Manual Symbols „ Operational and Safety Information In this manual, the following symbols are used with the items where important operational and safety information must be observed. Symbol Meaning Describes warnings to protect yourself and others from serious or potentially Warning fatal injury if you handle the machine incorrectly. - Page 9 About symbol symbol indicates the direction of the document. When the document has a length longer than its width, we use the symbol. When the document has a length shorter than its width, a symbol is not used. Width Length Length Width About...
-
Page 10: Key Descriptions
Key Descriptions In this manual, the operating keys are described as follows: The key names on the control panel are shown in < >, and the key names on the touch panel are in [ ]. Keys on the control panel „... -
Page 11: Precaution
Precaution Besides the “Safety Information” supplied with this product, please observe the following instructions. Installation Precautions Installation Site „ To ensure utmost safety and prevent possible malfunctions, install the machine in a location that meets the following requirements: • A location away from curtains, etc. that may catch fire and burn easily •... -
Page 12: Space Requirements
Space Requirements „ Caution Do not let any object obstruct or plug the ventilation holes of this product. Accumulated heat inside the product could result in a malfunction. IMPORTANT • Keep the ventilating slot of the machine at least 4 inches (100 mm) away from walls or other devices. -
Page 13: Operation Precautions
Operation Precautions IMPORTANT • A negligible amount of ozone is generated during normal operation of this machine. An unpleasant odor may, however, be detected in poorly ventilated rooms during extensive machine operations. For a comfortable operating environment, it is recommended that the room be well ventilated. -
Page 14: Transporting The Machine
If you install the machine on a cabinet, secure the machine with stoppers to prevent it from moving. Otherwise, the machine may move in an unexpected direction, potentially causing injury. • If you need to transport the machine over a long distance, consult your Muratec dealer. Care of Machine Supplies „... -
Page 15: Caution Labels And Indicators
Caution Labels and Indicators Caution The area around the fuser unit becomes extremely hot during operation. Do not touch the area around the fuser unit when removing paper jams or inspecting the inside of the machine. Doing so may cause burns. •... -
Page 16: Product Recycling And Disposal
Product Recycling and Disposal Caution This product contains mercury. Disposal of mercury may be regulated due to environmental considerations. For disposal or recycling information, please contact your local authorities. For California, USA only „ This Perchlorate warning applies only to primary CR (Manganese Dioxide) Lithium coin cells. -
Page 17: Table Of Contents
Contents Introduction .........................i Regulatory information ....................ii United States of America ...................ii Canada ........................iii ® ENERGY STAR .......................iii ® QuadAccess ......................iv Trademarks .......................iv Limited warranty ......................v How to Read This Manual ..................vii Symbols ........................vii Key Descriptions .......................ix Precaution ........................x Installation Precautions .................... - Page 18 Acceptable Paper ....................1-28 Items to Avoid ......................1-29 Printable Area .......................1-29 Cautions When Loading Paper ................1-30 Loading Paper into the Paper Cassettes ..............1-31 Loading Paper into the Bypass Tray ..............1-33 Setting the Paper Size...................1-34 Loading Documents ....................1-36 Acceptable Documents ..................1-36 Items to Avoid ......................1-36 Scanning Area .......................1-37 Loading Documents in the Automatic Document Feeder (ADF) ......1-37 Loading Documents on the Document Glass ............1-38...
- Page 19 Chapter 3 Registration Registering Destinations ..................3-2 Registering Folder Shortcuts ..................3-6 List of Settings ......................3-9 The [Register] tab Screen ..................3-9 The [Default Settings] tab Screen ................3-11 The [Management] tab Screen ................3-12 The [Paper Settings] tab Screen ................3-14 The [List] tab Screen .....................3-15 The [Personal Settings] tab Screen ..............3-16 Chapter 4 Maintenance Replacing the Toner Cartridge ................4-2...
-
Page 20: Overview Of Manuals
Overview of Manuals The instruction manuals for this product that describe the detailed operational and setting procedures are included on the CD. Refer to them as required. Manual Description User's Guide (this manual) Part names and functions Connecting the machine and major settings Paper / document loading method Making copies Scanning... - Page 21 Overview of Manuals...
- Page 22 Chapter Introduction Part Names and Functions ..................1-2 Overview of the OfficeBridge ..................1-5 Control Panel .......................1-6 Operation Screens ......................1-8 Ready Screen ......................1-8 Advance Screen Part Names and Functions............1-10 Basic Screen Part Names and Functions .............1-11 My MFP Screen .....................1-13 Help Screen ......................1-14 Connection and Main Settings ................1-15 Connecting the Power Cord ..................1-15 Connecting the LAN Cable ...................1-15...
-
Page 23: Part Names And Functions
Part Names and Functions Name Description ADF cover Open this when a document jams and when cleaning the scanning area. Document guide This supports the document so that it is fed straight. Document tray Load the document face-up in this tray. Document output tray Documents will exit into this tray after they have been scanned. - Page 24 Name Description Platen cover This holds down the document. Document glass Align the document using the arrow at the top left side of the glass as a guide. ADF glass This is where documents loaded in the ADF (Automatic Document Feeder) are scanned. Paper exit tray Copy and print jobs will exit face down in this area.
- Page 25 Name Description Toner cartridge Load the toner cartridge here. Charge wire cleaning rod When the print quality drops, move this rod back and forth to clean the charging needle. Drum cartridge Load the drum cartridge here. Toner cartridge lock lever When replacing the toner cartridge, move this lever to the left and pull out the toner cartridge.
-
Page 26: Overview Of The Officebridge
Overview of the OfficeBridge When the machine is connected to the network, you can operate it using the Web browser on a computer. OfficeBridge is a management system that enables you to manage documents from a Web browser. If you save the documents scanned on the machine in a user box on the OfficeBridge, you can transmit the data for the scanned documents via e-mail and fax. -
Page 27: Control Panel
Control Panel Mode keys Switches the machine to the Copier, Scanner, Fax and Printer mode. Display Displays machine status, interactive displays, and all machine functions. <Job Confirm. Fax Cancel> Press this key to cancel or review stored jobs, or to review the results of communication. - Page 28 <Energy Save> Puts the machine into the energy save mode and reduces power consumption. (See page 1-27.) <Start> Executes the operation. <Reset> Returns the menu to the ready screen and resets all settings back to their defaults. <My MFP> Press this key to use shortcut functions and check the usage status of the machine. For details, refer to “My MFP Screen”.
-
Page 29: Operation Screens
Operation Screens You can operate the machine by directly touching the keys and tabs on the touch screen. Ready Screen You can use the various functions of the machine by operating the keys displayed on the screen. The ready screen is displayed when you press a mode key or press <Reset> during an operation. - Page 30 „ Advance View and Basic View The Copy, Scanner, and Fax screen have both an advance view and basic view. To switch to the basic screen for each mode, press <Basic/Advanced View> to illuminate the key. Note that the Printer screen does not have a basic view. Advanced View Basic View Copy screen...
-
Page 31: Advance View Part Names And Functions
Advance View Part Names and Functions Example: Copy ready screen „ Name Description Message area This displays the current status and operation instructions. Operation screen switching Used when switching between operation screens on the tabs display. Operation area This displays the keys for performing operations and specifying settings for the machine. -
Page 32: Basic View Part Names And Functions
Basic View Part Names and Functions The basic view displays the basic operations with large text to enable them to be performed easily. For detailed information on using the functions, see the instruction manuals for each function. Copy ready screen „... - Page 33 Scan Ready Screen „ Name Description Destination name This displays the selected destination. Destinations This displays the registered destinations. Number of destinations This displays the number of destinations that are currently selected. Press [Location] to display the screen to check or delete the selected destinations.
-
Page 34: My Mfp Screen
My MFP Screen Press <My MFP> to switch to the My MFP screen. “Shortcuts” enable you to directly access functions on the My MFP screen. You can also use “My Jobs” functions to recall a series of operations, and display the usage status of the machine. You can also use personal settings to switch the shortcuts for each user. -
Page 35: Help Screen
Help Screen You can display a description and operation instructions for each function on the screen. is displayed on the upper left of screens where help can be displayed. Press Press the key to jump to the described function. Press [Close] to close the help screen. 1-14 Operation Screens... -
Page 36: Connection And Main Settings
Connection and Main Settings Connecting the Power Cord Warning • Connect the power cord to the power jack, and confirm that it is firmly inserted. Loose connections may cause fires. • Make sure to connect the ground wire to prevent electrocution in case of electrical leakage. -
Page 37: Connecting The Modular Cable
Connecting the Modular Cable Attach a ferrite cores to the modular cable. Make three loops near the connector of the cable. Connect the modular cable to the telephone line jack, as indicated in the diagram. 1-16 Connection and Main Settings... -
Page 38: Connecting An External Phone (Answering Machine)
Connecting an External Phone (Answering Machine) Connect an external phone (answering machine) to the external phone jack, as necessary. Note The external phone (answering machine) may function partially, or not at all, depending on the type of external phone (answering machine). Connect an external phone (answering machine) to the external phone jack. -
Page 39: Setting The Language
Select the screen brightness and press [Enter]. Note If [LCD Brightness Adjustment] is not on the My MFP screen, set it from <Setting>. For details, refer to the Administrator’s Guide. Setting the Language Select the language for the display. The selected language will be applied to the list printouts as well. - Page 40 Enter the administrator password, and press [Enter]. Press [User Install]. Press [Language]. Languages available to use are displayed. Select the language, and press [Enter]. If “ The language was changed. Try to turn on power.” is displayed on the screen, turn off the machine power, and then turn it back on.
-
Page 41: Setting The Date And Time
Setting the Date and Time Set the current time in the order of year (4 digits), month (2 digits), day (2 digits), hour (12-hour clock, 2 digits), and minutes (2 digits). Press <Setting>. Press the [Management] tab. If an administrator password is set, press [Admin Password]. -
Page 42: Specifying The Network Settings
Specifying the Network Settings You can automatically or manually set the IP address of the machine. Note If you set the IP address as described below, you can operate the machine from the Web browser on a computer. Connect to the machine from a Web browser to specify the required network settings and e-mail settings, etc. - Page 43 Press [TCP/IP Settings]. Press [Obtain IP address]. Select [ON] and press [Enter]. Manually Setting the IP Address „ Disable DHCP, and manually set the IP address. Press <Setting>. Press the [Management] tab. If an administrator password is set, press [Admin Password]. If an administrator password is not set, proceed to step 5.
- Page 44 Press [Obtain IP address]. Select [OFF] and press [Enter]. Press [IP Address]. Enter the IP address, and press [Enter]. Connection and Main Settings 1-23...
- Page 45 Press [Subnet Mask]. Enter the Subnet Mask, and press [Enter]. 1-24 Connection and Main Settings...
-
Page 46: Power Switch And Energy Save Mode
Power Switch and Energy Save Mode The machine has three power-related switches; the main power switch, the power switch and <Energy Save>. Turning the Power ON and OFF The machine has both a “main power switch” and “power switch”. „ Turning the Power ON Turn the main power ON when using the machine for the first time. -
Page 47: Turning The Power Off
„ Turning the Power OFF Turn the main power OFF when not using the machine for an extended period of time or when moving the machine. Caution Make sure to turn the main power switch OFF after turning the power switch OFF. Note Faxes cannot be received when the power switch is turned OFF. -
Page 48: Energy Save> And Energy Save Mode
<Energy Save> and Energy Save Mode When the machine has been idle for a long period of time, the energy save mode will activate to reduce power consumption. The energy save mode consists of the “low power mode” and the “sleep mode”, which further reduces power consumption. Use <Energy Save>... -
Page 49: Loading Paper
Loading Paper Acceptable Paper Paper cassette Paper type Paper size Quantity Plain paper Letter, Legal, Half-letter 500 sheets (weight: 20-24 lbs.) (weight: 20 lbs.) Bypass tray Paper type Paper size Quantity Plain paper Letter, Legal, Half-letter , Executive, A4, A5, 50 sheets (weight: 20-24 lbs.) A5 , A6, F4... -
Page 50: Items To Avoid
Items to Avoid To prevent jams and damage to your machine, do not use the following: • Creased paper • Wrinkled paper • Folded paper • Curled paper • Torn paper • Carbon paper • Moist paper • Paper previously printed on by a printer •... -
Page 51: Cautions When Loading Paper
Cautions When Loading Paper • If the paper is curled, stretch the paper into shape before loading it. • When you insert paper in the cassette, stack it so the leading edge and sides of the paper are even. • Do not stack paper above the “paper limit mark”... -
Page 52: Loading Paper Into The Paper Cassettes
Loading Paper into the Paper Cassettes Pull the handle to open the paper cassette. Press down the paper lifting plate until it locks into position. Adjust the rear paper guide to the desired paper length. Load the paper into the cassette. Loading Paper 1-31... - Page 53 Pinch the side paper guide and adjust to the width of the stack. Close the paper cassette. Set the paper size. “Setting the Paper Size” how to set it. (See page 1-34.) Attach the paper size sticker supplied with your machine to the front of the cassette.
-
Page 54: Loading Paper Into The Bypass Tray
Loading Paper into the Bypass Tray When you need to use a paper size that is not currently loaded in the paper cassette, or when you want to print on an envelope, transparency film or custom sized paper, use the bypass tray. -
Page 55: Setting The Paper Size
1) Adjust the paper guides to fit the paper, 2) then lower the flapper release lever. Set the paper size. “Setting the Paper Size” how to set it. (See page 1-34.) Setting the Paper Size After loading paper into the paper cassette/bypass tray, you need to set the correct paper size on the control panel by using the following procedure. - Page 56 Select the paper size, and press [Enter]. Loading Paper 1-35...
-
Page 57: Loading Documents
Loading Documents Be sure to read the following guidelines before you begin faxing, copying or scanning. Acceptable Documents Automatic document feeder (ADF) Single-sheet Multiple-sheet Max. : 8.5 × 35.4 in. (216 × 900 mm)* Max. : 8.5 × 14.0 in. (Legal) (216 × 356 Size Min. -
Page 58: Scanning Area
Scanning Area The scanned area is shown below. : 0.1 in. (3.0 mm) Copy, Scan : 0 in. (0 mm) Letter Scanned area : 0.1 in. (3.0 mm) Copy, Scan : 0.1 in. (2.0 mm) : Letter 8.4 in. (214 mm)/A4 8.2 in. (208 mm) Copy, Scan : Letter 8.5 in. -
Page 59: Loading Documents On The Document Glass
Loading Documents on the Document Glass Make sure that documents are not set in the automatic document feeder (ADF). Lift up the platen cover. Place the document face down. Align the top edge of the document with the back edge of the document glass (use the arrow in the top left corner as a guide). Gently close the platen cover. - Page 60 Chapter Operating the Machine Making Copies ......................2-2 Basic Copying ......................2-2 Copying on the Basic View..................2-3 Duplex Copying .......................2-4 Checking the Copy Settings ..................2-6 Introduction to Advanced Functions ..............2-7 Scanning ........................2-9 Scanning to an E-Mail Address ................2-9 Scanning to a Shared PC Folder ................2-11 Scanning to an FTP Server ...................2-14 Scanning to USB Memory ..................2-17 Scanning on the Basic View ..................2-18...
-
Page 61: Making Copies
Making Copies This section describes the basic procedure for making copies. For the detailed procedure, see the Copier Guide. Basic Copying Load the document, and press <Copy>. For details on loading documents, refer to “Loading Documents”. (See page 1-36.) Set the document type and contrast as necessary. “Document Type”... -
Page 62: Copying On The Basic View
Copying on the Basic View The basic view displays only the keys required for basic copying, without any complicated icons. The copy functions that can be used on the Basic view are as follows: • Paper selection • Zoom ratio •... -
Page 63: Duplex Copying
Duplex Copying You can use this function to perform: • One-sided copying of a duplex document (2 1sided) • Duplex copying of a duplex document (2 2sided) • Duplex copying of a one-sided document (1 2sided) Note •... - Page 64 Select the copying method. Select [Long Edge] or [Short Edge], and press [Enter] Refer to the description on the page below to select the binding position. When copying a two-sided document, select the binding position of the document. When copying a one-sided document, select the binding position of the copy.
-
Page 65: Checking The Copy Settings
Checking the Copy Settings You can check the copy settings that have been changed from their default values on the screen. You can also make further changes to the settings. This section describes an example where the preview function is enabled, the document type is set to [Photo], and the contrast is set to [Darker]. -
Page 66: Introduction To Advanced Functions
Introduction to Advanced Functions This product includes the following copy functions. For detailed procedures, refer to the Copier Guide. Preview You can check the scanned document image on the screen before copying it. Sorting The copied documents can be sorted in page order. Reduction / Enlargement Adjust the magnification setting to reduce or enlarge the image. - Page 67 Card Copy You can copy the front and back of ID cards, checks, and custom size documents so that both sides are printed together on a single page. Using ScanTag The ScanTag feature allows you to enter and send a metadata tag automatically to a network computer.
-
Page 68: Scanning
Scanning This section describes the basic procedure for performing scanning. For details on other operations, see the Scanner and Fax Guide. Scanning to an E-Mail Address You can scan a document directly to an e-mail address. Internet Internet Entering an E-mail Address for Transmission „... - Page 69 Enter the e-mail address, and press [Enter]. Up to 50 characters can be entered for an e-mail address. Press <Start>. • If you loaded the document in the ADF, this concludes the procedure. • If you loaded the document on the document glass, load the next document, and press [Next Doc].
-
Page 70: Scanning To A Shared Pc Folder
Scanning to a Shared PC Folder You can scan a document to a shared folder on a networked PC. Shared 1 Shared 2 Network Note In order to scan to a PC folder, the folder must be set to “Shared” status prior to scanning. - Page 71 Press [Browse]. The list of computers or networks is displayed. Specify the shared folder to save the data to, and press [Enter]. • Press [Root] to return to the list of computers or networks. • Press [Back] to return to the previous screen. Press <Start>.
- Page 72 Using a Folder Shortcut for Transmission „ Load the document, and press <Scan>. For details on loading documents, refer to “Loading Documents”. (See page 1-36.) Press the [PC/USB] tab, and then [Folder]. Specify the folder shortcut. • If you loaded the document in the ADF, this concludes the procedure. •...
-
Page 73: Scanning To An Ftp Server
Scanning to an FTP Server You can scan a document to a specific folder on an FTP (File Transfer Protocol) server. FTP Server Network Manually Specifying an FTP Server „ Load the document, and press <Scan>. For details on loading documents, refer to “Loading Documents”. - Page 74 Press [Link]. Enter the link to the FTP server, and press [Enter]. Start the link with two slashes (“//”). Press [User Name]. Enter the user name, and press [Enter]. Press [Password]. Scanning 2-15...
- Page 75 Enter the password, and press [Enter]. Press [Enter]. Press <Start>. • If you loaded the document in the ADF, this concludes the procedure. • If you loaded the document on the document glass, load the next document, and press [Next Doc].
-
Page 76: Scanning To Usb Memory
Scanning to USB Memory You can scan a document to a USB memory device that is directly connected to the machine. USB memory Note • Only USB memory formatted with FAT12, FAT16, or FAT32 can be used. • Support cannot be guaranteed with USB memory with embedded security functions, memory card readers connected via USB, USB memory connected via an extension cable and USB hub, and/or USB memory that does not meet USB standards. -
Page 77: Scanning On The Basic View
Connect the USB memory to the machine. Press <Start>. • If you loaded the document in the ADF, this concludes the procedure. • If you loaded the document on the document glass, load the next document, and press [Next Doc]. To finish scanning, press [Complete]. •... -
Page 78: Introduction To Advanced Functions
Specify the destination. Introduction to Advanced Functions This product includes the following scan functions. Preview You can check the scanned document image on the screen before saving it. Resolution You can set the resolution for scanning. If you set a high resolution, the document will be scanned clearly, but the size of the created data will be large. - Page 79 E-mail Subject When transmitting a scanned image via e-mail, you can edit the body and subject of the e-mail you're sending. You can also enter the body of the e-mail using a template registered in advance. File Name You can edit the file name for the scanned image data. You can also enter the file name using a file name registered in advance.
-
Page 80: Transmitting Faxes
Transmitting Faxes This section describes the basic procedure for transmitting faxes. For details on other operations, see the Scanner and Fax Guide. Transmitting Faxes This section describes the basic procedure for transmitting faxes. „ Entering a Fax Number for Transmission Load the document, and press <Fax>. - Page 81 Press <Start>. • If you loaded the document in the ADF, this concludes the procedure. • If you loaded the document on the document glass, load the next document, and press [Next Doc]. Press [Tx Start] to start transmission. „ Using the Address Book for Transmission Load the document, and press <Fax>.
-
Page 82: Faxing On The Basic View
Faxing on the Basic View The Basic view enables you to transmit a scanned document to the destination registered in advance, without worrying about any complicated functions. For details, refer to the Scanner and Fax Guide. „ Using the Address Book for Transmission Load the document, and press <Fax>. - Page 83 „ Entering a Fax Number for Transmission Load the document, and press <Fax>. For details on loading documents, refer to “Loading Documents”. (See page 1-36.) Press <Basic/Advanced View>. If the Basic view is already displayed, this operation is not required. Press [Numeric key Entry] Enter the fax number using the numeric keys.
-
Page 84: Canceling Faxes
Canceling Faxes This section describes the procedure for canceling faxes that are being transmitted. For details on canceling a delayed transmission, refer to Chapter 3, “Canceling / Checking Faxes” in the Scanner and Fax Guide. Press <Job Confirm. Fax Cancel>. The information for the current document is displayed. -
Page 85: Transmitting Pc Faxes
Note • Install the Muratec fax driver on the computer before using this function. For details on installing the driver, refer to Chapter 2, “Installing to Windows” in the Printer Guide. •... - Page 86 Select “Muratec Fax” as the printer. Click [Preferences] to open the detailed settings screen. Click the [Paper] tab, and specify the detailed settings, as necessary. Transmitting Faxes 2-27...
- Page 87 Click the [Fax Settings] tab. If it is necessary to change the user information, click [Select User...] and select the user. Select “Advance Mode”. Click [OK]. Start printing in the application software. When no user is selected in step 7, the login screen is displayed. Log in to OfficeBridge. When you have selected a user in step 7, proceed to step 11.
- Page 88 Enter the fax number in the “Fax Destination” entry box, and click [FAX]. • Pauses and other dialing options can be also entered using the keyboard. For details on dialing options, refer to Chapter 3, “Basic Transmission Settings” in the Scanner and Fax Guide.
-
Page 89: Introduction To Advanced Functions
Introduction to Advanced Functions This product includes the following fax functions. For details, refer to the Scanner and Fax Guide. Preview You can check the scanned document image on the screen before transmitting it. Broadcast This function enables you to transmit the same fax to many destinations in one operation, thereby eliminating the need to scan and transmit the fax to each individual destination. -
Page 90: Security Reception
When closed communication is set, fax messages cannot be transmitted and received between Muratec machines only (excluding some models). If a passcode is set, faxes can only be transmitted and received with machines that are the same product that also the same passcode set. - Page 91 Batch Transmission When transmitting an Internet Fax, you can transmit the divided pages of a scanned document. File Format When transmitting an internet fax, select the file format for saving the file. Offramp Transmission If you transmit an e-mail to the machine, you can transmit the mail text and attached file via fax. 2-32 Transmitting Faxes...
-
Page 92: Printing
Printing This section describes the basic procedure for printing. For the detailed procedure, see the Printer Guide. Note Install the print driver on the computer before using this function. For details on installing the driver, refer to Chapter 2, “Installing to Windows” and Chapter 3, “Installing to Mac OS X”... -
Page 93: Introduction To Advanced Functions
Specify each setting, and click [OK]. Execute a print command in the application software. Introduction to Advanced Functions This product includes the following print functions. For detailed procedures, refer to the Printer Guide. Security Print You can store print jobs in the machine's memory and release them by entering a password at the control panel. -
Page 94: Preview Function
Preview Function You can check the image of the scanned document before copying, scanning, or transmitting it by fax. When you have specified scanning settings, the result of those settings can also be checked in advance. Checking the scanned document enables you to prevent mistakes in settings. -
Page 95: Preview Screen
You can check and erase the image. After checking the preview, press [Close]. • To delete the displayed image, press [Delete]. • If the document has multiple pages, the next page will be scanned. When there is no more page, the machine starts copying. Preview Screen On the preview screen, you can check the image of a scanned document. - Page 96 Chapter Registration Registering Destinations ..................3-2 Registering Folder Shortcuts ..................3-6 List of Settings ......................3-9 The [Register] tab Screen ..................3-9 The [Default Settings] tab Screen ................3-11 The [Management] tab Screen ................3-12 The [Paper Settings] tab Screen ................3-14 The [List] tab Screen .....................3-15 The [Personal Settings] tab Screen ..............3-16...
-
Page 97: Registering Destinations
Registering Destinations To use the address book or speed-dial, it is necessary to register the destination in the Address Book Entry in advance. Up to 2,000 destinations can be registered. Note • Either a fax number or e-mail address must be registered. •... - Page 98 Press [Add]. Use the numeric keys to enter the fax number. • If you do not want to register fax number, proceed to next step. • If you do not want to register an e-mail address, press [Enter] and proceed to step 8. Press [e-mail] Enter the e-mail address, and press [Enter].
- Page 99 If a fax number is registered when the PIN Mode is set to “Mode 1”, the PIN entry screen is displayed. Use the numeric keys to enter the PIN, and press [Enter]. Otherwise, proceed to step 9. Enter the name, and press [Enter]. Up to 30 characters can be entered.
- Page 100 To change the super G3 setting, press [Super G3]. Select [ON] to enable transmission with Super G3 or [OFF] to disable it, and press [Enter]. Press [Close]. To continue to register address book destinations, repeat the procedure for steps 4 to 14. Note Refer to Chapter 2 “Activating the PIN mask”...
-
Page 101: Registering Folder Shortcuts
Registering Folder Shortcuts Up to 300 frequently used shared folders can be registered as shortcuts. Note • Be sure that the folder status has been changed to “Shared” on your PC in advance. • You can register folder shortcuts using methods other than that described here. For details, refer to Chapter 7, “Registering Destinations”... - Page 102 Browse to the folder you want to register, specify the folder, and press [Enter]. • Press [Keypad] to manually enter or edit the link. After entry, press [Enter]. The link must start with two slashes (“//”). • Press [Root] to return to the list of computers or networks. Press [Shortcut Name].
- Page 103 Enter the user name, and press [Enter]. Up to 64 characters can be entered. Press [Password]. Enter the password, and press [Enter]. Up to 28 characters can be entered. Press [Automatic Network Login]. Select [ON] to set the auto network login function or [OFF] to disable it, and press [Enter].
-
Page 104: List Of Settings
List of Settings If you press <Setting> on the control panel, the settings screen is displayed. On this screen, you can specify various settings according to your needs, such as specifying the common settings of the machine, setting the default values of the various functions, outputting lists, and specifying settings related to paper. - Page 105 FTP Shortcut You can register, edit, and delete shortcuts to FTP servers. Refer to Chapter 7, “Registering Destinations” in the Scanner and Fax Guide. TWAIN Scan Box You can register or edit the name and I.D. code for a TWAIN box. Refer to Chapter 2, “Scanning Documents Using a TWAIN Box”...
-
Page 106: The [Default Settings] Tab Screen
The [Default Settings] tab Screen The default values are those used when you press <Reset> to return to the ready screen. The machine returns to the default settings if is left without any operation for a designated period of time. Changing the default values of often-used functions can shorten the time required to adjust settings. -
Page 107: The [Management] Tab Screen
Sound Settings You can set the various sound settings. Refer to Chapter 1, “Specifying Default Settings” in the Administrator's Guide. Energy Save Mode You can specify the settings for the low power mode or sleep mode including the time it takes to switch to those modes, or the time it takes to start the energy save mode. Regardless of this setting, if you press <Energy Save>, the low power mode will start immediately. - Page 108 Network Settings You can specify the network settings for using the OfficeBridge and transmitting Internet Faxes. Refer to Chapter 2, “Specifying the Network Settings” in the Administrator's Guide. User Install You can specify the settings required for using the machine. Refer to Chapter 3, “Initial Setup (User Install)”...
-
Page 109: The [Paper Settings] Tab Screen
The [Paper Settings] tab Screen You can make paper settings for receiving faxes and making copies. You can also insert different paper to enable sorting. Cassette1 You can set the paper size used in Cassette 1. Refer to Chapter 1, “Paper Settings” in the Administrator's Guide. Cassette2 You can set the paper size used in Cassette 2. -
Page 110: The [List] Tab Screen
The [List] tab Screen You can print various lists. Address Book List Prints a list of the destinations registered in the address book. The list can be printed in order of the numbers or in alphabetical order. Refer to Chapter 7, “Registering Destinations” in the Scanner and Fax Guide. Group List Prints a list of the destinations registered in the address book as groups. -
Page 111: The [Personal Settings] Tab Screen
F-Code Box List Prints a list of the registered F-Code boxes. Refer to Chapter 4, “F-Code Communications” in the Scanner and Fax Guide. LDAP Server List Prints a list of the registered LDAP servers. Refer to Chapter 2, “Specifying the Network Settings” in the Administrator's Guide. Root Certificate List You can print the fingerprints for the root certificates of private certificate authorities. - Page 112 Chapter Maintenance Replacing the Toner Cartridge ................4-2 Replacing the Drum Cartridge ................4-4 Replacing the Stamp ....................4-6 Cleaning the Printer ....................4-8 Cleaning the Drum Charge Wire and the Print Head ..........4-8...
-
Page 113: Replacing The Toner Cartridge
Replacing the Toner Cartridge When the toner runs out, the machine will display “Toner should be replaced” and will not print until the toner cartridge has been replaced. Open the front cover. Turn the toner cartridge locking lever to the left (unlock position). Pull the used toner cartridge out. - Page 114 Unpack the toner cartridge from its carton. Then, holding the toner cartridge with both hands, gently shake it to distribute the toner evenly inside the cartridge. Do not touch the roller on the toner cartridge. Slide the toner cartridge into the machine firmly until it locks into place. Turn the cartridge locking lever to the right until it locks into place.
-
Page 115: Replacing The Drum Cartridge
Replacing the Drum Cartridge When the drum is near the end of life, the machine will display the message “The drum is low”. You should obtain a replacement drum cartridge soon. When the machine displays “Drum should be replaced”, it will not print until the drum cartridge has been replaced. Open the side cover and front cover. - Page 116 Pull the used drum cartridge out. Unpack the new drum cartridge from its carton and slide it into the machine firmly until it locks into place. Reinstall the toner cartridge and turn the cartridge locking lever to the right until it locks into place. Close the side cover and front cover.
-
Page 117: Replacing The Stamp
Replacing the Stamp Note • The stamp function is optional. • Do not directly touch the stamp surface. If the ink adheres to your hands, wash with water immediately. Open the ADF cover. Open the inner cover. Remove the cap of a new stamp Replacing the Stamp... - Page 118 Put the removed cap on the used stamp, and remove the used stamp. If you cannot pull out the stamp, use tools like tweezers or stick an adhesive tape to the cap to pull the stamp out. Insert the new stamp into the stamp unit. Close the inner cover and the ADF cover.
-
Page 119: Cleaning The Printer
Cleaning the Printer Cleaning the Drum Charge Wire and the Print Head When the following message is displayed, or you are experiencing poor print quality, the charge wire needs to be cleaned. Note Your machine will print approximately 100 pages after this message appears, after the maximum number of prints has been reached the machine will display a “Printer Not Usable”... - Page 120 Chapter Troubleshooting Document Jams......................5-2 Jam in the Document Feeder ..................5-3 Document Jammed in the Feed Area ..............5-4 Document Jammed in the Exit Area ..............5-4 Paper Jams ........................5-5 Removing Jammed Paper ..................5-5 Alarms ...........................5-8 Errors that will clear by pressing <Stop> ..............5-8 Errors that will not clear by pressing <Stop>...
-
Page 121: Document Jams
Document Jams If a document jams in the ADF (automatic document feeder), the following message will appear. Note To prevent document jams, use the document glass for wrinkled or torn documents. Document jammed during quick memory transmission or real-time transmission If a document jam occurs during a quick memory transmission or real time transmission, a message will be printed to inform you which page has jammed. -
Page 122: Jam In The Document Feeder
Jam in the Document Feeder Open the ADF cover. Open the inner cover. Gently remove the document. Close the inner cover and ADF cover. Make sure both sides are snapped down securely. Document Jams... -
Page 123: Document Jammed In The Feed Area
Document Jammed in the Feed Area Open the platen cover. Open the ADF cover and remove the jammed document. If you cannot remove the jammed document, open the ADF cover and inner cover to remove it. Close the platen cover and the ADF cover. Document Jammed in the Exit Area Open the platen cover. -
Page 124: Paper Jams
Paper Jams If a paper jam occurs, the following message will appear. If a paper jam occurs during fax reception, the machine will store the received document into memory and print it automatically once the paper jam has been cleared. Caution When you open the side cover to remove the paper, DO NOT touch the fuser roller. - Page 125 If paper is jammed in the paper supply area, remove the jammed paper. If paper is jammed in a paper cassette, open the paper cassette and remove the jammed paper. If paper is jammed in the fusing unit, remove the jammed paper. Paper Jams...
- Page 126 If paper is jammed in the paper output area, slowly remove the jammed paper from the paper output side. Close the side cover and paper cassette. Note Avoid getting loose toner on your hands and clothes when removing the jammed paper. Paper Jams...
-
Page 127: Alarms
Alarms When a transmission error occurs, or there is a problem with the machine, the information lamp will illuminate, and an error message will be displayed or printed. The information lamp will sometimes clear when <Stop> is pressed, and sometimes it will not. -
Page 128: If You Cannot Solve The Problem
If you cannot solve the problem If you have a problem with your machine that you cannot solve with the information provided in this chapter, contact your authorized Muratec dealer or call the Muratec Customer Support Center at (800) 347-3296 (from U. S. only). - Page 129 5-10 Alarms...
- Page 130 Chapter Specifications Specifications ......................6-2 General ........................6-2 Options ........................6-8 External Dimensions ....................6-8 Index ........................6-9...
-
Page 131: General
8.5 inch Color LCD WVGA 800 dots × 480 dots Image memory capacity 128 MB (approx. 72 hours of memory backup using battery) Document page capacity (for a Muratec standard document): approx. 600 pages (copy), 4200 pages (fax) External interface USB2.0 (Hi-Speed), Ethernet 10BASE-T/100BASE-TX... -
Page 132: Printer Specifications
Printer Specifications „ Item Specifications Photoreceptor type OPC drum Printing method Dry electric photographic recording method using LED exposure light source Developing method Non-magnetic single-component developing Fixing method Heat pressure fixing using heat roller Resolution 600 × 600(dots/inch) Paper sizes Paper cassette Letter, Half-Letter , Legal Bypass tray... -
Page 133: Fax Specifications
Fax Specifications „ Item Specifications Scanline density Ultra-high resolution mode: Main scanner 600 dots/inch × sub scanner 600 dots/inch, or main scanner 16 dots/mm × sub scanner 15.4 lines/mm High resolution mode: Main scanner 8 dots/mm × sub scanner 7.7 lines/mm Standard mode: Main scanner 8 dots/mm ×... -
Page 134: Printer Driver Specifications
Printer Driver Specifications „ Item Specifications Printer Language Option: PCL 5e, PCL XL, XPS, PostScrip 3, PDF (PDF1.7 Compatibility) Emulation HP LaserJet 4250n (PCL5e / PCLXL), Xerox Phaser 5500 (PostScrip 3 / PDF) ® Support OS Windows 2000 Professional ® Windows XP Home Edition ®... - Page 135 Fax Driver Specifications „ Item Specifications Image encoding method Resolution 600 × 600 (dots/inch) 400 × 400 (dots/inch) 200 × 200 (dots/inch) ® Support OS Windows 2000 Professional ® Windows XP Home Edition ® Windows XP Professional ® Windows XP Professional x64 Edition ®...
-
Page 136: Pc Fax Specifications
OfficeBridge Specifications „ Item Specifications ® ® ® Supported browsers Internet Explorer 6, Internet Explorer 7, Internet Explorer ® ® Firefox 2, Firefox System requirements Windows environment in which a supported browser can run Maximum number of 2,000 address book destinations Groups: 200 Maximum number of registered users... -
Page 137: Options
Options 500-sheet 2nd cassette Item Specifications Paper sizes Letter, Half-Letter , Legal Paper storage capacity 500 sheets (20-24 lbs. paper) Power Supplied from main unit Weight Approx. 11.02 lb. Machine dimensions W 20.5 in. × D 17.7 in. × H 4.7 in. (W 520 mm × D 450 mm × H 120 mm) External Dimensions 15.4 in. -
Page 138: Index
Index Manuals overview ..........xix My MFP ..............1-13 Address book registration ........3-2 Administrator Password ........3-13 Network settings ..........1-21 Alarm ..............5-8 OfficeBridge ............1-5 Basic View Advance View and Basic View ......1-9 Paper jams ..............5-5 Copying on the Basic View .........2-3 Part names and Functions ........1-2 Faxing on the Basic View .........2-23 PC Faxing .............2-26 Scanning on the Basic View ......2-18... - Page 139 6-10 Specifications...
Need help?
Do you have a question about the MFX-2590 and is the answer not in the manual?
Questions and answers