
Subscribe to Our Youtube Channel
Related Manuals for Perle S-10G-XTXH


Summary of Contents for Perle S-10G-XTXH
-
Page 1: Media Converters
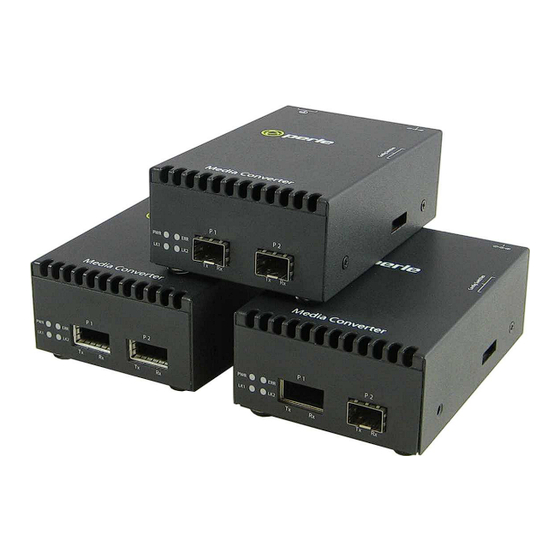
Perle 10G Media Converters Installation Guide S-10G-STS S-10G-XTS S-10G-XTX S-10G-XTSH S-10G-XTXH P/N 5500325-10... - Page 2 1G. Note2: When used with 1G modules, the S-10G does not support the Loopback Auto Detect feature. Visit Perle’s web site for the most up to date Installation guides, http://www.perle.com/ models and specifications: Getting to know your S-10G Media...
- Page 3 Front and Rear Panel Components Front View Rear View Perle S- 10G Media Converter Installation Guide...
-
Page 4: Installation
4. Insert the fiber or copper modules. 5. Connect the fiber or copper cables. 6. Using the Perle supplied power adapter, plug the power cord into the power cord connector at the rear of the chassis. 7. Plug the other end of the power adapter into an appropriate power outlet. -
Page 5: Dip Switch Settings
The function of the DIP switches varies by model, so please refer to the appropriate model. Note: Switch changes made when the product is powered up take effect immediately and will result in a link reset on both ports. Perle S- 10G Media Converter Installation Guide... - Page 6 Standard Mode: In this mode, the links can be brought up and down independently of each other. A loss of link on either fiber connection can occur without affecting the other fiber connection Perle S- 10G Media Converter Installation Guide...
- Page 7 This will be taken care of by the Auto Loopback feature. Illustration of the Built In Link Test / Loopback Local S-10G Configuration Test Mode (Switch 1 – Down) Test Fuction (Switch 2 –Up) Remote-S-10G Configuration All switches in the Up position Perle S- 10G Media Converter Installation Guide...
-
Page 8: Sequence Of Events
Note: If the remote media converter is not a Perle S-10G then the remote media converter will need to be put into loopback mode. See the documentation that came with that media converter. Sequence of Events 1. The Local S-10G sends the Remote S-10G a signal to go into loopback mode. - Page 9 EPROM on the module and the module type. Off: When AutoDetect Mode is turned OFF, the S-10G media converter will select the alternative mode that was established by the determination above. Perle S- 10G Media Converter Installation Guide...
-
Page 10: Operation
Operation Powering up the Perle Media Converter 1. Connect the Perle supplied power adapter to the media converter. 2. Turn on the power at the source. 3. Check that the PWR LED light is lit. Status LED The Perle 10G Media converters have three status LEDs located on the front panel of the unit. - Page 11 Grounding the S10-G Chassis If your installation requires additional grounding follow this procedure. Grounding the chassis requires the following items: • One grounding lug (not provided) • One 18-12 AWG wire (not provided) Perle S- 10G Media Converter Installation Guide...
- Page 12 Attach the power cord relief clip to the chassis and secure with the provided screw. Plug the power cord into the AC power connector at the rear of the chassis. Plug the other end of the power cord into an appropriate power outlet. Perle S- 10G Media Converter Installation Guide...
-
Page 13: Troubleshooting
2. Set Switch 3 to the Up position to test port 1 or Switch 3 to the Down position to test Port 2. 3. Loopback: If the remote media converter is a Perle S-10G, then the Local Perle S-10G media converter will signal the Remote media converter to go into loopback mode. - Page 14 S-10G will return the modules to normal operating. Loopback Auto Detect Perle S-10G media converters have the ability to automatically put remote Perle S-10G media converters in loopback mode. This allows the remote S-10G media converter to be located in distant or inaccessible locations.
-
Page 15: Technical Specifications
• XFP supports CX4 modules Fiber Cabling Requirements 50/125 microns 62.5/125 microns 9/125 microns Note: Please refer to the product page on the Perle website for the most up to date specifications. http://www.perle.com/ Perle S- 10G Media Converter Installation Guide... -
Page 16: Compliance Information
Warranty / Registration Perle’s standard Lifetime Warranty provides customers with return to factory repairs for Perle products that fail under the conditions of the warranty coverage. Details can be found at: http://www.perle.com/support_services/warranty.shtml Copyright ©...
Need help?
Do you have a question about the S-10G-XTXH and is the answer not in the manual?
Questions and answers