Table of Contents
Advertisement
Quick Links
Download this manual
See also:
Installation Manual
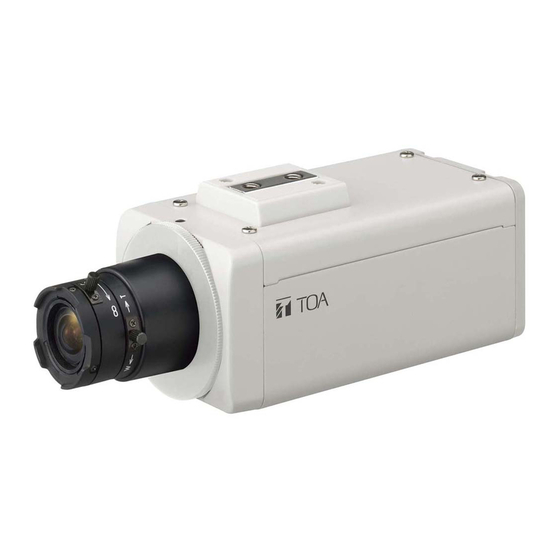
COLOR CAMERA
Camera settings can be performed using the camera's menu key. They can be also performed
remotely in combination with the C-RU10 Camera Remote Unit.
This manual describes the setup steps of the unit.
Thank you four purchasing TOA's Color Camera. Please carefully follow the instructions in this manual to
ensure long, trouble-free use of your equipment.
SETUP MANUAL
C-CC364 NT
Advertisement
Table of Contents

Subscribe to Our Youtube Channel
Related Manuals for Toa C-CC364 NT


Summary of Contents for Toa C-CC364 NT
-
Page 1: Color Camera
C-RU10 Camera Remote Unit. This manual describes the setup steps of the unit. Thank you four purchasing TOA’s Color Camera. Please carefully follow the instructions in this manual to ensure long, trouble-free use of your equipment. -
Page 2: Table Of Contents
TABLE OF CONTENTS 1. SETTING ITEM GUIDE ..................3 2. CONNECTIONS ....................4 3. FUNCTION SETTINGS 3.1. About Camera Settings ................... 5 3.2. About Camera Menu Screen ................6 3.3. Iris Level ( Brightness) Settings ............... 7 3.4. Shutter Speed Setting ..................7 3.5. -
Page 3: Setting Item Guide
1. SETTING ITEM GUIDE Camera menu screens are composed of the screens that display the setting items below. CAMERA MENU 1/2 [ Setting Item ] [ Setting Contents ] ( P. 7 ) Sets the camera image's iris. ( Iris level setting ) IRIS ( P. -
Page 4: Connections
2. CONNECTIONS • Connection example 1 Monitor Camera C-CC364 Connect to 12 V DC : BNC plug (optional) or 24 V AC • Connection example 2: When the C-RU10 is used Monitor Camera Remote Unit Camera C-RU10 C-CC364 Connect to 12 V DC : BNC plug (optional) or 24 V AC Note: For detailed connections, refer to the operating manual enclosed with the Camera Remote Unit. -
Page 5: Function Settings
3. FUNCTION SETTINGS 3.1. About Camera Settings The following 2 different methods are available for setting the camera. • Performing settings at the camera VIDEO OUT DAY/NIGHT V-PHASE ALARM MENU Menu key OFF ON F.ADJ 1/60 1/100 Clear key CLEAR Use the Menu and Clear keys to perform camera settings. -
Page 6: About Camera Menu Screen
• Performing settings using the C-RU10 Camera Remote Unit Setting can be performed using the Camera Remote Unit. POWER CABLE LENGTH CLEAR MENU CAMERA REMOTE UNIT C-RU10 Set, Clear, Menu keys Use the Menu key, Clear key, Set key, and keys on the C-RU10 to perform camera settings. -
Page 7: Iris Level ( Brightness) Settings
3.3. Iris Level ( Brightness ) Settings You can perform iris level setting ( brightness ) of a subject. • Iris setting screen 1. Select "IRIS" on the Menu screen (page 1), then press the Menu key. Iris setting screen indicator for "LOW"... -
Page 8: White Balance Setting
3.5. White Balance Setting Three modes are made available for selection: ATW, AWB, MANUAL ( Normally ATW mode is used. ) ATW: The camera's white balance varies as the subject's color temperature varies. AWB: Once the camera's white balance is adjusted during its installation, the camera operates on the initially set white balance even though the subject's color temperature changes. -
Page 9: Chroma Setting
3.6. Chroma Setting The subject’s chroma level can be adjusted as required. • Chroma level setting screen 1 Chroma level setting screen 1 1. Tilt the Menu key up or down to move the " " indicator N O R M A L C H R O M A L E V E L to select "NORMAL"... -
Page 10: Agc Setting
3.8. AGC Setting AGC can be set for "AUTO," "FIX," or "OFF." AUTO: Automatically adjusts the sensitivity in accordance with the brightness level of an subject in poor lighting condition FIX: The gain is always maintained at a set level. •... -
Page 11: Day & Night Setting (B&W Mode)
3.10. Day & Night Setting (B&W mode) This function switches the screen from color to B&W to increase the sensitivity in low-light scenes. OFF: Always displaying the camera image in color. Always displaying the camera image in B&W. NORMAL: Color switches to B&W when the subject’s illumination is approximately 0.8 lx. The illumination of the switched B&W screen can be adjusted by moving the cursor. - Page 12 3. When "NORMAL" is selected, tilt the Menu key to the left or right to move the indicator to set the brightness of a Normal setting screen subject that switches to B&W. • Setting AGC to "AUTO," level to "HIGH," and slow O F F D A Y / N I G H T shutter to "X64"...
-
Page 13: Backlight Compensation Setting
3.11. Backlight Compensation Setting • Backlight compensation Setting screen The brightness can be corrected so that a subject may not be too dark to be viewed even when the camera picks up the backlit subject. MANUAL: The area that includes a subject you want to view under bright conditions can be selected from 48 areas. - Page 14 • Backlight compensation ( Pattern 2 ) setting Perform settings for areas split on the screen for which backlight compensation is to be performed. 1. Set the "UPPER LEFT" position. Pattern 2 area screen • Use the Menu key to move the position left and right or up and down.
-
Page 15: Privacy Masking Setting
3.12. Privacy Masking Setting When there are locations that are required to be kept out of view in a camera scene, such locations can be masked out of view. Privacy masking setting screen 1. Tilt the Menu key up or down to set the privacy masking "ON"... -
Page 16: Camera Id Setting
3.15. Camera ID Setting The camera ID of up to 16 alphanumeric characters can be set. The display position can be selected for line and column. Camera ID setting screen • Camera ID setting screen 1 1. Tilt the Menu key up or down to move the " "... - Page 17 [Correcting character entries] • Correction 1 1. Using the cursor to select " " or " ." 2. Press the Menu key to confirm the setting. The cursor in the title area moves in the direction of arrow selected in step1. 3.
-
Page 18: Alarm Output Setting
3.16. Alarm Output Setting It is possible to send out alarm signals by motion detect function or connecting external sensors. The alarm signal can be superimposed and sent out to the camera remote control unit over a coaxial cable. • Motion detection setting Alarm output setting screen 1. -
Page 19: Resetting Camera Settings
3.17. Resetting Camera Settings Camera settings can be reset and returned to initial status set by the factory. Language indication can be selected either "JAPANESE," or "ENGLISH." • Preset setting screen Preset setting screen 1. Tilt the Menu key up or down to move the " "... - Page 20 Printed in Vietnam 1 3 3 - 1 2 - 9 8 0 - 1 0...
Need help?
Do you have a question about the C-CC364 NT and is the answer not in the manual?
Questions and answers