Toa C-CC514 Quick Manual
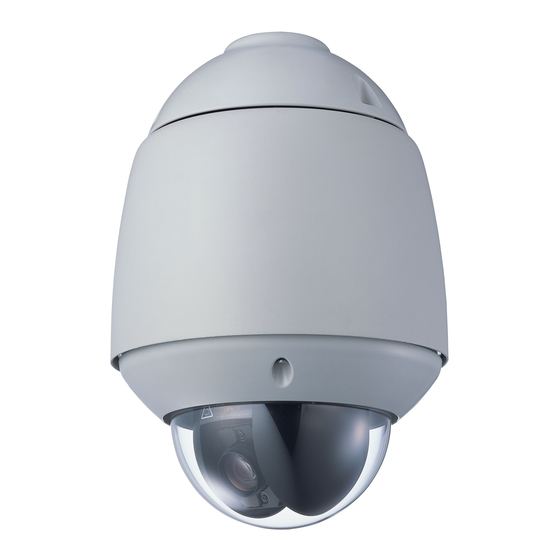
Combination camera
Hide thumbs
Also See for C-CC514:
- Catalog (28 pages) ,
- User manual (15 pages) ,
- Selection manual (4 pages)
Table of Contents
Advertisement
Quick Links
Download this manual
See also:
User Manual
COMBINATION CAMERA
OUTDOOR COMBINATION
CAMERA
TABLE OF CONTENTS
MENU SCREEN CONFIGURATION·························2
···································································4
ID Setting ·································································· 4
Camera setting (CAM) ············································ 5
Camera setting (POS) ············································· 8
Auto mode ································································ 9
Alarm ·······································································10
AUX ·········································································11
Timer ·······································································11
Thank you for your purchasing TOA's Combination Camera. Please carefully follow the instructions in
this manual to ensure long, trouble-free use of your equipment.
C-CC514, C-CC564
C-CC574, C-CC714
C-CC764, C-CC774
Manual ······································································12
Maintenance ····························································12
1. BEFORE SETTING ············································15
2. ENTERING CAMERA MENU SCREEN ···········17
3. SELECTING THE LANGUAGE ························18
4. SETTING PRESETS ··········································19
5. MAINTENANCE SETTINGS ·····························21
6. RETURN ALL SETTINGS TO INITIAL
STATUS SET BY THE FACTORY ·····················21
ENGLISH
QUICK MANUAL
Advertisement
Table of Contents

Related Manuals for Toa C-CC514


Summary of Contents for Toa C-CC514
-
Page 1: Table Of Contents
6. RETURN ALL SETTINGS TO INITIAL AUX ·········································································11 STATUS SET BY THE FACTORY ·····················21 Timer ·······································································11 Thank you for your purchasing TOA’s Combination Camera. Please carefully follow the instructions in this manual to ensure long, trouble-free use of your equipment. -
Page 2: Menu Screen Configuration
MENU SCREEN CONFIGURATION CAMERA MENU →PRESET ID SETTING CAMERA SETTING AUTO MODE ALARM TIMER MANUAL MAINTENANCE LANGUAGE ENGLISH *PRESET* →MEMORY READJUST ALL POS ***POS MEMORY RESET MEMORY ALL RESET AUTO RETURN HOME 1POS PRESET FREEZE *ID SETTING* →DISPLAY ID SETTING LOCATION FRAME ADJUST ZERO POINT *CAMERA SETTING*... - Page 3 FRONT PAGE *ALARM* →INPUT REPORT ACTIVE STATE PRIORITY ACTION INTERVAL RESET ACTION ALARM DATA *AUX* ----------------------------------------- →AUX1 AUX2 *TIMER* →PROGRAM TIME DISPLAY DATE DISPLAY MM/DD/YY ENTER TIME ENTER DATE SUMMER TIME *MANUAL* →ZOOM SCALABLE P/T P/T LIMIT P/T LIMIT SETTING LEFT MAX P/T SPEED FLIP...
-
Page 4: Function Table
FUNCTION TABLE Commands Keystrokes Description PRESET Settings such as camera direction, lens angular field of view, and focus can POS 1-255 - FINE SETTING MEMORY be preset in advance. Up to 255 positions can be set. This function simultaneously resets all preset camera panning positions. The deviation of one camera position is measured, based on which all other READJUST ALL POS POS 1-255 positions are globally corrected. -
Page 5: Camera Setting (Cam)
Displays the coordinate. Pan (0 to 359°)/ Tilt (5 to -185°) fixed 8 characters. ANGLE OFF/ON/1s/3s/5s/10s [ ***/-*** ] Pan angle (0 to 359°)/ ±Tilt (5 to 185°) ZOOM OFF/ON/1s/3s/5s/10s Displays the Electronic Zoom. Fixed 3-charactors. Displays the date in accordance with the date setting (timer setting) format. OFF/ON/1s/3s/5s/10s DATE Fixed 8-charactors. - Page 6 The Backlight Compensation function makes the image displayed on the screen easier to see when there is strong light behind the subject. (factory default: OFF) OFF : Turns the Backlight Compensation function off. This is the setting usually used. WIDE DYNAMIC Allows backlight compensation that prevents the subject from becoming too dark or the surrounding background from becoming too white.
- Page 7 (Factory default: ONE PUSH) ONE PUSH: Auto focusing is operated when the Auto-focus key is pressed. STOP AF : Auto focusing is automatically operated after the camera scene or angle of view has been changed. The STOP AF function does not work PUSH/STOP AF/ when the Focus key is used.
-
Page 8: Camera Setting (Pos)
The camera’s sync system can be switched to the system that uses the power frequency. It is also possible to adjust the phase. (Factory default: INT.) INT: Represents the internal sync system. Select this setting when only a single camera is used and it is not necessary to synchronize it with other camera. -
Page 9: Auto Mode
AUTO MODE One of the following 5 automatic functions can be assigned to the Auto key: (factory default: AUTO PAN) AUTO PAN: Auto Pan operation begins when the Auto key (or Auto Pan key) is pressed. : Sequence operation begins when the Auto key (or Auto Pan AUTO PAN/SEQUENCE/ AUTO KEY... -
Page 10: Alarm
The Preset Sequence function displays set positions of one same camera SEQUENCE on the monitor in predetermined sequential order. Sets the sequence order. (factory default: Normal) NORMAL: Playbacks preset-memory stored camera positions in numerical order. MODE NORMAL/RANDOM/TEST RANDOM: Playbacks preset memory store camera positions in random order. The stop duration for each position is determined in random order. -
Page 11: Aux
Specify whether to display the set alarm ID on the screen and forcibly execute alarm operation or give priority to operation when an alarm signal is received. number 1-8: ALARM/MANUAL/TIMER PRIORITY ALARM : Ignores commands from the controller and starts alarm operation. –... -
Page 12: Manual
Enables summer time between 2:00 AM on the set first day of summer time and 2:00 AM on the last day. OFF/ON/SET SUMMER TIME - FIRST DAY/LAST DAY OFF: Disables summer time. ON : Enables summer time. SET: Performs summer time setting. MANUAL Rotation speed relative to zoom ratio can be set to OFF. - Page 13 When any movement is detected within the set area, preset positions can be played back, the tour sequence is called up, or the contact opened and MOTION closed. This function is not a dedicated device for prevention of fire, etc. TOA 1POS/2POS/254POS/255POS DETECTION (*1) takes no responsibility for any incidental loss or accidents.
- Page 14 Set locations for motion detection sensors. AREA1-8 OFF : No movement detected. FUNCTION OFF/ON-L/ON-M/ON-H ON–L: Detects movement at low sensitivity. ON–M: Detects movement at intermediate sensitivity. ON–H: Detects movement at high sensitivity. Set operations that will take place when sensors are activated. : No operation.
-
Page 15: How To Setting
HOW TO SETTING 1. BEFORE SETTING 1.1. Address Display When Turning Power On When the camera’s power is turned on, the camera performs the initial operation (initializing operation) and simultaneously the camera address appears on the monitor. After the completion of initial operation and peripheral device connections, the camera can be controlled and the camera address screen will disappear. - Page 16 1.3. Setting Basic Operation Menu screen to be displayed and the operation slightly differ depending on the connected equipment, however there is no difference in basic operation. More particularly, refer to the instruction manual, operation manual or set up manual enclosed with each equipment. Menu key •...
-
Page 17: Entering Camera Menu Screen
2. ENTERING CAMERA MENU SCREEN Menu 1. Press the Menu key. (When a password is required, OPERATION MODE enter it with the numerical keypad.) The menu screen is displayed on the remote controller’s liquid crystal display. 2. With the joystick, select “CAMERA MENU” and press CAMERA MENU * * *CH the Set key. -
Page 18: Selecting The Language
3. SELECTING THE LANGUAGE The language to be displayed on the screen can be selected among English, German, French and Italian. (Factory default: English) 1. Select "LANGUAGE" on the Camera Menu screen CAMERAMENU with the joystick, then press the key. PRESET he arrow ( →... -
Page 19: Setting Presets
4. SETTING PRESETS Settings such as camera direction, lens angular field of view, and focus can be preset in advance. Up to 255 positions can be set. 4.1. Entering Presets into the Memory Note Positions cannot be preset in the electronic zoom range or in flip mode. Presetting is possible only for parts other than the electronic zoom or when the Flip function has been disabled. - Page 20 4. Press the Set key. The position setting screen (the selected camera image) is displayed. * * * - * * * SETTING Note “*** – ***” on the first line of the Setting screen indicates the camera number on the left and the position number on the right. 5.
-
Page 21: Maintenance Settings
5. MAINTENANCE SETTINGS This menu is used to control functions as well as to display information required during installation or maintenance. 1. Select “MAINTENANCE” on the Camera Menu screen, then CAMERA MENU press the Set key. PRESET ID SETTING CAMERA SETTING AUTO MODE ALARM 2. - Page 22 Ver. 1.02...
Need help?
Do you have a question about the C-CC514 and is the answer not in the manual?
Questions and answers