
Subscribe to Our Youtube Channel
Related Manuals for Zavio F3101


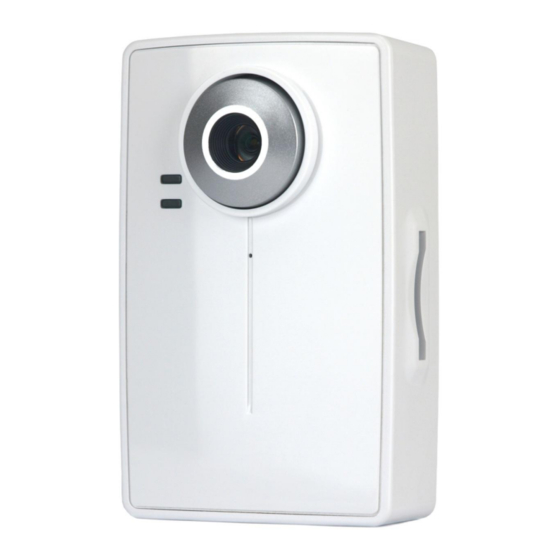
Summary of Contents for Zavio F3101
- Page 1 Wireless N Megapixel Network Camera F3101/3106 86085L1000020...
-
Page 2: Package Contents
Package Contents Camera – F3101/3106 Network Camera Quick Installation Guide – To provide brief product information and quick installation and wireless setting. Software CD – Free bundled IP surveillance software, Intelligent IP Installer, user manual and language packs. Ethernet cable –... - Page 3 Package Contents a. Wall mounting and Ceiling mounting 1. Use the 3 supplied screws to fix the base plate to a flat surface. 2. Loosen the lock ring to adjust the desired angle of the camera. 3. Tighten the lock ring. b.
-
Page 4: User Interface
User Interface Power on your PC and insert the CD-ROM. The setup page will show up automatically. Please follow these steps to install the firmware. Select “Intelligent IP Installer” and follow the installation process to complete the installation. 1. Before using Intelligent IP Installer, please check two settings. a. - Page 5 4. When accessing the IP Camera for the first time, a yellow information bar appears below the address bar: This website wants to install the following add-on: ‘AxvideoView.cab from ‘Zavio Inc’. 5. Click the information bar, and select Install ActiveX control.
- Page 6 User Interface 6. Click Install. 7. Live video displays in the centre of your web browser. 1. Select Safari icon 2. Click Bonjour function and select the camera you wish to access.
- Page 7 User Interface 4. The monitor image will be 3. Enter name and password to login to displayed in your browser. the IP camera. (Default is admin/admin) The default setting of lighting environment is Auto. However, you may also select 50 or 60 Hz upon the lighting environment of your country. Go to Setting Basic Camera...
- Page 8 Enter IP address in the web link enter username and password (default value admin/admin) The Zavio user interface and Live Image will show up in the middle of the screen. 2. Mobile phone viewing a. 3G Mobile Phone Streaming Viewing For 3G mobile phone viewing, please type “...
- Page 9 User Interface b. Internet Connectivity of the IP Camera can be established through PPPoE (Point-to-Point Protocol over the Ethernet) by inputting the username and password from your Internet Service Provider (ISP) within the PPPoE section. (Please go to Setting Basic Network PPPoE) Note 1: Please reboot the IP Camera, after changing the PPPoE settings.
- Page 10 User Interface c2. If your router is not a UPnP Internet Gateway Device, please setup Port Forwarding or Port Mapping Note 1: Home Routers manufactured before 2006 do not support UPnP IGD function. Note 2: Enterprise Routers do not support UPnP IGD function.
-
Page 11: Application Of Ip Camera
Application of IP Camera... - Page 12 MEMO …………………………………………………………………………………… …………………………………………………………………………………… …………………………………………………………………………………… …………………………………………………………………………………… …………………………………………………………………………………… …………………………………………………………………………………… …………………………………………………………………………………… …………………………………………………………………………………… …………………………………………………………………………………… …………………………………………………………………………………… …………………………………………………………………………………… …………………………………………………………………………………… …………………………………………………………………………………… …………………………………………………………………………………… …………………………………………………………………………………… …………………………………………………………………………………… …………………………………………………………………………………… …………………………………………………………………………………… ……………………………………………………………………………………...
- Page 13 MEMO …………………………………………………………………………………… …………………………………………………………………………………… …………………………………………………………………………………… …………………………………………………………………………………… …………………………………………………………………………………… …………………………………………………………………………………… …………………………………………………………………………………… …………………………………………………………………………………… …………………………………………………………………………………… …………………………………………………………………………………… …………………………………………………………………………………… …………………………………………………………………………………… …………………………………………………………………………………… …………………………………………………………………………………… …………………………………………………………………………………… …………………………………………………………………………………… …………………………………………………………………………………… …………………………………………………………………………………… ……………………………………………………………………………………...
- Page 14 MEMO …………………………………………………………………………………… …………………………………………………………………………………… …………………………………………………………………………………… …………………………………………………………………………………… …………………………………………………………………………………… …………………………………………………………………………………… …………………………………………………………………………………… …………………………………………………………………………………… …………………………………………………………………………………… …………………………………………………………………………………… …………………………………………………………………………………… …………………………………………………………………………………… …………………………………………………………………………………… …………………………………………………………………………………… …………………………………………………………………………………… …………………………………………………………………………………… …………………………………………………………………………………… …………………………………………………………………………………… ……………………………………………………………………………………...
- Page 15 MEMO …………………………………………………………………………………… …………………………………………………………………………………… …………………………………………………………………………………… …………………………………………………………………………………… …………………………………………………………………………………… …………………………………………………………………………………… …………………………………………………………………………………… …………………………………………………………………………………… …………………………………………………………………………………… …………………………………………………………………………………… …………………………………………………………………………………… …………………………………………………………………………………… …………………………………………………………………………………… …………………………………………………………………………………… …………………………………………………………………………………… …………………………………………………………………………………… …………………………………………………………………………………… …………………………………………………………………………………… ……………………………………………………………………………………...
Need help?
Do you have a question about the F3101 and is the answer not in the manual?
Questions and answers