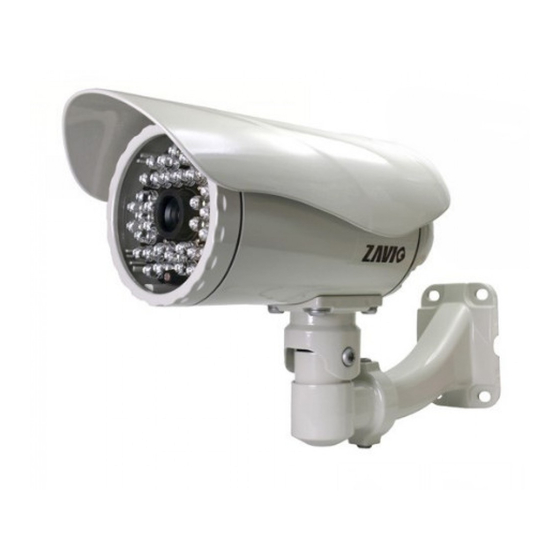
Zavio F731E Quick Installation Manual
Hide thumbs
Also See for F731E:
- Hardware user manual (10 pages) ,
- User manual (102 pages) ,
- Quick installation manual (12 pages)
Advertisement
Available languages
Available languages
Quick Links
Advertisement

Related Manuals for Zavio F731E


Summary of Contents for Zavio F731E
-
Page 2: Table Of Contents
List of language English Zavio F731E Quick Installation Guide ........................2 Français Guide d’installation rapide : Zavio F731E ........................ 11 Deutsch Zavio F731E Schnellinstallation ..........................20 日本語 Zavio F731E取扱説明書.............................. 29 한국어 Zavio F731E 빠른 설치 가이드 ..........................38 Português Zavio F731E Guia de instalação rápida ........................47 Español... -
Page 3: Zavio F731E Quick Installation Guide
Zavio F731E Quick Installation Guide Please follow the installation steps below to set up F731E IP Camera. Check the package contents against the list below. See P.2 Physical overview. See P.2 Install the hardware and connect all cables. See P.3 Use the software CD to install Intelligent IP Installer. - Page 4 Install the hardware and connect all cables a. Wall mounting 1. Fix the cover to the camera with two supplied screws. (Type 1 screws) 2. Fix the camera to the bracket with four supplied screws. (Type 2 screws) 3. Fix the camera and bracket to the wall using two screw and plastic anchors.
- Page 5 Microsoft OS:Use the software CD to install Intelligent IP Installer Power on your PC and insert the CD-ROM. The setup page will show up automatically. Please follow these steps to install the firmware. Select “Intelligent IP Installer” and follow the installation process to complete the installation. Access the IP Camera using Intelligent IP Installer 1.
- Page 6 4. When accessing the IP Camera for the first time, a yellow information bar appears below the address bar: This website wants to install the following add-on: ‘AxvideoView.cab from ‘Zavio Inc’. 5. Click the information bar, and select Install ActiveX control.
- Page 7 Mac OX using Safari Browser 2. Click Bonjour function and select the camera 1. Select Safari icon you wish to access. 3. Enter name and password to login to the IP 4. The monitor image will be displayed in your browser. camera.
- Page 8 Select Safari function → Enter IP address in the web link → enter username and password (default value admin/admin) → The Zavio user interface and Live Image will show up in the middle of the screen. 2. Mobile phone viewing a.
- Page 9 7. The IP Camera will send you a message with its Public IP and Private IP if the IP Notification Option is enabled. 8. Click on the small camera icon. Then, choose “View a new contact's webcam”. Camera at home says: 9.
- Page 10 Access to the Internet a. Internet connectivity of the IP camera can be established by inputting the cameras IP information within the Information section. (Please go to Setting → Basic → Network→ Information) Internet Connectivity of the IP Camera can be established through PPPoE (Point-to-Point Protocol over the Ethernet) by inputting the username and password from your Internet Service Provider (ISP) within the PPPoE section (Please go to Setting →...
- Page 11 c. Internet Connectivity of the IP Camera can be established if your router is UPnP (Universal Plug and Play) enabled. The IP camera is automatically detected and added to “My Network Places” on your computer. Please note that only Home Routers manufactured after 2006 support the UPnP function. c1.
-
Page 12: Guide D'installation Rapide : Zavio F731E
Guide d’installation rapide : Zavio F731E Veuillez suivre les étapes d'installation ci-dessous pour mettre en place la Camera F731E IP. Vérifiez le contenu de paquet contre la liste ci-dessous. Voir P.11 Aperçu physique. Voir P.11 Installez le matériel et connecter tous les câbles. Voir P.12 Microsoft OS: Utilisez le CD pour installer Intelligent IP Installer. - Page 13 Installer le matériel et connecter tous les câbles a. Support mural et support plafond 1. Fixez la couverture à la camera avec les deux vis fournies.(Vis :type1) 2. Fixez l'appareil-photo à la parenthèse avec les quatre vis fournies. (Vis :type 2) 3.
- Page 14 Microsoft OS: Utiliser le CD pour installer Intelligent IP Installer Allumez votre PC et insérez le CD-ROM. La page de configuration s'affichera automatiquement. Veuillez suivre ces étapes pour installer le firmware. Sélectionnez " Intelligent IP Installer " et suivre le processus d'installation pour terminer l'installation. Accès à...
- Page 15 4. Lorsque vous accédez à la caméra IP pour la première fois, une barre d'informations jaune apparaît en dessous de la barre d'adresse: Ce site veut installer l’ActiveX : AxvideoView.cab de Zavio Inc. 5. Cliquez sur la barre d'information, et sélectionnez Installer le contrôle ActiveX.
- Page 16 Mac OX en utilisant Safari Browser 2. Cliquez sur la fonction Bonjour et choisissez 1. Choisissez l'icône Safari la camera que Vous souhaitez accéder. 4. L'image de moniteur sera montrée en votre 3. Entrez le nom et le mot de passe pour ouvrir une browser.
- Page 17 1. Utiliser la camera via iPhone Choisissez la fonction de Safari Écrivez l’address d’IP dans le lien de Web Entrez le nom d'utilisateur et le mot de passe(Par défaut :admin/admin) L'interface utilisateurs de Zavio et l'image Live apparaîtront au milieu de l'écran.
- Page 18 7. La caméra IP vous enverra un message avec son IP publique et son IP privée si l’option de notification est activée. 8. Cliquez sur la petite icône de caméra. Ensuite, choisissez "Afficher un nouveau contact la webcam". Camera at home says: 9.
- Page 19 Accès via Internet A. La connectivité Internet de la caméra IP peut être établi en introduisant les informations de la caméra IP au sein de la section Information. (Veuillez aller sur « Setting → Basic → Network→ Information ») B. La connectivité Internet de la caméra IP peut être établie par le protocole PPPoE (Point-to-Point Protocol sur le port Ethernet) en introduisant le nom d'utilisateur et mot de passe de votre fournisseur Internet (FAI) dans la section PPPoE.
- Page 20 C. De connectivité Internet de la caméra IP peut être établi si l’option UPnP(Universal Plug and Play) de votre routeur est activé. La caméra IP est automatiquement détectés et ajoutés à "Favoris réseau" sur votre ordinateur. Veuillez noter que seules les Routeurs fabriqués après l’année 2006 ont la fonction UPnP. C1.
-
Page 21: Zavio F731E Schnellinstallation
Zavio F731E Schnellinstallation Bitte befolgen Sie die unten aufgeführten Installationsschritte genau, um Ihre IP-Kamera F731E einzurichten! Überprüfen Sie den Packungsinhalt auf Vollständigkeit. Siehe S.20 Kamera Übersicht. Siehe S.20 Installation der Kamera und Kabelanschlüsse. Siehe S.21 Für Microsoft OS Anwender: legen Sie die beigepackte CD in Ihr Laufwerk ein, um den „Intelligent IP Installer“... - Page 22 Installation der Kamera und Kabelanschlüsse a.Wandmontage 1. Befestigen Sie die Kamerabdeckung mit den beiden beigefügten Schrauben (Typ 1) und drücken Sie die Abdeckkappen fest ein. 2.Befestigen Sie die Wandhalterung am Gehäuse mit den vier beigefügten Schrauben (Typ 2) 3. Befestigen Sie die Kamera mit den beigefügten vier Schrauben/Dübeln an die Wand b.
- Page 23 Für Microsoft OS Anwender: legen Sie die beigepackte CD in Ihr Laufwerk ein, um den „Intelligent IP Installer“ einzurichten. Schalten Sie Ihren Computer ein und legen Sie die CD-ROM in das CD-Laufwerk. Das Menü zur Installation wird automatisch gestartet. Folgen Sie der Menüführung und installieren Sie die Firmware. Wählen Sie den folgenden Punkt aus: “Intelligent IP Installer”, folgen Sie den Anweisungen zur Installation Zugang zur Kamera unter Benutzung des Intelligent IP Installers 1.
- Page 24 4. Wen Sie das erstemal über den Internet Explorer auf die Kamera zugreifen, erscheint eine gelb unterlegte Information: Die Webseite verlangt die Installation des folgenden add-on: ‘AxvideoView.cab from ‘Zavio 5. Klicken Sie diese Information an und wählen dann: Install ActiveX 6.
- Page 25 Für Mac OS Anwender: benutzen Sie zur Einrichtung der Kamera Ihren “Safari Browser” 1. Rufen Sie Safari auf 2. Klicken Sie die Bonjour Funktion und wählen Sie die Kamera aus 3. Geben Sie den Benutzernamen und Ihr Passwort 4. Das Kamerabild wird in Ihrem Browser angezeigt ein, um sich bei der Kamera anzumelden (Standard ist admin/admin) Veränderung der Umgebungslicht-Einstellungen...
- Page 26 1. Anbindung eines i-Phone Wählen Sie die Safari Funktion geben Sie die IP-Adresse ein geben Sie Benutzername und Passwort ein (Standard admin/admin) das Zavio Interface und das Kamerabild wird angezeigt 2. Anbindung eines anderen Handys a.Zugriff mittels UMTS/3G Handy Für die Anbindung eines UMTS/3G Handys geben Sie in Ihren Web Media-Player ein:...
- Page 27 7. Wenn Sie alle IP Adressen frei gegeben haben, schickt Ihnen die Kamera eine Nachricht auf Ihr Handy. 8. Klicken Sie auf das Kamera Icon. Wählen Sie dann: “View a new contact's webcam”. Camera at home says: 9. Die IP-Kamera akzeptiert Ihre Einladung automatisch 10.
- Page 28 Zugang zum Internet a. Sie haben die Möglichkeit Ihre Internet Zugangsdaten für Ihre IP Kamera auch direkt im Fenster „Network/Informationen“ einzugeben. (Gehen Sie zu: Setting → Basic → Network→ Information) Der Internet Zugang Ihrer IP Kamera kann auch durch PPPoE (Point-to-Point Protocol over the Ethernet) erfolgen, unter Benutzung Ihrer Zugangsdaten die Sie von Ihrem Internet Provider erhalten haben Gehen Sie zum Unterpunkt: „PPPoE“...
- Page 29 c.Der Internet Zugang kann auch über Ihren Router erfolgen, wenn dieser über eine UPnP Funktion verfügt. Die IP Kamera wird automatisch erkannt und in die Liste der angeschlossenen IP Geräte aufgenommen. Bitte beachten Sie, das nur UPnP-Router ab dem Baujahr 2006 über diese automatisch Erkennung verfügen! c1.
-
Page 30: Zavio F731E取扱説明書
Zavio F731E 取扱説明書 以下のステップに従って F731E IP カメラを設定します。 パッケージ内容リストにより中身を確認してください。 (29 ページ) 各部の名称(29 ページ) ( 本機付属品取り付けとケーブル接続 30 ページ) Microsoft OS: ソフトウェア CD から Intelligent IP Installer をインストール(31 ページ) Intelligent IP Installer 経由で IP カメラにアクセス(31 ページ) Mac OX ウェブブラウザー「Safari」使用 (33 ページ) ライティング環境設定の変更(33 ページ)... - Page 31 本機付属品取り付けとケーブル接続 a. 壁面への取り付け 1. 付属のスクリュー二本(タイプ 1)でカメラカバ ーを固定します。 2. 付属のスクリュー四本 (タイプ 2) でカメラをブラ ケットに固定します。 3. 二組のスクリュー+アンカー(タイプ 3) でカメラとブラケットを壁面に固定します。 b. ケーブル接続 b1. パワー・オーバー・イーサネット(PoE)対応の場合。 1. 標準 RJ-45 ケーブルで IP カメラを PoE 対応型 ハブ/スイッチ/ルーターに接続。 b2. 非パワー・オーバー・イーサネット(PoE)対応の場合。 1. 電源アダプターを IP カメラに接続。 2. 標準 RJ-45 ケーブルで IP カメラを非 PoE 対応型ハブ/ スイッチ/ルーターに接続。...
- Page 32 ソフトウェア CD から Intelligent IP Installer をインストール PC の電源をオンにして CD を挿入するとセットアップページが自動的に表示されます。表示されるステッ プに従ってこのソフトをインストールしてください。 “Intelligent IP Installer” を選択し、表示される手順どおりにインストールを完成してください。 経由で IP カメラにアクセス Intelligent IP Installer Intelligent IP Installer 使用前に、以下の二つの設定を確認してください。 b. ブラウザーのインターネットオプショ a. ブラウザーのインターネットオプション ン → プライバシー →ポップアップブロ → セキュリティ→ デフォルトレベル ッカーを無効にする Intelligent IP Installer 2.
- Page 33 3. ユーザーネームとパスワードを入力 し、IP カメラにログインします。 (デフォルトは admin/admin) 4. 初めて IP カメラにアクセスすると、アドレスバーの下にある黄色のインフォメーションバーに以下のメッ セージが表示されます。 「This website wants to install the following add-on: ‘AxvideoView.cab from ‘Zavio Inc’」 5.インフォメーションバーをクリックし、 「Install ActiveX control」を選択します。 6.「Install」をクリックします。 7. ウェブブラウザーの中央にライブビデオが表示されます。...
- Page 34 Mac OX のウェブブラウザー「 Safari 」使用 2. 「 Bonjour function 」をクリックし、ア 1. 「Safari 」アイコンを選択します。 クセスしたいカメラを選択します。 3. ユーザーネームとパスワードを入力し、IP カメ 4. モニター映像がブラウザーに表示されます。 ラにログインします。 (デフォルト設定は admin / admin) ライティング環境設定 ライティング環境のデフォルト設定値は 60Hz です。周波数が 50Hz の国で使用すると映像にちらつきが出 ますので、この場合には設定を 50Hz に変更してください。もしくは、IP カメラを屋外に設置する場合に は、 「Outdoor」モードに設定してください。 “Setting → Basic → Camera → General"の順に選択し、お望みのライティング環境を設定してください。...
- Page 35 1. CD を CD-ROM に挿入。 2. CD の言語パックを通覧し、そこからお好みの言語を選択して「OK」をクリックする。 3. ウェブインターフェースがお好みの言語で表示されます。 モバイルフォンでの IP カメラ映像再生 1. iPhoneでのIPカメラ映像再生 ウェブブラウザー「Safari」を選択 → ウェブリンクで IP アドレスを入力 → ユーザーネームとパスワー ド入力 (デフォルト設定:admin/admin) → Zavio ユーザーインタフェースとライブ映像がスクリーン中 央に表示されます。 2. モバイルフォン再生 a. 3Gモバイルフォン・ストリーミング再生 3G モバイルフォンで映像再生するには、 3G ウェブメディアプレーヤーに “ rtsp://<IP>:<PORT>/video.3gp ” を入力。...
- Page 36 7.「IP Notification Option」が「On」にセットされていれば、IP カメラからパブリック IP とプライベート IP を書いたメッセージが送られてきます。 8. 小型カメラアイコンをクリックし、 「View a new contact's webcam」を選択します。 Camera at home says: 9. IP カメラが自動的にライブビデオ 10. メニュバー「Action 」を下ろし、 を配信し、映像が表示されます 「Start control panel」を選択します。 11. Windows Live Messenger アドインコントロールパネルで 「Snapshot」 、 「Image Setup」 、 が使用できます。 Snapshot Snapshot Image Setup...
- Page 37 インターネットにアクセス a.「Information section」でカメラの IP 情報を入力することにより、IP カメラのインターネット接続が可 能となります。. (「 Setting → Basic → Network→ Information」の順に選択していきます) PPPoE (Point-to-Point over the Ethernet)セクション内のインターネットサービスプロバイダー (ISP)により提供されたユーザーネーム/パスワードを入力することにより、IP カメラのインターネ ット接続が可能となります。 (「 Setting → Basic → Network→ PPPoE」の順に選択してください) 注 1: PPPoE 設定変更後は、IP カメラを再起動してください。 注 2: PPPoE 機能を使用するに当たり、先に「DDNS」と「IP Notification」機能を「On」にしてください。...
- Page 38 c. UPnP(Universal Plug and Play)対応ルーターであれば、IP カメラのネット接続ができます。コンピュ 注:ホームルーターの ータの「My Network Places」が IP カメラを自動的に探知し、リストに加えます。 場合、UPnP 対応機能搭載は 2006 年以降に製造されたホームルータに限られます。 c1.ご使用のルーターが UPnP-IGD (Internet Gateway Device)ならば、UPnP セクションに入り、UPnP 機能を「On」にしてください。 「Setting → Basic → Network→ UPnP」の順に入ります。 注: 「 turn on the UPnP Port Forwarding function」 にチェックマークを入れると、 RTSP (Real Time Streaming Protocol)ポートの設定値が以下の表示のように変更されます。...
-
Page 39: Zavio F731E 빠른 설치 가이드
Zavio F731E 빠른 설치 가이드 F731E IP 카메라의 설치를 위해 다음의 설치 단계를 따르십시오. 아래 목록에 따라 패키지 구성물을 확인하십시오. 38 페이지 참조 몸체 개관. 38 페이지 참조 하드웨어를 설치하고 모든 케이블을 연결하십시오. 39 페이지 참조 마이크로소프트 OS: Intelligent IP Installer 설치를 위해 소프트웨어 CD 를 사용합니다... - Page 40 하드웨어를 설치하고 모든 케이블을 연결합니다. a. 벽 설치 1. 두 개의 제공된 나사(Type 1 나사)로 덮개를 카메라에 고정시킵니다. 2. 네 개의 제공된 나사(Type 2 나사)로 카메라를 받침대에 고정시킵니다. 3. 두 개의 나사와 플라스틱 고정장치를 사용해 카메라와 받침대를 벽에 고정시킵니다. b. 모든 케이블 연결하기 b1.
- Page 41 Intelligent IP Installer 설치를 위해 소프트웨어 CD 를 사용합니다. 마이크로소프트 OS: PC 를 켜고 CD-ROM 을 삽입합니다. 설치 페이지가 자동적으로 나타납니다. 펌웨어를 설치하기 위해 다음의 단계를 따르십시오. “Intelligent IP Installer”를 선택하고 설치 완료를 위해 설치 과정을 따르십시오. Intelligent IP Installer 를 이용해 IP 카메라에 접속하기 1.
- Page 42 입력합니다. (초기설정은 admin / admin) 4. 처음으로 IP 카메라에 접속할 때에, 주소 바 밑에 노란 색 정보 바가 나타납니다: 이 웹사이트는 다음의 설치를 필요로 합니다: ‘AxvideoView.cab from ‘Zavio Inc’. 5. 정보 바를 클릭하여 ActiveX control 설치를 선택합니다. 6. 설치를 클릭합니다.
- Page 43 사파리 브라우저를 이용한 맥 OX 2. Bonjour 기능을 클릭하고 접속을 원하는 1.사파리 아이콘을 선택합니다. 카메라를 선택합니다. 3. IP 카메라에 로그인하기 위해 이름과 암호를 입력합니다. 4. 모니터 영상이 브라우저에 나타납니다. (초기값은 admin / admin) 조명환경 설정 조명환경의 초기 설정은 60Hz 입니다. 하지만 영상이 깜박거리게 보일 수 있는데, 이것은 계신 국가의 조명...
- Page 44 1. iPhone 을 통해 IP 카메라 사용하기 사파리 기능 선택 → 웹 링크에서 IP 주소 입력 → 사용자 이름과 암호 입력(초기화 값은 admin/admin) → Zavio 사용자 인터페이스와 동영상이 화면의 가운데에 나타날 것입니다. 2. 휴대폰 보기 a. 3G 휴대폰 스트리밍 보기...
- Page 45 5. MSN 메신저에 로그인 하기 위해 기존 계정을 사용합니다. 6. 대화상대 목록에 새로운 MSN 메신저 계정(e.g.: Camera at home)을 추가합니다. 7. IP 공지 옵션이 가능한 상태이면 IP 카메라가 공용 IP 와 개인 IP 로 메시지를 보냅니다. 8. 작은 카메라 아이콘을 클릭하고, “새로운 대화목록의 웹캠 보기”를 선택합니다. Camera at home says: Camera at home says: 10.
- Page 46 인터넷에 접속하기 a. IP 카메라의 인터넷 접속성은 정보 부분의 카메라 IP 정보를 입력하여 정해질 수 있습니다. (설정 → 기본 → 네트워크→ 정보로 가십시오.) b. IP 카메라의 인터넷 접속성은 PPPoE 부분에 인터넷 서비스 제공자(ISP)의 사용자 이름과 암호를 입력하여 PPPoE (Point-to-Point Protocol over the Ethernet)를 통해 정해질 수 있습니다. (설정...
- Page 47 c. IP 카메라의 인터넷 접속성은 공유기가 UPnP (범용 플러그 앤 플레이)가 가능한 경우 정해질 수 있습니다. IP 카메라가 자동적으로 찾아져서 컴퓨터의 “내 네트워크 환경”에 추가됩니다. UPnP 기능을 지원하는 2006 년 이후에 제조된 가정 공유기만 해당됨을 주의하십시오. c1. 공유기가 UPnP 인터넷 게이트웨이 장비(IGD)인 경우 UPnP 부분에서 UPnP 기능을 켜십시오. (설정...
-
Page 48: Zavio F731E Guia De Instalação Rápida
Zavio F731E Guia de instalação rápida Po favor siga os passos abaixo para configurar a Câmara IP modelo F731E. Verifique o conteúdo da embalagem, ver lista de items. Ver P.47 Detalhes do equipamento a nível físico Ver P.47 Instale o hardware o efectue todas as ligações. Ver P.48 Microsoft OS: Instale o software Intelligent IP Installer fornecido. - Page 49 Instale o hardware e ligue os todos os conectores a 1. Montagem na parede 1. Fixar a cobertura para a câmara com dois parafusos fornecidos. (parafusos tipo 1 ) 2. Fixar a câmera ao suporte com quatro parafusos fornecidos. ( parafusos tipo 2) 3.
- Page 50 Microsoft OS: Instale o software Intelligent IP Installer fornecido. Ligue o seu PC e insira o CD. Surgirá uma página de configuração. Siga as seguintes instruções para instalar e configurar a sua Câmara IP. Seleccione “Intelligent IP Installer” e siga as instruções de maneira a completar a instalação. Aceda à...
- Page 51 4. Quando acede à Câmara IP pela primeira vez, surge uma barra amarela abaixo da barra de endereço: This website wants to install the following add-on: ‘AxvideoView.cab from ‘Zavio Inc’. 5. Clique na barra de informação, e seleccione Install ActiveX 6.
- Page 52 Mac OX using Safari Browser 2. Clique na função Bonjour e selecione a câmera 1. Selecione o icone do Safari que pretende acessar 3. Introduza o seu nome e senha para acessar a 4. Imagem será exibida em seu navegador câmera IP.
- Page 53 Modifique a Interface Web para o seu Idioma Use as opções no ecrã para configurar o idioma da interface web. Ir a “Setting → Basic → System → Initialize”. 1. Insira o CD do software na drive de CD-ROM. 2. Procure e seleccione o idioma do pack de idiomas contidos no CD e clique OK. 3.
- Page 54 7. A Câmara IP enviar-lhe-á uma mensagem com o seu IP Público e o seu IP Privado, se a opção IP Notification estiver activa. 8. Clique no ícone da câmara. Depois escolha “View a new contact's webcam”. Camera at home says: 10.
- Page 55 Acesso à internet a. A ligação da câmara à Internet é configurada na secção Information. (Por favor aceda a Setting → Basic → Network→ Information) b. A conectividade à Internet da câmara IP pode ser feita por PPPoE (Point-to-Point Protocol over the Ethernet) inserindo o username e a password do seu ISP (Internet Service Provider) na secção PPPoE.
- Page 56 c. A ligação à Internet pode ser efectuada se o seu router suportar a função UPnP (Universal Plug and Play). A câmara IP será detectada automaticamente e adicionada a “Vizinhança na Rede” no seu computador. Note que só os routers posteriores a 2006 suportam a função UPnP.
- Page 57 Zavio F731E Guía de Instalación Rápida Por favor siga los pasos de instalación que se muestran abajo para su cámara IP F731E IP Camera. Verificar que el contenido de la caja corresponda con la lista de abajo. Ir a Pág.56 Descripción física.
- Page 58 Instalación de la Cámara y conexión de los cables a. Montaje de pared 1. Fijar la cobertura superior a la cámara con los dos tornillos provistos (Tornillos A) 2. Fijar la cámara al soporte con los cuatro tornillos provistos (Tornillos B) 3.
- Page 59 Microsoft OX: Usar el programa del CD para correr el software Intelligent IP Installer. Desde su computadora inserte el CD-ROM. Una ventana de configuración aparecerá automáticamente . Por favor siga las instrucciones para instalar el firmware de la cámara. Seleccione la opción “Intelligent IP Installer” y siga el proceso de instalación. Acceder a la Camera IP usando el software Intelligent IP Installer 1.
- Page 60 / admin) 4. Cuando accese la camra IP la primera vez, una barra amarilla le indicará que está por instalarse un plug in. ‘AxvideoView.cab from ‘Zavio Inc’. 5. Haga click en la barra y seleccione Instalar ActiveX control. 6. Hacer click en Instalar.
- Page 61 Mac OX usando el navegador Safari. 2. Clickee la function Bonjour y seleccione la 1. Seleccione el ícono Safari cámara que desea acceder. 3. Ingrese el nombre y clave para conectarse a 4. La imagen del monitor se despleagará en su navegador.
- Page 62 Seleccione la función Safari → Escriba la dirección IP en el web link → introduzca un nombre de usuario y la contraseña (Por defecto admin /admin) La interfaz de usuario Zavio y el Live Image se mostrarán en el centro de la pantalla.
- Page 63 7. La cámara IP le mandará un mensaje con su IP Publica e IP privada si la opción de notificación de IP Notification Option está activada. 8. Hacer clic en el pequeño icono de la cámara. Después escoja, “Ver la cámara del contacto”. Camera at home says: 9.
- Page 64 Acceso al Internet a. La conectividad de Internet para su cámara IP puede realizarse al ingresar la información de la cámara IP dentro de la opción Information section. (Acceda a Setting → Basic → Network→ Information) Conectividad de Internet a la cámara IP puede establecerse a través de PPPoE (Point-to-Point Protocol over the Ethernet) al ingresar el Usuario y Password desde su proveedor de dentro de la opción de PPPoE (Acceda a Setting →...
- Page 65 c. La conectividad al Internet de su cámara IP puede establecerse si su router tiene UPnP activado (Universal Plug and Play). La cámara IP es automáticamente detectada y agregada a “My Network Places” en su computadora . Solo los Routers a partir del 2006 tienen la función UPnP. c1.
Need help?
Do you have a question about the F731E and is the answer not in the manual?
Questions and answers