Table of Contents
Advertisement
Quick Links
Advertisement
Table of Contents

Related Manuals for Triax CR 310


Summary of Contents for Triax CR 310
- Page 1 TRIAX CR 310 Digital Cable Receiver User's Manual K7_ENGLISH 104574...
-
Page 2: General Safety
General Safety Warning Always follow these instructions to avoid the risk of injury to CAUTION yourself or damage to your equipment. RISK OF ELECTRIC SHOCK DO NOT OPEN Unplug the receiver from the AC power outlet before cleaning. CAUTION : To reduce the risk of electrical shock, Use only a damp cloth for cleaning the exterior of the receiver. -
Page 3: Table Of Contents
Contents Remote Control Unit .............4 Front Panel . -
Page 4: Remote Control Unit
Remote Control Unit STAND BY MUTE NUMERIC BUTTON TV/RADIO TV/STB YELLOW BUTTON/TIMER GREEN BUTTON INFO(BLUE BUTTON) SUBTITLE(RED BUTTON) UP/DOWN/LEFT/RIGHT VOL UP/DOWN CH UP/DOWN MENU EXIT PAUSE P.STD TEXT P.SIZE A/L/R RECALL A.LANG SLEEP When inserting batteries, make sure that the polarity (+/-) is correct. Note! 1 : The design of the Remote Control Unit may be changed without any notice in advance. -
Page 5: Remote Control Unit
Remote Control Unit MUTE To enable or disable audio. STAND BY To switch between operation and stand by mode. NUMERIC BUTTONS To select the channel and enter the channel edit and PIN code. TV/STB To switch between TV and STB receive mode. TV/RADIO To switch between TV and Radio. -
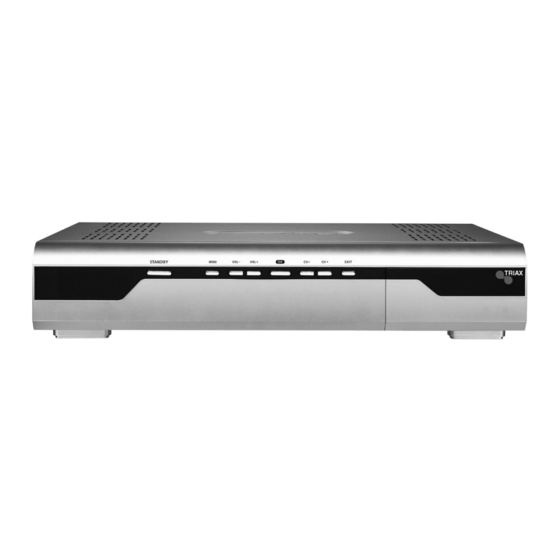
Page 6: Front Panel
Front Panel 1. POWER Switch the receiver power " " ON" or "OFF". . 2. MENU To see main menu. 3. VOL - / + (Program Volume - / + or select item of sub-menu. 4. OK Select a program, a highlighted line or parameter value. 5. - Page 7 Front Panel Front Panel Display Message KEY & DISPLAY The message of the 7-segment LED (Light-Emitting Diode) on the STB and keys are explained as below. Current Program Number on TV List Standby Mode System Booting Current Program Number on Radio List Power Off TV Mode MICOM Version...
-
Page 8: Rear Panel
Rear Panel 1. ANTENNA To connect to a digital terrestrial antenna input. 2. RF LOOP OUT Used to connect a RF signal from the Receiver to either the RF input jack on your television or to the Receiver (RF Loop In). 3. -
Page 9: Connecting Your Equipment
Connecting Your Equipment How to connect your STB to various systems There are several ways of connecting the STB to your TV, VCR and/or Hi-Fi SYSTEM. Consult your local supplier for assistance in setting-up your system that is best suited to your requirements. 1. - Page 10 Connecting Your Equipment TV with Cable Antenna 1. Connect one end of RCA/Cinch cable to the RCA/ Cinch jack on the back of the STB and the other end to a RCA/Cinch jack on your TV. If your TV doesn’t have a RCA/Cinch jack, connect one end of RF cable to the TV OUT on the back of the STB and the other end to a RF input jack on your TV.
-
Page 11: Basic Operation
Basic Operation Basic Function 1. Program Information After the television channels have been programmed, you will see the information box each time you change the channels. 1. Every time you change channels you will receive program information for a few seconds. (In the "Banner Time" menu you can select how long this information will be shown.) You can get "Channel Banner"... -
Page 12: Basic Function
Basic Operation Basic Function 4. Channel-Information Banner 1. During "Channel Banner" is appearing, when you press GREEN button, you can get "Channel-Information Banner". 2. Using "Channel-Information Banner", you can get a detailed channel listing information. 5. Volume Control/Mute 1. To control audio volume, press VOL -/+ buttons. 2. - Page 13 Basic Operation Basic Function 7. Timer The user can reserve a desired program at a desired time by using the Timer function. 1. Once, Daily, Weekly Reservation. the date and time. Press the OK button to save the selected time on the Disk icon. The program will record at each and every selected time.
- Page 14 Basic Operation Basic Function 9. Soundtrack 1. When you want to change the Audio Language of current channel, press the A.LANG button on the remote control. The on-screen menu is displayed on the left side of the screen. 3. To cancel or exit, press the A.LANG button again. You can change a default audio language in the system setting menu mode.
-
Page 15: Menu Guide
Menu Guide Easy Installation Before you can view the television or radio program, you must perform the installation procedure first. Therefore you will see only "Easy Installation Menu" at first when you plug in your system. The Easy Installation gives you the convenience of selecting various languages, adjusting the time and channel search. - Page 16 Menu Guide Easy Installation Language The first option is "Language Select" to select the desired language of the Menu, Audio, or Subtitle. Place the cursor on the sub menu by pressing the keys and press the OK button to change language. The Language of Menu, Audio, or Subtitle will be changed to the selected language.
-
Page 17: Main Menu
Menu Guide Main Menu Press the MENU button on the remote control unit. You will see the "Main Menu" on the screen. 2. You should enter the PIN code in order to move into the corresponding submenu in case of "Edit Channel List" or "System Setting". 3. -
Page 18: Channel Search
Menu Guide Channel Search Select Automatic/Manual channel search in main menu. Automatic Search 1. Press Automatic Search in Main Menu. 2. Input a proper Start Frequency of the cable signal using NUMERIC buttons. 3. Input a proper End Frequency of the cable signal using NUMERIC buttons. 4. -
Page 19: Manual Search
Menu Guide Channel Search Select Automatic/Manual channel search in main menu. Manual Search 1. Press Manual Search in Main Menu. 2. Input a proper Frequency of the cable signal using NUMERIC buttons. 3. Input a proper Symbol Rate of the cable signal using NUMERIC buttons. 4. -
Page 20: Channel List
Menu Guide Channel List This menu helps you to easily select the channel that you want to watch. You can see the channel list when you had searched before. To use this menu, you should set channel group you want in the Edit Channel List menu. 1. -
Page 21: Edit Channel List
Menu Guide Edit Channel List From these menus, You can edit favorite lists, lock, skip, delete, or move channel. 1. Select "Edit Channel List and press OK button. 2. At the request window, Input PIN code. If you have not entered your own PIN code, then the PIN code 0000 applies, which was set at the factory. - Page 22 Menu Guide Edit Channel List 1. You can edit favorite TV and Radio list. This enables you to create the 8 favorite TV and Radio lists. 2. Select the channel you want to edit favorite list and press OK button. Note To rename the Favorite channel, press INFO(BLUE) button.
-
Page 23: Program Guide
Menu Guide Edit Channel List 5. Move 1. You can change the position of the channel you want on the TV/Radio/ All channel lists. 2. Select the channel you want to move to desired channel and press the OK button. 3. - Page 24 Menu Guide Program Guide 1. Now/Next Program Guide Shows the information of Present/Following program on different channels. To watch the programs you go through the display window : 2. Use the button to change the channel list. 3. After selecting the program you want, press OK button. You can see the detailed information.
-
Page 25: System Setting
Menu Guide System Setting You will be asked to enter your PIN code before you can enter this menu. The PIN code preset to 0000 from the factory. The code can be changed from the “Change PIN Code” menu. Refer to page 38). If you want to customize the system to suit you better, you can specify some settings from the submenus in the “System Setting”... -
Page 26: Subtitle Language
Menu Guide System Setting 3. Subtitle Language In this menu You can change default language for subtitle when changing services. then press OK button. You can choose the language from a selection of English, Spanish, Finnish, Norwegian, Swedish, German, French, Turkish, Italian, Slovenian, Ukrainian, Russian, Czech, Latvian, Arabic, Farsi, Danish, Bulgarian, Romanian, Serbian, Dutch, Hungarian, Albanian.(Option) -
Page 27: Banner Time
Menu Guide System Setting 6. Banner Time When you switch channels, an information banner will be shown for a few seconds. You can select for how long the banner will be shown. 1. Select the banner time you want and then press OK button. 2. -
Page 28: Local Time
Menu Guide System Setting 9. Local Time You can set your local time according to your location. buttons by selecting GMT time. 10. Menu Transparency From 20 to 63 will give the variable transparency on Video and OSD screen. The transparency will be applied on the screen. 11. -
Page 29: Parental Lock
Menu Guide System Setting 12. Parental Lock When you change "Parental Lock" to "On" or "Off", service channel can get or not from that set values. If you select "On", you may need PIN code every time you select the lock channel program as you set in the channel control. If you select "Off", you can see all channels without PIN code. -
Page 30: Auto Power
Menu Guide System Setting 16. Auto Power 1. If the Auto Power is set to On and power is off, the Set turns on automatically and turns into the channel mode which you were watching before power breakdown. 2. If the Auto Power is set to Off and power is off, the Set turns into the standby mode. -
Page 31: Ca System
Menu Guide CA System The menus are provided by Smartcard. Your receiver is equipped with one Smartcard slot, Plug in the appropriate a valid Smartcard. You will then have access to the respective scrambled and Pay-Per-View services. Insert the Smartcard into the Smartcard Slot on the front panel. The Smartcard determine the programs that can be de-scrambled. -
Page 32: Utility
Menu Guide Utility 1. Game 1. Select "Game 2. Select the game you want to play and press OK button, and then you can play the game. 2. Demonstration Select "Demonstration OK button, you can see the Automatic Operation Function. Press the EXIT button to quit the Automatic Operation Function completely. -
Page 33: Troubleshooting
Troubleshooting Problem Solution No display LED on the front panel. Power cord plug in correctly. No power supply No Picture Ensure that the STB is switched on. Check connection and correct. Check channel and video output and correct Poor picture quality Check the signal level, if this is low then try adjusting the alignment of your dish. -
Page 34: Technical Specifications
Technical Specifications Tuner Demodulation Constellation 16, 32, 64,128, 256 Input Connector IEC 169-24, Female(75 Ohm) Frequency Range 51MHz ~ 858MHz 0.87 ~ 11.7 Mbaud Symbol Rate RF Modulator PLL type UHF(CH 21~69) or VHF(CH 3~4) for the modulation TV Standard PAL B/G, I, D/K, NTSC M selectable RF Connector 75 Ohms, 169-2, Male/Female... -
Page 35: Power Supply
Technical Specifications A/V & Data Input/Output Video RCA/Cinch, Video Output(CVBS)/SCART(CVBS, RGB) RCA/Cinch Volume & Mute Control Audio (Resolution: 20 bits DAC, Max 2Vrms) S/PDIF of Dolby Digital Bitstream Out RS-232C Transfer rate 115Kbps, 9 PIN D-Sub Type System Resources Flash Memory 1Mbyte, 2Mbytes (Option) SDRAM 8Mbytes, 16Mbytes (Option) - Page 36 www.triax.com...
Need help?
Do you have a question about the CR 310 and is the answer not in the manual?
Questions and answers