Table of Contents
Advertisement
Advertisement
Table of Contents

Related Manuals for Triax S-HD 207


Summary of Contents for Triax S-HD 207
-
Page 1: Content
Content Triax S-HD 207 Digital Satellite Receiver Operating Manual 305210... -
Page 2: Table Of Contents
Content Content Content ............................1 Content ............................1 General instructions ........................3 Safety Instructions ......................... 4 Cleaning and care .......................... 4 Control elements, front and rear panel..................5 Connecting the receiver ......................... 6 Remote control ..........................7 Initial installation ..........................8 Operating the receiver ......................... -
Page 3: General Instructions
Connection of external mass storage device (option) ..............28 List of recordings .......................... 29 Operating the external mass storage device (Option) ..............30 Recording ..........................30 Timeshift function ........................31 Playback ............................31 Choosing the audio channel for recordings ................31 Fast forward and rewind...................... -
Page 4: Safety Instructions
Safety Instructions Safety Instructions Before installing your digital receiver, all security and operating instructions should be read carefully. The User’s Manual should be retained for future reference. All operating and using instructions should be followed. Never allow children to operate this electrical device without supervisor. ENVIRONMENTAL CONDITIONS Protect the receiver against humidity, heat and cold. -
Page 5: Control Elements, Front And Rear Panel
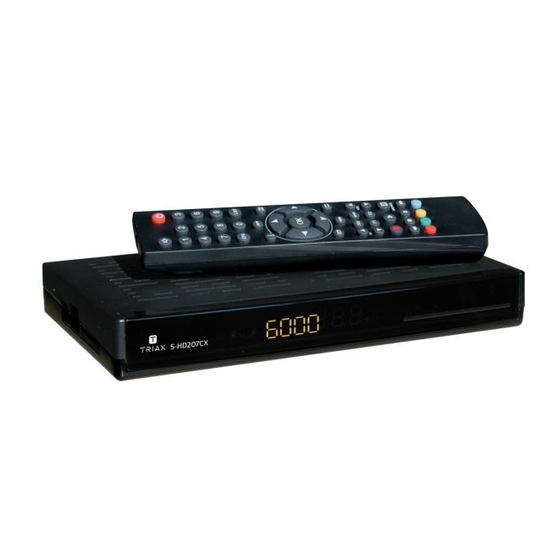
Control elements, front and rear panel Control elements, front and rear panel 4-digit display shows channel number or LED Display Receiver in standby mode. Channel number Receiver is ON rEC. Timer activated Smartcard reader Connector for mains adapter 12VDC TV-Scart port for connecting the TV HDMI-Output (digital Audio- and Videosignal) for connecting the TV USB-socket for external mass storage device IF Input Digital –... -
Page 6: Connecting The Receiver
Connecting the receiver Connecting the receiver Connecting a satellite antenna Connect the coaxial cable of your satellite system with the socket IF-INPUT DIGITAL (6). Caution: If, after connecting the receiver to the mains, the screen shows the message “Short circuit or overload at antenna input”, there is a short circuit in the LNB cable or in the LNB. -
Page 7: Remote Control
Remote control Remote control... -
Page 8: Initial Installation
Initial installation Initial installation After reading the safety instructions (see chapter “safety instructions)” and finishing the actions explained in chapter “connecting the receiver” please use the supplied power cord for connecting the apparatus to the power supply. When running the receiver for the first time the “welcome menu”... -
Page 9: Satellite Reception
Initial installation Satellite reception In the last step please select the type of your connected satellite antenna system (use or ). Standard or SCR (Sat Channel Router) Welcome Satellite Reception Standard SCR (Sat Channel Router) Standard Choose this option, if you want to connect the receiver to a conventional satellite antenna system. -
Page 10: Operating The Receiver
Operating the receiver Operating the receiver Switching receiver ON/OFF This receiver is optionally equipped with a low power standby circuit. If this function is activated, the standby power consumption of the receiver is less than 1W. The function is switched ON or OFF in the menu SETTINGS/RECEIVER SETUP. Low-Power Standby ON –... -
Page 11: Selecting A Channel
Operating the receiver Selecting a channel Using the directional up/down keys To change the channels stepwise press the buttons . In order to switch the channels quicker hold these buttons pressed longer. Using the numeric keys (direct input) One or more digit channel numbers can be input by using the numeric buttons 0…9 and pressing OK. -
Page 12: Epg - Electronic Programme Guide
EPG – Electronic Programme Guide EPG – Electronic Programme Guide Almost all TV and radio broadcasters provide further information on their programme. Your receiver stores and decodes these data and displays them in the so called Electronic Programme Guide (EPG). This programme preview is activated by using the EPG button. -
Page 13: Settings - Receiver Setup
Settings Press the OK button. Settings The following menu is displayed: Receiver setup Picture Sound Subtitle The first line Receiver Setup is marked. OSD configuration Parental lockj Choose this menu item by pressing and confirm by OK. Settings – Receiver setup The following menu is displayed: Receiver setup Time difference... -
Page 14: Settings - Picture
Settings Settings – Picture For entering the Picture menu, select menu item Picture in the Settings menu and press OK. The following menu appears: 1) Analog Video Picture The analog video output at the SCART socket can be adjusted by pressing ◄ or ►. You can Analog Video select among following options: FBAS, RGB, or Digital Video... -
Page 15: Settings - Sound
Settings Settings – Sound Sound Sound settings Stereo Sound channel TV Stereo Sound channel Dig. Uncompressed (PCM) 1) Sound setting Using ◄ or ► you can activate following audio modes: Stereo, Mono left or Mono right. 2) Sound channel TV If the broadcasted programme offers different audio options you can select the desired audio output at the TV Scart by keys ◄/►. -
Page 16: Settings - Osd Configuration (Option)
Settings Settings – OSD Configuration (Option) For entering the OSD configuration menu, please select menu item OSD configuration in the Settings menu and press OK. The following menu appears: OSD Configuration Display time 1) Display time: By using ◄ or ► you can modify the display duration of the channel change graphics (1-10 seconds). -
Page 17: Settings - Parental Lock
Settings – Parental lock Your receiver is equipped with a parental lock. This secures the receiver against unauthorised use. When the parental lock is activated, the receiver can only be switched on after entering a 4-digit PIN code. Parental Lock In the Main menu, use the ▲▼... -
Page 18: Installation
Installation Installation Installation In the main menu, select the line Installation using and confirm with OK. The Installation menu Antenna configuration will appear: Channel search Factory reset Use the buttons to make your selection and Software download confirm with OK. Installation –... -
Page 19: Installation - Channel Search
Installation Installation - channel search This digital receiver is pre-programmed with most digital TV- and RADIO channels of following satellites: Astra 19.2° East, Hot Bird 13° East, Türksat 1C 42° East, Sirius 2/3 5° East, Amos 1 4° West, Hellas Sat 2 39°... -
Page 20: Installation - Factory Reset
Installation The following settings are used only in search mode Transponder. Frequency: For entering the frequency of the desired transponder please select line Frequency. Then press OK and use the numeric input buttons 1…0 for entering the 5 digit frequency. Confirm your inputs by OK. -
Page 21: Installation - Smartcard Reader (Option)
Installation – Smartcard Reader The Digital-Receiver is optionally equipped with a smartcard reader. With an equal smartcard it is possible to unscramble encoded channels. The smartcard can be inserted also while the receiver is switched on. Insert the smartcard (golden chip on lower side towards the receiver) carefully into the slot at the front panel of the receiver. -
Page 22: Installation - Software Download
Installation – Software download With this function the operating software of the receiver, it´s menu texts and channel list can be updated via Astra 19.2” (East). Nevertheless, your satellite antenna system must receive this satellite. Your currently active channel list is not changed by a software update. Attention: In case of a software update the current operating software will be erased and a new software version will be installed. - Page 23 If you want to update one of the options a.) to c.) press OK at the corresponding menu item. If required by the receiver, it may happen that there are selected additional menu items automatically. In line Information you can specify, if you want to receive further information on the selected data (keys ◄...
-
Page 24: Channel List
Channel list Channel list You can resort and/or erase TV and radio channels found in the course of an automatic channel search. This function is available for all TV and radio channels. For entering the corresponding on screen dialog, please press the Menu key to enter the Main Menu, then select menu item Channel List and confirm with OK. -
Page 25: Channel List - Delete Antenna
Timer Channel list – Delete Antenna This dialog allows you to delete all channels of the selected satellite from the channel list. Therefore please enter menu channel list and select menu item Delete Antenna (OK). Delete Antenna Select the satellites to be erased with and mark them with OK. For erasing their channels from the channel list please press the red button on your remote control. -
Page 26: Timer - Sleep-Timer
Select line Repetitions with and use ◄ ► to specify the number of repetitions of this record. Select line Activate timer and activate the programmed record timer by pressing OK there (text Activate timer changes to Deactivate timer). The receiver will switch on at the programmed time and signals a timer record by displaying “rEC.“... -
Page 27: Information
Information Information Enter the main menu, there use to select line Information and press OK. In the upper section of the menu the channel parameters of the activated channel are displayed. In the lower section of the menu the signal qualities are displayed. - Level: The further the bar turns right the better the reception. -
Page 28: Connection Of External Mass Storage Device (Option)
Connection of external mass storage device Connection of external mass storage device If an external mass storage device is connected to the USB-Socket on the rear side of the receiver, it can be managed in the menu “Mass Storage Device”. Important: Before connecting or disconnecting the mass storage device, the receiver must be switched to Standby. -
Page 29: List Of Recordings
List of recordings List of recordings In normal operation, press the Archive button to open up the list of recordings. Deleting recordings You can delete recordings you no longer need from the mass storage device. to select the recording you wish to delete. Then press the red button. -
Page 30: Operating The External Mass Storage Device (Option)
In the lower window you will see in the first line the name of the selected programme. Below it, available characters are shown. Use the green button to switch between capital and lower- case letters. In the name, use the red and blue buttons to select the characters you wish to change. The current position that can be changed is highlighted in colour. -
Page 31: Timeshift Function
Timeshift function The Timeshift function enables you to record and playback at the same time. This gives you various options: Time-delayed television. You can watch the beginning of the recording and jump over recorded passages (e.g. commercial breaks). Press the red record or PAUSE button to start a timeshift recording. To watch the partially recorded programme, press the Playback button. -
Page 32: Operating The Hard Disk - Setting And Managing Markers
Playback Overview of symbols displayed: Indication Meaning ► Playback ► ► Fast forward ► ► ► Very fast forward ► ► ► ► Maximum speed forward ● Record ●► Timeshift operation ◄ ◄ Fast rewind ◄ ◄ ◄ Very fast rewind ◄... -
Page 33: Using Serial Interface
00:17:22 00:20:30 1 00:00:00 Start 2 00:03:11 Mark1 J 3 00:08:58 Mark2 4 00:12:01 Mark3 L 5 00:20:30 End Using serial interface The serial data interface “DATA” offers you the possibility to connect the receiver to a PC. Therefore you need a PC and serial cable (On the PC-side a female SUB-D connector with 9 or 25 pins and on Receiver-side a RJ11 plug with 6 pins). -
Page 34: Trouble-Shooting
Trouble-shooting Trouble-shooting Every electric device can have a malfunction. It does not automatically mean that it is defective. In most cases it happens because of a feed cable, plug-and-socket connections or access mistakes. Please control the following items before taking the receiver to your specialised dealer: Problem Possible causes... -
Page 35: Technical Data
Technical data Technical data General 6000 channels On screen video text and VBI video text Fast-OSD quick channel change (zapping) no delay at on screen graphic display big type for better readability concise help for all menus Electronic Programme (EPG) Channel list editor copy, replace, delete blockwise operations... - Page 36 2006/95/EC (repealing the 73/23/EEC Directive, amended by the 93/68/EEC Directive) and 2004/108/EC (repealing 89/336/EEC Directive) Directives. Svend Kristiansen Quality Manager Triax A/S Bjørnkærvej 3 8783 Hornsyld Danmark Electric and electronic equipment and included batteries contains materials, components and substances that can be hazardous to your health and the environment, if the waste material (discarded electric and electronic equipment and batteries) is not handled correctly.
Need help?
Do you have a question about the S-HD 207 and is the answer not in the manual?
Questions and answers