
Related Manuals for Triax S-209CX


Summary of Contents for Triax S-209CX
- Page 1 User Manual Digital HDTV Receiver With built in Conax Cardreader Model Item no. TRIAX S-209CX 305219 triax.com Version 06 - 2014...
-
Page 2: Introduction
Safety Information Important - Read these instructions fully before installing or operating Introduction Symbols used in this manual • Read this manual thoroughly before operating The following symbols are used in this manual. this device,. WARNING • Retain this manual for future reference. Ignoring instructions indicated with WARNING can Safety Precautions... -
Page 3: Table Of Contents
Contents Contents Contents Media browser USB - Videos Introduction USB - Photos & Music Safety information Media Server Power Cord Advanced Features Receiver Internet Portal Symboles used in this manual SETUP Batteries Channel Installation Features Main Menu Accessories included Autimatic Channel Scan Remote Control Manual Search Viewing Controls and Connections... -
Page 4: Features
Getting Started Features • 4000 TV channels and radio programs • Teletext function support ( DVB ) • Media Browser ( USB 2.0 ) support • Resetting to factory settings option • DVB-C Compliant • TV SCART • HDMI Output ( 576p, 720p, 1080i resolutions •... -
Page 5: Remote Control
Getting Started Remote Control Mute Internet portal Standby Switch betweenTV/Radio Favorite list broadcasts Numeric buttons Media browser Library of recordings Previous channel Channel Up/Downd Volume Up/Down Electronic Programme Guide Exit Menu Info Back Navigation OK/Channel list Play Stop Record Search forwards Search backwards Pause/Timeshift Display Teletext... -
Page 6: Viewing Controls And Connections
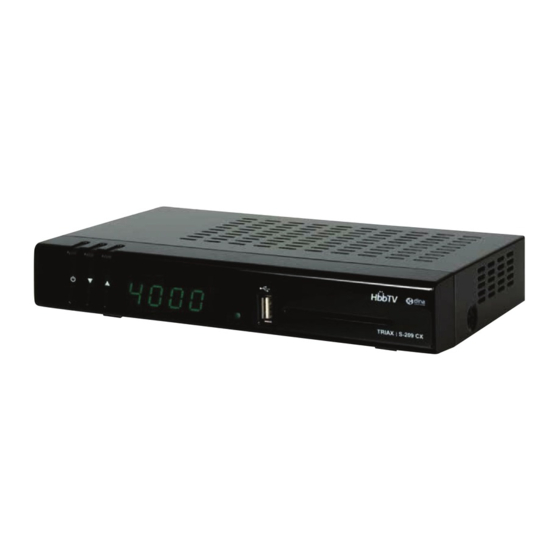
Getting Started Viewing Controls and Connections Front Panel 1. On/Off 2. Channel down 3. Channel up 4. USB port 5. Cardreader Back Panel 1. AUDIO: Audio Output 2. RF OUT/TV: To watch analogue channels on the TV. 3. LNB IN:Stik til satellitkabel. 4. -
Page 7: Inserting Batteries In The Remote Control
Getting Started Inserting Batteries in the Remote Control • Remove the battery cover located on the back of the remote control. • Place two AAA/R3 (2 X 1.5Volt) batteries in the remote control and attach the battery cover. • The approximate range of the remote control is 7m/23ft. -
Page 8: First Time Installation
Getting Started First Time Installation The First Time Installation menu is displayed Automatic Channel Scan when the set-top box is started for the first time. • Select one of the four following antenna types The First Time Installation menu is NOTE: “◄”/“►”... -
Page 9: Motor
Getting Started First Time Installation Motor: • Select this antenna type if a motorized antenna is used, and press OK. • Follow the instructions on the screen and press OK to start searching for channels. Once you have selected satellite in the initial installation will be the window manually search for Astra 1 satellite view. -
Page 10: Basic Operations
Getting Started Basic Operations Changing Channels Viewing Electronic Programme Guide (EPG) Use either of the following methods to select a channel: EPG receives programme information for channels • Use the numeric buttons (0-9). Press the numeric via the 7-DAY-EPG. An info bar showing all available commands is displayed. -
Page 11: Viewing Epg Content
Getting Started Basic Operations Viewing Electronic Programme Guide Time Shifting (EPG) Cont. In timeshifting mode, the programme is paused and simultaneously recorded to the connected Record Programme USB storage device. NOTE: A USB storage device must be connected • Press (PAUSE) button while watching a to use the Record function. -
Page 12: Managing Channels/Favorites
Basic Features Managing Channels/Favourites Channel Management Channel Management Stations stored in the set-top box are displayed in Deleting Channels Channel List. Press MENU on the remote control. • Select the channel to be deleted. • Select Channel List and press OK. •... -
Page 13: Moving Channels
Basic Features Managing Channels/Favourites Cont. Moving Channels Favourite Management • Select the channel to be moved. Setting Favourites • Press MENU or EXIT when finished. Select Favourites and press “OK”. The Edit Favourite List menu is displayed. • Select Move and press OK. •... -
Page 14: Media Browser
Media Browser USB - Videos Video Files Media Browser • Select USB-Device and press OK. The set-top box can play media music, video and picture files that are located on a USB storage media or on a DLNA media server (network connection required). -
Page 15: Usb - Photos & Music
Media Browser USB - Photos & Music Photos files Music files • Select USB-Device and press OK. • Select USB-Device and press OK. • Select PHOTOS and press OK. All photo files are listed. • Select MUSIC and press OK. All music files are listed. -
Page 16: Media Server
Media Browser Media Server This option plays music, video and photos from The following is displayed if a DLNA media server a DLNA media server. cannot be located on the network. • Press MENU on the remote control. • Select Media Browser and press OK. •... -
Page 17: Advanced Features
Advanced Features Internet Portal Internet portal feature adds your set-top box a feature that allows you connect a server on the Internet and view content via icons/shortcuts. NOTE: The speed and stability of the network/ internet connection is of high importance when using the internet portal. -
Page 18: Setup
Setup Channel Installation Main Menu Automatic Channel Scan This option populates the channel list by Detailed settings can be configured to suit personal automatically searching for available channels. preferences or hardware compatibility issues. • Press MENU on the remote control. NOTE: Existing channel and favourite lists are deleted when an automatic channel search is performed. -
Page 19: Manual Search
Setup Channel Installation Manual Search NOTE: Selecting 1000 KHz results in the channel search being more detailed, and extends This option adds a user-defined channel to the the search time accordingly. channel list. • Press OK to start the search. Press MENU to cancel the channel NOTE: search. -
Page 20: Country - Output Settings - Upgrade
Setup Country - Output Settings - Receiver Upgrade • Press MENU on the remote control. Output Settings Select Output Settings and press OK. ▲ ▼ • Select Setup with the “ ”/“ ” buttons and press the OK button. The following fields are displayed: TV Type. -
Page 21: Menu Locking - Time - Power - Language
Setup Menu Locking - Time - Power - Language Menu Locking Automatic Power Down This setting limits menu accessibilty. This setting defines if the set-top box will automatically power off when not used for a long • Select Menu Locking and press OK. period of time. -
Page 22: Recording - Format Hdd - Internet
Setup Recording - Format HDD - Internet Internet Settings Recording Configuration Select Recording Configuration and press OK. The Internet Settings tool is used to configure a wired network connection for accessing Internet and/or DLNA Media Server content. • Check that a network cable has been inserted into the set-top box’s network port. -
Page 23: Recording Library
Setup Recordings Library Recordings Library Play Options A USB storage device must be connected to the set-top box for the recording features to be available. Important: Disconnect power to the set-top box before connecting the USB storage device. Connect the USB storage device and turn on the set-top box. -
Page 24: Loading & Saving Settings, Timers
Setup Loading & Saving Settings, Timers Load Settings Timers This setting loads the most recently saved channel • Press MENU on the remote control. table and settings profile. • Press MENU on the remote control. • Select Timers and press OK. •... -
Page 25: Conditional Access
Setup Conditional Access Conditional Access/Cardreader Filtering Channels • Press the P<P button to activate the Channel Some channels cannot be accessed without use List Filter function. of a smartcard. ▲ ▼ • Switch off the set-top box and unplug to from the and use “... -
Page 26: Product Support
Product Support Trouble Shooting Problem Possible Reason What To Do LED is not lit. Power is not supplied to the Check that the power cable is set-top box. connected to the set-top box. No picture or sound. No signal or weak signal. Check the antenna cable on the set-top box and wall socket. -
Page 27: General Characteristics
Product Support GENERAL CHARACTERISTICS Power supply for set-top box: 12 V DC Preffered DC Adaptor: 220 - 240 V AC, 50-60Hz Input Frequency : 54 - 1002 MHz Maximum Power Consumption : 14 W Standby power consumption : less than 1 W Operating temperature : 5ºC - +40ºC Storage temerature :... -
Page 28: Remote Control
Product Support REMOTE CONTROL Operating Distance 7 m Max. Batteries 2x1.5V Micro (R-03/AAA) TUNERS 1 xRF In IEC-type, female (75Ohm) 1 x RF Out (loop through) IEC-type, male (75Ohm) USB POWER SUPPLY 5V @ 500mA max FRONT PANEL Display : VFD display Remote Control Keys On / Off... -
Page 29: Notes
Notes... - Page 30 Copyright © 2016 TRIAX. All rights reserved. The TRIAX Logo and TRIAX, TRIAX Multimedia are registered trademarks or trademarks of the TRIAX Company or its affiliates. All specifications in this guide are subject to change without further notice. TRIAX A/S | Bjørnkærvej 3 | DK-8783 Hornsyld | Denmark...
Need help?
Do you have a question about the S-209CX and is the answer not in the manual?
Questions and answers