Advantech TPC-31 User Manual

Advantech TPC-31 User Manual

3.5"/ 5.7" qvga tft lcd ti cortex-a8 touch panel computer
Table of Contents

Advertisement

User Manual
TPC-31/61
3.5"/ 5.7" QVGA TFT LCD TI
Cortex-A8 Touch Panel
Computer

Advertisement

Table of Contents
loading
Need help?

Need help?

Do you have a question about the TPC-31 and is the answer not in the manual?

Questions and answers

Subscribe to Our Youtube Channel

Summary of Contents for Advantech TPC-31

  • Page 1 User Manual TPC-31/61 3.5"/ 5.7" QVGA TFT LCD TI Cortex-A8 Touch Panel Computer...
  • Page 2 No part of this manual may be reproduced, copied, translated or transmitted in any form or by any means without the prior written permission of Advantech Co., Ltd. Information provided in this manual is intended to be accurate and reliable. How- ever, Advantech Co., Ltd.
  • Page 3: Declaration Of Conformity

    Because of Advantech’s high quality-control standards and rigorous testing, most of our customers never need to use our repair service. If an Advantech product is defec- tive, it will be repaired or replaced at no charge during the warranty period. For out- of-warranty repairs, you will be billed according to the cost of replacement materials, service time and freight.
  • Page 4 Technical Support and Assistance Visit the Advantech web site at www.advantech.com/support where you can find the latest information about the product. Contact your distributor, sales representative, or Advantech's customer service center for technical support if you need additional assistance. Please have the following information ready before you call: –...
  • Page 5: Safety Instructions

    (158° F). THIS COULD DAMAGE THE EQUIPMENT. THE EQUIPMENT SHOULD BE IN A CONTROLLED ENVIRONMENT. CAUTION: DANGER OF EXPLOSION IF BATTERY IS INCORRECTLY REPLACED. REPLACE ONLY WITH THE SAME OR EQUIVALENT TYPE RECOMMENDED BY THE MANUFACTURER, DISCARD USED BATTERIES ACCORDING TO THE MANUFACTURER'S INSTRUCTIONS. TPC-31/61 User Manual...
  • Page 6 Servicestelle zu überprüfen: a.Netzkabel oder Netzstecker sind beschädigt. b.Flüssigkeit ist in das Gerät eingedrungen. c.Das Gerät war Feuchtigkeit ausgesetzt. d.Wenn das Gerät nicht der Bedienungsanleitung entsprechend funktioniert oder Sie mit Hilfe dieser Anleitung keine Verbesserung erzielen. TPC-31/61 User Manual...
  • Page 7: Table Of Contents

    Figure 3.6 Volume & Sounds Settings 1........14 Figure 3.7 Volume & Sounds Settings 2........14 Chapter Windows CE ........17 Windows CE.................... 18 
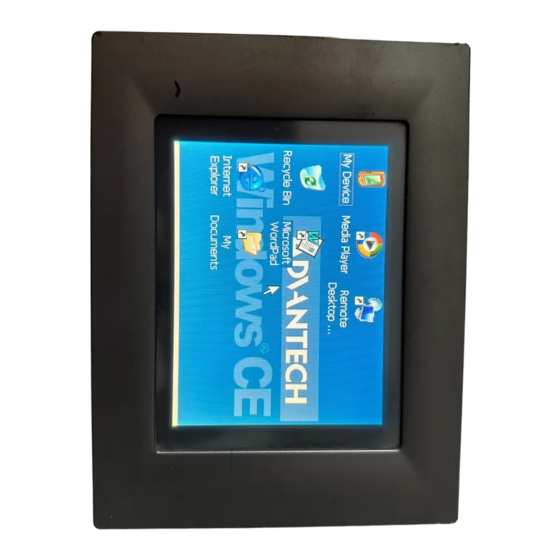
Figure 4.1 Windows CE on TPC-31/61........18 TPC Utilities .................... 19 4.2.1 Soft-Keyboard ................19 Figure 4.2 Soft-Keyboard............19 4.2.2 TPC Configuration ..............
  • Page 8 Figure 4.8 Misc Page..............22 Figure 4.9 Reboot Machine ............22 Figure 4.10Registry Saving Success.......... 23 Figure 4.11Registry Editor............23 4.2.3 Advantech Tools ................. 24 Figure 4.12Advantech Tools............24 Figure 4.13NotepadPlus............. 25 Figure 4.14TPC Version Information .......... 25 4.2.4 Other Utilities ................26 Networking ....................
  • Page 9 EAMB-2201 Top side..............60 Jumper Setting DIP Switch ..............60 TPC-61T Component construction............61 F.3.1 EAMB-2200 Top side..............61 F.3.2 EAMB-2200 Bottom side............. 61 Jumper Setting DIP Switch ..............62 F.4.1 SW3 UART Controlled Function ..........62 TPC-31/61 User Manual...
  • Page 10 TPC-31/61 User Manual...
  • Page 11: Chapter 1 General Information

    Chapter General Information This chapter gives background information for the TPC-31/61 series. Sections include:  Introduction  Specifications  LCD Specifications  Touchscreen Specifications  Power  I/O Port Arrangement  Mounting  Dimensions and Cutout...
  • Page 12: Introduction

    RS-232 x 2 (COM1,2)RS-422/RS-485 x1 (COM 3) with auto data flow control, USB2.0 (Host) x 1, USB2.0 (Client) x 1 1.2.3 Storage TPC-31/61 panel computers provide two methods for storage. One is the on-board 512MB micro SD card and the other one is an external SD card. TPC-31/61 User Manual...
  • Page 13: Safety And Environment

    1 million times with a 8 mm diameter silicone rubber finger Note! There is no pointer/cursor shown using the touch screen. The cursor only appears when closing or minimizing the window. 1.2.7 Power  Input Voltage: 18~32 V  Maximum Current: 1 A TPC-31/61 User Manual...
  • Page 14: I/O Ports Arrangement

    TPC-31T provides 1 serial port, 1 Ethernet LAN port and 1 USB port. While TPC-61T provides 3 serial ports, 1 Ethernet LAN, 2 USB port(1xHost, 1xClient). Figure 1.1 TPC-31T I/O Ports Arrangement Figure 1.2 TPC-61T I/O Ports Arrangement TPC-31/61 User Manual...
  • Page 15: Panel Mounting

    Panel Mounting There is an adhesive waterproof gasket on the front bezel. Make sure the waterproof gasket is in position before installing a TPC-31/61 panel computer into the panel opening. TPC-31T: Install the panel computer into the panel opening. Find the mount bracket, four short screws and four long screws in the accessory pack.
  • Page 16: Dimensions And Cutout

    TPC-31T: 120.79 x 85.5 x 26.5 mm (4.76" x 3.37" x 1.04") TPC-61T: 195 x 148 x 44.4 mm (7.68" x 5.83" x 1.75")  Cutout: TPC-31T: 115 x 79.5 mm TPC-61T: 189 x 142 mm Figure 1.4 TPC-31T Dimensions and Cutout Figure 1.5 TPC-61T Dimensions and Cutout TPC-31/61 User Manual...
  • Page 17: Chapter 2 System Setup

    Chapter System Setup This chapter provides a brief explanation for operating the TPC- 31/61.
  • Page 18: System Setup

    Figure 2.1 Power Connector and Power Lines Figure 2.2 Pin Assignment on the Power Receptor Warning! The system may be damaged when the power is turned on if the power source is not connected to the correct pins. TPC-31/61 User Manual...
  • Page 19: Figure 2.3 Power Line Into The Power Receptor

    Plug the power lines into the system power receptor. Thus the system will turn Figure 2.3 Power Line into the Power Receptor Turn on the System Calibrate the touchscreen. TPC-31/61 User Manual...
  • Page 20 TPC-31/61 User Manual...
  • Page 21: Chapter 3 System Tuning

    Chapter System Tuning Sections include:  LCD Contrast Tuning  Touchscreen Calibration  Buzzer Setting...
  • Page 22: Lcd Tuning

    Figure below. Figure 3.1 Display To set the time to automatically turn off, tick the check box “turn off backlight” and set the time to elapse by inputting a number in the edit box. Figure 3.2 Display Properties TPC-31/61 User Manual...
  • Page 23: Touchscreen Calibration

    Double-Tap and Calibration. Double-Tap is used to record the time period between the two taps when double-tapping in Windows CE. Calibration is for users to calibrate the touch screen. Figure 3.4 Stylus Properties TPC-31/61 User Manual...
  • Page 24: Figure 3.5 Touchscreen Calibration

    Figure 3.5 Touchscreen Calibration Buzzer Setting TPC-31/61 panel computers provide a buzzer setting in Windows CE. This function enables a beep when users use the touch screen. To enable/ disable this functional- ity, open “Start” -> “Setting” -> “Control Panel” -> “Volume & Sounds” as shown in Fig- ure 3.6.
  • Page 25 TPC-31/61 User Manual...
  • Page 26 TPC-31/61 User Manual...
  • Page 27: Chapter 4 Windows Ce

    Chapter Windows CE Sections include:  TPC Utilities  Networking  Application Program Develop- ment...
  • Page 28: Windows Ce

    Note! The default version of Windows CE in TPC-31/ 61 series is the English version. Contact your local Advantech representative for local language support.
  • Page 29: Tpc Utilities

    4.2.1 Soft-Keyboard The TPC-31/61 series also has a small-sized operator interface. Since it is not con- venient to attach a keyboard to such a small device, a software keyboard is built into the standard Windows CE OS. Upon boot-up, a small keyboard icon will appear on the status bar.
  • Page 30: Figure 4.4 General

    Figure 4.5. Release the current IP and retrieve the new IP through the provided button, “Renew”. Use the “Ping” button to ping a specified IP address if you wish to test the connection. Figure 4.5 Network TPC-31/61 User Manual...
  • Page 31: Figure 4.6 Advanced Network

    The watchdog will suppose the machine to be deadlocked and REBOOT it after the watchdog response time. If the machine reboots as expected after the watchdog response time, the watchdog is proved to be working properly. TPC-31/61 User Manual...
  • Page 32: Figure 4.8 Misc

    Note! Do NOT try to insert a NON-executable file into the startup program. Reboot: You can reboot TPC-31/61 panel computers by clicking the “Reboot” button. Once this button is clicked, the dialog below will be displayed. Figure 4.9 Reboot Machine...
  • Page 33: Figure 4.10Registry Saving Success

    Web Server Root: Input the root path of the web server here. The root path will only be effective after the machine has been rebooted. FTP Server Root: Input the root path of the ftp server here. The root path will only be effective after the machine has been rebooted. TPC-31/61 User Manual...
  • Page 34: Advantech Tools

    Advantech Tools There are several useful tools in the Advantech program. Go to “Start” -> “Programs” -> “Advantech” to run the tools as shown in Figure 4.12. The tools include “Active- Sync”, “Registry Editor”, “Registry Saver”, “DiagAnywhere”, “NotepadPlus”, “System Font Setting” and “TPC Version Information”.
  • Page 35: Figure 4.13Notepadplus

    TPC Configurator is an integrated utility to configure the basic settings of the panel computer. Refer to section 4.1.2. TPC Version Information TPC Version Information shows the version information of the operation system in the TPC-31/61 as shown in Figure 4.18. Figure 4.14 TPC Version Information TPC-31/61 User Manual...
  • Page 36: Other Utilities

    The procedure is listed below step by step. Note! LAN transmission will crash when speed mode be changed. Press Start in the task bar of Windows and select “Setting” -> “Networking and Dial-up connections”. Figure 4.15 Network and Dial-up Connections TPC-31/61 User Manual...
  • Page 37: Figure 4.16Selected Connection

    A window that shows all available connections will pop up. Double click the icon that has the connection you want to configure. For example, double click DM9CE1 icon to configure. Figure 4.16 Selected Connection Select the “IP Address” tab. Figure 4.17 Setting IP Address TPC-31/61 User Manual...
  • Page 38: Figure 4.18Settng Name Servers

    Figure 4.18 Settng Name Servers Note! Do NOT click the Next button at this time. Press “Start” in of task bar of Windows and select “Run”. Execute “regsave” to save the registry settings to a storage card. Figure 4.19 Save Registry TPC-31/61 User Manual...
  • Page 39: Network Via Serial Port

    Setup the communication environment of the TPC and the host Setup the Communication Environment of TPC Configure COM1 on the TPC. Press “Start” in Windows and select “Setting -> “Con- trol Panel” Click the icon “PC Connection” Figure 4.20 PC Connection TPC-31/61 User Manual...
  • Page 40: Figure 4.21Pc Connection Properties

    Click 'change...' to select the COM port- serial 1. In this example, we use COM1 of TPC to connect with COM1 of the host. Figure 4.21 PC Connection Properties Check the COM box and select your desired port from the list. Figure 4.22 Change Connection TPC-31/61 User Manual...
  • Page 41: Figure 4.23Change Connection

    You can find the change is active. The connection is via serial1 - COM1. Figure 4.24 COM1 Set Setting the Communication Environment of the Host Double click the icon ActiveSync on your host computer. Figure 4.25 Microsoft ActiveSync TPC-31/61 User Manual...
  • Page 42: Figure 4.26Select Connection Setting

    Select “File” -> “Connection Settings” Figure 4.26 Select Connection Setting Configure the connection setting. Figure 4.27 Configure Connection Setting TPC-31/61 User Manual...
  • Page 43: Figure 4.28Get Connected

    Run “repllog.exe” on the TPC. Figure 4.29 Run Repllog.exe on the TPC Press the “Next” button on your host computer. The message shown below will show on the TPC once the TPC and the host PC are connected. TPC-31/61 User Manual...
  • Page 44: Figure 4.30Connection On The Tpc

    Figure 4.30 Connection on the TPC A window will pop up as shown below on the host computer, once the TPC and the host PC are connected. Select “No” and then press “Next”. Figure 4.31 Connection on the Host PC TPC-31/61 User Manual...
  • Page 45: Figure 4.32Explore The Tpc

    It does not reflect the total amount of space required to install the entire product. This is because some files must be installed on the system partition, regardless of where other files are installed. TPC-31/61 User Manual...
  • Page 46: Building Windows Ce Runtime

    Figure 4.33 Starting a New Project Note! The selected CPU type must be Win32 (WCE ARM V4) or Win32 (WCE ARMV4I). TPC-31/61 User Manual...
  • Page 47: Figure 4.34Selecting

    Select “ADVTPC” in the main window of embedded Visual C++. Figure 4.34 Selecting After you complete the configuration procedure, you can start to develop your appli- cation. Press “Build” to compile your program to a.exe file and download it to TPC. Figure 4.35 Compiling Your Program TPC-31/61 User Manual...
  • Page 48 TPC-31/61 User Manual...
  • Page 49: Appendix A Watchdog Timer Programming

    Appendix Watchdog Timer Programming...
  • Page 50: Device Io Control

    There is a built-in watchdog timer in the TPC-31/61 series. You can access it through the WIN32 API. TPC-31/61 panel computers provide a WDT driver to allow users to enable/disable the Watchdog timer. The driver name is “WDT1:”. Programmers must open this driver before using the resources.
  • Page 51: How To Use The Control Code

    0 means 2 seconds, 1 means 5 seconds, 2 means 10 sec- onds, 3 means 15 seconds, 4 means 30 seconds, others means 40 seconds. The default setting is 5 seconds. nOutBufferSize: unused. TPC-31/61 User Manual...
  • Page 52: Ioctl_Wdt_Settimeout

    // #define IOCTL_WDT_REBOOT 0x1006 HANDLE m_hWDT=NULL; TCHAR szClassName[66]; // assign the WDT driver name wsprintf(szClassName, TEXT("WDT1:")); // Open the WDT driver m_hWDT = CreateFile(szClassName, GENERIC_READ GENERIC_WRITE, 0, NULL, OPEN_EXISTING, FILE_ATTRIBUTE_NORMAL, NULL); if ( m_hWDT == INVALID_HANDLE_VALUE ) { TPC-31/61 User Manual...
  • Page 53 // Enable the Watchdog timer DeviceIoControl(m_hWDT, IOCTL_WDT_ENABLE, NULL, 0, NULL, 0, &dwTemp, NULL); While (1) { // do your job here°¦ Sleep(8000); DeviceIoControl(m_hWDT, IOCTL_WDT_STROBE, NULL,0, NULL, 0, &dwTemp, NULL); DeviceIoControl(m_hWDT, IOCTL_WDT_DISABLE, NULL, , NULL, 0, &dwTemp, NULL); CloseHandle(m_hWDT); TPC-31/61 User Manual...
  • Page 54 TPC-31/61 User Manual...
  • Page 55: Appendix B Fuse Specifications

    Appendix Fuse Specifications...
  • Page 56: Fuse Specifications

    Fuse Specifications Rating: 250 V , 1A Note! The fuse is set to break if the input voltage exceeds 32V TPC-31/61 User Manual...
  • Page 57: Appendix C Pin Assignments

    Appendix Pin Assignments...
  • Page 58: Rs-232 Pin Assignments

    Pin No. Description Pin 1 No Connection Pin 2 DATA + Pin 3 DATA - Pin 4 No Connection Pin 5 Pin 6 No Connection Pin 7 No Connection Pin 8 No Connection Pin 9 No Connection TPC-31/61 User Manual...
  • Page 59: Appendix D Visual Settings

    Appendix Visual Settings...
  • Page 60: Font Setting

    There are two powerful and friendly utilities included to extend the visual capabilities of TPC-31T/61T. The two utilities are used to set the font size and rotate the screen. Font Setting Go to start->programs->advantech->system font setting. Figure D.1 Font Setting TPC-31T/61T provides two font settings - normal and small.
  • Page 61: Figure D.3 Change Font Setting

    Figure D.3 Change Font Setting Figure D.4 Small Font Display TPC-31/61 User Manual...
  • Page 62: Screen Rotation

    Screen Rotation Go to start->setting->control panel-> screen rotation as below. Figure D.5 Screen Rotation Select how you want the view display. Figure D.6 Screen Rotation Options TPC-31/61 User Manual...
  • Page 63: Figure D.7 90 Degrees Rotation

    This screen is rotated 90 degrees in the example. Figure D.7 90 Degrees Rotation Figure D.8 Portrait Rotation TPC-31/61 User Manual...
  • Page 64 TPC-31/61 User Manual...
  • Page 65: Appendix Etpc-31T /61T Update Guide

    Appendix TPC-31T /61T Update Guide...
  • Page 66: Updating Image & Bootloader

    Copy new "MLO" and "EBOOTSD.nb0 " files to root directory of HardDisk from HardDisk2. Copy new "NK.nbl" file to "WINCE" folder under HardDisk from HardDisk2 After a successful file update, reboot the system. The system is initializing and will take around 3 minutes. TPC-31/61 User Manual...
  • Page 67 Version Information. Note! This update process is only for image version V3.03 B240.From next image version, TPC-31T/61T system will check image status from exter- nal SD card and update latest image to bootloader automatically. TPC-31/61 User Manual...
  • Page 68 The Boot Loader version can be checked at system power on stage. TPC-31/61 User Manual...
  • Page 69: Appendix F Jumper & Dip Switch Setting List

    Appendix Jumper & Dip Switch Setting List...
  • Page 70: Tpc-31T Component Construction

    TPC-31T Component construction F.1.1 EAMB-2201 Top side Jumper Setting DIP Switch RS-232 /RS485 Selection RS-485 Setting SW6.5 Terminal RS-232 Setting OFF (No Terminal) TPC-31/61 User Manual...
  • Page 71: Tpc-61T Component Construction

    TPC-61T Component construction F.3.1 EAMB-2200 Top side F.3.2 EAMB-2200 Bottom side TPC-31/61 User Manual...
  • Page 72: Jumper Setting Dip Switch

    Jumper Setting DIP Switch F.4.1 SW3 UART Controlled Function UART Controlled Function Description This switch is used to select UART Controlled Function Default PIN6:URAT Mode Selection ON UART Mode Selection SW3.6 RS485_422 Selection OFF(RS422) ON(RS485) TPC-31/61 User Manual...
  • Page 73 TPC-31/61 User Manual...
  • Page 74 No part of this publication may be reproduced in any form or by any means, electronic, photocopying, recording or otherwise, without prior written permis- sion of the publisher. All brand and product names are trademarks or registered trademarks of their respective companies. © Advantech Co., Ltd. 2012...

This manual is also suitable for:

Tpc-61Tpc-31tTpc-61t

Table of Contents