Table of Contents
Advertisement
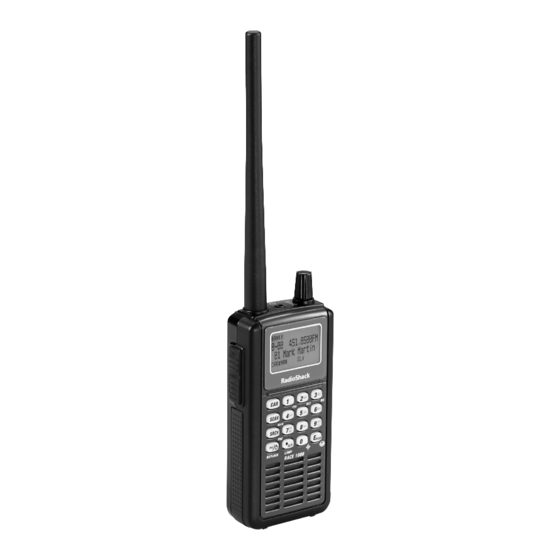
RACING SCANNER
Thank you for purchasing your Racing
Scanner from RadioShack. Your handheld
scanner is one of a new generation of
race scanners.
www.radioshack.com
What's Included
Scanner
Antenna: 1 Long, 1 Short
Belt Clip
Preprogrammed Race
Frequency List
User's Guide
Quick Start Guide
PRO-137
20-137
Advertisement
Table of Contents

Related Manuals for Radio Shack RPO-137


Summary of Contents for Radio Shack RPO-137
- Page 1 PRO-137 20-137 RACING SCANNER Thank you for purchasing your Racing Scanner from RadioShack. Your handheld scanner is one of a new generation of race scanners. What’s Included Scanner Antenna: 1 Long, 1 Short Belt Clip Preprogrammed Race Frequency List User’s Guide Quick Start Guide www.radioshack.com...
-
Page 2: Table Of Contents
Contents About Your Scanner ........4 Connecting the Antenna ........6 Attaching the Belt Clip ........6 Powering Your Scanner ........6 Batteries ...............7 Battery Notes ............8 External Power ............9 Turning on the Scanner ........9 Setting the Volume ..........9 Setting the Squelch ..........9 Headphones and Speakers ......10 Listening Safely .............10 Understanding Your Scanner .......10 Understanding Banks ........11... - Page 3 Contents Overwriting the Preset Race Frequency List ..19 Storing Known Frequencies Into Channels ..20 Editing a Tag .............21 Copying a Frequency ........22 Searching .............23 Fine Tune ............23 Service Bank Search ..........23 Chain Search .............24 Search Speeds ...........25 Storing Found Frequencies......25 Programming Search Ranges ......25 Search Skip Memory .........26 Signal Stalker I ...........27...
-
Page 4: About Your Scanner
About Your Scanner SEL / VOL / SQL Headphones Rotate to select next or previous, and to change scan or search direction. Push to enter Volume Control mode, or to complete the entry of frequencies and text in Menu mode. Push after Func to enter squelch control mode. - Page 5 1 / PRI Press after Func to turn priority on or off. 2 ABC / DLY Press after Func to program a 2-second delay for a selected channel or service. 3 DEF / WX Press after Func to start weather scan. 1- 0 / A - Z Press to enter numbers and letters.
-
Page 6: Connecting The Antenna
Connecting the Antenna Attach the supplied antenna to the scanner by screwing it tightly onto the anchor post at the top of the scanner. When using an external antenna, always use 50-ohm, RG-58, or RG-8, coaxial cable to connect to it. If the antenna is over 50 feet from the scanner, use RG-8 low-loss dielectric coaxial cable. -
Page 7: Batteries
Batteries For the longest operation and best performance, use alkaline batteries, available at your local RadioShack store, or use RadioShack nickel- metal hydride (Ni-MH) rechargeable batteries. To install batteries: 1. Slide open the battery compartment cover on the back of the scanner. 2. -
Page 8: Battery Notes
Battery Notes • When battery power is low, BATTERY Symbol flashes and the scanner beeps every 15 seconds. When battery power is depleted, the scanner turns itself off. • Rechargeable batteries last longer and deliver more power if you let them fully discharge once a month. -
Page 9: External Power
External Power You can power your scanner using a 6V, 800mA AC/DC adapter (not supplied). To use an external power source: 1. Always connect the adapter (not supplied) to the scanner first. 2. Plug the adapter into the power source. 3. -
Page 10: Headphones And Speakers
Headphones and Speakers For private listening, you can plug headphones (not included) into the headphone jack on top of your scanner. This automatically disconnects the internal speaker. Note that the sound is not stereo. Listening Safely To protect your hearing, follow these earphone or headphones guidelines: •... -
Page 11: Understanding Banks
range, you can also search your scanner’s service banks. Service banks are preset groups of frequencies categorized by the type of services that use those frequencies. For example, many amateur radio frequencies are located in the Ham service bank. When you search and find a desired frequency, you can store it into a programmable memory location called a channel. -
Page 12: Transferring Data From Another Scanner Or Pc
(the first channel in bank 0), and program the fire department frequencies starting with Channel 100 (the first channel in bank 1). Transferring Data from Another Scanner or PC You can clone your scanner by transferring the programmed data to and from another PRO-137 scanner using a connecting cable. -
Page 13: Settings
cable and software (available at your local RadioShack store or www.radioshack.com). 1. Make sure your scanner is turned off. 2. Connect the interface cable to your computer and then connect the other end of the cable to PC/IF on the side of the scanner. 3. -
Page 14: Using The Keylock
again, select the channel and press Func + /DLY. DLY appears. • To turn on the 2-second delay to search again, press Func + 2 /DLY while the scanner is searching. DLY appears and the scanner automatically adds a 2-second delay to every frequency it stops on in that band. -
Page 15: Using The Backlight Display
Using the Backlight Display To turn on the display light for easy viewing at night, press . The display lights for 15 seconds. If you press again during the display, the scanner continue to light 15 seconds more. Using the Auto Backlight Display You can set the scanner so the auto backlight turns on for about 5 seconds when the scanner receives signals. -
Page 16: Using The Battery Save Function
5. Rotate the knob to select 1: On or 2: Off, then press E . Press and hold Menu to exit the Menu mode. Using the Battery Save Function When the scanner is set to receive (monitor) a manually selected channel, and it is not actively scanning, using the battery save feature conserves energy. -
Page 17: Before You Get To The Track
and receives on one or more frequencies. The scanner’s preset racetrack frequencies are organized by the name of the race and by car number. For example, you might hear drivers and their pit crews on the car number frequencies and officials and the news media on the race frequencies. -
Page 18: Loading The Preset Race Frequency List
Loading the Preset Race Frequency List For your convenience, six car race frequencies are preprogrammed. You can use one of these race frequencies by loading it to the channel banks. To load the race frequencies: 1. Press Menu. 2. Rotate the knob to select 1: Preset Race, then press E 3. -
Page 19: Monitoring A Car
Monitoring a Car To monitor a car. 1. Press CAR, enter the car number, then press 1. Select the car from a list. Press CAR then press E 2. Rotating the knob to the desired car, then press E Select the Car’s Primary Frequency Primary frequency is the frequency which is selected first when a car has two or more frequencies. -
Page 20: Storing Known Frequencies Into Channels
3. Rotate the knob to select 2: Store Race, then press E 4. Rotate the knob to select one of the races, then press E CAUTION: Be sure the race you select is the same one that is currently loaded into the scanner’s memory. -
Page 21: Editing A Tag
8. Rotate the knob to select 1: Edit Car#, then press E 9. Use the number keys to enter the car number in 3-digits, then press E 10. Rotate the knob to select 2: Edit Tag, then press 11. Use the number keys to enter the tag then press E 12. -
Page 22: Copying A Frequency
• Press Func to toggle the input mode between ABC, abc, and 123. • Press •CLR once to erase one character. Press and hold to erase all characters. • Press E to save the tag and exit editing tag. For example, to enter the word “Scanner” 1. -
Page 23: Searching
The frequency has been copied. To cancel the copy, press Menu. Searching If you do not have a reference to frequencies in your area, find a transmission using a Fine Tune, Chain, or Service Bank Search. While searching, press Func + 2 /DLY to turn the delay on or off). -
Page 24: Chain Search
to these services. 1. Press SRCH in scan mode or press Func + SRCH in search mode. 2. Rotate the knob to select a service bank, press E The selected service begins to be searched. Note: Because there are many different frequencies allocated to Ham Band, it can take several minutes to search all the service frequencies. -
Page 25: Search Speeds
Note: At least one bank needs to be entered. If you disable all the banks, the error tone beeps. 5. Rotate the knob to search down or up. 6. When the scanner stops on a transmission, quickly press SRCH/PSE to stop searching to listen to the transmission. -
Page 26: Programming Search Ranges
Programming Search Ranges To define the search range during a chain search in each search bank: 1. Press Menu. 2. Rotate the knob to select 3: PGM Chain SRCH. 3. Press E 4. Rotate the knob to select the bank number you want to change the range. -
Page 27: Signal Stalker I
2. Rotate the knob to select the frequency you want to clear from the skip frequency. 3. Press E To clear all the skipped frequencies at once while searching, press SRCH/PSE, then hold down •CLR / L/OUT until the scanner beeps twice. Notes: •... -
Page 28: Signal Stalker I Options
3. Rotate the knob to select the option you want, then press E 4. Rotate the knob to select 1: On or 2: Off then press E 5. Press and hold Menu to exit the Menu mode. Signal Stalker I Options 1: Only Mode Set to 1: On to turn on Signal Stalker I and turn off normal scanning. -
Page 29: Using Signal Stalker I
after the 10 log channels are fully stored with frequencies, the oldest memory is deleted and the new frequency is stored in that channel. You can scan the log channels along with the normal 1000 channels. • The 10 log channels are located after Channel 999. -
Page 30: Band Meter For Signal Stalker I
Using Signal Stalker I To turn on Signal Stalker I, press Func + 0 / Signal Stalker On appears. Every two seconds, the scanner searches for frequencies in the range you specified. When the scanner finds a frequency, it alerts you according to its settings and Found! Press any key appears. -
Page 31: Scanning
Scanning To begin scanning channels, press SCAN. The scanner scans through all unlocked channels in the activated banks. (See “Locking Out Channels” and “Turning Channel-storage Banks On and Off”). When the scanner finds a transmission, it stops on it. When the transmission ends, the scanner resumes scanning. -
Page 32: Turning Channel Storage Banks On And Off
Turning Channel Storage Banks On and Off You can turn each channel-storage bank on and off. When you turn off a bank, the scanner does not scan any of the 100 channels in that bank. While scanning, press the number key that corresponds to the bank you want to turn on or off. -
Page 33: Priority
Priority The priority feature lets you scan through the channels and still not miss important or interesting calls on specific channels. You can program any stored channel as a priority channel. If the priority feature is turned on, the scanner checks the priority channels for activity every two seconds. -
Page 34: Weather Scan
Weather Scan To scan for weather transmissions: /WX. WX Scan appears. You 1. Press Func + 3 can change the scan direction by rotating the knob. 2. If you want to stop the scan, press SRCH/PSE. *PAUSE* appears. Turning on the Weather Alert Feature Your scanner can detect the 1050 Hz tone weather alert signal broadcast by the NOAA Weather Service during an event in your local area. -
Page 35: About Skywarn
About Skywarn Skywarn is an organized group of trained weather observers. A Skywarn group exists in virtually every US county with a significant population. During inclement weather, reports made by Skywarn observers include information about: • Pea-sized and larger hail •... -
Page 36: Troubleshooting
Troubleshooting Problem Cause Solution Scanner is on Squelch is not Adjust squelch. but will not adjusted correctly. scan. Only one channel Store frequencies or no channels are into more than one stored. channel. Scanner does Batteries are Recharge the not turn on. discharged. -
Page 37: Resetting The Scanner
Resetting the Scanner Caution: This procedure clears all the information you have stored in the scanner. Before you reset the scanner, try turning it off and on to see if it begins working properly. Reset the scanner only when you are sure it is not working properly. 1. -
Page 38: Scanning Legally
Scanning Legally Your scanner covers frequencies used by many different groups including police and fire departments, ambulance services, government agencies, private companies, amateur radio services, military operations, pager services, and wireline (telephone and telegraph) service providers. It is legal to listen to almost every transmission your scanner can receive. -
Page 39: Care
Care Keep the scanner dry. If it gets wet, wipe it dry immediately. Use and store the scanner only in normal temperature environments. Handle the scanner carefully; do not drop it. Keep the scanner away from dust and dirt, and wipe it with a damp cloth occasionally to keep it looking new. -
Page 40: Specifications
Specifications Frequency Coverage: 25.0000 – 27.9950 MHz (in 5 kHz steps) 28.0000 – 54.0000 MHz (in 5 kHz steps) 108.0000 – 136.9875 MHz (in 12.5 kHz steps) 137.0000 – 174.0000 MHz (in 5 kHz steps) 216.0000 – 224.9950 MHz (in 5 kHz steps) 400.0000 –... - Page 41 Scan Speed ...... 90 Channels/Second Search Speed: Normal ......... 90 Steps/Second Hypersearch ....... 270 Steps/Second Priority Sampling ......2 Seconds Delay Time ........2 Seconds IF Frequencies 380.75 MHz, 10.8 MHz, 450 kHz Weather Alert Tone ........1050 Hz Antenna Impedance ........50Ω Audio Output ......500 mW maximum Built-in Speaker ....
- Page 42 Notes...
- Page 43 Notes...
- Page 44 Limited One-year Warranty This product is warranted by RadioShack against manufacturing defects in material and workmanship under normal use for one (1) year from the date of purchase from RadioShack company-owned stores and authorized RadioShack franchisees and dealers. For complete warranty details and exclusions, check with your local RadioShack store.
Need help?
Do you have a question about the RPO-137 and is the answer not in the manual?
Questions and answers