CHIEF PNRIW Series Installation Instructions Manual
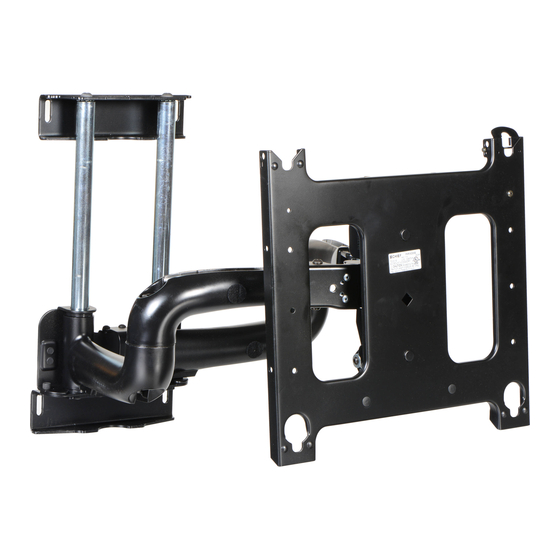
Large flat panel in-wall swing arm mount
Hide thumbs
Also See for PNRIW Series:
- Installation instructions manual (8 pages) ,
- Installation instructions manual (13 pages)
Table of Contents
Advertisement
Quick Links
I N S T A L L A T I O N I N S T R U C T I O N S
Instrucciones de instalación
Installationsanleitung
Instruções de Instalação
Large Flat Panel In-Wall Swing Arm Mount
Istruzioni di installazione
Installatie-instructies
Instructions d´installation
Spanish Product Description
German Product Description
Portuguese Product Description
Italian Product Description
Dutch Product Description
French Product Description
PNRIW Series
Advertisement
Table of Contents

Subscribe to Our Youtube Channel
Related Manuals for CHIEF PNRIW Series


Summary of Contents for CHIEF PNRIW Series
- Page 1 Instrucciones de instalación Istruzioni di installazione Installationsanleitung Installatie-instructies Instruções de Instalação Instructions d´installation Large Flat Panel In-Wall Swing Arm Mount Spanish Product Description German Product Description Portuguese Product Description Italian Product Description Dutch Product Description French Product Description PNRIW Series...
-
Page 2: Installation Instructions
Milestone assumes no responsibility for accuracy, completeness or sufficiency of the information contained in this document. ®Chief and Centris Select™ are registered trademarks of Milestone AV Technologies. All rights reserved. IMPORTANT WARNINGS AND CAUTIONS! - Page 3 Installation Instructions PNRIW Series DIMENSIONS DIMENSIONS: [MILLIMETERS] INCHES DIMENSIONS: [MILLIMETERS] INCHES...
- Page 4 PNRIW Series Installation Instructions DIMENSIONS (CONT’D) DIMENSIONS: [MILLIMETERS] INCHES LEGEND Hex-Head Wrench Tighten Fastener Apretar elemento de fijación Llave de cabeza hexagonal Befestigungsteil festziehen Sechskantschlüssel Chave de cabeça sextavada Apertar fixador Chiave esagonale Serrare il fissaggio Bevestiging vastdraaien Zeskantsleutel Serrez les fixations Clé...
- Page 5 Installation Instructions PNRIW Series TOOLS REQUIRED FOR INSTALLATION AND PARTS (9/16") (3/16") NOTE: Listed PSBU interface bracket provided with Listed Model PNRIWUB, but not shown. A (1) B (4) 2 short (SIDES) 2 long E (4) D (4) C (4) 5/16"...
-
Page 6: Trim Installation
PNRIW Series Installation Instructions Installation The following procedure assumes that a Chief Listed Model PAC501 In-Wall accessory has previously been installed following the installation instructions provided with the PAC501. If a PAC501 is not installed or there are any other questions regarding the installation of this accessory, immediately contact a Chief Customer Service representative. -
Page 7: Display Installation
If an interface bracket is not installed or there are any other questions regarding the installation of the display, immediately contact a Chief Customer Service representative. Remove pin and nuts and move to lower holes. -
Page 8: Cable Management
PNRIW Series Installation Instructions Cable Management Attach all cables to display. If necessary, use cable tie mounts (G) and cable ties (M) to secure cables within PAC501. WARNING: IMPROPER INSTALLATION CAN LEAD TO SERIOUS PERSONAL INJURY OR DAMAGE TO EQUIPMENT! Make sure cables do not run through pinch points. -
Page 9: Tension Adjustments
Installation Instructions PNRIW Series Adjustments TENSION ADJUSTMENTS Pitch Tension Adjustment With display mounted, check for desired Pitch tension. If required, adjust the Centris Select knob right or left until desired Pitch tension is obtained. (See Figure 7) To lock the mount at the desired position, tighten the Pitch locking screw. -
Page 10: Swing Arm Tension Adjustment
PNRIW Series Installation Instructions Swing Arm Tension Adjustment Swing arm tension is pre-set at the factory and is adjusted to accommodate displays with weights near the top of the mounts DECREASE capacity. If smaller displays are used it may be difficult to reposition the display after mounting. - Page 11 Installation Instructions PNRIW Series...
- Page 12 F 877.894.6918 / 952.894.6918 Europe A Fellenoord 130 5611 ZB EINDHOVEN, The Netherlands P +31 (0)40 2668620 Chief Manufacturing, a products division F +31 (0)40 2668615 of Milestone AV Technologies Asia Pacific A Office No. 1 on 12/F, Shatin Galleria...
Need help?
Do you have a question about the PNRIW Series and is the answer not in the manual?
Questions and answers