Table of Contents
Advertisement
HITACHI
Inspire
the Ne×
Instruction Manual
V_DEO
RAM
RAM
l_ilhrJ;].,III I :]1!:
DZ-GX20A
/ DZ-MV730A
/ DZ-MV780A
HITACHI AMERICA,
LTD.
HOME ELECTRONICS
DIVISION
900 Hitarhi Way
Chula Vista, CA 91914 3556
Service Hotline:
1 800 HITACHI
11 800 448 2244)
HITACHI CANADA LTD.
DIGITAL MEDIA DIVISION
2495 Meadowpine
Blvd.
Mississauga,
Ontario
L5N 6C3
CANADA
Service Direct: 1 800 HITACHI
(1 800 448 2244)
DVDCAM PC Software Support
Center
URL http://dvdcam
pc.support,hitachi.ca/
Thank you for buying a Hitachi product. Please take time to become familiar with the manual and how it
is set up. Keep it handy for future reference.
Be sure to read page 181 before unpacking the provided CD-ROM.
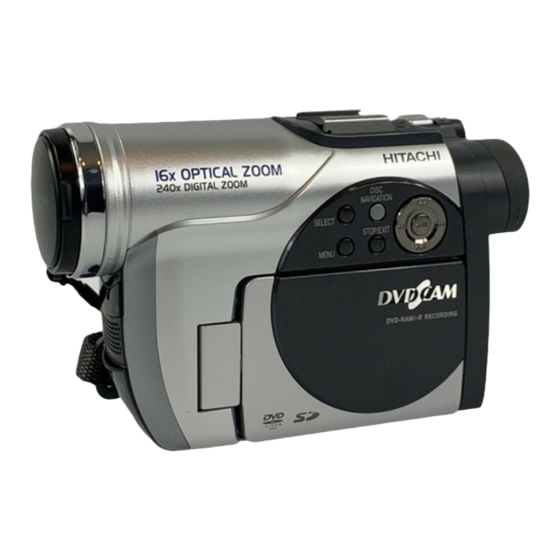
The illustrations of DZ-MV780A and DZ-MV730A
are
shown only on the front cover of this instruction manual
The method for operating the DZ-MV780A and DZ-MV730A
is the same as that for DZ-GX2OA.
QR35d02 f,Himchi, Lid 200.5
This manual was printed
with soy based ink.
Printed
on recycled
paper
Printed
in gdpcm
OG-H(I)
Advertisement
Table of Contents

Related Manuals for Hitachi DZ-MV780A


Summary of Contents for Hitachi DZ-MV780A
- Page 1 URL http://dvdcam pc.support,hitachi.ca/ Thank you for buying a Hitachi product. Please take time to become familiar with the manual and how it is set up. Keep it handy for future reference. Be sure to read page 181 before unpacking the provided CD-ROM.
- Page 2 Important Information For Your Safety The power switch turns the DVD video camera/recorder on and off, leaving the date/time feature unaffected. If the camera/recorder is to be left unattended for a long period of time, turn it off WARNING : TO PREVENT FIRE OR SHOCK HAZARD, DO NOT EXPOSE THIS UNIT TO RAIN OR MOISTURE.
- Page 3 Warning: This device complies two conditions: (1) This device may not cause harmflfl any interference received, including Note: This equipment has heen tested and fbtmd to comply with tile limits for a Class B digital device, pursuant to Part 15 of tile FCC Rules. These limits are designed to provide reasonable )rotection against harmflfi interference in a residential installation.
-
Page 4: Important Safety Instructions
IMPORTANT SAFETY INSTRUCTIONS In addition to the careful attention devoted to quality standards major factor in the design of every instrument. This page fists important information recorder end accessory equipment. Read these instructions Keep these instructions. Heed allwarnings Fotlow alI instructions Do not use this apparatus near water CIean only with dry cloth... - Page 5 Cautions When Handle the liquid crystal display (LCD) with care: • The LCD is a very delirate display devire: Do not press its surf_re with %rre, hit it o1" prirk it with a sharp otoject. • If you push the LCD surfhce, unevenness in display may occur. If unevenness does not disappear soon, turn the DVD video camera/recorder •...
- Page 6 • Cleaning the lens is not neressary when using this DVD video ramera/rerorder • Using 8 cm CD lens cleaner could cause this DVD video camera/recorder • If you have to clean the lens, use a Hitachi Maxell cleaner that is exclusively fbr 8 cm DVD discs. AC adapter/charger a f_mlt.
- Page 7 Be careful of moisture condensation: • When you move the DVD video camera/recorder temperatures is great such as entering vehicle condensation (vapor in air warmed and/or inside tile DVD video disc or card insertion block if possible. dry cloth. Even if the external remain inside: Turn the DVD video camera/recorder hours be%re using it again.
- Page 8 Also, Hitachi cannot be responsible • If you or a third party make a mistake when handling etc., the recorded contents may be lost. We cannot be responsible to loss of recorded contents.
- Page 9 • A quick index for the inforn-lation most otLen (this page). • A detailed specific infiormation t4). Get to know your DVD video camera/recorder using this manual, and get to know Hitachi. We appreciate your business. Quick Index Available Discs ... Recording Movie ...
- Page 10 Introduction • You can start recording immediately after stopping playback (p. 49, 58) Unlike tape devices, you do not need to search tbr tbe recording beginning of blank portion. You can stop playback and immediately previously recorded data. If you stop playback midway and start recording, OYou can immediately play back desired recorded scenes (p.
- Page 11 OYou can easily edit scenes, which is quite difficult with tape (p. 83) Using this video camera/recorder, of your child, for example, on play collect scenes Navigation list of Disc fimction original simply play movie: Then list and it on VCR or DVD Up to now, you had to With a DVD, you can...
-
Page 12: Table Of Contents
Table of Contents Important Information For Your Safety ... Precautions IMPORTANT SAFETY INSTRUCTIONS Cautions When Using ... Cautions When Storing Suggestions and Restrictions Read This First About This Manual Introduction Table of Contents Checking Provided Accessories Names of Parts ... Try Recording and Playing Back... - Page 13 Adjusting Brightness of Image to be recorded (Exposure) ... Compensating for Backlight ... Using External Microphone Built-in Video Flash (for DZ-GX20A only) ... 76 Viewing on TV Screen ... CONNECTING TO A TV ... VIEWING TV SCREEN Playback on DVD Recorder/Player PLAYING BACK DVD-RAM...
- Page 14 DISPLAYING MOVIES OR STILLS INDEPENDENTLY (CATEGORY) ... 136 PLAYING BACK SCENES REPEATEDLY (REPEAT PLAY)... 136 SLIDE SHOW (CONTINUOUS STILLS)... 137 Connecting to PC (DZ-GX20A/DZ-MV780A) FOLLOWING AVAILABLE CONNECTING TO PC... 138 Contents on Provided CD-ROM ... 140 Installing Software ... DISPLAYING INSTALLER SCREEN INSTALLING SOFTWARE ...
-
Page 15: Checking Provided Accessories
Lens cap and lens cap string: Attach the lens cap when not recording, _rotect the lens. PC connection cable: Use this cable when connecting the DVD video camera/recorder to PC. For DZ- GX20A or DZ-MV780A only Accessories Battery (model DZ-BP7S): For DZ-MV780A or DZ-MV730A only... -
Page 16: Names Of Parts
When tile remote control is used to operate the DVD video camera/recorder, receiver will receive the infl'ared Optical 10x zoom lens (for DZ-GX20A or DZ-MV780A only) Optical 16× zoom lens (for DZ-MV730A only) (p. 56) Lens hood (p. 57) Always... - Page 17 To adjust tile focus of image viewfindeI_ (Pull out tile viewfinder.) 17 ACCESS/PC indicator (for DZ-GX20A or DZ-MV780A only) ACCESS indicator (for DZ-MV730A only) (p. 7, 49, 5t) Will blink or light when tile disc in DVD video camera/recorder is accessed...
- Page 18 27 QUICK MENU button (p. 63) To display only the t\mctions fl'equently use (simple menus). 28 FOCUS button (p. 72) To switch hetween manual fkocus and auto fL)CLIS. 29 MENU button (p. 84, 66, 111) Press this button to display setting camera f\mctions and Disc Navigation.
- Page 19 49 DISC NAVIGATION button (p. 103) 50 DISPLAY button (p. 62) * The bnttons on remote control will t\mction HITACHI DZ-RM4W 51 ZOOM T button (p. 56) 52 DIGITAL ZOOM button (p. 56) 53 ZOOM W button (p. 56) 54 Reverse skip button (p. 60) 55 Forward search button (p.
- Page 20 1 Connect a power supply (p. 43). 2 Insert a disc (p. 45). @ Press down the DISC EJECT bntton and release it. @ Gently open the cover tmtil AC adapter/charger DC power cord once @ Push the disc against the turntable center of disc insertion until a click is heard, and then close the covet"...
- Page 21 3 Start recording (p. 49). @ Open the LCD monitor (p. 35), o1"pull out tile viewf_nder (p. 36). While holding down the button right of power switch, set the switch "_ll" "l"l" (only "din" fbr DVD Note: • When using an unformatted disc, format (initialize) it on this DVD video camera/recorder If unformatted disc is inserted into this DVD video camera/recorder,...
- Page 22 1 Connect a power supply (p. 43). 2 Insert a card ([3.48). @ Open tile LCD monitor (i3. 35). @ Open tile cover of card insertion with power turned off..• ... j Power cable AC adapter/charger DC power cord Put in a card.
- Page 23 3 Start recording (p. 51). @ Open tbe LCD monitor (p. 35). @ While holding down tbe button on tbe right of power switch, set the switch to "[]" Note: • With the DZ-GX2OA only, the built-in flash may emit light in a dark area (see page 76) •...
-
Page 24: Discs And Cards
Not playable on those before DVD-R disc can be format is different can R A N4.7 R4.7 that you use Hitachi Maxeil HG discs, since their compatibility has been confirmed. disc, take great it Using a disc other than these on DVD-R disc. -
Page 25: Information On Dvd-R Disc
R DISC DVD-R disc, it is but not fnalized, into a used or recorded other than DZ-GX2OA, DZ-MV780A and not finalized, the Disc Navigation start, and no recording on PC or DVD recorder may not be If so, witt appear (Fig. 1" on page 26), or... -
Page 26: Handling Discs
HANDLING DISCS OUsing discs DVD RAM and DVD R discs are very delicate recording media. Carefully read the fbllowing cautions and observe them: • Ahvays use a brand new disc when recording important materiah • Be sure not to touch tile recording disc, or dirty or scratch it. -
Page 27: Available Cards
AVAILABLE CARDS SD memory card can be used on this calllera/recorder. When using an exclusive adapter, memory card can be used in tile same SD memory cald. OHandling card • Do not use cards other than the designated ones. • Be sure to use a brand cal_t when recording vital images. -
Page 28: Storage Capacity On Disc
Storage Capacity RECORDABLE TIME OF MOVIE (VIDEO) Tile reeordable tinle will vary depending of video recording quality. Movie recordable time on one disc XTRA Approx. FINE Approx. Approx. "1 : Variable bit recording (recording automatically between approx. 3 - 10 Mbps) *2: Fixed bit rate: Approx. -
Page 29: Recordable Stills (Photos) On Card
For DZ-GX20A FINE Approx 13 Approx. 29 NORM Approx 18 Approx. 38 Approx 27 Approx. 58 For DZ-MV780A FINE Approx 27 Approx. 58 NORM Approx 36 Approx. 76 Approx 54 Approx. 116 Approx. 240 For DZ-MV730A FINE Approx 108 Approx. -
Page 30: Size And Quality Of Photos
SIZE AND QUALITY OF PHOTOS Tile pixel size of stills (]PEG) that ran be rerorded on this DVD video ramera/rerorder DZ-GX2gA DZ-MV78OA DZ-MV730A Tile following table shows the file size and quality of'one still (JPEG) recorded oil card: FiNE Approx. 1,024 KB NORM Approx. -
Page 31: Holding Dvd Video Camera/Recorder
This section explains preparations and battery. Setting Up the HOLDING DVD VIDEO CAMERA/RECORDER Insert your right hand fl'om tile bottom thumb. Put your hand in a position where Adjust the length of hand strap button with your thumb. Note: Do not adjust the hand strap while holding the DVD video camera/recorder: Doing this could cause the DVD video camera/recorder... -
Page 32: Attaching Shoulder Strap
ATTACHING SHOULDER STRAP Be sure to pass through the 2 slots ATTACHING LENS CAP Attach tile shorter of lens lens cap. 2 Attach the longer of lens attachment hole of DVD video recorder. Pnsh tile both sides of cap inward it over tile lens. -
Page 33: Inserting Battery Into
Replace the battery Battery holder slide tile Note: • Replace the battery with a Hitachi Maxell, Sony, Panasonic, Sanyo, Toshiba CR2032, DL2032. Use of another battery may present a risk of TREATMENT fire or explosion •... - Page 34 • The DVD video camera/recorder is not remote control code of Hitachi VCRs Hitachi VCR, etc with remote control code set to "VCR2", a VCR placed near the DVD video camera/ recorder will atso be operated To prevent this, change the remote control code of the •...
-
Page 35: Viewing Image On Lcd Monitor
VIEWING IMAGE ON LCD MONITOR SCREEN If you open tile LCD monitoi; you can n-lonitor subject in-lage oil the LCD screen. 1 Open tile LCD monitor. The LCD monitor has a portion where you can hook your finger. Hook tile finger there to open the monitor. -
Page 36: Closing Lcd Monitor
CLOSING LCD MONITOR Before dosing the LCD n-lonitor, it at right angles to tile DVD video recorder. Replace the LCD monitor Oil tile DVD video camera/recorder with the LCD screen f;_cing inward until a click is heard. VIEWING SUBJECT THROUGH VIEWFINDER Pull out the viewfinder. -
Page 37: Setting Date And Time
SETTING DATE AND TIME Set the current date and time so that the date and time you make a recording can be recorded correctly The following procedure can also be used to correct the date and time you have already set. 1 Turn the DVD video camera/recorder 2 Press the MENU button. -
Page 38: Changing Display Format And Time
CHANGING DISPLAY FORMAT OF DATE AND TIME You can select one of three date display month/day. Associated with the selected follows: M/D/Y D/M/Y Y/MID Press the MENU button. The menu screen will appear. 2 Use the 1_I4/D"I_I/'_I/ 11_ buttons to choose "Date Mode"... -
Page 39: Setting Up The Battery
When charging a battery, unplug the DC power cord from the DC output jack on AC adapter/charger. Battery indicator AC adapter/charger DC output terminal provided with DZ-MV780A using the DVD video camera/ (optional, unavailable for DZ- If the CHARGE indicator stitl does not to AC adapter/charger. -
Page 40: Attaching Battery To Dvd Video Camera/Recorder
• Battery charged status You can find the charged status charger: During charge Charge complete Note: See "Troubleshooting" on page 167 when the CHARGE • Reference for time required DZ BP14S (provided with DZ GX20A)/DZ BP 14SKY (optional): Approx. 165 mirmtes DZ BP7S (provided with DZ MV780A and DZ MV730A)/DZ BP7SW (optional): Approx. - Page 41 LCD monitor When using viewfinder FINE When using LCD monitor When using viewfinder When using LCD monitor With DZ-BP7S (provided with DZ-MV780A and DZ-MV730A)/DZ-BP7SW** (optional) When using viewfinder XTRA* When using LCD monitor When using viewfinder FINE When using LCD monitor...
-
Page 42: Battery Remaining Level Indicator
BATTERY REMAINING LEVEL INDICATOR When the battery is used to power appears in the viewfinder or on the LCD screen as follows: Fully charged White portion shows remaining level Note: The remaining levet indicator "_ " may be displayed for an extended for a shorter period If the remaining battery level runs out, the DVD video camera/recorder sure to set the power switch to "OFF"... -
Page 43: Using Dvd Video Camera/Recorder
USING DVD VIDEO CAMERA/RECORDER It is recommended that yon nse tile AC adapter/ctmrger Dora honsehold AC ontlet when yon perfbrm indoors. Note: Be sure to use the specified AC adapter/charger AC adapter/chargers could cause electric shock or result in fire Connect tile power cable to AC adapter/... - Page 44 Turning Video While holding down tile gray button at the right of power switch, set tile switch according each recording function: Set to "OFF": Tile DVD video camera/ recorder will turn oft\ Set to "D": To record still on SD memory card Set to "_": To record movie on DVD...
-
Page 45: Inserting Disc
Inserting and Removing INSERTING DISC / Press down tile DISC EJECT bntton once and release it. A few moments after the ACCESS/PC indicator blinks, the cover of disc insertion block will open. 2 Gently open tile cover by hand f\dly nntil it stops. - Page 46 See page 91 for video mode See page 92 for 16:9 mode When recording GX20A or DZ-MV780A While the above messages are heing displayed, press the • button_ or when message "Format the disc now?" appears, choose "NO" and then press the I_/|| hutton.
-
Page 47: Removing Disc
REMOVING DISC / Press down tile DISC EJECT button once and release it. In a i_lon-lent, the cover of disc insertion block will open. If tile DVD video calllera/recorder is oil at this time, the "EJECT" indicator will blink oil tile LCD monitor or in the viewfinder. - Page 48 Inserting and Removing Open the LCD monitor. 2 Turn tile DVD video camera/recorder 3 Open the cover of card insertion _-___ block. 4 Inserting Card: terminal inward Insert card with its £ ... until it locks. ,> Card Removing Card: off.
- Page 49 This section explains about recording of movies and still images, and also basic settings on DVD video camera/recorder. Recording Movie Before You Begin /" Insert a recordable DVD-RAM or DVD-R disc into this DVD video camera/ recorder. Pressing REC once witl start ACCESS/PC pressing it once again will...
-
Page 50: Recording Movie
On/Off. For various functions available during recording, "Setting Up Camera Functions" on page 86. Hitachi cannot be responsible for video and audio that cannot be recorded or edited because The power switch can be changed over even during recording, but the operation will not be changed. - Page 51 Recording Stills Note: Recording of stilt images is possible on DVD-RAM disc and card. ACCESS/PC indicator CARD ACCESS indicator Remove tile lens cap, and then point tile DVD video camera/recorder at subject. Turn the DVD camera/recorder When using DVD RAM disc: Set the power switch to '1"1".
-
Page 52: Information Display During Recording
On-Screen Information Various types of information will appear INFORMATION DISPLAY DURING RECORDING See the next page fbr details. 2 Program AE 3 White balance ((_)) 4 EIS 5 Manual Focus 6 Backlight compensation 1 Recording mode 13 Zoom 14. Exposure correction Warning message 15 Disc/Card type 16 Movie recording quality... - Page 53 Recording mode (p. 49, 51, 95) : Movie : Still (Disc) : External input : External input : Still (Card) : External input : External input Program (only in movie recording (p. 86) No display : Auto : Sports : Portrait : Spotlight 8 ",_' : Sand...
- Page 54 19. Vohmle (p. 58) The vohlme can lie adjusted during external input and playback. stills is or DZ-MV780A. or disc has not yet been initialized, than the displayed time. stills is for reference: This number may not decrease, of on screen...
- Page 55 ODisplay when recording an image of yourself Wben recording with tile LCD screen lens, tile operating status will appear: appear only when the remaining blink. Tile fiallowing operating status indicator warning message to usei: The message the LCD monitor 180o to the original LCD screen was R_cing the same direction No warning/message (see page 52) will appear...
- Page 56 Zooming If you continue to hold tile zoom lever on the "T" control side with Dig. Zoom 40x o1"240× specified, tile digital zoom will be activated midway (when optical 10 power DZ GX20A or DZ MV780A, or optical is exceeded on DZ MV730A).
-
Page 57: Macro Recording
MACRO RECORDING Use the macro function when recording suhject as close as approximately tile screen. / Aint the DVD video camera/recorder subject, and press the zoom lever to "W" control side. RECORDING SUBJECTS FOR STRONGER WIDE-ANGLE EFFECT Use the tele conversion lens or wide conversion lens with the fbllovving filter diameter and thread pitch to record subjects for stronger telephoto or wide angle eft)ct: Filter diameter: 34 mm for DZ GX20A or DZ MV730A: 30.5 mm fbr DZ MV780A Thread pitch: 0.5 mm... -
Page 58: Playing Back
Playing Back Before You Begin 51). insert a disc or card recorded on this DVD video camera/recorder (p. 49, Turn the DVD video camera/recorder on (p. 44). PLAYING BACK Use _ and then press 1_/11 to designate Press the I_/11 button in the recording StTItt/S. -
Page 59: Search Playback Of Movie
PLAYBACK FROM START Use the Go To fimction (p. 61) or Disc Navigation flmction (p. 103) to play back fi'om the start of disc or card. SEARCH PLAYBACK OF MOVIE During playback, press the _1 o1"I_ button hold it: Search playback will start. -
Page 60: Skip Playback Of Movie
SKIP PLAYBACK OF MOVIE During playback, press tile _ locate tile start of desired scene. Press b'lH once: To skip to the first image of tbe scene fbllowing the one being played playback. Press I_1 once: To return to tile first image of the scene being played back, and start playback. -
Page 61: Jumping To Specified Point (Go To)
JUMPING TO SPECIFIED POINT (GO TO) 1 Press the MENU button during playback. Choose the option (point want to go to), and then press tile li_/|| button. OSpecifying the point to view 10hoose .1step 2, bove,then press tbe I,,III button. The screen fbr specif_¢ing the point to go to will appear. -
Page 62: Display During Playback
On-Screen Information INFORMATION DISPLAY Various types of infbrmation oil rerording ÷ No disptay • Switching the information mode Press tile DISPLAY button: You ran switrb tile display mode of on screen infbrmation. When using disc: Recording mode .1 -Repeat Scene_o E E] A_BE( -- Disc type .4... - Page 63 Checking Flow The following two on-screen menu modes are available with this DVD video camera/recorder: • Quick Menu: To display only the fundamental • Normal Menu. To display all menu items for experts (p. 84) While the camera image is being displayed Tile Quick Menn will appear.
- Page 64 OOperating Menu You can use tile I_I_/_D,'I/'_I/I_I_ options in Quick Menu designate Press the QUICK MENU button u d ,}ns When using the Normal Menu (p. 85) and Disc Navigation choose any menu item and determine Note: • Pressing the QUICK MENU button during recording will not work. •...
-
Page 65: Flow Of Quick Menu When Recording Movie
Tile details of each flmction are described oil tile pages showing the Normal Menu: See each reference page. ORecord Functions Setup ODate Setup (gR#!/ I:'1_ * Displayed on DZ-GX20A (p. 37) E (Ii}RETUR_, QRAM (p 91) 8, r,:e _ s;o (p 92) (p 94) and DZ-MV780A only. -
Page 66: Flow Of Quick Menu When Recording Photo (Disc)
• Initial Setup FLOW OF QUICK MENU WHEN RECORDING PHOTO (DISC): Tile following shows the menu details of each f\mction are described page. • Record Functions Setup ... a,,,E_T _,_t_;_,i,,i_,, 2.°,_,_ (p. 102) when disc is being on pages showing the Normal used: Menu:... - Page 67 @Date Setup (p. 37) @Initial Setup (p 102) Note: No photo can be recorded on DVD-R disc...
-
Page 68: Flow Of Quick Menu When Recording Photo (Card)
FLOW OF QUICK MENU WHEN RECORDING PHOTO (CARD): Tile details of"each f\mction are described page. • Record Functions Setup IDQui k !I_nJ _@ai FINE I soJr_ :a_ER_ I I=_ m _el_ Time_ • Date Setup ID:u k a = on pages showing the Normal D QJick cei_'i... - Page 69 Olnitial Setup While Disc Navigation screen is being displayed button: The Quick Menu will appear. Only the f\mdamental menu items will appear in the Quick Menu, and the explanation function on which the cursor is positioned during recording). Press the DISC NAVIGATION _o,,Ui;;_,_tr_ I...
-
Page 70: Flow Of Quick Menu (With Dvd-Ram Disc)
FLOW OF QUICK MENU (WITH DVD-RAM DISC): Tile details of"each f\mction are described page. OScene _1 u or sc_n_ I ('] F<(gR TRli ®R;td ODisc • Others on pages showing the Normal Edi_ s_gl,e [1;} T R {i)R gR_ [ Quik /!÷nJ (p. -
Page 71: Flow Of Quick Menu (With Dvd-R Disc)
FLOW OF QUICK MENU (WITH DVD-R DISC): Tile details of each f\mction are described page. ODisc OOthers Note" The menu item "Finalize Disc" wilt not appear with a finalized DVD-R disc FLOW OF QUICK MENU The details of each ffmction are described on pages showing the Normal Metal: See each reference page, on pages showing the Normal... -
Page 72: Focusing During Recording
Manually Focusing The DVD video camera/recorder manually focus a subject depending on the recording conditions. FOCUSING DURING RECORDING Normally. tile DVD video camera/recorder also manually focus a subject, Focusing range Yon can switch tile display mode of on screen infi01"i_lation: •... - Page 73 Manually figcus the following objects, / Objects not in / tsheCennterof Objects moving rapidly Object behind glass with water droplets, dirt on it which be automatically in brightness, such as white wall Objects with little variation Objects lit by neon sign, spotlight, etc.
- Page 74 Adjusting Brightness (Exposure) The DVD video camera/recorder adjust the exposure depending on the recording conditions. Press the EXPOSURE button during recording. exposure adjustnmnt bar will screen. Exposure adjustment 2 Use the@ @ buttons to adjust tile exposure, while viewing the image in tile viewflnder or oil tlle LCD screen.
- Page 75 Using External Connect external microphone (generally video camera/recorder. Clearer and start recording. For details Note: • Depending on the shape of its plug, an external microphone in the AV/S input/output terminaI. • This DVD video camera/recorder cannot use a plug-in power type microphone DVD video camera/recorder) Microphone available)
- Page 76 DZ GX20A to record photo (not displayed when the optional Video Flash is connected) • Optional Video Flash (for DZ- GX20A or DZ-MV780A only) See "Introduction to Optional Accessories" page 151. You can use the optional DZ FLH3 Video Flash* (p.
-
Page 77: Connecting To A Tv
Viewing on TV Screen CONNECTING TO A TV the provided AV/S input/output follows: * If your TV has an S-VIDEO input jack, you can connect the S-VIDEO Note: • Using S-VIDEO wilt deliver clearer playback status • Before connecting, make sure that the volume on TV is turned down: Forgetting this may cause howling (see "Terminology", p 155) from the TV speakers... -
Page 78: Viewing On Tv Screen
• The infrared remote control is useful when operating the DVD video camera/recorder fur how image on TV screen. However, if you use a Hitachi VCR, the remote control may inadvertently the VCR if it is near the DVD video camera/recorder. -
Page 79: Playing Back Dvd-Ram Disc
Playback on DVD Recorder/Player PLAYING BACK DVD-RAM DISC You can use a DVD recorder (see play back 8 cm DVD-RAM discs Insert tile disc into the DVD and play it back. See the instruction n-lanua] fbr DVD recorder/playei: PLAYING BACK DVD-R DISC Finalize a recorded R disc. -
Page 80: Recording (Dubbing) Images From Other Video Device
To AV input/output jack AVIS input/output cabt_'_e _ (provided) * If you are using DZ-GX20A or DZ-MV780A, connect the S-VIDEO jack of AV/S input/output Set the input source on the DVD video camera/ recorder to "LINE (L IN) ". - Page 81 AC outlet using the AC adapter/ charger. • If you use a Hitachi VCR, it will be operated remote control provided with the DVD video camera/ recorder When recording an image from a Hitachi VCR, change the remote control code of the VCR to other than "VCR2".
-
Page 82: Recording (Dubbing) Images From Other Video Cameras
"1 : The AVIS input/output cable provided with this DVD video camera/recorder video cameras *2: If the video camera to be connected recorder (only for DZ-GX20A or DZ-MV780A) Set the input source on tlle DVD video camera/ recorder to "LINE (L IN) ". -
Page 83: Recording (Dubbing) Images On Other Video Devices
• If you are using a Hitachi VCR, using the remote control provided with this DVD video camera/recorder may operate the VCR. To record (dub) images from... - Page 84 This section explains about various settings to further extend the usefulness video camera/recorder. Checking Flow The following two on-screen menu modes are available with this DVD video camera/recorder: • Quick Menu: To display only the fundamental • Normal Menu. To display all menu items for experts Press tile MENU button while tile camera image is heing displayed on tile LCD monitor: Tile Normal Menu will appear.
- Page 85 Quick Menu of'eacb flmrtion. Date Setup I (_sr NTER {IpRETURN Date setting fk)rmat .9 (i7. 38) Display LCD/EVF or DZ-MV780A is in I' m 'IF is_ay '.uoI I _J_ER ',il;<E URn, Adjust (p. 98) Display Initial Setup F_ _it _; Seep...
-
Page 86: Selecting Shooting Mode To Match The Subject
Setting Up Camera Begin I Before • See page 64 for how to set • No menu screen appears with external input SELECTING SHOOTING MODE TO MATCH THE SUBJECT (SWITCHING PROGRAM AE MODE) This DVD video camera/recorder situation and records the optinmn-i image: If you choose the shooting mode to match the recording conditions, clearer images will be recorded. -
Page 87: Recording Dark Subjects
RECORDING DARK SUBJECTS When Program AE is set to Low Light, you can use the light from L CD monitor to record a subject. 1 Press the MENU button, and choose "Program AE" fl_omtile "Camera Functions Setup" menu. 2 Choose "Low Light", and designate it. - Page 88 ADJUSTING COLOR (WHITE BALANCE) This DVD video camera/recorder adjusts tile color of" subject. Change balance setting depending oil tile conditions. Auto White balance always automatically adjusted You can manually adjust white balance to match the light source or situation (p. 89) Outdoor To record in fine weather...
- Page 89 OSetting white balance manually 1 Point the DVD video camera/ recorder at a white object so that it fills the screen. object that is not transparent. If focus is not correct when white object fills the screen, manually the object, referring to "Manually Subject"...
-
Page 90: Using The Electronic Image Stabilizer
"EIS On" is specified: Firmly hold the DVD video camera/recorder • EIS may not operate correctly .m_oM,. conversion • EIS cannot be used when recording photos on DZ- GX20A or DZ-MV780A. S_0OA_ 9,'30'200S zoom. built into this DVD video camera/recorder, tile low fl'equency... -
Page 91: Switching Movie Quality (Video Mode)
Setting Up Record SWITCHING MOVIE QUALITY (VIDEO MODE) Choose tile movie quality h_om Press the MENU hutton, use "Operating Menu" (p. 64) to choose "VIDEO Mode" on tile "Record Functions Setup" inenu screen, and then press tile I_/|| button. 2 Choose the desired quality mode, and then press the I_/|| button. -
Page 92: Setting To Wide Tv Screen Mode (16:9 Mode)
SETTING TO WIDE TV SCREEN MODE (16:9 MODE) When viewing recorded images later on a wide (16:9) mode "On": Yon can also record images with tile aspect ratio changed "Off" is 4:3). "16:9 On" specified (aspect ratio 16:9) , ... 1 Press the MENU button, choose "16:9"... - Page 93 * This system records the aspect ratio (16:9, 4:3) information external input, S-VIDEO external mode, you will not be able to switch to recording of or DZ-MV780A only) using the same disc with ID-1/ID-2*. p 155), the TV may not automaticalIy in void space between video signals.
-
Page 94: Switching Quality Of Still Image (Quality)
SWITCHING QUALITY OF STILL IMAGE (QUALITY) You can switch tile still recording Press the MENU button, use "Operating Merm" (p. 64) to choose "Quality" on tile "Record Functions Setup" lllenu screen, and then press tile I_/11 button. Choose tile option you want, and then press the _'/|| button. - Page 95 SWITCHING EXTERNAL INPUT RECORDING METHOD (PHOTO INPUT) When "Input Sourre: LINE o1"S LINE" oil either a DVD disc or a card. with little movement by specifying iilovement. Does not suit recording Frame subjects, despite of less moving video. Field Suitable for recording 1 Press the MENU hutton, use "Operating...
- Page 96 SELF-TIMER You can record photos using tile self timer function, Press the MENU button, use "Operating Menu" (p. 64) to choose "Self Timer" on tile "Record Functions Sett/p" Ii-lentl screen, and then press tile I_/|| button. 2 Select "On", and then press the 1_/11 button. The self timer will be set.
-
Page 97: Setting On-Screen Display Output On Or Off (Osd Output)
SETTING ON-SCREEN DISPLAY OUTPUT ON OR OFF (OSD OUTPUT) If you connect this video camera/recorder switch off the oil screen infbrmation screen. 1 Press the MENU _R_c,)rd hutton, use "Operating Menu" (p. 64) to choose "OSD Output" oil tile "Record Functions @ENTER_ETURti Setup"... -
Page 98: Setting Brightness Of Lcd Screen (Lcd Brightness)
LCD/EVF Setup SETTING BRIGHTNESS OF LCD SCREEN (LCD BRIGHTNESS) Press the MENU button, use "Operating Menu" (p. 64) to choose "Adjust" on the "LCD/ EVF Setup" menu screen, and then choose "LCD Brightness". The brightness adjustn-lent bar will appear oil the screen. -
Page 99: Setting Color Density (Color Level)
SETTING COLOR DENSITY (COLOR LEVEL) You can adjust the color density 1 Press the MENU button, use "Operating Menu" (i7. 64) to choose "Adjust" on the "LCD/ EVF Setup" menu screen, and then choose I (OENE_ "Color Level". The color density adjustnmnt on the screen. - Page 100 Initial Settings SWITCHING OPERATING SOUND ON OR OFF (BEEP) Beep is heard when )ressed, No beep is heard. Press the MENU button, use "Operating Menu" (p. 64) to choose "Beep" on the "Initial Setup" inenu screen, and then press the I_/|| button.
-
Page 101: Turning Record Led On Or Off (Record Led)
TURNING RECORD LED ON OR OFF (RECORD LED) You can switch off the recording recording. The recording is recording. The recording Recording '1 Press the MENU hutton, use "Operating Menu" (i7. 64) to choose "Record LED" on the "Initial Setup" nlentl screen, and then press the I_'/|| button. -
Page 102: Resetting Menu Settings To Defaults (Reset)
RESETTING MENU SETTINGS TO DEFAULTS (RESET) Yon can restore menn settings to defi_nlts (initial settings at the factory (p. 174)). (Note, however, that the date/time will not be reset.) Press the MENU button, use "Operating Menu" (p. 64) to choose "Reset"... -
Page 103: Starting Or Terminating
Using Disc Navigation STARTING OR TERMINATING Disc Navigation is a tool fiorediting scenes recorded on this DVD video camera/recorder. Here is an explanation oil "scene" and "program _',so that you will be able to make most use of Disc Navigation fhnction. Tile screens in this instruction manual are basically those that will appear when DVD RAM disc is used: Some items will :lot appear when DVD R disc or card is used, but the operation is tile same. - Page 104 Cursor-- StiII image icon *2- Operation guide .3- "1 Scene number refers to display number on thumbnail No still icon wilt appear for card. The operation guide will varydepending Appears when 13 scenes or more have been recorded. "C_R" will appear for DVD-R disc. " :_" will appear for card. Icons to be displayed oil thumbnail: _i"_...
-
Page 105: Playing Back From Disc Navigation Screen
PLAYING BACK FROM DISC NAVIGATION SCREEN 1 Press the DISC NAVIGATION button. h Use tile I_I_/_D,I/'_II/I_I_ buttons to select the desired scene. The selected scene will be fi'amed: This is called a "cursor". OWhen playback ends: Tile DVD video camera/ recorder will enter tile playback pause... -
Page 106: Selecting Multiple Scenes
SELECTING MULTIPLE SCENES 1 Press the DISC NAVIGATION 2 Use the I_I_/_I/"_(I/II'I) huttons tile desired scene. Press the SELECT button once: selected scene will be fl'amed yellow. SELECTING CONSECUTIVE 1 Press the DISC NAVIGATION bntton. 2 Use the I_NI/I_I/_/ buttons to select desired scene. -
Page 107: Functions Available
FUNCTIONS AVAILABLE Tile Disc Navigation mode will Editing of scenes Setting special effects to scenes Scene information display Changing title Creation of play list Disc or Card initialization Copy from disc to card Disc finalization Repeat play Slide show Remaining display (Capacity) Disc protection... - Page 108 UNDERSTANDING FLOW OF DISC NAVIGATION MENU Press the MENU button on the Disc Navigation menu screens fbr disc and card will appear: See "Checking Flow of Normal Refer to pages indicated for details of settings. OWhen using DVD-RAM disc Scene --3-- Edit (p 110)._1._...
- Page 109 OWhen using card Scene Delete (p 110) Select (p 119)'--i-- Lock (p 118) Detail (p 120) Go To (p 131) (p 131 ) Card Format Card Capacity Start _ Current (p 119) Current _ End (p 119) (p 119) Slide Show (p.
-
Page 110: Deleting Scenes (Edit - Delete)
Scene DELETING SCENES (EDIT - DELETE) Yon may want to delete unwanted Scenes oil DVD R disc cannot be cleleted, Press the DISC NAVIGATION Select the scene to be deleted. 3 Press the MENU button. Scene to be deleted Choose "Scene", "Edit", "Delete", and then press tile I_/ll button. - Page 111 OEditing using submenu Press the MENU button hefore pressing appear. Edit ------T_Delete ... To delete selected I--.-Exit Select _ Start > Current.. [-----Current > End... To select scenes from the scene tlle cursor All ... Go To .----T-._Top L---End Pressing the •...
-
Page 112: Dividing Movies (Edit - Divide)
DIVIDING MOVIES (EDIT - DIVIDE) divide a scene into two To delete unnecessary portion of scene, portion. '1 Press the DISC NAVIGATION 2 Select the scene to be divided. 3 Press the MENU bntton. Choose, "Scene". "Edit". "Divide" then press the _/|| button. -
Page 113: Combining Multiple Scenes (Edit - Combine)
COMBINING MULTIPLE SCENES (EDIT - COMBINE) If you have recorded numerous Navigation. Be sure to select consecutive multiple All" is specified (p. 136). Stills cannot be combhled. '1 Press the DISC NAVIGATION button. 2 Select tile consecutive multiple scenes to be con-lbined. - Page 114 DIRECTING SCENES EFFECTIVELY You can add finding to the beginning There are three types of special effects: Fade Out Fade In White: Fades in from white screen Fades out to white screen 1 Press the DISC NAVIGATION bntton. 2 Select the scene fin" adding special effects.
-
Page 115: Playing Back By Skipping Scenes (Effect - Skip)
PLAYING BACK BY SKIPPING SCENES (EFFECT - SKIP) You can specif,/"Skip" for scenes yon do not want to play hack: Tile selected 1 Press the DISC NAVIGATION 2 Select tile scene to be skipped. 3 Press the MENU button. 4 Choose "Scene", "Eff_ct', "Skip", and... - Page 116 CHANGING IMAGES FOR THUMBNAILS Normally. the first image of tile rerorded image of the scene fur thumbnaih glance recorded fl'om at the Disc Original thumbnail '1 Press the DISC NAVIGATION button. Select the thumbnail of the scene to he changed. 3 Press the MENU button.
-
Page 117: Copying Stills On Dvd-Ram Disc To Card (Copy)
COPYING STILLS ON DVD-RAM DISC TO CARD (COPY) Set tile power switch to "_il" Press the DISC NAVIGATION Select tile still to be copied. Press MENU button. Choose "Copy" on the "Scene" iilenu screen, then press tile I*/11 button. 6 The "Copy to card" I Copy {0 card screen will appear: yOU are sure you want... -
Page 118: Locking Scenes On Card (Lock)
LOCKING SCENES ON CARD (LOCK) Yon can lock each photo recorded 1 Set the power switch to "IINI". 2 Press the DISC NAVIGATION button. 3 Select the scene to be locked. Press the MENU bntton. 5 Choose "Lock" on the Isc,_re "Scene"... -
Page 119: Selecting Scenes Using Menu Screen (Select)
SELECTING SCENES USING MENU SCREEN (SELECT) You ran nse this "Selert" fnnrtion This function is nseful when there are mnTlerous 1 Press the DISC NAVIGATION button. Point the cursor at the first or last scene to be selected: When selecting all scenes, simply proceed with step 3. -
Page 120: Displaying Information
DISPLAYING INFORMATION You can display various intbrmation length, special effects and movie quality Press the DISC NAVIGATION Select the scene whose information to know. 3 Press the MENU button. Choose "Scene", "Detail", I,,I II button. Tile detailed infbrmation on tile scene appear. -
Page 121: What Is "Program"
Program WHAT IS "PROGRAM"? Program refers to an assembly of scenes movie or still. Scene No 1 Scene No. 2 SWITCHING TO THUMBNAIL Since the scenes recorded on this DVD video camera/recorder recording date, selecting a program will allow you to display only the scenes on a specific date. Press the DISC NAVIGATION button. -
Page 122: Playing Back Program (Play)
PLAYING BACK PROGRAM (PLAY) Yon can play hack only tile selected 1 Press the DISC NAVIGATION 2 Press the MENU bntton. 3 Use "Operating Menu" (p. 64) to choose "Play" on tile "Program" screen, and then I_lenu press the I_/11 button. L(}ENTER CHANGING TITLE OF PROGRAM (TITLE) Tile recording date/time has initially been attached to any program. - Page 123 O After entering the title, TITLE choose "Enter" and i 7 # T 4'r /, then press tile I1_/11 _bcdef_hijklm hotton. 7 The screen %1" v erifying TITLE [_]_Fiii the change in title will appear: Choose "YES", and then press tile )"/|| hutton.
-
Page 124: What Is "Play List"
Play List WHAT IS "PLAY LIST"? You can create a play list oil this DVD video recorded scenes. Since the play list is not created by copying making a play list. On tile other hand, deleting disc capacity fbr recording. Example: Program 1 Play list of up to No. -
Page 125: Switching To Display Of Each Play List (Switch)
SWITCHING TO DISPLAY OF EACH PLAY LIST (SWITCH) Select the desired one of multiple play lists: The Disc Navigation screen of the selected play list will appear. 1 Press the DISC NAVIGATION button. 2 Press the MENU button. 3 Use "Operating Menu" (p. -
Page 126: Adding Scenes To Play List (Editing Play List)
ADDING SCENES TO PLAY LIST (EDITING PLAY LIST) Press the DISC NAVIGATION Press the MENU bntton. Use "Operating Menu" (p. 64) to choose "Edit" oil tile "PlayList" menu screen, and then press the )"/ll button. LF_#NTER (re)RETURN 4 Use the play list select screen to select the play list to which you wish to add scenes, and then... -
Page 127: For Editing (Editing Play List)
DELETING SCENES FROM PLAY LIST (EDITING PLAY LIST) 1 Press the DISC" NAVIGATION Display tile editing screen of tile play he edited. Per%rm steps 4 on page Move tile cursor to the play list in lower ro_, place the cursor the scene to be deleted. -
Page 128: Deleting Scenes Using Submenu For Editing (Editing Play List)
DELETING SCENES USING SUBMENU FOR EDITING (EDITING PLAY LIST) You can delete scenes fi_om play list on the editing 1 Press the DISC NAVIGATION Display tile editing screen of the play list to be edited, Perfbrn-i steps 2 4 on page 126. Move tile cnrsor to the play list in lower row. -
Page 129: Order Of Scenes (Move)
ARRANGING ORDER OF SCENES (MOVE) You can move scenes only when Press the DISC NAVIGATION button. Press the MENU button. Use "Operating Menu" (p. 64) to choose "Switch" on the "PlayList" menu screen, and then press tile I_/11 button. Select tile play list to be edited, and then press tile I_/|| button. -
Page 130: Changing Title Of Play List (Title)
CHANGING TITLE OF PLAY LIST (TITLE) The play lists have serial numbers times: You can change this title at any time. 1 Press the DISC NAVIGATION 2 Press the MENU button. 3 Use "Operating Menu" (p. 64) to choose "Title" on the "PlayList" menu screen, and then press the I_/ll button. - Page 131 Go To From the Disc Navigation screen, you can jump to the first scene or last scene. TOP (END) Press the DISC NAVIGATION 2 Press the MENU button. O Use "Operating Menu" (p. 64) to choose "Top" or "End" on the "Go To"...
- Page 132 PC when it is connected to PC via cane, the disc or card may not be (for DZ-GX2OA or DZ-MV780A only)
-
Page 133: Verifying Remaining Free Space On Disc Or Card (Capacity)
PROTECTING DISC FROM WRITING (PROTECT DISC) You can protect a DVD RAM disc in order to prevent recorded images fl_ombeing erased or edited by mistake. Fnrther recording will not be possible oil protected disc nntil tile protection is released. 1 Press the DISC NAVIGATION button. 2 Press the MENU button. -
Page 134: Updating Control Information
UPDATING CONTROL INFORMATION (UPDATE CONTROL INFO.) Disc Navigation in this video thumbnail, skip, fi_de, in a particular DVD video camera/recorder, camera/recorder, tile Disc Navigation Control Into t\mction to update • When using the AC adapter/charger recorder for updating control information, Before You Begin turned off during updating: If the DVD video camera!recorder off during updating and the updating is interrupted,... -
Page 135: Finalizing Dvd-R Disc (Finalize Disc)
FINALIZING DVD-R DISC (FINALIZE DISC) • Be sure to use the AC adapter/charger recorder when finalizing a DVD-R disc. Finalization cannot be executed Before You Begin using a battery. If the DVD video camera!recorder finalization result, and at worst, the disc may be damaged. If you want to play back a DVD-R device confomfing... -
Page 136: Playing Back Scenes Repeatedly (Repeat Play)
Others DISPLAYING MOVIES OR STILLS INDEPENDENTLY Scenes recorded on this DVD video camera/recorder regardless of whether they are movies display to stills only o1"movies Press the DISC NAVIGATION button. Press the MENU bntton. 3Use " Operating Menu" (p. 64) to choose "Category"... -
Page 137: Slide Show
SLIDE SHOW (CONTINUOUS If you play back stills recorded pause status after each still is played back. Setting Slide Show allows you to continuously '1 Press the DISC NAVIGATION button. 2 Press the MENU button. 3 I Ise "Operating Menu" (p. - Page 138 THE FOLLOWING ARE AVAILABLE tile provided PC connection w'hich tile software oi1 tbe CD photos recorded oil tile OUsing, on PC, the photos recorded on DVD-RAM disc or card in this DVD video camera/recorder: DVD-RAM disc or card recorded this DVD video camera/recorder OViewing, on PC, DVD-RAM disc recorded on this DVD video camera/ recorder:...
- Page 139 OUsing PC to edit images on DVD-RAM disc recorded on this DVD video camera/recorder: DVD-RAM disc recorded Original DVD-RAM disc or on this DVD video camera/ another DVD-RAM disc recorder OUsing PC to edit images on DVD-RAM disc recorded on this DVD video camera/recorder and create a DVD video (DVD-R disc) (see page 147): DVD-RAM disc recorded...
- Page 140 Contents on Provided The CD-ROM supplied with the DVD video camera/recorder To refer to the contents of CD-ROM, set the CD-ROM in the CD-ROM drive of PC, right-click the CD- ROM icon and choose "Open". DVDCAM7 DVDMASE4 DVDfun2 AcrobatReader Although the CD-ROM may contain a folder or file other than the above, they will not be needed on this DVD v deo camera/recorder un ess some spec a nstruct on s g yen.
- Page 141 4\manuals\English fblder DVDMASE contained on the provided CD ROM. • After installing DVD MovieAlburnSE, open "Prograrns" or "All Programs" fl'om the Windows "Start" menu, choose "Hitachi DVDCAM" and "DVD MovieAlburnSE", and then open "Instruction Marmal". • Requirements of available • The provided software carmot be used on Windows } 98 o1" Windows _{98 Second Edition.
-
Page 142: Displaying Installer Screen
CD ROM is located. appear. Double The ".exe" extension may not appear, depending on the PC heing used. your PC. PC kit fur the Hitachi kit fur the Hitachi Applications" application. Do you click tile Setup.exe icon. - Page 143 INSTALLING SOFTWARE / Click "All" on the installer screen. Clicking 'All" allows you to install the DVD RAM driver. DVD MovieAlbumSE DVDflmSTUDIO 2.2 all at one time. If any of the software programs installed, uninstall them. and then proceed with installing the provided The screen %r installing MovieAlbumSE...
- Page 144 O A message veritying whether is to be created oi7 desktop will appear: want to create one, click "Yes". If not, choose "No'. 7 Click "Finish". Then the installation of DVDfunSTI.TDIO will start. Ciick B The screen for installing DVDfhnSTUDIO will appear: Click "Next".
- Page 145 15 Click "Next". 15 Caref\flly read the License Agreement: accept it, click "Yes". The contents of agreement displayed actual screen be difIerent the figure. |/If do not which tile UDF "Next". Click If you 18 If yon do not wish to change the folder nan-le, click "Next".
- Page 146 tll Check the displayed contents, "Next"• 20 Installation will start. When complete, some notes will appear: contents, then click "x" at the top right window. The contents displayed on actual screen may be diftFrent from those in the figure. 21 Ifyonr then click message that prompts...
- Page 147 Creating Video Recorded on DVD Using DVD-MovieAIbumSE and DVDfunSTUDIO, images recorded on this DVD video camera/recorder, / Insert a recorded DVD RAM disc into the DVD video camera/recorder, DVD video camera/recorder terminal of PC. /- Start MovieAlhumSE. images on DVD disc as necessary.
- Page 148 O DVDfunSTIJDIO will automatically following Collect Tool will "OK". Ally scene exported on DVD will be automatically registered DVDI\mSTI JDIO. You can now change tbe DVD desired style, change the title, of disc to he used (8 cm/12 cm/12 layered) the playback method.
-
Page 149: Uninstalling Software
• Ordinary data on PC can usually be written to DVD- RAM disc in this DVD video camera/recorder, Hitachi does not guarantee the operation. • Data may be readable or writable from/to storage media in this DVD video camera/recorder... - Page 150 Introduction to Video Tile fkallowing introduces tile sof'Lware recorded on this video camera/recordei_ reference only; Hitachi does software company fur any inqniries • For Mac PIXELA CORPORATION "Pixe Browser" InfL_rmation on product: http://www.pixela-1 You can capture videos recorded edit them...
-
Page 151: Camera Accessories
Introduction to Optional CAMERA ACCESSORIES Wide conversion Iens (DZ-WL1)* Video flash (DZ-FLH3)** • When using camera accessories, * When attaching the wide or tele-conversion step-up ring: Attach it after removing ** Unavaitabte for DZ-MV730A POWER SUPPLY Battery (DZ-BP14SW) * Ueavaitabte for DZ-G×2OA. -
Page 152: Removing And Replacing From/In Round Dvd Holder
90 ° from Its Package cartridge Remove the disc Dora tile holder, cartridge may vary with the disc maker: the discs made by Hitachi L Without touching recording the disc edge and center hole to remove it. SIDE... -
Page 153: Removing Disc From Cartridge
REMOVING DISC FROM CARTRIDGE at ne t ipped pen, etr. tosnap oil" the , ork pins, and then remove them. Snap off and remove Fockpin eRemoving disc from caddy case / Insert yonr finger into the hole in tile center of disc, taking care not to touch tile... - Page 154 "4m'_or "1_1",or a card is loaded with the power switch set to • The demonstration DVD video camera/recorder DZ-GX20A or DZ-MV780A • While the demonstration indicator will blink HITACHI function...
-
Page 155: Terminology
Terminology DISC-PROTECT: This disables writing to disc (protects cannot he accidentally deleted DOLBY DIGITAL: An audio recording %rmat widely recording can enhance the recording with higher resolution (bit rate) or a longer recording DVD PLAYER: This device can play back video and audio signals recorded on DVD Video and DVD R discs using the DVD video fi0rmat. -
Page 156: Photo
FINALIZE: This process makes a DVD R disc recorded on this DVD video camera/recorder player, etc. that conforms to 8 cm DVD R: No fllrther recording can be made oil a finalized DVD R disc. HOWLING: This phenomenon occurs as fbllows: When the DVD video camera/recorder such as TV, the audio input to the microphone of DVD video camera/recorder output from the speakers of TV, and the signal is again input to the microphone: This is repeated to fbrm an endless loop of audio signal, and the signal is amplified up to the audio output amplitude... - Page 157 SD MEMORY CARD: This is a standard of memory card developed mm thick, and has 9 pins. Since the SD memo W card was developed (MMC), MMC can be inserted into SD memo W card slot and used. Howevei; cannot be inserted in the slot exclusively SLOT-IN TYPE PC: PC;...
- Page 158 No DVD Video Check Following: Movie can be recorded only on DVD-RAM R disc. Check the following: is proper type of disc inserted? Is power switch set to "411"? is the DVD-RAM disc in DVD video camera/ recorder write-protected? Release protect.
- Page 159 Is a fully charged battery attached? Is the DVD video camera/recorder AC outlet? Is DVD video camera/recorder powered from using PC connection MV78OA) Unplug the PC connection Does DVD video camera/recorder end of the scene to which wipe-out played back? Press the DiSC NAVIGATION connected to PC...
- Page 160 Trouble Messages A message may appear while you are operating the DVD video camera/recorder. appears, refer to the following table and take appropriate corrective action. Messages are arranged in alphabetical (I) Data error in a part It is possible of image file. Repair file when power data now? editing...
- Page 161 Cannot combine scene Scenes of multiple programs, be combined. Create Playlist first, and scenes then combine scenes. Cannot combine. Select only movies Deselect PHOTO scenes. Cannot combine. Select Select a range of at least 2 scenes multiple scenes, combine Cannot delete scenes.
-
Page 162: Disc
Card ful!. Delete unnecessary No more recording stills or use another Card full. Delete unnecessary Cannot execute. Card is not formatted. Was the card formatted Format the card now? video camera/recorder, CHECK DiSC A disc unusable been inserted Make sure that the type of disc is correct, disc is not write-protected. - Page 163 Disc error. • Use another • See *3 on page 166. • Mismatch done on some recorder. Initialize • Initializing Disc full. Cannot Delete execute, disc. Disc has no data. This message playback Disc has no Play List. Switching Disc includes protected The disc may be software scenes.
- Page 164 Error occurred. Please An abnormality replace disc. Replace Finalize may not be Instantaneous complete. Finalize again 3ower was supplied now? It is unrecordable The inserted this card. recorder: JPEG file related to This message scenes are not found, using a device be copied No card.
- Page 165 There was no scene This message which can be deleted. Disc Navigation Release This card cannot The card cannot used. another Please replace card. This disc cannot be A disc that cannot used. Please replace has been loaded. disc. This disc is recorded This DVD video camera/recorder the PAL system.
- Page 166 • This message also appear disc is recognized immediately soft, cloth to clean off tile • This message also appear DVD video camera/recorder • If the repair message appears disc loaded after recording on it, choose • If the repair message appears disc...
- Page 167 Troubleshooting Check to see the following before video camera/recorder to normal, Power supplies Battery cannot be Is the ambient charged. Charge Is the battery Remove Is the DC power Has the battery Remove charged, • If the battery procedures, Battery weakens fast Are you using the DVD video temperature A fully charged...
- Page 168 Even if the DVD video The DVD video camera/recorder camera/recorder is off, recognize opening the cover will DVD video camera/recorder cause the ACCESS indicator to blink. During recording Pressing the REC or Is input image copy-guarded? PHOTO button wil! not Is the disc write-protected start recording.
- Page 169 During playback Recognition of disc is is disc dirty? not complete Use the provided Pressing the playback Has the image button wil! not start video camera/recorder? playback. Playback camera/recorder recorder. Has scene camera/recorder? (f a scene recorded on a device other than this DVD video camera/recorder, may not be possible No playback picture...
- Page 170 Photos on card cannot This DVD video camera/recorder be played back. recorded to the DCF (Design range of image data normally camera/recorder vertical outside the figure), Even when the number playback of the digital DCF (Design file format of digital digital devices It wil! take some...
- Page 171 When the DVD video camera/recorder No drive icon appears The DVD video camera/recorder is not turned on. on PC. Check the power supply. Turn PC off and then disconnect the PC connection cable. Turn PC on again, and then use the PC connection cable to connect the DVD video camera/recorder to PC.
- Page 172 The DISC EJECT While the DVD video camera/recorder is connected to PC, use button is not valid when Explorer to right-click the DVD video camera/recorder drive icon the DVD video camera/ and execute "Eject". recorder is connected to If DVD-MovieAtbumSE is running, clicking the eject button on DVD-MovieAIbumSE wi!l open the cover of disc insertion block of this DVD video camera/recorder: Remove the disc.
- Page 173 Miscellaneous Power does not come Execute on, or no operation Has the DVD video camera/recorder occurs by pressing The DVD video camera/recorder button. dealer. The date and time are Has the DVD video camera/recorder period incorrect. The internal Charge No scene can be is the cursor If the selected deleted.
- Page 174 System Reset If the DVD video camera/recorder video camera/recorder may recover to normal defaults. The date and time will also be reset: Set the date and time again before using the DVD video camera/recordett Set the power switch to "OFF" to tnrn tile DVD video camera/reorder Detach tile battery or AC adapter/charger.
- Page 175 0.5 mm DZ-MV73OA : FI.6 - 2.3, f = I/8" - 1-1/t6" Filter diameter: Thread pitch: 0.5 mm Auto/Manual Optical 10× (DZ-GX20A/DZ-MV780A), Optical t6× (DZ-MV73OA), 240× with digital zoom added, 40× for stil! 0.3 Ix in Low Light mode 0.2-inch color (equivalent to approx.
-
Page 176: Dvd-Ram Disc)
External input: 640 × 480 pixets Movie: Conforming to DVD video format Still: Conforming to JPEG (DZ-GX20A: DZ-MV780A: I280 × 960 pixels, DZ-MV73OA: pixels) standard External input: 640 × 480 pixets MPEG Audio layer 2, linear PCM, Dolby Digital 8 cm DVD-RAM... - Page 177 Operating temperature (humidity) Storage temperature Weight Total weight when recording Provided accessories 32 - 104 °F (0 - 40 °C) (less than 80%). 32 - 86 °F (0 - 30 °C) when connected -4 - 140 °F (-20 - 60 °C) DZ-GX20A approx.
- Page 178 Operation is subject to the following two conditions: interference, and (2) this device must accept any interference received, including interference that may cause undesired operation. Responsible Party: HITACHI AMERICA, LTD. HOME ELECTRONICS 900 Hitachi Way Chula Vista, CA 91914-3556 Tel: 6!9-591-5200...
- Page 179 Index Numerics 16:9 ... 240x (Dig Zoom) 40x (Dig. Zoom) ... 8 cm bare disc ... AC adapter/charger ACCESS/PC indicator Add (edit) ... Atl programs Auto (program AE) ... Auto-focus AV input/output jack ... Backlight correction Battery Attaching to DVD video camera/recorder Charging Recordable time on DVD video camera/...
- Page 180 Low Light (Program AE) ... MF ... MIC FiIter Move ... Normal Menu ... Optical 10x zoom tens ... Optical 16x zoom lens ... OSD Output ... PHOTO Input ... Play (play tist) ... Play (program) Play list ... Add scenes ... Add scenes (submenu) Create ...
- Page 181 Article 4 Quality Assurance Under no circulnstances will Hitachi, Ltd., Matsushita Electric Industrial Co., Ltd. accept any responsibility flor any damages you may incur fiom using or being unable to use This Software (including, but not limited to, loss of business profit, interruption of business, loss of business infbrmation, or other moneta W damages).
- Page 183 Warranty Limitations The Umited Warranty provided by Hitachi does cover: A Cabinet (exterior finish items), Battery packs, Accessories, Lens C{eaniegs, Cleanings, DVD Disc Damage, Video Tape Damage, or Software Modifications. B Any defect, malfunction, or failure caused by or resulting from improper service,...
-
Page 184: Warranty
Produe[s + CA_ICORDER Products AC ADAPTER CHARGER Conditions Hitachi Limited Warranty These Hitachi Products are warranted of defects in parts and workmanship purchase by the original owner found to be detective, Hitachi will re replace defective parts at orig warranted... - Page 185 REGISTER YOUR PRODUCT ON-LINE AT HITACH,COMtTV OR MA_L IN TO ADDRESS ON THIS CARD. HITACHI "In order to allow Hitachi to better serve customer needs, please complete this card and return it to Hitachi America, Electronics Division. Completion to vatidate your Hitachi timited warranty, but would assist us in developing better services and programs for our customers."...
- Page 186 C_c_ cD _ r_rG © cQ _ © ©...
- Page 187 8_ntres de service non aufhorises par Hitachi Dommages ou pertes echappant a tout contr6Je de la parte de Hitachi tel que: feu, inondation, foudre, etc ProduJts achefes etfou utilJses a Fext@ieur du Canada Dommages encourus suite a une mauvaise...
-
Page 188: Your Warranty
NOTICE: This warranty will _to Canada OR sold by any organization AVIS IMPORTANT: Notre garantie ne couvre Das les produits achetes a I'exterieur du Canada OU vendus par toute autre organisation que HITACHI CANADA LTD, FOR SERVICE CONTACT 1-800-HITACHI 1-800-448-2244... - Page 189 Quels son/Its deL_X f_deL_rs _esp_Jsimportan/sc_i or_ti_lfl u e_ce_tre decisiond acha_? Hot_ did you _ear abOL_t t}lis VIDEO PRODUOT? Comm÷nl avez _L_Sp_isc_n_ssar_ce de _e _RODU_TVIOPO? Wh_ _he_VlDFO PRODUOT bra_dsd_ _L_cor_s_del b_te_ seceding Hitachi? QLlell÷ I_ut_ ma_/_ede PRODUCT V_{)E 0 a_/_ls e_/visage d acquerir a,antd (@ter_OL_I _qitachi?
- Page 190 £ z_z_ > ©o >_...
Need help?
Do you have a question about the DZ-MV780A and is the answer not in the manual?
Questions and answers