Kolcraft Contours Options Instruction Sheet
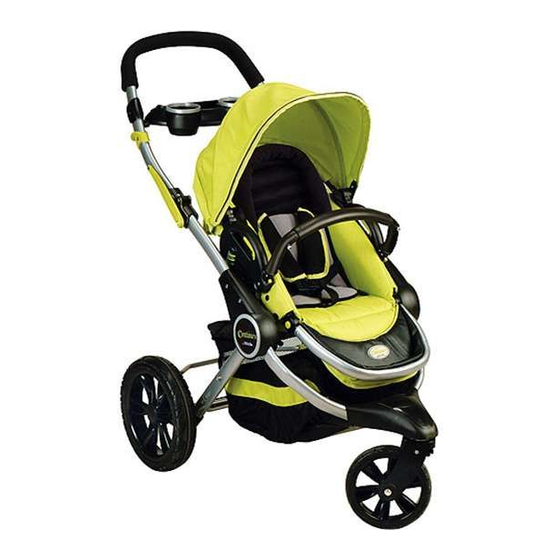
3 wheeler stroller
Hide thumbs
Also See for Contours Options:
- Instruction sheet (63 pages) ,
- Instruction sheet (26 pages) ,
- Instruction sheet (45 pages)
Advertisement
Quick Links
Download this manual
See also:
Instruction Sheet
Advertisement

Related Manuals for Kolcraft Contours Options


Summary of Contents for Kolcraft Contours Options
- Page 1 ® Options ® 3 Wheeler Stroller Instruction Sheet Hoja de instrucciones de la carriola Contours ® Options ® de 3 ruedas Feuille d’instructions pour la poussette à 3 roues Contours ® Options ® ©2010 Kolcraft ® Enterprises, Inc. SIL001-R2 8/10...
-
Page 2: Important Safety Information
WARNING Avoid serious injury from falling or sliding out. Always use Restraint System. Your child's safety depends on you. Proper stroller use cannot be assured unless you follow these instructions. DO NOT USE STROLLER UNTIL YOU READ AND UNDERSTAND THESE INSTRUCTIONS. IMPORTANT SAFETY INFORMATION: How to Keep Your Child Safe While Using this Stroller Adult Assembly Required. - Page 3 ® , Gerry ® , Graco ® , Maxi-Cosi ® , Peg Perego ® Safety 1st ® are trademarks of their respective owners. They are not associated with Kolcraft Enterprises, Inc. and no approval by them is to be implied.
- Page 4 ADVERTENCIA Evite daños serios causados por caídas o al deslizarse del asiento. Siempre use el sistema de cinturones. La seguridad de su hijo/a depende de usted. No se puede asegurar un uso apropiado de la carriola a menos que usted siga estas instruc- ciones.
- Page 5 Si su asiento infantil no se encuentra bien asegurado a la base o si tiene alguna duda sobre el ensamblaje o uso del portaasientos, NO USE ESTE PRODUCTO. Llame a Kolcraft al 1-800-453-7673. • Asegúrese que la carriola esta desplegada y que el adaptador de asiento de automóvil está...
-
Page 6: Mise En Garde
® Safety 1st ® son marcas registradas de sus respectivos dueños. No están asociados con Kolcraft Enterprises, Inc. y no existe ninguna aprobación implícita. MISE EN GARDE Pour éviter que l’enfant ne se blesse grièvement en tombant ou en glissant, toujours utiliser la ceinture de sécurité. - Page 7 Que faut-il éviter avec cette poussette • Toujours équilibrer le poids de la poussette de façon égale. Pour éviter qu la poussette ne devienne instable ou ne bascule: Ne pas placer de paquets ou autre chose de ce genre sur la capote, le siége ou autour de la poignée de la poussette.
- Page 8 , Graco ® , Maxi-Cosi ® , Peg Perego ® Safety 1st ® sont des marques déposées appartenant à leur propriétaire respectif. Elles ne sont pas associées à Kolcraft ® Enterprises, Inc. et aucun accord n'est impliqué de leur part.
-
Page 9: Liste De Pièces
LISTE DE PIÈCES PARTS LIST - LISTA DE PARTES - Stroller Frame Stroller Handle Parent Tray Left Brake Assembly Right Brake Assembly Estructura de la carriola Asa de la carriola Charola para adultos Ensamble del freno Ensamble del freno Cadre de la poussette Poignée de la poussette Plateau de l’adulte izquierdo... - Page 10 HOW TO ASSEMBLE YOUR STROLLER - CÓMO ENSAMBLAR SU CARRIOLA - COMMENT ASSEMBLER VOTRE POUSSETTE To Open Stroller - Para abrir carriola - Pour déplier la poussette Remove any cardboard inserts or plastic ties used to protect the product during shipment. ES: Remueva cualquier inserción de cartón o plástico puesto para proteger el producto durante el envío.
- Page 11 To Attach Stroller Handle - Para instalar el asa de la carriola - Pour attacher la poignée de la poussette Slide the Stroller Handle with holes facing down onto the stroller frame until the small holes on each side of the Stroller Handle can be seen in the frame. ES: Deslice el Asa de la Carriola con los orificios hacia abajo sobre la estructura de la carriola, hasta que los orificios en cada lado del Asa de la Carriola puedan...
- Page 12 To Assemble Brake Assembly - Para ensamblar los frenos - Pour assembler les freins Secure Right Brake Assembly to Brake tube using two short screws. Please note the curve of the tube should be facing towards the outside as shown. ES: Asegure el ensamble del freno derecho al tubo del freno con (2) tornillos cortos.
- Page 13 To Assemble Rear Wheels - Para ensamblar las ruedas traseras - Pour assembler les roues arrière Position brake assembly as shown, with brake tube pointing towards back of stroller. ES: Coloque el ensamble del freno como se muestra, con el tubo del freno orientado hacia la parte posterior de la carriola.
- Page 14 To Assemble Front Wheel & Attach Wheel Cover Para ensamblar la rueda delantera y unir el reposapies Pour assembler les roues avant et fixer les couvercles de roue Place stroller back on handle bar. ES: Ponga la carriola hacia atrás sobre el mango. FR: Coucher la poussette en l’appuyant sur les poignées.
- Page 15 To Attach Basket - Para instalar la canastilla - Attacher le panier Align the Basket Tube with the Basket Frame in the rear of the stroller as shown. ES: Alinée el tubo de la canastilla con la estructura de la canastilla en la parte trasera de la carriola, como se muestra.
- Page 16 To Attach Wheel Cover - Para sujetar la cubierta de la rueda - Fixation du chapeau de roue Align bosses underneath wheel cover to the two holes on the metal stroller frame. ES: Alinée los topes bajo apoyapiés con los dos agujeros del marco de metal.
- Page 17 To Attach Seat - Para situar los asiento - Pour attacher de siège WARNING ADVERTENCIA MISE EN GARDE DO NOT Place car seat in NO PONGA el car seat en asiento NE PAS mettre le siège d'auto dans stroller seat. Car seat will not del carriola.
- Page 18 To Attach Front Bar - Para instalar la barra anterior - Pour installer le plateau avant CAUTION PRECAUCIÓN ATTENTION To prevent injury to your child, take Para evitar la sejeción del niño, Pour prévenir votre bébé des tome el cuidado al insertar la barra blessures, faites attention lorsque vous care when inserting bar into frame.
- Page 19 To Install Infant Neck Roll - Instalación del soporte del cuello (Select Models) (Modelos - Installation du coussin de tête pour enfants selectos) (Modèles sélectionnés) Infant neck roll is to be used with newborns who can not hold up their head. It should be used only when the seat is reclined.
- Page 20 HOW TO PROPERLY USE YOUR NEW STROLLER CÓMO USAR SU NUEVO CARRIOLA CORRECTAMENTE INSTRUCTIONS POUR UNE UTILISATION CORRECTE DE VOTRE NOUVELLE POUSSETTE To Operate Brakes - Para usar los frenos - Pour utiliser les freins TO LOCK BRAKE: Push 1-Touch brake bar down to Unlock lock wheels.
- Page 21 To Secure Child In Stroller - Para asegurar al niño en la carriola - Pour attacher l’enfant dans la poussette WARNING ADVERTENCIA MISE EN GARDE Avoid serious injury from falling Evite daños serios causados por Pour eviter que l’enfant ne se blesse grievement en tombant ou or sliding out.
- Page 22 To Adjust Shoulder Strap Height - Para ajustar la altura de las cintas de los hombros - Pour ajuster la hauteur des sangles passant aux épaules NOTE: For a secure fit, straps should be at or below the child's shoulder. Adjust straps to higher position as your child grows.
- Page 23 To Operate Swivel Wheel Lock - Para asegurar la rueda giratoria - Actionner le blocage de roue orientable LOCK FRONT SWIVEL: Push lock located under wheel cover. Adjust front wheel so that wheel is straight and lock is forward. Push lock to right. ES: ASEGURAR LA RUEDA: Empuje la cerradura situada bajo cubierta de la rueda.
- Page 24 To Recline Seat - Para reclinar el asiento - Pour incliner le siège WARNING ADVERTENCIA MISE EN GARDE To avoid finger entrapment or Para evitar heridas en los Pour éviter que l’enfant ne se pinching, do not adjust the seat dedos, no ajuste el respaldo del coince les doigts, ne pas incliner back while child is in the...
- Page 25 To Attach Infant Car Seat Adapter (Select Models) - Para instalar y usar el adaptador de asiento de auto infantil (Modelos selectos) - Pour attacher l'adaptateur du siège d'auto pour enfants (Modèles sélectionnés) Infant Car Seat Adapter Catches Align Infant Car Seat Adapter catches over frame Enganches del adaptador de asiento de automóvil hubs as shown and push Infant Car Seat Adapter down onto the frame hubs until a “Click”...
- Page 26 To Secure All Acceptable Infant Car Seats - Para asegurar otro asiento infantil acceptable - Pour fixer tous les sièges d'auto pour bébés appropriés WARNING ADVERTENCIA MISE EN GARDE When using this product, to Al usar este producto, evite Lorsque vous utilisez ce produit, daños serios causados por caí- avoid serious injury from falling l’enfant doit être bien attaché...
- Page 27 For a secure fit, wrap restraint straps and position through Infant Car Seat belt slots and buckle. Tighten Restraint Straps. Special Instructions for Car Seats without belt slots: Secure Infant Car Seat to Adapter by wrapping restraint around frame and over seats lowest center point near handle and buckle them together.
- Page 28 Pull end tab of restraint belt to set. Push To Remove Infant Car Seat buckles together to secure. ES: Para remover el asiento infantil FR: Pour enlever le siège d'auto pour enfants ES: Jale el extremo del cinturón para ajustarlo. Abroche las hebillas para asegurarlas.
- Page 29 To Fold Stroller - Para doblar a carriola - Pour plier la poussette Lock brakes. ES: Asegure los frenos. FR: Verrouiller les freins. Close canopy. ES: Cierre la sombrilla. FR: Fermer le capot. Adjust canopy to the lowest position (select models). ES: Ajuste la sombrilla a la posición mas baja (modelos selectos).
- Page 30 Engage locking latch. ES: Ponga el seguro. FR: Enclencher le taquet de verrouillage. Stroller should stand up right when folded properly. ES: La carriola debe mantenerse parada cuando esté plegada de la forma adecuada. FR: La poussette devrait être stable lorsqu'elle est correctement dépliée.
-
Page 31: Care And Maintenance
CARE & MAINTENANCE • To keep your stroller running smoothly and avoid squeaking wheels use a silicone or graphite based lubricant. It is important to get it into the axle and the wheel assembly. • Clean metal parts with a damp cloth and wipe dry. •... -
Page 32: Limited Warranty
For a period of ONE YEAR from the date of purchase, Kolcraft will repair or replace, at its option, the defective product. If you have a problem or are not satisfied with this product, please contact the Consumer Service Department at Kolcraft. -
Page 33: Garantía Limitada
Por un período de UN AÑO después de la fecha de compra, Kolcraft reparará o reemplazará, a su opción, el producto defectuoso. Si usted tiene un problema o no está satisfecho con este producto, por favor diríjase al Departamento de Servicio al Consumidor de Kolcraft. -
Page 34: Garantie Limitée
Etats-Unis et le Canada et au1-910-944-9345 en dehors des Etats-Unis et du Canada, ou par courrier électronique à customerservice@kolcraft.com. En cas de retour de cet article au Service à la Clientèle de Kolcraft pour une réparation ou un remplacement, envoyez-le en port payé et suffisamment assuré. - Page 35 REPLACEMENT PARTS LIST / LISTA DE PIEZAS DE REPUESTO / LISTE DES PIÈCES DE RECHANGE Circle the Part You Need Replacement parts may look slightly different than what is shown below. Marque con un círculo el Las piezas de recambio se pueden ver ligeramente diferentes de como se muestran abajo.
- Page 36 Total Due - Total a pagar - Total à régler : ❑ Check or money order (in US dollar) enclosed (payable to Kolcraft Enterprises, Inc.) Cheque o giro adjunto (a nombre de Kolcraft Enterprises, Inc.) Chèque ou mandat postal (montant en dollar US) inclus (à l'ordre de Kolcraft Enterprises, Inc.) ❑...
Need help?
Do you have a question about the Contours Options and is the answer not in the manual?
Questions and answers