
Related Manuals for Henny Penny OEA/OGA-341


Summary of Contents for Henny Penny OEA/OGA-341
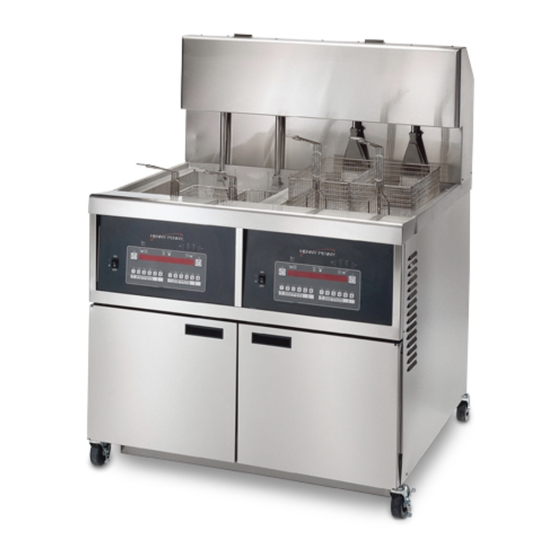
- Page 1 Model OFE/OFG/OEA/OGA-341, 342 Henny Penny High Volume Open Fryer Model OFE/OFG-341 Model OFE/OFG-342 Model OEA/OGA-341 Model OEA/OGA-342 TECHNICAL MANUAL...
- Page 2 Model OFE/OFG/OEA/OGA-341, 342...
- Page 3 The Model OFG/OGA-34X open fryer is equipped with a continuous pilot. But the open fryer can not be operated without electric power. The unit will automatically return to normal operation when power is restored.
-
Page 4: Table Of Contents
Wiring Diagrams Section 3. PARTS INFORMATION ...3-1 3-1. Introduction ...3-1 3-2. Genuine Parts ...3-1 3-3. When Ordering Parts...3-1 3-4. Prices ...3-1 3-5. Delivery ...3-1 3-6. Warranty ...3-1 3-7. Recommended Spare Parts for Distributors ...3-1 TABLE OF CONTENTS Model OFE/OFG/OEA/OGA-341, 342 Page... -
Page 5: Section 1. Troubleshooting
This section provides troubleshooting information in the form of an easy to read table. If a problem occurs during the first operation of a new fryer, recheck the Installation Section of the Operator’s Manual. Before troubleshooting, always recheck the Operation Section of the Operator’s Manual. -
Page 6: Troubleshooting
Probe Replacement Section; “E6” • Faulty high limit • Check high limit per the appropriate High Temperature Limit Control Section; “E10” • Faulty drain switch • Check drain switch per Drain Microswitch Section; “E15" Model OFE/OFG/OEA/OGA-341, 342 CORRECTION 1003... - Page 7 • Improper or bad • Use recommended shortening shortening • Improper filtering • Refer to the Filtering the Shortening Section in Operator’s Manual • Improper rinsing after • Clean and rinse the frypot; then dry cleaning the fryer thoroughly Model OFE/OFG/OEA/OGA-341, 342 CORRECTION...
- Page 8 • Defective motor • Check/replace motor • Motor thermal • Reset thermal switch on filter motor protector tripped • Clogged lines or • Remove and clean pump and lines pump • Replace pump seal, rotor and rollers Model OFE/OFG/OEA/OGA-341, 342 CORRECTION 1003...
-
Page 9: Error Codes
Turn switch to OFF, then back to ON; if display shows any of the error codes, try to reinitialize the control (Special Program Mode Section of Operator’s Manual); if error code persists, replace the control panel per Complete Control Panel Replacement Section Model OFE/OFG/OEA/OGA-341, 342... - Page 10 I/O board “E-92” 24 VAC fuse on I/O open Model OFE/OFG/OEA/OGA-341, 342 PANEL BOARD CORRECTION Press the timer button to try the ignition process again, and if “E-20 A” persists, check the air switch per Vacuum Switch Section Press the timer button to try the ignition process again, and if “E-20 B”...
-
Page 11: Section 2. Maintenance
The red reset button is located under the control panel, in the front of the fryer. (Figure 2-1). This allows heat to be supplied to the frypot. -
Page 12: High Temperature
If the circuit is open, replace the control, then continue with this procedure. (If the circuit is closed, the high limit is not defective. Re- connect the two electrical wires.) Model OFE/OFG/OEA/OGA-341, 342 1003... - Page 13 To avoid electrical shock or other injury, run the capillary line under and away from all electrical power wires and terminals. The tube must never be in such a position where it could accidentally touch the electrical power terminals. Model OFE/OFG/OEA/OGA-341, 342...
-
Page 14: Complete Control Panel Replacement
In the off position, the circuit should be open. If the switch checks defective, replace by continuing with this procedure. Figure 2-11. Model OFE/OFG/OEA/OGA-341, 342... -
Page 15: Temperature Probe Replacement (Gas)
2. Drain the shortening from the frypot. 3. Remove the control panel and heat shield from control area. Figure 2-13. 4. Using a ½ inch wrench, remove the nut on the compression fitting. Figure 2-14. Model OFE/OFG/OEA/OGA-341, 342... -
Page 16: Temperature Probe Replacement (Electric)
Excess force will damage probe. 8. Connect new probe to PC board and replace control panel. 9. Replace shortening, and turn power on to check out fryer. The temperature probe relays the actual shortening temperature to the control board. If it becomes disabled, “E06” shows in the display. -
Page 17: Flame Sensor/Pilot/Ignitor Assembly (Gas)
7. Reconnect new probe onto wires, replace rear cover, and fryer is now ready for use. The Henny Penny open fryer (gas) has electronic spark ignition that lights a standing pilot. The gap between the spark electrode and the pilot hood should be1/8 of an inch (3.18 mm). The flame sensor recognizes the pilot flame and allows gas to continue to the pilot. - Page 18 4. Using a 7/16” wrench, loosen the nut on the pilot tube and pull tube from assembly. Figure 2-21. 5. Remove the two screws securing the assembly and pull assembly from unit. Figure 2-22. 6. Now the flame sensor or or pilot assembly can be removed from bracket. Model OFE/OFG/OEA/OGA-341, 342 1003...
-
Page 19: Ignition Module
2. Remove the control panel and heat shield from control area. Figure 2-23. 3. Using a 3/8 inch socket, remove the two nuts securing the module. Figure 2-24. 4. Label and remove the wires at module. Figure 2-25. 5. Install new module in reverse order. Model OFE/OFG/OEA/OGA-341, 342... -
Page 20: Transformer Replacement
PC shield and remove shield. Figure 2-28. 4. Disconnect the wire assemblies from the appropriate board. 5. Using a 5/16” nut-driver or wrench, remove the 4 nuts securing the appropriate board to the shroud. 6. Install the new board in reverse order. Model OFE/OFG/OEA/OGA-341, 342 1003... - Page 21 5. Label and remove wires from air switch. Figure 2-31. 6. Install new vacuum switch in reverse order. To avoid property damage, do not tamper with, or disas semble this component. It is set and sealed from the factory and is not to be adjusted. Model OFE/OFG/OEA/OGA-341, 342 2-11...
-
Page 22: Filter Switch Replacement
REPLACEMENT Figure 2-34 2-12 “open”, cutting off the pilot flame. This will prevent the fryer from heating while shortening is being drained from the frypot. 1. Remove electrical power supplied to the unit. To avoid electrical shock or property damage, move the power switch to OFF and disconnect main circuit breaker, or unplug cord at wall receptacle. - Page 23 CIRCUIT BREAKERS AT THE CIRCUIT BREAKER BOX OR UNPLUG SERVICE CORD FROM WALL RECEPTACLE. TURN OFF THE MAIN GAS SUPPLY TO THE FRYER AND DISCONNECT AND CAP THE MAIN SUPPLY LINE TO FRYER, OR POSSIBLE EXPLOSION COULD RESULT. Model OFE/OFG/OEA/OGA-341, 342 2-13...
-
Page 24: Gas Control Valve Replacement
2. Label and remove wires from gas valve. Figure 2-38 3. Using a 7/16 wrench, remove the pilot line from the gas valve. Figure 2-39. 4. Using a 1-inch wrench, loosen the nut securing the main gas inlet line to the gas valve. Figure 2-40. Model OFE/OFG/OEA/OGA-341, 342 1003... -
Page 25: Blower Motor Replacement
To avoid electrical shock or property damage, move the power switch to OFF and disconnect main circuit breaker, or unplug cord at wall receptacle. 2. Remove screws securing the rear cover to the unit. Figure 2-43. Model OFE/OFG/OEA/OGA-341, 342 2-15... - Page 26 3. Remove the wire cover from the blower motor housing. Figure 2-44. 4. Remove wire nuts connecting blower motor wires to wires in conduit. Figure 2-45. 5. Loosen conduit from blower motor. Figure 2-46. 7. Remove screws connecting flue to blower. Figure 2-47. Model OFE/OFG/OEA/OGA-341, 342 1003...
-
Page 27: Heating Elements (Electric)
Be aware the other control on 2-frypot units will have power. 2. Remove rear cover. Figure 2-49. 3. Using a flat-head screwdriver, remove the appropriate wires from the terminal blocks. Figure 2-50. Model OFE/OFG/OEA/OGA-341, 342 2-17... - Page 28 3. Using a Phillip’s-head screwdriver, remove the screws securing the element to the element hinges. Figure 2-51. 4. Pull element from fryer and replace with new element, following steps in reverse order. . Connect the power cord to the wall receptacle or close wall circuit breaker.
-
Page 29: Heating Contactors (Electric)
Figure 2-52 Figure 2-53 1003 Each well of an electric fryer requires two switching contactors. The first in line is the primary contactor and the second in line is the heat contactor. When open, the primary contactor does not allow power to flow to the heat contactor. When closed, the primary supplies voltage to the heat contactor. - Page 30 Be aware the other control on 2-frypot units will have power. 1. Remove only the wires directly connected to the contactor being replaced. Label the wires for replacement. Figure 2-54. Model OFE/OFG/OEA/OGA-341, 342 Results The voltage should read the same at each terminal...
- Page 31 Label the wires for replacement. Figure 2-56. 2. Remove screws securing contactor to unit and remove contactor. Figure 2-57. 3. Install new contactor. 4. Reinstall the control panel. 5. Reconnect power to the fryer and test for proper operation. Model OFE/OFG/OEA/OGA-341, 342 2-21...
-
Page 32: Speaker Assembly
6. Pull the speaker connector from control board. Figure 2-61. 7. Using a 5/16” nut-driver or wrench, remove the 2 nuts securing the speaker to the shield and remove speaker from panel. Figure 2-62 8. Install new speaker in reverse order. Model OFE/OFG/OEA/OGA-341, 342 1003... -
Page 33: High Temperature Limit Control (Electric)
OFF and disconnect main circuit breaker, or unplug cord at wall receptacle. 2. Remove rear cover of fryer. Figure 2-64. 3. Remove the two screws securing the high limit to the bracket and pull high limit from bracket. Figure 2-65. Model OFE/OFG/OEA/OGA-341, 342 2-23... - Page 34 Be aware the other control on 2-frypot units will have power. 1. Drain the shortening from the frypot. 2. Remove capillary from brackets on upper part of element. Figure 2-67. 3. Remove capillary bulb from bulb holder inside the frypot. Model OFE/OFG/OEA/OGA-341, 342 1003...
- Page 35 1003 4. Straighten the capillary tube, and pull capillary tube through the hole in the element hinge, from the rear of the fryer. 5. Remove the defective control from the fryer. 6. Straighten the capillary tube on the new high limit, and thread the capillary tube through the hole in the element hinge.
-
Page 36: Filter Pump And Motor Removal
4. Loosen screws on conduit connector and pull conduit from the connector. Figure 2-72. 5. Disconnect filter union to filter in drain pan. 6. Using a pipe wrench, disconnect the outlet pipe to frypot. Figure 2-73. Model OFE/OFG/OEA/OGA-341, 342 1003... -
Page 37: Motor Removal
2. Remove control panel. 3. Label and remove wires from transformer. Figure 2-75. 4. Using 3/8” nut-driver or wrench, remove nuts securing transformer to panel and remove transformer from panel. Figure 2-76. 5. Install new transformer in reverse order. Model OFE/OFG/OEA/OGA-341, 342 2-27... -
Page 38: Autolift Pc Board Replacement (If Applicable)
OFF and disconnect main circuit breaker, or unplug cord at wall receptacle. 2. Drain shortening from frypot. 3. Remove basket and knock pin from basket hanger. Figure 2-78. 4. Remove rear cover. Figure 2-79. Model OFE/OFG/OEA/OGA-341, 342... - Page 39 5. Disconnect actuator connector. Figure 2-80. 6. Remove female connector from plate. Figure 2-81. 7. Using 7/16” socket, remove the 4 nuts securing the support plate. 2 nuts are behind the insulation. Figures 2-82 & 2-83. Model OFE/OFG/OEA/OGA-341, 342 2-29...
- Page 40 Figure 2-84. 9. Using a 15T torx driver, remove the 2 torx screws from the back shroud, and pull the actuator from the unit. Figure 2-85. 10. Install new actuator in reverse order. Model OFE/OFG/OEA/OGA-341, 342 1003...
- Page 41 Model OFE/OFG/OEA/OGA-341, 342 Drain switch wired N/C 2-31...
- Page 42 Model OFE/OFG/OEA/OGA-341, 342 Drain switch wired N/C 2-32...
- Page 43 Model OFE/OFG/OEA/OGA-341, 342 Drain switch wired N/C 2-33...
- Page 44 Model OFE/OFG/OEA/OGA-341, 342 Drain switch wired N/C 2-34...
- Page 45 Model OFE/OFG/OEA/OGA-341, 342 Drain switch wired N/C 2-35...
- Page 46 Model OFE/OFG/OEA/OGA-341, 342 Drain switch wired N/C 2-36...
- Page 47 Model OFE/OFG/OEA/OGA-341, 342 Drain switch wired N/C 2-37...
- Page 48 Model OFE/OFG/OEA/OGA-341, 342 Drain switch wired N/C 2-38...
- Page 49 Model OFE/OFG/OEA/OGA-341, 342 Drain switch wired N/O 2-39...
- Page 50 Model OFE/OFG/OEA/OGA-341, 342 Drain switch wired N/O 2-40...
- Page 51 Model OFE/OFG/OEA/OGA-341, 342 Drain switch wired N/O 2-41...
- Page 52 Model OFE/OFG/OEA/OGA-341, 342 Drain switch wired N/O 2-42...
- Page 53 Model OFE/OFG/OEA/OGA-341, 342 Drain switch wired N/O 2-43...
- Page 54 Model OFE/OFG/OEA/OGA-341, 342 Drain switch wired N/O 2-44...
- Page 55 Model OFE/OFG/OEA/OGA-341, 342 Drain switch wired N/O 2-45...
- Page 56 Model OFE/OFG/OEA/OGA-341, 342 Drain switch wired N/O 2-46...
-
Page 57: Section 3. Parts Information
This section list the replaceable parts of the Henny Penny OFE/OFG- 32X Open Fryers. Use only genuine Henny Penny parts in your fryer. Using a part of lesser quality or substitute design may result in damage to the unit or personal injury. - Page 58 √ 1 60536 √ 2 50290 √ 3 54561 √ 4 72515 √ 5 TS22-012 √ recommended parts Model OFE/OFG/OEA/OGA-341, 342 Description Transformer – 120-24V Transformer – 230-24V Autolift PC Board Speaker Assy. Vacuum Switch (Gas Only) Transformer-Autolift Qty. per Well...
- Page 59 (OGA-SN: BS0804002 & Below) Kit - Ignition Module – CE (OFG-SN: BR0803010 & Below) (OGA-SN: BS0804002 & Below) High Limit Relay – 10A-24V Temperature Probe Assy. Vacuum Switch Hose Assy – Gas Line (Flex) – 342 Model OFE/OFG/OEA/OGA-341, 342 Qty. per Well...
- Page 60 NS03-067 23389 64055-03 64055-16 21629 60032 23118 Model OFE/OFG/OEA/OGA-341, 342 Gas Burner Assembly Description Union – ½ NPT Female - BI Elbow – Street ½ x 90 BI Nut – Locking ½-20 x 3/16 LON Weldment - Manifold Orifices – Burner - LP Orifices –...
- Page 61 EF02-104 √ 4 14970 60722 19923 60838 √ recommended parts/*not shown Model OFE/OFG/OEA/OGA-341, 342 Electric Components Description Mercury Contactor – 24V Standard Contactor – 24V Assy.-240v E/M Heat Contactor-CE-240V Assy.-240v E/M Heat Contactor-CE-230V Fuse and Holder Assembly (SN: BC0707002 & below) 2 Fuse –...
- Page 62 Item No. Part No. 60367 √ 14849 √ recommended parts Model OFE/OFG/OEA/OGA-341, 342 Description Guard - High Limit Temperature Probe Assembly (Gas units) Qty. per Well...
- Page 63 Model OFE/OFG/OEA/OGA-341, 342...
- Page 64 32794 03498 03551 03499 03552 03003 √ recommended parts Model OFE/OFG/OEA/OGA-341, 342 Description Screen Assembly, Filter Crumb Catcher Top Filter Screen Bottom Filter Screen - SN: BR0502006 & below) 1 Bottom Filter Screen - SN: BR0502007 & above) 1 Filter Envelope Clips Filter Envelope Paper (100 per Carton) Drain Pan Cover - 341-Before Jan.
- Page 65 Rod - Drain Valve - Gas (normally open) - CE Microswitch – Drain (behind bracket) Caster-4 inch Union - Handle Fitting Drain Valve and Coupling Assy. Model OFE/OFG/OEA/OGA-341, 342 9 15 10 14 11 12 13 Qty. per Unit 1 (per well)
- Page 66 14416 14417 √ recommended parts *not shown 3-10 Model OFE/OFG/OEA/OGA-341, 342 Description Gas Valve - 24V - Nat. Gas Valve - 24V - Nat. - CE Gas Valve - 24 V - LP Gas Valve - 24V - LP - CE Weld Assy.
- Page 67 21645 60810 21643 59565 √ TS22-012 √ recommended parts Model OFE/OFG/OEA/OGA-341, 342 Description Transformer – 120-24V Transformer – 230-24V Control Panel Assy. less transformers Control Board Assy – China I/O Board w/Power Supply Assy. Assy -Wire-Temp Interconnect - 2 pin...
- Page 68 Panel – Left Side - Jan. 1, 2006 & After Panel – Right Side - Before Jan. 1, 2006 Panel – Right Side -Jan. 1, 2006 & After Bearing – Auto-Lift (when applicable) Model OFE/OFG/OEA/OGA-341, 342 Qty. per Unit 1 (per well) 1 (per well)
- Page 69 ½ Size Basket 1/3 Size Basket Full Size Basket Basket, 1/2 Size, Reduced Weight Skimmer - Square Mesh Kit – Joining (Non-Auto-Lift fryers only!) Model OFE/OFG/OEA/OGA-341, 342 Qty. per Well 1 (per unit) 1 (per unit) 1 (per unit) 1 (per unit)
- Page 70 Spreader - Front - 34X Strap - Spreader - 34X Weldment - Spreader - 34X Strap - Vertical - Rear Strap - Brace Vertical - Rear Strap - Capillary Tube Guard - Position Hi Limit Model OFE/OFG/OEA/OGA-341, 342 Qty. per Well...
- Page 71 Description Pilot - Tee Style & Ignitor Assy. Orifice – Pilot – Nat. Orifice – Pilot – LP Sensor - Flame - Pilot Tube – Pilot Tube – Pilot – CE Model OFE/OFG/OEA/OGA-341, 342 Qty. per Well 3-15...
- Page 72 32497 32498 recommended parts/*not shown 3-16 Electric Components Description High Limit - 425º F Assy-Heater Terminal Block Temperature Probe Assembly Microswitch EMC Filter Board - CE Assy – 4 Inch Terminal Block Model OFE/OFG/OEA/OGA-341, 342 Qty. per Well...
- Page 73 FP02-040 FP02-032 FP01-098 FP02-023 21801 FP01-200 *not shown Model OFE/OFG/OEA/OGA-341, 342 OFG/OGA-342 Description Elbow – Male Nipple – ½ x 24 LG BI Elbow – ½ NPT x 90 Female - BI Nipple – ½ x 17 LG BI Nipple – ½ x 4 LG BI Male Connector –...
- Page 74 Item No. Part No. 24809 70102 36030 38912 3-18 Model OFE/OFG/OEA/OGA-341, 342 Description Hook – Basket Hanger – ½-Size Hook – Basket Hanger – ½-Size Bracket – 1/3-Size Basket Bracket – 1/2-Size Basket (before 06/01/05) Qty. per Well (before 06/01/05)
- Page 75 60814 √ 35916 √ 60536 √ 60792 √ 51795 √ 65098 √ 65567 36224 Model OFE/OFG/OEA/OGA-341, 342 DESCRIPTION Adjustable Relay Base Adjustable Time Delay Relay 24VAC Coil Relay 24V Dual Face Timer Thermostat Kit E/M Bulb Mounting Clip (Gas) Transformer 120V to 24V (Gas) Transformer 24V/230V (Electric) Indicator Light –...
- Page 76 U BOLT 1/4-20 FOR 3/4 DIA BRACKET-TUBE SCREW #10 X 1/2 PH PHD TEK 2 C ASSY-TUBE RETURN LINE FITTING CONNECTOR MALE ELBOW-1/2NPT X 90 FEMALE BI NIPPLE-1/2 NPT X 2.00L BI ASSY-PUMP RETURN TUBE BRACKET-TUBE REAR SUPPORT Model OFE/OFG/OEA/OGA-341, 342 Qty.
- Page 77 OVER-THE-TOP FAUCET ASSY. (March 1, 2006 & After) Item No. Part No. 71899 17333 71665 17334 71830 1209 Description ASSY. – 341 FAUCET FEMALE DISCONNECT ASSY. – 342 FAUCET MALE DISCONNECT HANDLE – DIVERTER VALVE ( Model OFE/OFG/OEA/OGA-341, 342 Qty. Direct-Connect units) 3-21...
- Page 78 DISCONNECT-FEMALE HOSE-SHORTENING DISCARD VALVE-3/4 CHECK BRACKET-34X D/C REAR SUPPORT NIPPLE-3/4 X 27 LG-BI SCREW #10 X 1/2 PH PHD TEK 2 C PLUG-3/4 PIPE-BI NIPPLE-3/4 NPT X 4 IN LONG BI NIPPLE-3/4 X 6 LG-BI Model OFE/OFG/OEA/OGA-341, 342 Qty. Qty.
- Page 79 SCREW #10 X 1/2 PH PHD TEK 2 C BRACKET-TUBE COTTER PIN CONNECTOR – ½ MALE ELBOW VALVE – DIVERTER FITTING CONNECTOR MALE ASSY – PUMP RETURN TUBE BRACKET-TUBE REAR SUPPORT STOP – D/C EXTENSION ROD Model OFE/OFG/OEA/OGA-341, 342 Qty. 3-23...
- Page 80 NIPPLE-1/2 NPT X 2.00L BI SCREW #10 X 1/2 PH PHD TEK 2 C U BOLT 1/4-20 FOR 3/4 DIA RINSE HOSE DISCONNECT FEMALE RINSE HOSE DISCONNECT MALE NIPPLE 3/8 CLOSE RETURN LINE - UPPER WELD ASSY-TUBE COUPLING PLATE Model OFE/OFG/OEA/OGA-341, 342 Qty. Qty.
- Page 81 FP01-090 FP02-018 SC01-209 SC03-001 SC06-013 17333 17334 FP02-001 60610 71462 73188 Model OFE/OFG/OEA/OGA-341, 342 Description FITTING CONNECTOR MALE PIN-COTTER CONNECTOR 1/2 MALE ELBOW 1/2" 90 STRT ELL,S.S. VALVE-DIVERTER VALVE-3/4 CHECK STOP-D/C EXTENSION ROD ASSY-PUMP RETURN TUBE BRACKET-TUBE REAR SUPPORT BRACKET-TUBE...
- Page 82 FP01-090 FP02-018 SC03-001 SC06-013 17333 17334 FP02-001 60610 71462 73188 3-26 Model OFE/OFG/OEA/OGA-341, 342 Description FITTING CONNECTOR MALE PIN-COTTER CONNECTOR 1/2 MALE ELBOW VALVE-DIVERTER ASSY-PUMP RETURN TUBE BRACKET-TUBE REAR SUPPORT BRACKET-TUBE ASSY-TUBE RETURN LINE A/LIFT TUBE-LINE OIL RETURN ASSY-DIV TUBE LS A/LIFT...
Need help?
Do you have a question about the OEA/OGA-341 and is the answer not in the manual?
Questions and answers