Casablanca Isotope Owner's Manual
C30g45h
Hide thumbs
Also See for Isotope:
- Owner's manual (20 pages) ,
- Owner's manual (16 pages) ,
- Installation instructions manual (20 pages)
Table of Contents
Advertisement
Quick Links
I
sotope
Read and Save theSe inStRuCtionS!
Safety and the proper operation of your Casablanca fan both require a thorough knowledge of the product and
proper installation. Therefore, before attempting to install and operate your Casablanca fan, read this Owner's
Manual completely and carefully. Retain this manual and other included documentation for future reference.
Caution: to avoid possible electrical shock, make certain that electricity is turned off at the circuit breaker
or fuse box before attempting any installation procedure.
PaRTS guide . . . . . . . . . . . . . . . . . . . . . . . . . . . . . . . . . . . . . . . . . . . . . . . . . . . . . . . . . . . . . . . . . . . . . . . . . . . 3
inTROduCTiOn. . . . . . . . . . . . . . . . . . . . . . . . . . . . . . . . . . . . . . . . . . . . . . . . . . . . . . . . . . . . . . . . . . . . . . . . . . 4
Before You Start. . . . . . . . . . . . . . . . . . . . . . . . . . . . . . . . . . . . . . . . . . . . . . . . . . . . . . . . . . . . . . . . . . . . . . . . . 4
Safe use . . . . . . . . . . . . . . . . . . . . . . . . . . . . . . . . . . . . . . . . . . . . . . . . . . . . . . . . . . . . . . . . . . . . . . . . . . . . . . 4
MOunTing ReCOMMendaTiOnS. . . . . . . . . . . . . . . . . . . . . . . . . . . . . . . . . . . . . . . . . . . . . . . . . . . . . . . . . . . 5
general guidelines . . . . . . . . . . . . . . . . . . . . . . . . . . . . . . . . . . . . . . . . . . . . . . . . . . . . . . . . . . . . . . . . . . . . . . 5
getting Started. . . . . . . . . . . . . . . . . . . . . . . . . . . . . . . . . . . . . . . . . . . . . . . . . . . . . . . . . . . . . . . . . . . . . . . . . . 5
Ceiling MOunTing PRePaRaTiOn and inSTallaTiOn. . . . . . . . . . . . . . . . . . . . . . . . . . . . . . . . . . . . . . . . 6
Ceiling Mounting Plate installation. . . . . . . . . . . . . . . . . . . . . . . . . . . . . . . . . . . . . . . . . . . . . . . . . . . . . . . . . . . 6
MOTOR HOuSing inSTallaTiOn . . . . . . . . . . . . . . . . . . . . . . . . . . . . . . . . . . . . . . . . . . . . . . . . . . . . . . . . . . . 7
Blade PRePaRaTiOn and inSTallaTiOn . . . . . . . . . . . . . . . . . . . . . . . . . . . . . . . . . . . . . . . . . . . . . . . . . . 11
ligHT FiXTuRe inSTallaTiOn . . . . . . . . . . . . . . . . . . . . . . . . . . . . . . . . . . . . . . . . . . . . . . . . . . . . . . . . . . . . 12
PRIME•TOUCH2® COnTROl InSTAllATIOn . . . . . . . . . . . . . . . . . . . . . . . . . . . . . . . . . . . . . . . . . . . . . . . . . 13
Control Bracket installation . . . . . . . . . . . . . . . . . . . . . . . . . . . . . . . . . . . . . . . . . . . . . . . . . . . . . . . . . . . . . . . 13
Remote Operation . . . . . . . . . . . . . . . . . . . . . . . . . . . . . . . . . . . . . . . . . . . . . . . . . . . . . . . . . . . . . . . . . . . . . . 14
Changing Transmitter Frequency Setting . . . . . . . . . . . . . . . . . . . . . . . . . . . . . . . . . . . . . . . . . . . . . . . . . . . . 14
TROuBleSHOOTing TiPS . . . . . . . . . . . . . . . . . . . . . . . . . . . . . . . . . . . . . . . . . . . . . . . . . . . . . . . . . . . . . . . . 15
CaRe ReCOMMendaTiOnS . . . . . . . . . . . . . . . . . . . . . . . . . . . . . . . . . . . . . . . . . . . . . . . . . . . . . . . . . . . . . . 16
PROduCT SPeCiFiCaTiOnS . . . . . . . . . . . . . . . . . . . . . . . . . . . . . . . . . . . . . . . . . . . . . . . . . . . . . . . . . . . . . . 16
®
owner's Manual
CONTENTS
Pn C3543001 at0309
1
Advertisement
Table of Contents

Related Manuals for Casablanca Isotope


Summary of Contents for Casablanca Isotope
-
Page 1: Table Of Contents
sotope ® owner’s Manual Read and Save theSe inStRuCtionS! Safety and the proper operation of your Casablanca fan both require a thorough knowledge of the product and proper installation. Therefore, before attempting to install and operate your Casablanca fan, read this Owner’s Manual completely and carefully. - Page 2 Warranty page inside the front cover of your Owner’s Manual if it does not appear there already. These numbers are found on the motor identification plate affixed to the fan motor in the location shown below: Motor Identification Plate ® isotope tYPe hanGeR tYPe C30G45H...
-
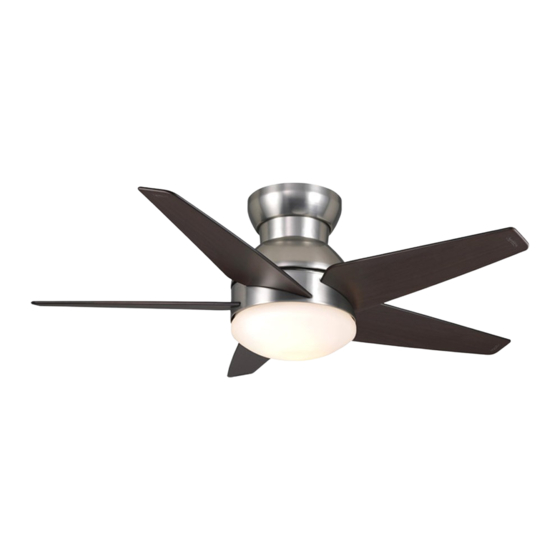
Page 3: Parts Guide
Parts guide item # description Picture (not to scale) Quantity Motor Housing Ceiling Mounting Plate Phillips Screwdriver Screw Pack (a): 2 ea " x 8-32" Roundhead screws and Washers Screw Pack (a): 2 ea " Wood Screws and Washers Screw Pack (a): 2 ea 3"... -
Page 4: Introduction
F o r a s s i s t a n c e i n o b t a i n i n g 84" edge of blade service, call Casablanca Fan Company at to floor 1-888-227-2178 or contact your local authorized Casablanca dealer. -
Page 5: Mounting Recommendations
® sotope MOUNTING RECOMMENDATIONS GENERAl GUIDElINES Before mounting your Casablanca fan, read the following helpful recommendations. The location of the fan, air circulation, and fan size are all important factors to consider before installation. Location Ceiling fans have practical uses in almost every room in your home. We suggest you follow these mounting recommendations as you decide where to install your Casablanca fan. -
Page 6: Ceiling Mounting Preparation And Installation
faN INSTallaTION CEIlINg MOUNTINg PlaTE INSTallaTION CeiLinG haRdWaRe (not to scale) Screw Pack a: Screw Pack a: Wire nuts (3) 1½" Wood Screws (2) and Washers (2) Phillips Screwdriver Ceiling Mounting Plate Screw Pack a: Screw Pack a: 3" Wood Screws (2) "... -
Page 7: Motor Housing Installation
® sotope MOTOR hOUSING INSTAllATION CeiLinG haRdWaRe (not to scale) Screw Pack B Wire nuts (3) Fan Mounting Screws (2) Fan Body Step 2a. unlock the canopy cover from the canopy ring tabs to loosen and bring down to fan body as shown in Figure #1. - Page 8 3 GReen GRound Step 2c. Trim excess motor wires to six inches and WiReS attach the fan wires to the ceiling bracket wiring by placing the bare end of the wires side by side and then securing with a wire nut. Test that the connection is secure by pulling on the wire nut.
- Page 9 ® sotope Step 2f. using both hands, lift the fan body from the hanGinG SLot hook and position the hanging slots on both sides of the fan body, using the two fan mounting screws located on the ceiling mounting plate. Slide the two slots on both sides of the fan body between the head of the screws and rotate the fan body clockwise into the elongated slots as shown in Figure #7.
- Page 10 Step 2i. To install the canopy ring you will need to lift straight up on the canopy ring. lock the CanoPY RinG taBS and the CanoPY taB hoLdeRS by rotating the canopy cover clockwise as shown in Figure # 11, locking the canopy ring in to place.
-
Page 11: Blade Preparation And Installation
® sotope BladE INSTallaTION BlADE hARDwARE (not to scale) Blade Screws and Blades (5) Phillips Washers (16) Screwdriver Blade installation Step 3a. locate the Casablanca logo on the end of the blade as shown in Figure #1. Slide the end of the blade with the three holes into the slot located on the blade ring. -
Page 12: Light Fixture Installation
lIghT BUlB aNd glaSS INSTallaTION haRdWaRe (not to scale) 50 -watt Glass Shade halogen Bulbs (2) install halogen Bulbs Step 4. Screw the two bulbs into the light fixture as shown in Figure #1. iMPoRtant! When installing a halogen bulb, carefully cut off the end of the plastic sleeve the bulb comes in and hold the bulb by the plastic sleeve to screw it into the socket. -
Page 13: Prime•Touch2® Control Installation
® RIME• OUCH PrIME•TOUCH ® W-505 CONTrOl INSTallaTION haRdWaRe (not to scale) SCReWS, Wood SCReWS, 6-32 X /8" (2) 1" (2) 12v BatteRY W-505 W-505 dRYWaLL anChoRS, SCReWS, ContRoL ContRoL 6-32 (2) 6-32 X 1"(2) (tRanSMitteR) BRaCKet CONTrOl BraCKET INSTallaTION SAFETY FIRST: To reduce the risk of electrical shock, this fan must be installed with an isolating wall control/switch. -
Page 14: Remote Operation
® RIME• OUCH rEMOTE OPEraTION lIGhT Fan Control To start the fan, press the appropriate speed button to run the fan at the desired Send Signal speed. hIGh • = lOW speed •• = MED speed ••• = HIGH speed To turn off the fan, press the Fan OFF button. -
Page 15: Troubleshooting Tips
® sotope TROUBlEShOOTING TIPS Please refer to this troubleshooting guide before requesting service or contacting your dealer for assistance. PRoBLeM PoSSiBLe ReMedieS Fan will not start • Check the main circuit fuses, circuit breakers, and wall switch position. Check all wire connections. -
Page 16: Care Recommendations
Consult the dealer or an experienced radio/TV technician for help. Note: Any changes or modifications to the transmitter or receiver not expressly approved by Casablanca Fan Company may void one’s authority to operate this remote control. - Page 17 Fans & Air Quality Interior & Exterior Lighting Best Sellers hunter purifiers crystal pendant lights design house ceiling fans ceiling fan companies pendant lighting alabaster tech lighting fire hunter retro fan semi flush mount ceiling light minka aire cirque artemis minka aire fan linear crystal chandelier candle chandeliers kitchen fan...
Need help?
Do you have a question about the Isotope and is the answer not in the manual?
Questions and answers