Casablanca Isotope Installation Instructions Manual
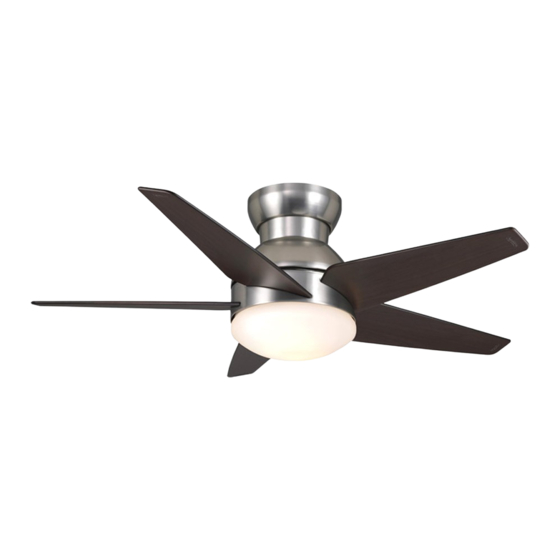
44 in. indoor snow white ceiling fan with light
Hide thumbs
Also See for Isotope:
- Owner's manual (20 pages) ,
- Owner's manual (16 pages) ,
- Owner's manual (17 pages)
Table of Contents

Subscribe to Our Youtube Channel
Related Manuals for Casablanca Isotope


Summary of Contents for Casablanca Isotope
-
Page 1: Table Of Contents
1.888.227.2178 What to Expect with Your Installation Preparation Ceiling Plate Hanging the Fan 30 inches 7 feet Ladder Wiring Wall Control Canopy Blades Maintenance Glass Wall Control & Cleaning Troubleshooting M8546-01 • 03/23/17 • © 2017 Casablanca Fan Company... -
Page 2: What To Expect With Your Installation
This device complies with Part 15 of the FCC Rules. Operation is subject to the following two conditions: (1) This device may not cause harmful interference, and (2) this device must accept any interference received, including interference that may cause undesired operation. M8546-01 • 03/23/17 • © 2017 Casablanca Fan Company... -
Page 3: Preparation
9/64” Drill Bit Screwdriver bag. The symbols can be used (included) (optional) (optional) to identify the appropriate If mounting to a support structure, you hardware for each step. will also need these tools. M8546-01 • 03/23/17 • © 2017 Casablanca Fan Company... -
Page 4: Ceiling Plate
To avoid possible electrical shock, before installing your fan, disconnect the power by turning off the circuit breakers to the Refer to warning w.1 on pg. 2 outlet box associated with the wall switch location. M8546-01 • 03/23/17 • © 2017 Casablanca Fan Company... -
Page 5: Hanging The Fan
Note: Remove the canopy screws from the shipping holes in the triangular seat. plate inside the canopy. Discard the shipping plate but save the screws for canopy installation. Note: Wiring not shown for visual clarity. M8546-01 • 03/23/17 • © 2017 Casablanca Fan Company... - Page 6 Connect the white wires together. hook of the ceiling mounting plate. Connect the blue wires together. The third, loose wire will not be used for your installation. It is capped to prevent usage. M8546-01 • 03/23/17 • © 2017 Casablanca Fan Company...
- Page 7 Spread the wires apart, with the grounded wires on one side of the outlet box and the ungrounded wires on the other side of the outlet box. M8546-01 • 03/23/17 • © 2017 Casablanca Fan Company...
- Page 8 Spread the wires apart, with the grounded wires on one side of the outlet box and the ungrounded wires on the other side of the outlet box. M8546-01 • 03/23/17 • © 2017 Casablanca Fan Company...
- Page 9 M8546-01 • 03/23/17 • © 2017 Casablanca Fan Company...
- Page 10 M8546-01 • 03/23/17 • © 2017 Casablanca Fan Company...
-
Page 11: Blades
Note: The blades will only fit properly over the Repeat this process for all five blades. screws holes one way. If the holes do not line up, remove the blade and turn it over. M8546-01 • 03/23/17 • © 2017 Casablanca Fan Company... -
Page 12: Operation Instructions
Align the notches in the globe assembly with the tabs in the light kit fitter. Carefully lift the globe assembly as far as it will go, then rotate it counter- clockwise until it is held into place by the three tabs. M8546-01 • 03/23/17 • © 2017 Casablanca Fan Company... - Page 13 This device complies with Part 15 of the FCC Rules. Operation is subject to the following conditions: (1) this device may not cause harmful interference, and (2) this device must accept any interference received, including interference that may cause undesired operation. M8546-01 • 03/23/17 • © 2017 Casablanca Fan Company...
- Page 14 Reference the included remote function card Installing the Wall Plate for information on how to use your wall control! Push the wall plate onto the Wall Plate Bracket. It should snap into place. M8546-01 • 03/23/17 • © 2017 Casablanca Fan Company...
- Page 15 Wall Control For Dual Switches www.CasablancaFanCo.com 1.888.227.2178 To install the Casablanca Wall Control into a dual switch location, Verify which switch controls the fan light. you will need a wall plate with both a standard switch and rocker Turn on power for the fan.
- Page 16 Reference the included remote function card provided wire nuts. for information on how to use your wall control! Push all wires into the switch box. M8546-01 • 03/23/17 • © 2017 Casablanca Fan Company...
- Page 17 Long Dimming Mode Long Press On/Off Fan Reverse Press Long Fan Updraft Press Long Fan Downdraft Press Power On/Off Long Pair Function Press Long Reset Press (For WiFi enabled fans ONLY) M8546-01 • 03/23/17 • © 2017 Casablanca Fan Company...
- Page 18 Be sure to turn off power to the fan before performing any maintenance or relamping. Cleaning the fan - use soft brushes or cloths to prevent scratching. Cleaning products may damage the finishes. M8546-01 • 03/23/17 • © 2017 Casablanca Fan Company...
- Page 19 Casablanca Authorized Service than expected after power is successful pairing. Centers, visit turned off. www.CasablancaFanCo.com or call toll free 1-888-227-2178. M8546-01 • 03/23/17 • © 2017 Casablanca Fan Company...
- Page 20 “unpair” the remote. If applicable, the fan will turn off and the fan will turn on and the lights will flash and stay on to indicate successful pairing. lights will flash and turn off to indicate successful “unpairing.” M8546-01 • 03/23/17 • © 2017 Casablanca Fan Company...
Need help?
Do you have a question about the Isotope and is the answer not in the manual?
Questions and answers