Table of Contents
Advertisement
Quick Links
Advertisement
Table of Contents

Related Manuals for ELECTROCOMPANIET PI 2D


Summary of Contents for ELECTROCOMPANIET PI 2D
- Page 1 PI 2D Balanced Integrated Amplifier (with built-in DAC) Owner's Manual...
- Page 2 • 2 pcs. batteries. Set up procedure Before connecting the PI 2D to the mains, check that the main voltage indicated on the rear panel corresponds to the line voltage in the terri- tory where you intend to use the unit.
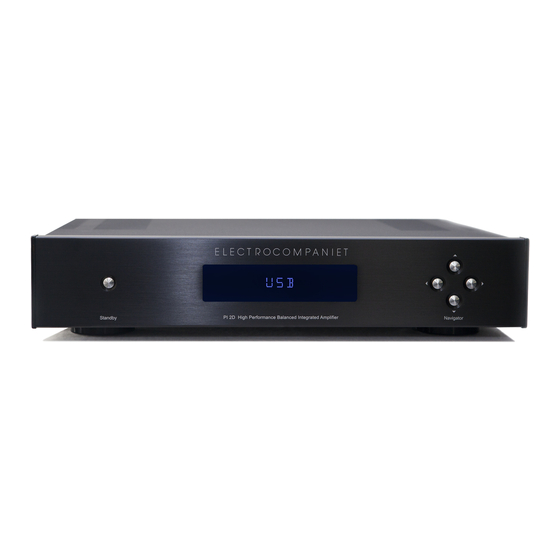
- Page 3 Connect the red connector to the plus side on the speakers and the white connector to the minus side on the speakers. Never short the positive output to ground or chassis. Always switch the PI 2D off when you connect the speakers. Front panel ( See illustration "front panel", page 8.)
-
Page 4: Navigator Window
Navigator window ( See illustration "front panel", page 8.) This window in the middle of the front panel shows which source is currently active. The listening volume will be displayed when the volume is adjusted using the remote control or the navigator up/down buttons. The display may be turned off using the DIM AMP button on the remote. -
Page 5: Error Codes
Error codes If the PI 2D is not working properly, the display will show an error code. Error text Description What to do DC L DC voltage left channel Please contact service center. DC R DC voltage right channel DC left + right channels... - Page 6 7. TOSLink 2 - switch to TOSLink 2 input. 8. USB - switch to USB input. 9. AUX - switch to AUX input. 10. No function on PI 2D. 11. AMP DIM - turn display on/off. 12. DVD - switch to DVD/Blu-ray input.
-
Page 7: Important Notice
It is normal for the PI 2D to feel warm. A good rule of thumb is to allow at least 3 - 5 cm (1 - 2 inches) of air sidewise, and 5 - 8 cm(2 - 3 inches) above the PI 2D... - Page 8 PI 2D front panel illustration...
- Page 9 PI 2D back panel illustration...
-
Page 10: How To Connect The System
How to connect the system... -
Page 11: Rated Output Power
Technical specifications PI 2D The following technical data were measured on randomized test objects and are typical data. All measurements are made at 120V / 240V // 50Hz / 60Hz Input impedance(Single-Ended/Balanced).......60/120 kOhm Output impedance............< 0,03 Ohm Noise floor (20 Hz - 20 kHz)..........< -130 dB Frequency response( - 3 dB)..........1- 225 kHz... - Page 12 Verify line voltage before use. Do not remove cover. No user serviceable parts inside. Refer servicing to qualified service personal. The warranty is void if the product is tampered with by non-authorised personnel. Use only authorized Electrocompaniet service center. Made in Norway www.electrocompaniet.no...
Need help?
Do you have a question about the PI 2D and is the answer not in the manual?
Questions and answers