
Related Manuals for ELECTROCOMPANIET ECI 6DS


Summary of Contents for ELECTROCOMPANIET ECI 6DS
- Page 1 ECI 6DS Balanced Integrated Amplifier (with integrated DAC and Streamer) Owner's Manual ENGLISH...
-
Page 2: Setup Procedure
• 2 pcs. Batteries Set up procedure Before connecting the ECI 6DS to the AC Power outlet, check that the main voltage indicated on the rear panel corresponds to the line voltage in the country were you intend to use the unit. -
Page 3: Preamp Out
RCA shorting plug. HT (Home Theatre) HT is a direct input where the volume control is bypassed. ECI 6DS will work like a power amplifier with fixed gain. When selected the output will be muted for a few seconds as a safety against accidental overload. -
Page 4: How To Connect Your System
Please read this page carefully and follow, page 20-21. SPDIF inputs ECI 6DS will accept optical SPDIF sources up to 96 kHz/24bit on inputs TOSLink1 and TOSLink2. Please use a optical TOSLink cable for this connection. Connect coaxial sources up to 192kHz/24bit to inputs COAX1 and COAX2. -
Page 5: Navigator Window
The main switch is located in the center of the lower part of the front panel. In daily operation, switch off the ECI 6DS by using the STANDBY button on the remote control. If the ECI 6DS has been switched off, allow two hours of warm-up for optimal sonic performance. When the ECI 6DS is not to be used for a long period of time, use the main switch to turn the unit off. -
Page 6: Error Codes
Error codes If the ECI 6DS is not working properly, the display will show an error code. The error codes are: Display Error Description What to do text DC FAULT LEFT DC voltage left channel Please contact service center. DC FAULT... -
Page 7: Input Configurations
Speaker: Red = positive Black or White = ground ECP5XLR: RCA to XLR adapter: 1 & 3; ground and negative = shorted 2 = positive Updating the ECI 6DS firmware Please download the update instruction from our website at: "Downloads - Firmware" area. - Page 8 ECT 4 Remote Control Universal Remote Control ECT 4 Unpacking the ECT 4 Remote Control Immediately upon receipt of the ECT 4, inspect the carton for possible dam- age during shipment. The carton and packaging have been designed to provide the safest possible protection for transport of your remote control. Unpack the unit carefully.
-
Page 9: Start Pairing
ECT 4 Remote Control Start Pairing To be able to use the ECI 6DS with ECT 4 the two devices have to be paired once. In the pairing process the devices exchange some necessary data like device ID, RF address, etc. After pairing success, ECI 6DS will be added to the device selection screen of the ECT 4 and can be used. - Page 10 3 Operating the ECI 6DS with ECT 4. After ECT 4 has been paired with ECI 6DS, you can start operating all functions. The ECT 4 is working in radio communication mode and you don't need to point the remote control at the ECI 6DS.
- Page 11 ECT 4 Remote Control ECT 4 Remote control 1. Standby - switches ECI 6DS on and off. 2. Four hot keys - controlling the devices shown at the display above each button. ECI 6DS,TV,DVD etc. 3. No function with ECI 6DS.
- Page 12 Power control and home screen Press the button to switch the ECI 6DS on, press again for Standby mode. When the ECI 6DS is powered on, the source menu screen with all available sources will be displayed. The following choices are available: 1.
- Page 13 How to connect to Network and Internet Wired LAN Connection Connect the Ethernet cable to the LAN port at the back panel of ECI 6DS. When turned on, the ECI 6DS will try to establish connection automatical- ly using DHCP. It is also possible to set network options manually. Go to the "Home"...
- Page 14 ECT 4 Remote Control Play music from a Memory stick USB port 1. Connect your memory stick to the USB port at the rear panel ( image 1). 2. Select "Memory Stick" from the "Home" menu. 3. Choose the music by Artist, Album, Title or other options displayed.
-
Page 15: User Settings Menu
ECT 4 Remote Control Settings menu Press the "Settings" button to open the system settings menu. Under this menu there is five submenus: 1. Device selection 2. Change Zone 3. System Information 4. User-Settings 5. Start Pairing User settings menu Under the User settings menu you will find the following settings: Name - select and press Enter, to change the... - Page 16 Updating software and programming the ECT 4 ECT 4 is a universal remote control that also are able to control other IR devices. To setup, please download and install the "Remote Configtool" program. The installation file is available on our website at the "Downloads - Firmware"...
-
Page 17: Preamplifier Section
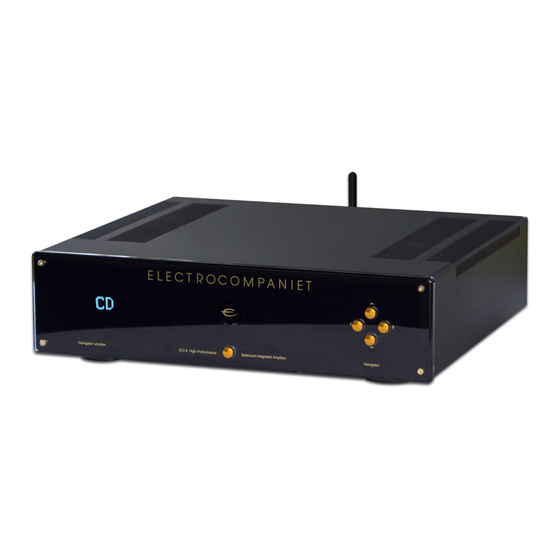
Technical specifications ECI 6DS: The following technical data were measured on randomized test objects and are typical data. All measurements are made at 120V / 240V // 50Hz / 60Hz. Clipping point of the amplifier is set to a level where total harmonic distortion (THD) is 0.2 %. - Page 18 ECI 6DS Front panel illustration...
- Page 19 ECI 6DS Rear panel illustration...
- Page 20 How to connect the system (Analog Inputs)
- Page 21 How to connect the system (Digital Inputs)
-
Page 22: Important Notice
For optimal sonic performance, the ECI 6DS should be burned in for a minimum time of 72 hours. The easiest way to burn in your ECI 6DS is to put a signal at any input, without the speakers connected In daily operation, switch off the ECI 6DS by using the MUTE button on the remote control. - Page 24 Verify line voltage before use. Do not remove cover. No user serviceable parts inside. Refer servicing to qualified service personal. The warranty is void if the product is tampered with by non-authorised personnel. Use only authorized Electrocompaniet service center. Made in Norway www.electrocompaniet.no...
Need help?
Do you have a question about the ECI 6DS and is the answer not in the manual?
Questions and answers