Rose electronics UltraLink 2 Installation And Operation Manual
Remote kvm over ip
Hide thumbs
Also See for UltraLink 2:
- Specifications (2 pages) ,
- Quick start manual (4 pages) ,
- Quick start manual (4 pages)

Related Manuals for Rose electronics UltraLink 2


Summary of Contents for Rose electronics UltraLink 2
- Page 1 UltraLink 2 Remote KVM Over IP INSTALLATION AND OPERATIONS MANUAL 10707 Stancliff Road Phone (281) 933-7673 Houston, Texas 77099 www.rose.com...
- Page 2 ® Rose Electronics warrants the UltraLink 2™ to be in good working order for one year from the date of purchase from Rose Electronics or an authorized dealer. Should this product fail to be in good working order at any time during this one-year warranty period, Rose Electronics will, at its option, repair or replace the Unit as set forth below.
-
Page 3: Declaration Of Conformity
Communications du Canada. Radio Frequency Energy A Category 5 (or better) twisted pair cable must be used to connect the UltraLink 2 unit in order to maintain compliance with radio frequency energy emission regulations and ensure a suitably high level of immunity to electromagnetic disturbances. -
Page 4: Table Of Contents
Single Unit Installation....................28 Dual Unit Installation...................... 28 Dual Unit Installation to a KVM Switch................29 Operating procedure ...................... 30 Troubleshooting ......................35 Safety ..........................36 Maintenance and Repair ....................37 Technical Support ......................37 UltraLink 2 Installation and Operations Manual... - Page 5 Figures Page # Figure 1. UltraLink 2 Models ....................6 Figure 2. Configuration via USB..................7 Figure 3. Configure via Network crossover cable ..............8 Figure 4. Initial connect screen ................... 8 Figure 5. Configure Dual model ..................10 Figure 6. VNC Toolbar ...................... 15 Figure 7.
-
Page 6: System Introduction
KVM switching system can support. The UltraLink 2 is different in the way it manages remote access to your systems. All of the systems that will be remotely connected remain completely unchanged and can run their usual operating system normally. -
Page 7: Features
Flash upgradeable so your unit is always up to date with new features and enhancements Private single user or shared access (Shared access allows up to four simultaneous users to access the UltraLink 2 at any one time) Up to 16 user profiles can be set-up with event logging Compatible with Rose Electronics KVM switches, extenders, and most other KVM devices. -
Page 8: Cables
Rose Electronics or your reseller so the problem can be quickly resolved. Rose Electronics web site Visit our web site at www.rose.com for additional information on the UltraLink 2 and other products designed for data center applications, classroom environments, and many other applications. -
Page 9: Single Access Model
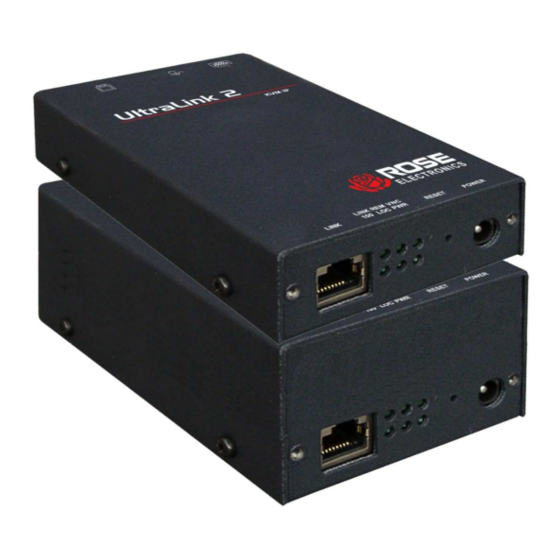
Connectors To KVM Keyboard – PS/2 (MiniDIM6F) (TOP) Mouse – PS/2 (MiniDIN6F) Monitor – HD15F To Computer Keyboard – PS/2 MiniDIM6F (Bottom) Mouse – PS/2 (MiniDIN6F) Monitor – HD15F Figure 1. UltraLink 2 Models UltraLink 2 Installation and Operations Manual... -
Page 10: Method #1 - Unit Configuration Via Usb Ports (All Models)
CONFIGURATION Configuration – All Models There are three ways to configure the UltraLink 2. All models can be configured using a connection to the unit and to a standalone computer or laptop’s USB ports. All models can also be configured using a network crossover cable. The dual access model can be configured directly using a local keyboard and mouse. -
Page 11: Method #2 - Unit Configuration Via Network Crossover Cable (All Models)
Method #2 - Unit configuration via network crossover cable (all models) To modify the IP address using method #2, connect the UltraLink 2’s RJ45 port to a computer configured with an Ethernet card and Window’s operating system (XP or Vista). - Page 12 When the connected computer’s video displays, click on the “Configure” tab in the upper right corner. This displays the configuration menu. Click on the configure tab to display the configuration menu From the configuration menu, click on “Network Configuration”, the below menu will display. UltraLink 2 Installation and Operations Manual...
-
Page 13: Method #3 - Unit Configuration Via Local Kvm Station (Dual Access Model Only)
Change the IP address, network mask, and other network information that has been assigned to the UltraLink 2. The VNC port (5900) and HTTP Port (80) should only be changed if they conflict with existing network settings. If you choose to use DHCP, check the box adjacent to “Use DHCP”. -
Page 14: Configure Unit
(default), Ctrl + Shift, Alt + Shift, Alt Gr, Left + Right Alt, Left Ctrl + Alt or Right Ctrl + Alt. If the UltraLink 2 is connected to a KVM switch, make sure that the hot key combination selected does not conflict with the KVM switch hot key assignments. -
Page 15: Configure Network
IP address to remotely connect. IP Address, Net Mask, and Gateway Enter the IP, Net Mask, and Gateway addresses that have been assigned to the UltraLink 2 unit. If Use DHCP was selected, these fields will be greyed out. -
Page 16: Secure Keys Menu
Enter the Username “admin” and the password entered on the configure unit menu. Upon acceptance, the connected computer’s video will display on the local monitor. The unit is now configured with the correct network and unit information for local and remote access. UltraLink 2 Installation and Operations Manual... -
Page 17: Connecting Remotely
Computer To access Using a computer connected to the same subnet of the network as UltraLink 2, start a web browser and enter the UltraLink 2’s assigned network IP address in the URL field of the browser. When the browser locates the UltraLink 2, it will respond back to the browser with the below request. -
Page 18: Vnc Viewer Toolbar
KVM switch. Clicking on the left or right arrows switches UltraLink 2 from the shared mode to the private mode. Private mode inhibits other connections. UltraLink 2 Installation and Operations Manual... -
Page 19: Vnc Remote Configuration Menu
Click on the Configure tab to Display the configuration menu Figure 7. Remote Configuration Menu The configuration menu allows you to set-up various properties of the UltraLink 2. User Accounts tab Allows you to create and manage up to sixteen separate user accounts, each with separate access permissions. -
Page 20: User Account
Local - User can access the UltraLink 2 directly from the local KVM station b. Remote – User can access the UltraLink 2 via an IP network link or via the internet (depending how the unit is connected and network permissions) Tick/untick the Auto logon option for a selected user. -
Page 21: Unit Configuration
UltraLink 2 connected to a KVM switch and assign a hot key of, for instance, F5 and that is the same hot key used by the KVM switch, the UltraLink 2 will intercept that hot key as an instruction and not pass the key sequence to the KVM switch. -
Page 22: Advanced Unit Configuration
F5 and that is the same hot key used by the KVM switch, the UltraLink 2 will intercept that hot key as an instruction and not pass the key sequence to the KVM switch. - Page 23 Clicking on the Configure Console tab allows you to select the Local Hot Key Sequence, turn on or off the screensaver timeout feature, and turn on or off the notification to the local use that a remote user has logged on UltraLink 2 Installation and Operations Manual...
-
Page 24: Time And Date
Contact Rose Electronics for full details To perform a flash upgrade Connect to the UltraLink 2 from a remote workstation and log on as the admin user. The firmware upgrade file (xxxxxxx.bin) must be saved on the connecting remote workstation’s PC. -
Page 25: Network Configuration
UltraLink 2 unit. This additional feature adds to the security of the UltraLink 2. The default IP access control is +0.0.0.0/0.0.0.0 which grants all IP addresses access to the UltraLink 2. Click on the “Add” tab to add an IP range to grant or deny access. - Page 26 For instance, to accurately encompass the range in the earlier example: 192.168.142.67 to 192.168.142.93 You would need to define the following six address and mask combinations in the IP access control section: UltraLink 2 Installation and Operations Manual...
-
Page 27: Host Configuration
Click on the “Host Configuration” tab to display the Host menu shown in Figure 13. Figure 13. Remote Hosts Configure Menu Connecting the UltraLink 2 to a KVM switch provides remote access to all the equipment connected to the KVM switch. The Host feature is designed to easily switch to any of the KVM switches ports. -
Page 28: Permissible Key Presses
‘+’, ‘-’, ‘+ –’ and ‘*’ which have special meanings, as explained below. When all entries have been made, click on the Save tab to save the information entered. UltraLink 2 Installation and Operations Manual... -
Page 29: Logging And Status
Start a text application (i.e. Word, WordPad, Notepad) and press Ctrl and V, or right mouse click and ‘Paste’ to paste the log status information to the text application. UltraLink 2 Installation and Operations Manual... -
Page 30: Ldap Configuration
Typical values are ‘uid’ or ‘cn’. Anonymous bind If checked, bind requests are anonymous (suitable for Linux LDAP implementations. If unchecked, the bind requests are sent with the user name and password (suitable for active directory) UltraLink 2 Installation and Operations Manual... -
Page 31: Single Unit Installation
PS/2 mouse ports on the UltraLink 2 and on the computer to access. Next connect the network cable from the unit to the network and your done. - - - UltraLink 2 must be configured properly before installing and accessing - - - . Network workstations Computer to access Figure 16. -
Page 32: Dual Unit Installation To A Kvm Switch
Dual Unit Installation to a KVM Switch The installation of the UltraLink 2 Dual model to a KVM switch is the same as the dual model installation except a KVM switch is substituted for the stand-alone computer as show in Figure 18. Connect a local keyboard, monitor, and mouse to the corresponding PS/2 top connectors. -
Page 33: Operating Procedure
From any network workstation, start a web browser and enter in the URL field, the IP address assigned to the UltraLink 2 unit. When the unit is located on the network, it will respond back to the web browser with the following three options:... -
Page 34: Figure 19. Vnc Viewer Toolbar
The first time you connect to the UltraLink 2 or switch CPU ports if connected to a KVM switch, the cursors may be out of sync. Click on the Calibration tab on the toolbar calibrate the Video + Mouse. After the calibration is complete, the mouse cursors will follow each other over the VNC viewer window. - Page 35 -Ctrl or -Alt if these keys are to be released together. Video Settings This dialog provides access to all of the key video settings that determine image quality and link performance. UltraLink 2 Installation and Operations Manual...
- Page 36 Virtual Media A unique feature of the UltraLink 2 is the Remote Virtual Media function. This feature allows you to remotely send or receive files or folders from the connected computer. Single files or collections of files and folders up to 2GB in size can be quickly transferred via the VNC link.
- Page 37 Host Tab If UltraLink 2 is connected to a KVM switch and the Configure Host feature has been set- up, the “Host” tab on the toolbar will display. It allows you to easily switch to any CPU port on the KVM switch. Each of the 128 Host locations can be set-up with the appropriate keyboard command sequence to switch to that port.
-
Page 38: Troubleshooting
If both the VNC viewer and Applet login is denied access, remove power from the UltraLink 2 for two to three seconds. This will reset the unit and unlock the IP address. If the UltraLink2 unit is using DHCP, the previously assigned IP address may be changed to a different IP address when power is restored. -
Page 39: Safety
The Unit does not operate normally when all operating instructions have been followed. The Unit has been dropped or the case has been damaged. The Unit exhibits a distinct change in performance, indicating a need for service. UltraLink 2 Installation and Operations Manual... -
Page 40: Maintenance And Repair
Technical Support If you are experiencing problems, or need assistance in setting up, configuring or operating your UltraLink 2, consult the appropriate sections of this manual. If, however, you require additional information or assistance, please contact the Rose Electronics Technical Support... -
Page 41: Appendix A- Specifications
0° - 45° C / 32° - 113° F, 5 - 80% non-condensing RH Approvals FCC, CE Dimensions Width Depth Height Weight UL2-SA (in) 2.95 4.72 1.06 0.76 lbs (mm) 0.34 kg UL2-DA (in) 2.95 4.72 1.65 1.02 lbs (mm) 0.46 kg UltraLink 2 Installation and Operations Manual... -
Page 42: Appendix B- Part Numbers
Appendix B- Part Numbers Part Number Description UL2-SA UltraLink 2 Single mode UL2-DA UltraLink 2 Dual mode TRF-05D250FSUB-2.5 Power adapter (Optional - /SW P/N suffix) CPU Adapter cable (Supplied with order) UltraLink 2 Installation and Operations Manual... -
Page 43: Appendix C- Video Modes
1280 x 1024 @ 67Hz apple 640 x 480 @ 67Hz apple 832 x 624 @ 75Hz apple 1152 x 870 @ 75Hz * Not actually a VESA mode but a common DOS/BIOS mode UltraLink 2 Installation and Operations Manual... -
Page 44: Figure 20. Virtual Media Set-Up
The UltraLink-2 provides an ingenious feature that allows authorized remote users to transfer files and folders to a host computer. The “Host” computer must be connected to the UltraLink 2 using the PS/2 to USB adapters. PS/2 to USB adapters Figure 20. - Page 45 OK to start the process. UltraLink 2 will establish a USB connection from the remote to the Host computer and start windows explorer showing the virtual drive and the selected file to transfer to the Host computer.
-
Page 46: Appendix E- Vnc Viewer Options
Appendix E- VNC Viewer Options When you are connected to the UltraLink 2 using the VNC viewer (not the java applet), there are several options that are available to modify the way the connection is made. Click on the “Options” tab and the below VNC Viewer Option screen will display. - Page 47 Preserve Aspect Ratio When ticked, maintains a consistent ratio between the horizontal and vertical dimensions of the screen image. UltraLink 2 Installation and Operations Manual...
- Page 48 Defaults - Save When clicked, saves the current connection options as the default set that will be used in all subsequent VNC connections. UltraLink 2 Installation and Operations Manual...
- Page 49 Menu key This feature allows you to select which function key is used to display the VNC viewer options menu. The menu key is only way to exit from the full screen viewer mode. UltraLink 2 Installation and Operations Manual...
- Page 50 Offer to automatically reconnect When ticked, the viewer will offer to restore a lost connection with the server. Try Single Sign-On if server allows it This option does not apply to UltraLink 2 connections. UltraLink 2 Installation and Operations Manual...
- Page 51 If an existing UltraLink 2 is fully reconfigured then it will need to be issued with a new identity. In this case the...
- Page 52 Defaults - Save When clicked, saves the current connection options as the default set that will be used in all subsequent VNC connections. UltraLink 2 Installation and Operations Manual...
- Page 53 New connection... Displays the connection dialog so that you can log on to a different UltraLink 2 or VNC server location. Options... Displays the full range of connection options Connection info...
- Page 54 〒103-0014 東京都中央区日本橋蛎殻町 1-16-11 TEL:03-3668-8089 FAX:03-3668-9872 URL:http://www.cybernetech.co.jp...
Need help?
Do you have a question about the UltraLink 2 and is the answer not in the manual?
Questions and answers