Table of Contents
Advertisement
Quick Links
Download this manual
See also:
User Manual
Advertisement
Table of Contents

Related Manuals for Opticon H15


Summary of Contents for Opticon H15
- Page 1 Handheld Data Terminal The H15 Handheld Data Terminal is a handheld device, compatible with Microsoft Windows CE .Net ® User Manual technology.
- Page 2 Opticon assumes no liability for any direct, indirect, consequential or incidental damages arising out of use or inability to use both the hardware and software, even if Opticon has been informed about the possibility of such damages.
-
Page 3: Table Of Contents
Opticon User Manual Table of Contents 1. Introduction ........................ 1-1 1.1. About this Manual....................1-1 1.2. User and Product Safety ................... 1-2 1.3. Battery Safety ....................1-2 1.4. CE Statement ....................1-3 1.5. Federal Communication Commission (FCC) Statement ........1-4 1.5.1. - Page 4 Opticon User Manual 3. Settings3-1 3.1. Introduction......................3-1 3.2. Control Panel..................... 3-1 3.2.1. Bluetooth Device Properties ..............3-2 3.2.2. Certificates ....................3-6 3.2.3. Control Center ................... 3-8 3.2.4. Control Center – Information ..............3-9 3.2.5. Control Center – Brightness ..............3-9 3.2.6.
- Page 5 Opticon User Manual 5.3. DiskOnChip ......................5-18 5.3.1. Saving to Flash ..................5-18 5.3.2. DiskOnChip Location ................. 5-18 5.3.3. DiskOnChip Size ..................5-18 Table of Figures Figure 2-11. Date/Time properties ..............2-26 Figure 2-12. Task Bar & Command Bar............. 2-28 Figure 2-13.
- Page 6 Opticon User Manual Figure 3-29. Dialing Properties – new location name ........3-14 Figure 3-30. Dialing Properties – dialing patterns..........3-14 Figure 3-31. Display Properties ................. 3-15 Figure 3-32. Display Background Image ............3-15 Figure 3-33. Display Properties – Browse ............3-16 Figure 3-34.
- Page 7 Table of Tables Table 1-1. Front Labeling..................1-6 Table 1-2. Rear Labeling ..................1-7 Table 2-1. H15 package contents..............2-10 Table 2-2. Terminal overview ................2-12 Table 2-3. Keypad list ..................2-19 Table 2-4. Special reset key combinations ............2-20 Table 2-5.
-
Page 8: Introduction
Opticon User Manual 1. Introduction Congratulations on purchasing the Opticon H-15 Hand Held Terminal(HHT), a Microsoft Windows® CE rugged Terminal. Its special combination of features makes it perfect for using in a wide range of applications. These features as: •... -
Page 9: User And Product Safety
Use only the original approved AC adapter. Use of an unapproved AC adapter could result in electrical problems, fire, or electrical shock. Opticon shall not be held responsible for any damages caused by using an AC adapter not provided by Opticon. -
Page 10: Ce Statement
Opticon User Manual 1.4. CE Statement This device complies with the essential requirements of the R&TTE Directive 1999/5/EC. 0560 Standard Description EN 60950-1: 2006 Safety of Information Technology Equipment EN50360: Product standard to demonstrate the compliance of mobile (2001-07) phones with the basic restrictions related to human exposure to electromagnetic fields (300 MHz–3 GHz) -
Page 11: Federal Communication Commission (Fcc) Statement
Opticon User Manual 2454–2483.5 MHz. For detailed information, the end-user should contact the national spectrum authority in France. 1.5. Federal Communication Commission (FCC) Statement This equipment has been tested and found to comply with the limits for a Class B digital device, pursuant to Part 15 of the FCC Rules. -
Page 12: Led And Laser Safety Information
Do not shine the LED/laser on a reflective surface 1.6. Recycling & Disposal Do not dispose of this product in household trash. For proper end-of-life treatment consult the Environmental Care section of www.opticon.com. 1.7. Regulatory Information For CE, FCC, RoHS, and other Document of Conformities information, consult... -
Page 13: Product Labeling
Opticon User Manual 1.8. Product Labeling The Terminal has several labels, as shown below. Figure 1-1. Front labeling Table 1-1. Front Labeling Label nr. Description LCD panel protection film Opticon logo... -
Page 14: Table 1-2. Rear Labeling
Opticon User Manual Figure 1-2: PHL 8100 product labels Figure 1-2. Rear labeling Table 1-2. Rear Labeling Label nr. Description Label nr. Description Laser radiation warning label Warranty seal Terminal. System and regulatory label Windows CE label Serial number and Article number... -
Page 15: System Specifications
Opticon User Manual 1.9. System Specifications The H-15 detailed specifications as follows. Unless otherwise noted, all the specifications are subject to change without prior notification. Item Description Processor 312MHz Intel PXA270 32 bits RISC CPU 128 MB / 256 MB Flash ROM... -
Page 16: Environment And Durability
1.11. Warranty and after service Should this Terminal require service, please contact your local reseller. In case of technical questions, send an email to support@opticon.com and provide information about the product name, the serial number (see chapter 1.8 "Product labeling") and provide a detailed... -
Page 17: Getting Started
Opticon User Manual 2. Getting started Open the package and confirm that all required parts are present and undamaged: Figure 2-1. Package contents Table 2-1. H15 package contents Label nr. Description H-15 Terminal Standard battery pack (3.7VDC/1880mAh) Spring Cord for Stylus... -
Page 18: Product Overview
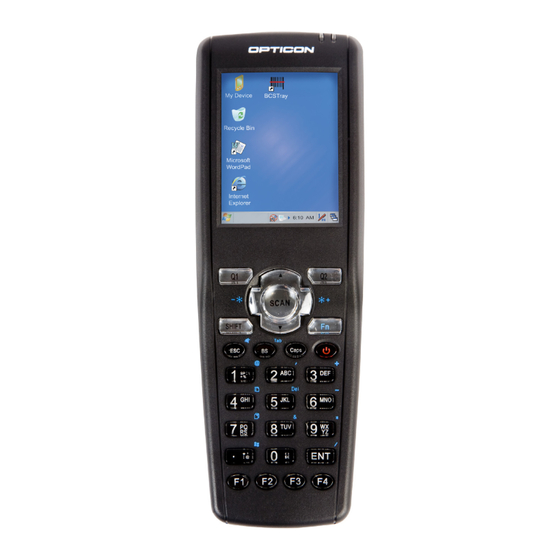
Opticon User Manual 2.1. Product Overview Figure 2-1. Terminal overview 2-11... -
Page 19: Table 2-2. Terminal Overview
Opticon User Manual Table 2-2. Terminal overview Label Description Barcode reader LED Red color: Barcode reader on indicator Green color: Successful reading Charge LED indicator Red color: Charging battery Green color: Battery fully charged LCM / touch panel User input on touch panel by stylus... -
Page 20: Charging The Battery Pack
Opticon User Manual 2.2. Charging the Battery Pack Before using the Terminal, charge the battery pack. Charge time: The initial charge cycle for the battery pack is approximately 6 hours. Subsequent charging cycles are approximately 4 hours. When charging the battery pack, the charging LED indicator on the Terminal turns Red. - Page 21 Opticon User Manual Place the battery cover by inserting the top first, and then press the bottom in firmly. Slide the battery cover latches outward to secure the cover to the Terminal. Figure 2-4. Replace the battery cover 2-14...
-
Page 22: Charging The Terminal
Opticon User Manual Charging the Terminal 2.2.2. Plug in the connector of the power adapter to the cradle. Connect the power cord to the power adapter and the power source. Make sure you have the battery still inserted in the terminal. -
Page 23: Handling The Terminal
Opticon User Manual 2.3. Handling the terminal This section offers the basic procedures for using the Terminal. Starting the terminal 2.3.1. Press the power key to turn ON/OFF the Terminal. If the Terminal does not power on, perform a cold boot. See chapter 2-6 Resetting the Terminal. -
Page 24: Calibrating The Touch Screen
Opticon User Manual Calibrating the touch screen 2.3.3. On the initial boot-up of the Terminal, the stylus calibration screen opens. Use the stylus to press and hold briefly on the center of each target as it around moves the screen. -
Page 25: Muting The Sound
Opticon User Manual Muting the sound 2.3.5. To mute the sound, press the key first, and then press the key to turn off and on of the sound. Using the stylus 2.3.6. The stylus is located next to the hand strap on the left rear of the PDT. The stylus functions the same as the mouse on a PC. -
Page 26: Combine Numeric And Shift Modes
Opticon User Manual Combine Numeric and Shift modes 2.3.9. Default the numeric mode is enabled. To switch to text mode press the key, the text icon appears at the task bar. For example, to type “cap1” word, press: < 2 seconds >... -
Page 27: Table 2-4. Special Reset Key Combinations
Opticon User Manual Down Page Down Page Up Audio Mute Backspace TAB (Tabulation) Shift to text mode Function change @ (at) Space: \ = % Space: \ = % ’ A B C + (Plus Sign) D E F Paste G... -
Page 28: Table 2-5. Definition Of Main Function
Opticon User Manual Table 2-5. Definition of main Function Main Function Definition User configurable Configure its function by customer demand. Default : None User configurable Configure its function by customer demand. Default : None Scan Button Activates the scan function of Terminal. - Page 29 Opticon User Manual key enables you to toggle between the numeric and text modes. Default the numeric indication appears at the task bar to indicate the numeric mode is enabled. Shift between When you press the key, the indication at the task...
-
Page 30: Table 2-6. Special Function Key Define
Opticon User Manual Number key “0” Dot key Enter This key confirms data entry Table 2-6. Special Function key define Fn + Main Key Sequence Definition Function Increase the LCD backlight brightness (lighten): Backlight Increase press key, followed by key. -
Page 31: Table 2-7. Shift + Numeric Keys Define
Opticon User Manual Fn + Main Key Sequence Definition Function Use the “Delete” function: Del (Delete) press key, followed by key. Enter a minus sign: - (Minus Sign) press key, followed by key. Use the “Copy” function: Copy press key, followed by key. - Page 32 Opticon User Manual Press the Keys Press the Keys enter enter f F g G h H i I j J k K l L m M n N o O p P q Q r R s S t...
-
Page 33: Navigating The Display
Opticon User Manual 2.4. Navigating the Display Time and Date 2.4.1. In the Date/Time options, you can change the year, month, date, time, time zone, or select automatic adjust for daylight saving time. To set or change the date and time: 1. -
Page 34: Entering Data
Opticon User Manual Entering Data 2.4.2. To select and open programs, select Start > Programs from the task bar to open a list of available programs. Or, if the program has an icon on the desktop, double-tap to open it. There are several ways to enter data in an application on the Terminal: •... -
Page 35: The Soft Keypad
Opticon User Manual Command Bar Task Bar Figure 2-11. Task Bar & Command Bar The Soft Keypad 2.4.4. In applications that accept keypad input, the Soft Input Panel (SIP) can be used to enter data using the stylus. The SIP is a software, QWERTY-style keyboard. -
Page 36: Setting Up Wireless Lan
Opticon User Manual Setting Up Wireless LAN 2.4.5. The Summit Client Utility (SCU) is an application designed for end users and administrators of mobile devices that use a Summit radio module. Using SCU, an end user can: • Disable the radio (turn it off) and enable the radio (turn it on) •... - Page 37 Opticon User Manual Main Tab Figure 2-12. Main tab • Enable/Disable Radio: When the radio is enabled, selecting this button disables it; when the radio is disabled, selecting this button enables it. • Active Profile: You can view the name of the active profile and, using the selection list, select a different profile.
- Page 38 Opticon User Manual Profile Tab Profile settings are radio and security settings that are stored in the registry as part of a configuration profile. When a profile is selected as the active profile on the Main tab, the settings for that profile become active.
- Page 39 Opticon User Manual you as an administrator select an encryption type that requires the definition of WEP keys or a pre-shared key, the PSKs/WEP Keys button appears; when you tap it, a dialog box appears that enables you to define WEP keys or a PSK.
- Page 40 Opticon User Manual Status Tab The Status tab provides status information on the radio. • Active profile • Radio’s status: Down (not recognized), Disabled, Not Associated, Associated, or [EAP type] Authenticated • Client info: Name, IP address, and MAC address •...
- Page 41 Opticon User Manual Diags Tab Figure 2-16. Diags tab • (Re)connect: Disable and enable the radio, apply or reapply the current profile, and attempt to associate and authenticate to the wireless LAN, logging all activity in the output area at the bottom.
-
Page 42: Reading Barcodes
Opticon User Manual Global Tab Figure 2-17. Global tab Global settings include: • Radio and security settings that apply to all profiles • Settings that apply to SCU itself An administrator can define and change most global settings on the Global Settings Tab in SCU. -
Page 43: Help
Opticon User Manual • Good scanning position. The reading range is from 50 to 650mm distance. Decrease the scanning distance to the barcode when scanning small barcodes. Increase the scanning distance from the barcode when scanning large barcodes. The scanning area is visible by a red laser beam. -
Page 44: Resuming
Opticon User Manual The following conditions will suspend: • Press the <Power> key while the unit is on. • The duration timer of item Switch state to Suspend expires, which indicates that there has been no use for a specified of time. -
Page 45: Resetting The Terminal
Opticon User Manual 2.6. Resetting the Terminal Soft (Warm) Reset 2.6.1. A warm reset is a transition from the on, idle, or suspend power state that close all applications, clears the working RAM, but preserves the file system. Reason to Warm Reset: If an application “hangs”, initiate a warm reset to terminate the application only. -
Page 46: Introduction
Opticon User Manual 3. Settings 3.1. Introduction To view available options for the terminal settings, tap Start > Settings. There are three items inside Settings: Control Panel, Network and Dial-up, and Taskbar and Start. 3.2. Control Panel View the Control Panel and the settings you can modify by tapping Start > Settings >... -
Page 47: Bluetooth Device Properties
Opticon User Manual Bluetooth Device Properties 3.2.1. ICON ITEM & FUNCTION “BT Service” Tab: • Select Enable Bluetooth Device to enable the Bluetooth device (Figure 3-1). • Wait for 20 seconds to initialize the Bluetooth hardware correctly. • Tap Scan Device Service to open the Bluetooth Manager window. -
Page 48: Figure 3-1. Bt Service - Enable Bluetooth Device
Opticon User Manual Figure 3-1. BT Service Figure 3-2. BT Service – Enable Bluetooth Device – Bluetooth Manager scan Inquiry Figure 3-3. BT Service Figure 3-4. BT Service – Bluetooth hardware error – Bluetooth authentication error... -
Page 49: Figure 3-5. Bt Service - Bluetooth Pin Window
Opticon User Manual Figure 3-5. BT Service Figure 3-6. BT Service – Bluetooth PIN Window – Bluetooth Scan Device Trusted/Active Figure 3-7. Serial Port Figure 3-8. Serial Port – Enable Bluetooth Device – Bluetooth Manager Window... -
Page 50: Figure 3-9. Serial Port - Bluetooth Manager Window
Opticon User Manual Figure 3-9. Serial Port – Bluetooth Manager Window Figure 3-10. Serial Port Figure 3-11. Serial Port – Bluetooth Manager Window – Bluetooth Manager Window NOTE: If the device to which the Terminal is bonding does not appear in the list, ensure it is turned on, in discoverable mode, and within range (30 feets / 10 meters) of the Terminal. -
Page 51: Certificates
Opticon User Manual Icon Description Unknown device icon Device is not defined Locked icon Device is locked and can not be bonded to. Not locked icon Device is not locked and can be bonded to. Bluetooth device icon Bluetooth device... -
Page 52: Figure 3-13. Certificates - Stores Tab
Opticon User Manual Figure 3-13. Certificates Figure 3-14. Certificates – Stores tab – Trusted Authorities Figure 3-15. Certificates Figure 3-16. Certificates – your Trusted Authorities – Import... -
Page 53: Control Center
Opticon User Manual Figure 3-17. Certificate Details Control Center 3.2.3. The Control Center includes four applications: • Information • Brightness • Function Key Settings • Backup & Restore. Figure 3-18. Control Center... -
Page 54: Control Center - Information
Opticon User Manual Control Center – Information 3.2.4. ICON ITEM & FUNCTION The information tab shows: OS Version, WLAN MAC address, Bluetooth ID, Serial Number Control Center – Brightness 3.2.5. LCD Brightness: Tune the LCD brightness by adjusting the slider, or by tapping the right-arrow &... -
Page 55: Control Center - Backup & Restore
Opticon User Manual Figure 3-20. Choose Fn-Key Figure 3-21. Assign Fn-Key Control Center – Backup & Restore 3.2.7. “Backup / Restore” Tab: • You can backup and restore the system to/from a flash disk or an inserted memory card (Figure 3-22 , Figure 3-23) •... -
Page 56: Figure 3-22. Backup/Restore
Opticon User Manual Figure 3-22. Backup/Restore Figure 3-23. Backup & Restore Start Figure 3-24. Backup/Restore Wait Figure 3-25. Backup/Restore Finished 3-11... -
Page 57: Date/Time
Opticon User Manual Figure 3-26. Restore Finished Date/Time 3.2.8. ICON ITEM & FUNCTION “Date/Time” Tab Please see the detailed information in section 2.4.1. 3-12... -
Page 58: Dialing Properties
Opticon User Manual Dialing Properties 3.2.9. ICON ITEM & FUNCTION “ Dialing Properties” Tab (Figure 3-27 to 3-30) • In the When dialing from list, select the “Location” where you want to change settings. • To create a new location, select “New”. Enter the name of the location, and then select “OK”. -
Page 59: Figure 3-27. Dialing Properties - Location
Opticon User Manual Figure 3-27. Dialing Properties Figure 3-28. Dialing Properties – location – new location Figure 3-29. Dialing Properties Figure 3-30. Dialing Properties – new location name – dialing patterns 3-14... -
Page 60: Display Properties
Opticon User Manual Display Properties 3.2.10. ICON ITEM & FUNCTION “Background” Tab • From the “Image” list, select an image you want as the background of the desktop (Figure 3-31, Figure 3-32). • To locate an image in another folder, select “Browse” (Figure 3-33). -
Page 61: Figure 3-33. Display Properties - Browse
Opticon User Manual Figure 3-33. Display Properties – Browse Figure 3-34. Display Properties Figure 3-35. Display Properties – Scheme – Scheme selection 3-16... -
Page 62: Input Panel
Opticon User Manual Input Panel 3.2.11. ICON ITEM & FUNCTION “Input panel” Tab • Select the input method you want to change (Figure 3-36). • To change the Soft Keyboard Options , tap “Option” (Figure 3-37). “Options” Tab Change the soft keyboard options as desired, selecting from: •... -
Page 63: Internet Options
Opticon User Manual Internet Options 3.2.12. ICON ITEM & FUNCTION “General” Tab (Figure 3-38) • Type in the URL of desired start page and the desired search engine. • You also change the Cache Size, clear the Cache and Clear the History. -
Page 64: Figure 3-38. Internet Settings General
Opticon User Manual Figure 3-38. Internet Settings General Figure 3-39. Internet Settings Connection Figure 3-40. Internet Settings Security Figure 3-41. Internet Settings Privacy 3-19... -
Page 65: Keyboard
Opticon User Manual Figure 3-42. Internet Settings Advanced Figure 3-43. Internet Settings Popups Keyboard 3.2.13. ICON ITEM & FUNCTION “Repeat” Tab (Figure 3-44) To change the amount of time between depressions before repetition starts, adjust the Repeat delay slider To change the repeat rate, adjust the Repeat rate slider. -
Page 66: Network And Dial-Up Connections
Opticon User Manual Network and Dial-up Connections 3.2.14. ICON ITEM & FUNCTION “Connection” Tab (Figure 3-45 to Figure 3-55) To create a “Dial-up Connection”: • Double-tap the “Make New connection”. • In the “Make New Connection” dialog box, enter a name for the connection. -
Page 67: Figure 3-45. Connection Icon
Opticon User Manual Figure 3-45. Connection icon Figure 3-46. Make new connection Figure 3-47. Modem Figure 3-48. Phone Number 3-22... -
Page 68: Figure 3-49. Port Settings
Opticon User Manual Figure 3-49. Port Settings Figure 3-50. Call Options Figure 3-51. TCP/IP Settings – General Figure 3-52. TCP/IP Settings – Name Servers 3-23... -
Page 69: Figure 3-53. Security Settings
Opticon User Manual Figure 3-53. Security Settings Figure 3-54. WLAN Adapter – IP Address Figure 3-55. WLAN Adapter – Name Servers 3-24... -
Page 70: Owner
Opticon User Manual Owner 3.2.15. ICON ITEM & FUNCTION “Identification” Tab (Figure 3-56) • Fill in or edit the data as desired. • To have this information displayed when you start your device, select “Display Owner Identification” at Power On. -
Page 71: Password
Opticon User Manual Figure 3-58. Owner Network ID Password 3.2.16. ICON ITEM & FUNCTION “Password Setting” Tab • Enter the “Password” • In the “Confirm password “box, enter the password again. • To require the password on startup, select “Enable password protection at power- on“. -
Page 72: Pc Connection
Opticon User Manual PC Connection 3.2.17. ICON ITEM & FUNCTION “PC Connection” Tab • Select the first checkbox to enable direct connections to the desktop computer (Figure 3-60). • Tap the “Change Connection…” button to modify the connection method from USB or Serial (Figure 3-61). -
Page 73: Power
Opticon User Manual Power 3.2.18. ICON ITEM & FUNCTION “Battery” Tab (Figure 3-62) • Provide change level indicators for Main battery and Backup battery. • Provide remaining power capacity of main battery. • If a “Main Batteries very Low” warning message shows, the remaining battery life is around 30 minutes before Terminal shuts down (Figure 3-63). -
Page 74: Figure 3-64. Battery Power Switch State
Opticon User Manual Figure 3-64. Battery Power Switch state Figure 3-65. Schemes AC Power Figure 3-66. Main Batteries Very Low 3-29... -
Page 75: Regional Settings
Opticon User Manual Regional Settings 3.2.19. ICON ITEM & FUNCTION “Region” Tab: (Figure 3-67) • Select the desired location/language. • Review the Appearance samples in the bottom half of the screen. • Select the Tab at the top for any settings... -
Page 76: Stylus
Opticon User Manual Stylus 3.2.21. ICON ITEM & FUNCTION “Double-Tap” Tab (Figure 3-69) • Double-tap the checkerboard grip at a comfortable speed. • Double-tap the clapboard to test your settings • The function is OK if the figures are changed. -
Page 77: System
Opticon User Manual System 3.2.22. ICON ITEM & FUNCTION “General” Tab (Figure 3-72) • Use this tab to read: o Operating System information o Information about Processor type, Memory size, Expansion card “Memory” (Figure 3-73) • Move the slider to adjust memory allocation. Default storage memory is normally set to 32MB with the reminder assigned to Program memory. -
Page 78: Terminal Server Client Licenses
Opticon User Manual Figure 3-74. System Device Name Figure 3-75. System Copyright Terminal Server Client Licenses 3.2.23. ICON ITEM & FUNCTION “Terminal Server Client Licenses” Tab • The section allow users can connect to Terminal Server, If the user has a License. -
Page 79: Volume & Sounds Properties
Opticon User Manual Volume & Sounds Properties 3.2.24. ICON ITEM & FUNCTION “Volume” Tab : (Figure 3-77) The factory default for Volume is the fourth level. You can adjust the volume to your environment and comfort. • Set the volume by adjusting the slider from Soft to Loud, or press Right or Left edge of Navigation keys. -
Page 80: Taskbar And Start Menu
Opticon User Manual 3.3. Taskbar and Start Menu ICON ITEM & FUNCTION Start up (Figure 3-79) • Click on the Windows icon to pull out the menu. • Select “Settings” and “Taskbar and Start Menu” applet. “General” Tab (Figure 3-80) •... -
Page 81: Communication
Opticon User Manual 4. Communication 4.1. Installing & Setting Up Microsoft ActiveSync Installing Microsoft ActiveSync on the Host PC 4.1.1. Microsoft ActiveSync is a file transfer tool to synchronize the files on a PC with the files on your Terminal. -
Page 82: Figure 4-1. Communication
Opticon User Manual Transferring Files To transfer files, complete the following steps on the host PC: 1. Select Start> Programs > ActiveSync. 2. After you have established a connection with Terminal, tap the “Explore” button at the top of the ActiveSync window (or select Explore from the File menu). -
Page 83: Activesync File Synchronization
Opticon User Manual ActiveSync File Synchronization 4.2.2. ActiveSync file synchronization requires an ActiveSync partnership between the Terminal and the host PC. Refer to Setting up a Partnership, above: 1. Select the files in the synchronization configuration for the partnership. 2. Select Tools > Options from the ActiveSync command bar to configure the synchronization options. -
Page 84: Software Applications
Opticon User Manual 5. Software Applications 5.1. Introduction The Terminal includes several applications for example email, Internet Explorer etc. You can switch to any software application by tapping the Start Menu. 5.2. Software Applications Inbox 5.2.1. Use Inbox to send and receive email messages in the following ways: •... - Page 85 Opticon User Manual to use your current connection, select (none). If you have not created a connection, select Create new connection. Double-tap the Make New Connection icon, and follow the instructions in the wizard. When finished, select Inbox in the Task bar and continue setting up Inbox.
- Page 86 Opticon User Manual select New twice. In the Inbox Preferences dialog box, choose any of the following options: Get message headers only: Select to save storage space and time by downloading only headers. You can download a full copy of the message later by selecting the message and then Services>...
- Page 87 Opticon User Manual 8. Set the action to follow deleting, moving, or responding to a message: • Select Services > Options > Read tab. • Select desired options. 9. Delete a message: • Select the message and select File > Delete. Messages are moved to the Deleted (local) folder and deleted according to the option you have selected in the Services >...
- Page 88 Opticon User Manual from your mail server. If a folder is not designated as offline, you will be able to read and respond to messages in that folder only when connected to the server. To designate a folder as offline, select the folder and then select Service >...
- Page 89 Opticon User Manual 15. Reply to or forward a message: • Open the message, and then select Compose > Reply to Sender, Reply to All, or Forward. • Enter your response. • Select File > Send. TIPS: Selections in the Options dialog box determine whether the original text is included.
- Page 90 Opticon User Manual • The size column in the Inbox list view displays the local size and server size of a message. Even when a message has been downloaded fully, these numbers may differ because the size of a message can very between the server and the device.
-
Page 91: Internet Explorer
Opticon User Manual 21. Store an attachment: • Select the Service > Options > Storage tab. • Select to store attachments on internal RAM or a storage card. • If you use more than one storage card, select it from the list. - Page 92 Opticon User Manual c) Navigation Control Internet Explorer uses sliding menus for application and navigation control. Tap and drag the sliding menus to the left or right to see the hidden menu items and toolbars. To achieve more screen real estate in Internet Explorer, you can hide the Status bar and View menu.
- Page 93 Opticon User Manual • Confirm or change the name. • To view your favorite Web sites, select Favorites and the Web site you want to view. • NOTE: To organize your Favorites list, select Favorites > Organize Favorites. j) Browse Web pages •...
-
Page 94: Microsoft Wordpad
Opticon User Manual r) Select security Options • Select the View > Internet Options > Security tab. • Select the security protocols you want. s) Change the font size • Select View > Text Size and select the desired size. - Page 95 Opticon User Manual • Move, copy, or delete text: Select the text you want to move, copy, or delete. To move or delete text, select the Cut button. To copy the text, select the Copy button. To paste the information, move the insertion point to the desired location, and select the Paste button.
- Page 96 Opticon User Manual • Indent a paragraph: Select the paragraph you want to indent. Select Format > Paragraph. Adjust the indentation settings as needed. • Set tabs: Select Format > Tabs. Change the tab settings as needed. c) Adjusting the Display •...
- Page 97 Opticon User Manual g) Setting a Password for a Document • Select File > Password. • Type and verify the password. • You must save the document (File > Save) to return the password. h) Converting Documents About document conversion: If an email program is installed on your device and you receive an attached Word document or template created in Word version 6.0 or later, WordPad will convert the file on your device.
-
Page 98: Remote Connection
Opticon User Manual Revision marks, annotations, and comments: Revision marks are visible but cannot be changed. Annotations and documents are removed during conversion. Remote Connection 5.2.4. Using Remote Desktop Connection, you can log on to Windows Terminal Server and use all programs installed on this server. For example, instead of running Microsoft WordPad, you can run the desktop version of Microsoft Word. -
Page 99: Windows Explorer
Opticon User Manual c) Disconnecting and Ending a Session In the Remote Connection window, select Start > Shutdown. Select Log Off > OK. Windows Explorer 5.2.5. Windows Explorer works almost the same on your PDT as it does on your PC. See the topics below for information about the difference in Windows Explorer on your device. - Page 100 Opticon User Manual • Select File > New Folder. • Add a folder to your Favorites list. • Open the folder. • Select Favorites > Add to Favorites. • In the Name box, type the shortcut name. HINT: To open a favorite file or folder, select Favorites and then select the folder.
-
Page 101: Diskonchip
Opticon User Manual 5.3. DiskOnChip The DiskOnChip provides storage memory to store the application or a data file. NOTE: The DiskOnChip storage memory persists through all reset (warm/cold reboot) conditions and software/firmware uPDTtes. We strongly recommend installing all applications, applets, programs, and important data files to the DiskOnChip flash location.
Need help?
Do you have a question about the H15 and is the answer not in the manual?
Questions and answers