
Related Manuals for Shoprider Mobility


Summary of Contents for Shoprider Mobility
- Page 1 Scooter Owner’s Manual www.shoprider.com.au R E L I A B L E M O B I L I T Y G U A R A N T E E D...
-
Page 2: Table Of Contents
User Manual Contents INTRODUCTION SCOOTER FEATURE GUIDE SAFETY RULES EMI WARNINGS ADJUSTMENTS 10-11 Tiller Angle Adjustment (Fig. 6A&B) Seat Slide & Swivel Adjustment (Fig. 7) Seat Removal (Fig. 7) Seat Height Adjustment (Fig. 8) Armrest Width Adjustments (Fig. 9) Armrest Angle Adjustment (Fig. 11) Seat Reclining Angle (Fig. - Page 3 User Manual Contents continued OPERATING YOUR SHOPRIDER® SCOOTER Mounting the Scooter Starting Scooter Movement Steering Reversing Dismounting Basic Driving Grass and Gravel Ramps Curbs Maximum User Weights Ramp Angle (Appendix 1) BATTERIES AND BATTERY CHARGER Battery Charger Charging Periods of Storage Airline Travel CARE &...
-
Page 4: Introduction
ATTENTION: This owner's manual is printed based on the latest specifications and product information available at the time of publication. SHOPRIDER® reserves the right to make changes as they become necessary. Any changes to the SHOPRIDER® range may cause slight variations between the illustrations and explanations in this manual and the scooter model that was purchased. -
Page 5: Scooter Feature Guide
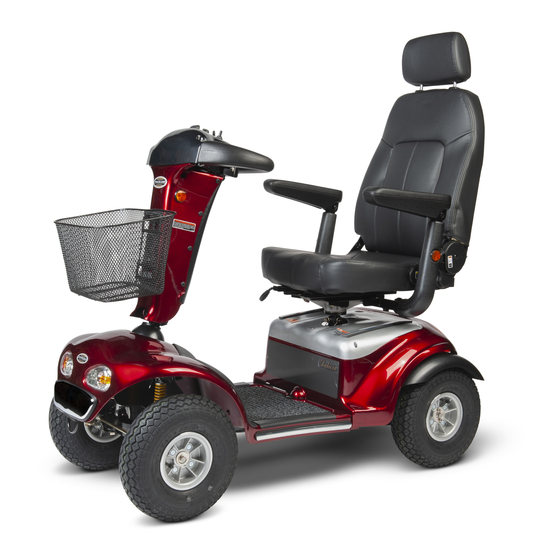
Scooter Feature Guide ROCKY 6 Tiller Scooter Controls Deluxe Front Head Lights Chrome Front Bumper Pad 360mm X 80mm Pneumatic Tyres Adjustable Width & Lift Up Armrests Seat Swivel Lever Seat Recline Adjustment Lever Deluxe Multi Hand Position Handle Bar Detachable Shopping Basket Double Pillow High Back Seat/ Adjustable Headrest Tiller Angle Lever Lock... - Page 6 Scooter Feature Guide continued 889SL Tiller Scooter Controls Front Head Light Front Chrome Bumper Pad 330mm X 100mm Pneumatic Tyres Adjustable Width & Lift Up Armrest Seat Swivel Lever Seat Recline Adjustment Lever Foam Padded Multi Hand Position Handle Bar Detachable Shopping Basket Double Pillow High Back Seat / Adjustable Headrest Tiller Angle Lever Lock...
- Page 7 Scooter Feature Guide continued 889ERS Tiller Scooter Controls Front Head Light 330mm X 100mm Tyres Adjustable Width & Lift Up Armrest Seat Recline Adjustment Lever Foam Padded Multi Hand Position Handle Bar Detachable Shopping Basket High Back Seat With Adjustable Headrest Tiller Angle Lever Lock Suspension Front &...
-
Page 8: Safety Rules
Safety Rules Please use your SHOPRIDER® scooter often and let it expand your horizons. The more mobility your SHOPRIDER brings ® the happier we will be! But as with all things, observing a few rules will ensure safe scootering. So please take the time to read and fully understand each rule below. -
Page 9: Emi Warnings
Australian standard. The intensity of the interfering EMI energy can be measured in volts per meter (V/M). Each SHOPRIDER® scooter can resist up to a certain intensity. This is called “immunity level” the higher the immunity the greater the protection. At this time current technology is capable of achieving 20V/M immunity level which will provide useful protection from the more common sources of radiated EMI. -
Page 10: Adjustments
Adjustments Tiller Angle Adjustment (Fig. 6A&B) On the left hand side at the base of the tiller is a red lever/black knob. Push/pull the lever to release the pin and select the required tiller angle. Refit the pin into one of the Tiller Angle five location holes. -
Page 11: Armrest Width Adjustments (Fig. 9)
Adjustments continued Armrest Width Adjustments (Fig. 9) On the underside of the rear seat there are two hand knobs/Allen key head bolts, one either side. Loosening the Armrest Adjustment hand knob or bolt allows the arm rest to be adjusted to the Hand Knob required width, or removed for transportation. -
Page 12: Scooter Tiller Controls
High / Low Speed Switch (where fitted) Some Shoprider® scooters have a High / Low speed settings, “WARNING: The legal speed limit in most states in public areas is 10Kph. The scooter is set up with a Hi/Lo switch which when set to low will meet the legal requirements.”... -
Page 13: Rocky 6 - Rocky 6 Golf
Scooter Tiller Controls continued Battery Level Speed Control Indicator Dial Indicator Hi/Low Speed Switch Switch Battery Hazard Charger Port Lights Wig Wag Lights Horn Reverse Lever Tiller Angle Wig Wag Adjustment Lever Switch Forward Lever ROCKY 6 Battery Level Speed Control Indicator Dial Hi/Low... -
Page 14: 889Sl - 889Ersf
Scooter Tiller Controls continued Battery Level Speed Control Indicator Dial Indicator Hi/Low Speed Switch Switch Wig Wag Wig Wag Reverse Lever Forward Lever Horn Lights Hazard Lights Switch Tiller Angle Battery Adjustment Lever Charger Port 889SL Battery Level Speed Control Indicator Dial Battery... -
Page 15: 889Ers
Scooter Tiller Control continued Speed Control Battery Dial Charger Port Battery Level Indicator Switch Wig Wag Wig Wag Reverse Lever Forward Lever Horn Lights Tiller Angle Adjustment Lever 889ERS... -
Page 16: Free Wheel Operation (Fig. 13)
The anti-tip wheels are located at the rear of the scooter frame. The anti-tip wheels are removable on some models. The scooter should not be used unless the anti-tips are fitted. Shoprider® is not responsible for the damage or injury due to improper or misuse of the scooter. Rear Chassis Cover... -
Page 17: Operating Your Shoprider® Scooter
Operating Your Shoprider® Scooter Mounting the Scooter For your first lesson be sure you and your Shoprider® scooter are on a level surface with plenty of room to test drive the scooter. Mount the scooter, either by lifting the armrest and sliding on to the seat or rotate the seat by lifting seat swivel lever and then rotate to face the tiller. -
Page 18: Grass And Gravel
This will reduce the possibility of the scooter tipping. CAUTION: Do not drive your Shoprider® across the side of an incline Do not stop if possible while driving up or down an incline. Use 7-10 setting on your speed dial when going up an incline and 1-4 when going down the incline. -
Page 19: Ramp Angle
Appendix 1 Rocky 6 15' (27%) 75kg 12' (20%) 100kg (15%) 125kg (10%) 150kg (0%) 227kg Rocky GOLF 15' (27%) 75kg 12' (20%) 100kg (15%) 125kg (10%) 150kg (0%) 227kg 889SL (15%) 91kg (10%) 113kg (0%) 136kg 889ERSF (15%) 113kg (10%) 136kg (0%) 159kg... -
Page 20: Batteries And Battery Charger
Batteries life is not specific due to a number of reasons however Shoprider® encourages that the scooter be placed on charge every night. -
Page 21: Periods Of Storage
Figure 15 Figure 16 Periods of Storage If the Shoprider® scooter is not going to be used for long periods of time then Shoprider® recommends that the scooter be charged every two weeks as a minimum. Airline travel Your Shoprider® scooter uses either Gel or Sealed lead acid deep cycle batteries. They are maintenance free and transportable on Aeroplane, Train and Automobiles, as there is no danger of leakage. -
Page 22: Care & Maintenance
Every six months check the tiller base bolts, wheel axle bolts, and arm rest angle adjustment bolts and tighten as necessary. Also check the seat and arm rest tightening knobs and tighten as needed. If your scooter is fitted with authorised Shoprider®... -
Page 23: Trouble Shooting Guide
Structural Frame – 3 Years Shoprider Australia warrants that the frame will be free from defects under normal use, for a period of three (3) years from the date of purchase by the original customer. - Page 24 Warranty Terms & Conditions Drive Train Assembly – 18 months Shoprider Australia warrants that the drive train Assembly will be free from defects under normal use, for a period of eighteen (18) months from the date of purchase by the original customer.
-
Page 25: Technical Specifications
Rocky 6 may be optioned with 330 x 100mm tyres. DISCLAIMER Congratulations on your purchase of the Shoprider® It is not intended to be used by individuals with physical limitations that could prevent the user from operating this unit safely. Shoprider® disclaims all responsibility for any personal injury or property damage, which may occur as a result of improper or unsafe use of its products. - Page 26 You can rely on a Shop rider Ask for the brand Shoprider! R E L I A B L E M O B I L I T Y G U A R A N T E E D...
Need help?
Do you have a question about the Mobility and is the answer not in the manual?
Questions and answers
ater charging or 24 hours, the red light is still on one bar and blionking
If the red light is still on one bar and blinking after charging a Shoprider mobility scooter for 24 hours, it indicates an abnormality with the charging system. This usually means the charger is not receiving a signal from the batteries due to a break in the connection. Possible causes include:
- Loose or disconnected battery cables (black and red connectors)
- Blown fuses in the in-line fuse boxes
- A tripped circuit breaker (reset button)
- Batteries unable to hold a charge due to damaged cells or bad internal connections
Check all connections, fuses, and the reset button. If the issue persists, the batteries may need load testing.
This answer is automatically generated
can you put a speed limiter on the scooter
Yes, a speed limiter can be installed on a Shoprider mobility scooter. Speed limiters are typically part of the scooter's control system and are used to ensure safety by restricting the scooter's speed.
This answer is automatically generated