
Subscribe to Our Youtube Channel
Related Manuals for Shoprider VIKING 3


Summary of Contents for Shoprider VIKING 3
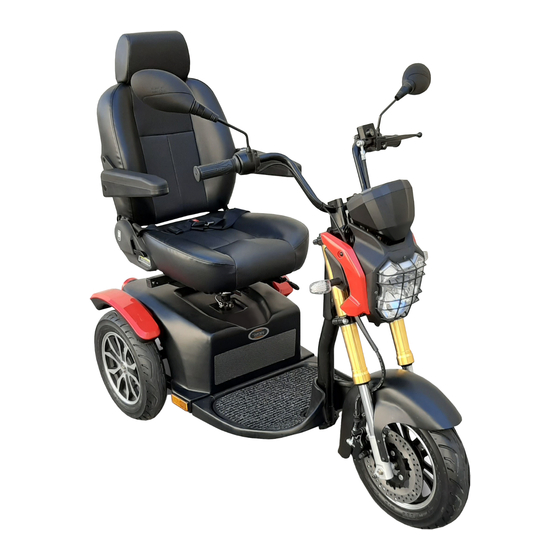
- Page 1 ATTENTION Please read your owner’s manual before driving your scooter. VIKING 3 Owner’s Manual...
-
Page 2: Table Of Contents
CONTENTS INTRODUCTION .....................3 FEATURE GUIDE ....................3 SAFETY ADVICE ....................4 EMI Warning ......................6 ADJUSTMENT ......................9 SCOOTER TILLER CONTROLS ................10 FREE WHEEL OPERATION ...................11 STARTING TO DRIVE YOUR SCOOTER..............12 EXTRA GUIDELINES IN THE CONTROL OF YOUR SCOOTER ......13 BATTERIES AND BATTERY CHARGER ...............14 MAINTENANCE ......................15 TROUBLE SHOOTING GUIDE ................17 WARRANTY TERMS &... -
Page 3: Introduction
® Congratulations on your purchase of the Shoprider scooter. This scooter incorporates the ® latest innovative designs patented and only available on a Shoprider scooter. This scooter can be used in outdoors. Direct drive transaxles and electromagnetic brakes give ®... -
Page 4: Safety Advice
SAFETY ADVICE • Do not carry passengers. • This mobility Product is intended to assist you. For your own safety, please read the Owner’s Manual before using the Scooter. If in any doubt, contact your supplier directly for advice. • Do not exceed inclines over 9 degrees (15% grade). •... - Page 5 • Ensure the scooter is serviced every 12 months by an authorised Shoprider service provider to ensure it remains in safe working order. Failure to do so may cause...
-
Page 6: Emi Warning
EMI Warning ® Shoprider scooters may be susceptible to electromagnetic interference (EMI), which is a kind of interfering electromagnetic energy (EM) emitted from sources such as radio stations, TV stations, amateur radio (HAM) transmitters, two-way radio, and cellular phones. The interference (from radio wave sources) can cause the scooter to release its brakes, move by itself, or move in unintended directions. - Page 7 EMI. NOTE! There is no easy way to evaluate the overall immunity of the scooter. ® 5. Report all incidents of unintended movement or braking to your Shoprider dealer, and note whether there are sources of EMI nearby.
-
Page 8: Adjustment
ADJUSTMENTS Armrest Angle Adjustment (Fig. 1) Flip up the armrests to allow access to the adjusting wheel located under the armrest wind the adjusting wheel (Fig. 2) in a either clockwise or anti clock direction to adjust the Adjusting armrest up or down. Wheel Do not use the scooter without the arms being fitted. - Page 9 SCOOTER TILLER CONTROLS (Fig. 5) Fig. 5 (1) LCD Display Item Description Item Description Temperature Display Odometer Display Speedometer Display Headlight / High Beam Display Battery Gauge Display Hazard Warning Light Display “E”: Empty ; “F”: Full Spanner Symbol & Code – Service Direction of Travel Display refer to Self-Help Guide (P.17) Left / Right Turn Signal Display...
-
Page 10: Scooter Tiller Controls
(2 & 3) Speed Controls The speed control allows you to control your speed up to maximum speed of 10kmph Pushing down on the thumb lever (2) to increase or decrease your speed, to stop the scooter remover your thumb from the lever for automatic braking. The “High / Medium / Low”... -
Page 11: Free Wheel Operation
FREE WHEEL OPERATION (Fig. 6) The free wheel release lever (red handle) is located inside the left rear wheel. To disengage the motor, lift up the lever (the scooter can now be pushed). To re-engage the motor push down on the lever. WARNING! Always re-engage the free wheeling device after use. -
Page 12: Starting To Drive Your Scooter
STARTING TO DRIVE YOUR SCOOTER Getting Started • Select a level area with plenty of space. • Mount the scooter, either by lifting the arm and sliding on to the seat or rotate the seat outwards and then rotate the seat back to face the tiller. •... -
Page 13: Extra Guidelines In The Control Of Your Scooter
EXTRA GUIDELINES IN THE CONTROL OF YOUR SCOOTER Ramps The stability of your scooter is governed by several factors such as the seating position, the angle of the slope and your height and weight. When approaching an incline, do so directly and not at an angle and whenever possible avoid making turns. -
Page 14: Batteries And Battery Charger
3-pin lead from the tiller. Charging Port ® WARNING: Only use the original Shoprider approved charger! This charger is for indoor use only. DO NOT expose it to rain or water spray. Do not leave the charger plugged into the charger port if the charger is not charging. -
Page 15: Maintenance
Regular servicing will ensure trouble free operation. Please Note Heavy users of the scooter may require more frequent servicing. Consult with your authorised Shoprider dealer to have the servicing requirements completed every year. Lubrication At six-month intervals you should lubricate the following parts with a light oil or similar lubricant: •... - Page 16 Wheels and Tires The wheels of your scooter have one piece rims and tubeless tyres so repairing any punctures will need to done by a authorised repairer or tyre centre. To change the wheels remove the center 13 mm bolt and slide the wheel off its axles. Take care not to lose the drive key on the rear wheels.
-
Page 17: Trouble Shooting Guide
TROUBLE SHOOTING GUIDE The Self-Help Guide (Table 1) is intended to assist in the location of a fault that may occur in a certain part of the scooter. The diagnostic alarm will sound a warning signal to alert the user that a diagnostic alarm pattern is about to be sounded. The signal will be a set of fast beeps lasting two seconds. - Page 18 Please consult your dealer if your scooter does not run after checking these points. Please consult your selling Shoprider provider if your scooter does not run after checking these points.
-
Page 19: Warranty Terms & Conditions
Shoprider® will as noted below supply spare parts as required as part of this agreement. Structural Frame – 10 Years Shoprider Australia warrants that the frame will be free from defects under normal use, for a period of ten (10) years from the date of purchase by the original customer on units purchased after October 2022. - Page 20 NOTE: In the event of a warranty issue, Always contact your selling Shoprider® dealer who will arrange any work and return any faulty parts. Parts will be assessed and replaced within 3-5...
-
Page 21: Technical Specifications
TECHNICAL SPECIFICATIONS Model Name 779XLS VIKING 3 1550(61) x 700(28) x 1305(51) Overall Dimensions: L x W x H mm(in) 1 x 16.0 Front Pneumatic Tire Diameter pcs x in 2 x 16.0 Rear Pneumatic Tire Diameter pcs x in... -
Page 22: Disclaimer
This owner's manual is printed based on the latest specifications and product information available at the time of publication. SHOPRIDER® reserves the right to make changes as they become necessary. Any changes to the SHOPRIDER® range may cause slight variations between the illustrations and explanations in this manual and the scooter model that was purchased. -
Page 24: Notes
Notes P/N:300904-163...
Need help?
Do you have a question about the VIKING 3 and is the answer not in the manual?
Questions and answers