Table of Contents
Advertisement
Advertisement
Table of Contents

Related Manuals for Godex EZ-4TT Plus


Summary of Contents for Godex EZ-4TT Plus
- Page 1 P/N. 920-010611-03 Edition 3 AUG.07 EZ-4TTP/4TKP User’s Manual...
- Page 2 FCC COMPLIANCE STATEMENT FOR AMERICAN USERS This equipment has been tested and found to comply with the limits for a CLASS A digital device, pursuant to Part 15 of the FCC Rules. These limits are designed to provide reasonable protection against harmful interference when the equipment is operated in a commercial environment.
-
Page 3: Table Of Contents
EZ-4TTP/4TKP USER’S MANUAL ............0 1. ABOUT THE PRINTER ...............3 1-1. I ..................3 NTRODUCTION 1-2. G ..............3 ENERAL PECIFICATIONS 1-3. C ..................... 4 ONTENTS 1-4. P ..................4 RINTER ARTS 1-5. I .................... 5 NDICATORS 2. S ............6 ETTING UP RINTER 2-1. -
Page 4: About The Printer
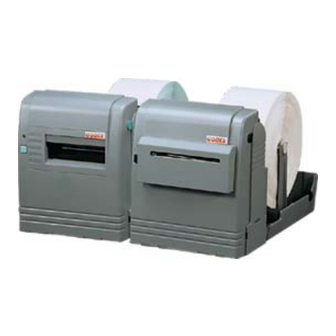
EZ-4TT Plus has a 4” print wide with 16” print length that can be maximized to 40” long and the EZ-4TK Plus has a 4” print wide with 6” print length that can be maximized to 16” long The printing resolution is 203dpi / 300dpi and a high-speed performance of up to 4”... -
Page 5: Contents
Specifications EZ-4TT Plus EZ-4TK Plus Options Expanded memory module Cutter Stripper GODEX Stand alone Data Terminal Keypad USB Adapter kit Ethernet printer server kit Datamatrix Code and QR Code 1-3. Contents The contents comprise of the following: <1>Printer <2>Switching Power Supply <3>... -
Page 6: Indicators
1-5. Indicators LED indicator Color Meaning Green (solid) Media and Ribbon* loaded Green (flashing) Asia fonts download Red (solid) Out of media, ribbon Red (flashing) Upgrading firmware Orange Firmware damaged, refer described on page 13 * Thermal transfer printing only Buzzer indicator Beep sound Meaning... -
Page 7: Setting Up Your Printer
2. Setting up Your Printer 2-1. RS-232 Setting The Serial Port setting sees as below: Syntax : ^Yp1.p2,p3,p4 Parameter : p1 : Baud Rate; 48=4800bps; 96=9600bps; 19=19200bps; 38=38400bps p2 : Parity (N, O, E); N=none parity; O=odd parity; E=even parity p3 : Number of data bits (7 or 8) p4 : Number of stop bits (1 or 2) 2-2. -
Page 8: Loading Label Roll
Fig. 2.2.4 Fig. 2.2.5 2-3. Loading Label Roll Load a small label roll The EZ-4TTP/4TKP printer can print on heat-sensitive direct thermal paper and non heat-sensitive thermal transfer paper. In case of non heat-sensitive paper, a suitable thermal transfer ribbon must be used. Whatever media in used, the recommended minimum label height is 20 mm. -
Page 9: T Oconnect The Printer To An Interface
B. Load large label roll Open the front and back cover. To load a label roll onto the roll core (part 14). Remove the label roll stands (part 10). Vertically place the two stands along the left side and right side of the back cover (see Fig. -
Page 10: Tripper
2-5. Stripper Stripper (Peeler) helps you separate the printed label from the liner (backing paper). Only when the separated label has been taken away, will another label be printed automatically. Open the front cover and back cover. Press the printer locks (part 12) to loosen the printhead assembly, and turn over the head assembly. Press the stripper arm down to “on”... - Page 11 Fig. 2.5.3 Fig. 2.5.4 Fig. 2.5.5...
- Page 12 Fig. 2.5.6 Lift the strip arm to “off” position whenever you do not choose stripper. Note: Put back the strip sensor whenever you do not choose stripper. The strip bracket bar is used for strip function. If you don’t need to use strip function, you may take out the strip bracket bar and keep to safe place.
-
Page 13: Utter
2-6. Cutter We suggest that the minimum label height be more than 35 mm. If you need any help in installation and maintenance, please consult your supplier or dealer. Rotary Cutter Adjustment There are two adjustable opening showed as arrow “A” on the cutter. The paper jam may cause the cutter work improperly, power off the printer. -
Page 14: Self Test
Release the feed button after the printer beeps 3 times. Wait for about 3 seconds; the printer will print the following contents. Disable the Self-test, please power off the printer at least 2 seconds, than power on again. EZ-4TT Plus LABEL PRINTER VERSION : Vx.xxx CODE 39... -
Page 15: Maintenance And Adjustments
3. Maintenance and Adjustments 3-1. Cleaning the Printhead Open the Front cover and back cover. Press the printer lock (part 14) to loosen the printhead assembly. Turn over the head assembly. Use a soft cloth soaked with isopropyl alcohol to remove the stuck label and cleans the surface. Put back the printhead and fasten it. -
Page 16: Adjusting The Printhead Pressure Screws
3-3. Adjusting the Printhead Pressure Screws decrease pressure increase pressure When opening the front cover, you can see two screws on the top of the printhead assembly. With different paper material or ribbon material, you may need to adjust the printhead pressure by turning these two screws to decrease or increase the pressure. -
Page 17: Appendix
Appendix A. Troubleshooting Problem Solution or Reason LED does not light (power Check Power connector. switch already turned on). Printing stops and LED turns Software setting or programming problem. red. Refer described on page 5. Perform a Label Gap Sensor Adjustment as described on page 14. Printing no stops or skip label Perform a Label Gap Sensor Adjustment as described on page 14.
Need help?
Do you have a question about the EZ-4TT Plus and is the answer not in the manual?
Questions and answers