
Related Manuals for Gefen EXT-VGARS232-141


Summary of Contents for Gefen EXT-VGARS232-141
- Page 1 ® VGA RS-232 Extender E X T - V G A R S 2 3 2 - 1 4 1 U S E R M A N U A L www.gefen.com...
- Page 2 Notice Gefen, LLC reserves the right to make changes in the hard ware, packaging and any accompanying doc u men ta tion without prior written notice. VGA RS232 Extender is a trademark of Gefen, LLC © 2010 Gefen, LLC, All Rights Reserved All trademarks are the property of their respective owners.
-
Page 3: Table Of Contents
TABLE OF CONTENTS INTRODUCTION OPERATION NOTES PANEL DESCRIPTIONS INSTALLATION INSTRUCTIONS HOW TO ADJUST THE PICTURE CAT5 WIRING DIAGRAM SPECIFICATIONS WARRANTY WALL MOUNTING PLATE INSTRUCTIONS... -
Page 4: Introduction
Thank you for purchasing the new VGA RS232 Extender by Gefen, Inc. The VGA RS232 Extender by Gefen allows users the benefi ts of extending VGA and RS232 signals beyond the desktop. The VGA RS232 Extender series can be used to extend a VGA and RS232 signal to cover the distance of 330 feet. -
Page 5: Operation Notes
OPERATION NOTES READ THESE NOTES BEFORE INSTALLING OR OPERATING THE VGA RS232 EXTENDER SYSTEM • Use industry standard Category-5 (CAT-5) cable to operate the VGA RS232 Extender system. CAT-5 E cable is preferred. • Please connect all the cables between the computer and the VGA RS232 Extender before powering up the VGA RS232 Extender unit. -
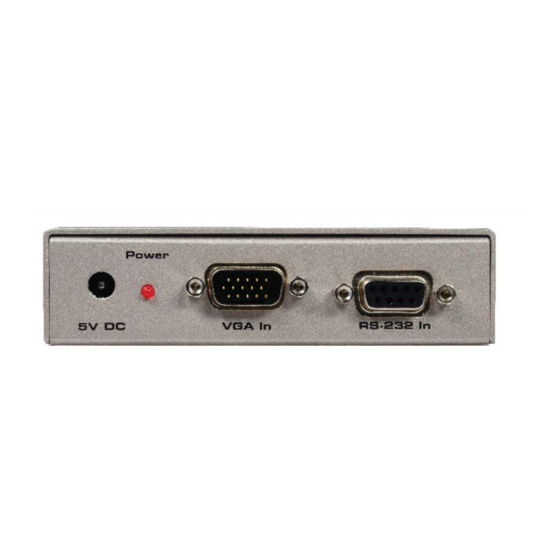
Page 6: Panel Descriptions
PANEL DESCRIPTIONS... -
Page 7: Installation Instructions
INSTALLATION INSTRUCTIONS Connect the VGA RS232 Extender Sender unit to the VGA and RS232 output on the back of your computer. The six foot RS232 and M-F VGA cables connect the CPU and Sender unit together. Connect the VGA RS232 Extender Receiver unit to your monitor with the VGA cable that is attached to your monitor. -
Page 8: How To Adjust The Picture
HOW TO ADJUST THE PICTURE The fi rst step in adjusting the video quality is to display text and a graphic on your monitor (i.e. desktop icons). Then set your computer to the resolution that you will be using most frequently. -
Page 9: Cat5 Wiring Diagram
CAT5 WIRING DIAGRAM... -
Page 10: Specifications
SPECIFICATIONS Video Amplifi er Bandwidth .................. 350 MHz Actual Bandwidth ....................120 MHz Input Video Signal ..................1.2 Volts p-p Horizontal Frequency Range ................15-70 KHz Vertical Frequency Range ................30-170 Hz Video In ......................HD-15 Male Video Out ....................HD-15 Female Serial In (RS232 Connector) ..............DB9 9-Pin Female Serial Out (RS232 Connector)..............DB9 9-Pin Male Link Connector ...................... -
Page 12: Mounting Plate Installation
Wall Mounting Plate Installation Guide Mounting Plate Installation Remove the rubber feet covering the screws off the bottom of the unit. Remove the screws. Line up the mounting plates and screw it on to the unit. - Page 13 Rev X3 20600 Nordhoff St., Chatsworth CA 91311 1-800-545-6900 818-772-9100 fax: 818-772-9120 www.gefen.com support@gefen.com...
Need help?
Do you have a question about the EXT-VGARS232-141 and is the answer not in the manual?
Questions and answers