
Related Manuals for GE 40


Summary of Contents for GE 40
- Page 1 Security TruVision DVR 40 User Manual P/N TVR40 uman-EN • REV R1.0• ISS 02MAY10...
- Page 2 Disclaimer The information in this document is subject to change without notice. GE Security, Inc. (“GE Security”) assumes no responsibility for inaccuracies or omissions and specifically disclaims any liabilities, losses, or risks, personal or otherwise, incurred as a consequence, directly or indirectly, of the use or application of any of the contents of this document.
-
Page 3: Table Of Contents
Connecting the TVR 40 to a PC................................4 Setting up a PTZ dome camera ................................ 5 Connect a TVR 40 to a PTZ dome camera ........................5 Configure the PTZ protocols for GE Security cameras ..................... 5 Wiring the TVK-505U keypad................................7 Monitor connections .................................... - Page 4 Menu timeout ......................................39 Selecting video standard ...................................39 Video scaling......................................39 Menu transparency ....................................40 Defining VGA resolution..................................40 Setting system time and date................................40 Multiscreen and sequencing ................................41 Camera settings ........................44 Setting up the camera title................................45 Positioning the camera title................................45 Modifying the image quality................................46 Displaying the current time and date on-screen ........................47...
- Page 5 Upgrading the firmware..................................98 Restoring factory default settings ..............................99 Managing the hard drive................................. 100 Viewing system logs..................................101 Rebooting the TVR 40 ..................................102 Viewing system information................................103 13. Troubleshooting and support.................... 105 Troubleshooting your system ............................... 105 Contacting technical support ............................... 106 Appendix 1: Specifications ......................
-
Page 7: Product Overview
The TruVision DVR 40 offers 4, 8 or 16 channels of analog recording, all up to 4CIF resolution (704 x 576). The dual streaming functionality allows the user to set up different settings for recording and streaming video. -
Page 8: Installation Environment
(10 to 90%) before choosing an installation location. Extremes of heat or cold beyond the specified operating temperature limits may cause the TruVision DVR 40 to fail. Do not install the unit on top of other hot equipment. Leave space between rack mounted units. -
Page 9: Tvr 40 Installation
VGA output. Both outputs will display the same video information. Optional connections Connect a spot monitor (Mon B) to the TVR 40. Connect the monitor video to VIDEO OUT. Connect the monitor audio (if used) to AUDIO OUT (). -
Page 10: Connecting Alarm Inputs And Outputs
Connect the external data and alarm input/output (I/O) cable. See Figure 3 on page 4 for more information. M. Connect the TVR 40 to ground. Power connection Connect the power cord to the TVR 40. Be sure all devices are connected and turned on before you turn on the TruVision DVR 40. Connecting alarm inputs and outputs Figure 3: Connecting the external data and alarm I/O cable : Not used... -
Page 11: Setting Up A Ptz Dome Camera
Before the PTZ cameras are assembled in their housings, set their protocol and address DIP switches for the TVR 40. See Table 1 below for the different GE Security’s PTZ camera configurations. If you are using PTZ cameras from another company, please refer to their configuration instructions. - Page 12 TruVision DVR 40 User Manual Camera Switch setting TruVision Dome Protocol DIP 000000 12X PTZ: Outdoor switches Dome RS-485 0000000000 communication DIP switches Camera site ID DIP 0000 switches 1. Protocol DIP switches; 2. RS-485 communication DIP switches; 3. Camera site ID DIP switches...
-
Page 13: Wiring The Tvk-505U Keypad
1200 m. Both can be expanded using a signal distributor. Both the first and the last device in series should be terminated with 120 Ohm resistance to minimize line reflections. See Figure 6 below. Figure 6: RS-485 bus serial wiring 1. TVK-505 keypad; 2. I/O box; 3. TVR 40... -
Page 14: Monitor Connections
TruVision DVR 40 User Manual Monitor connections Connect the unit to the monitors via 75-ohm video coaxial cables with BNC connectors. The unit provides a 1 Vpp CVBS signal. -
Page 15: Controlling The Tvr 40
TruVision DVR 40 User Manual 3. Controlling the TVR 40 There are four ways to control the TVR 40 menu options: Front panel control IR remote control Mouse control Web browser control These options are described in the following sections. -
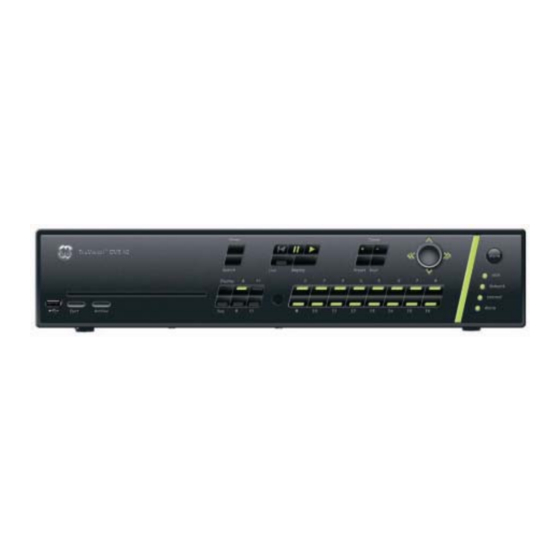
Page 16: Using The Front Panel
TruVision DVR 40 User Manual Using the front panel The buttons on the front panel control all functions. The LED indicators light up or flash to alert you to various conditions. The functions available can be limited by setting passwords. See Figure 7. - Page 17 TruVision DVR 40 User Manual Item Name Description Trigger-point joystick Use to select options in a menu and to control playback. Press for Enter. LED arrows are lit when the jog is active. In live mode: Press to enter PTZ mode.
-
Page 18: Using The Ir Remote Control
TruVision DVR 40 User Manual To silence the audible button feedback At any time press and hold down the Menu button for at least five seconds. The audible button feedback will activate or deactivate depending on the current status. Press Menu to return to live mode. -
Page 19: Using The Mouse
If the problem persists, please contact your local supplier. Using the mouse Use the USB mouse provided with the TVR 40. It can carry out the same operations as the front panel and remote control. Connect the mouse to the DVR by simply plugging the mouse USB connector into one of the USB ports on the TVR 40. -
Page 20: Using The Web Browser
Using the Web browser The TVR 40 Browser lets you easily view, record, and playback video as well as manage all aspects of the system from any Internet location. It has easy-to-use controls that give you quick access to the functions you require. - Page 21 TruVision DVR 40 User Manual To access the TVR 40 Browser Open Internet Explorer and type the IP address assigned to the TVR 40. In the Login screen enter the user ID and PIN. User ID = admin PIN = 1234...
-
Page 22: Basic Operations
To get the unit into operation quickly 1. Connect all the devices required to the back panel of the TVR 40. See Figure 2 on page 3. 2. Turn on the unit. The unit automatically carries out a diagnostic test of the devices. The video images then appear on-screen. -
Page 23: Logging In Using Pins
The way the monitors display video depends on how you have set up the system. In live mode the TVR 40 displays the status of each video channel at the bottom of the screen. See Figure 10 on page 18. The number of channels displayed (4, 8, or 16) depends on the TVR 40 model. - Page 24 The monitor is inactive if the letter is grey Caution: TVR 40 has no camera autodetection mode. The unit records a channel even if no camera is connected to it. A black picture with the message "Video Loss" is displayed when the channel is selected in either live mode or playback mode.
-
Page 25: Selecting A Monitor
Right-click the mouse and select Status Bar from the menu. Selecting a monitor The TVR 40 can be connected to up to two monitors. However, only one monitor can be controlled at a time. You can select from which monitor to display the camera views in live mode. -
Page 26: Manual Recording
TruVision DVR 40 User Manual To view a multiscreen display Front panel/ IR remote control Press the Display button to switch to multiscreen live mode. If the multiscreen display does not include all the cameras required, keep pressing the Display button to increase the number of screens displayed. -
Page 27: Searching And Playing Back Recorded Video
5. Press the Menu button on the front panel, or right-click the mouse, to save changes and return to live mode. Searching and playing back recorded video The TVR 40 lets you quickly search and playback recorded video. You must be in live mode to playback video. See Figure 11 on page 22. -
Page 28: Control Playback Progress
TruVision DVR 40 User Manual Figure 11: Playback screen Note: You must have playback rights to playback recorded images. See “Modifying operational rights” on page 90 for more information. The system also lets you playback channels simultaneously so that multiple images appear on- screen. -
Page 29: Search Recorded Video
TruVision DVR 40 User Manual Option Description 4. Current playback time Playback always starts from time zero. The actual time of the recording is shown on the top of the screen. Move the joystick up to jump forwards 30 seconds. It is not possible to jump backwards. - Page 30 To search for recorded video 1. In live mode press the Search button on the front panel of the TVR 40 or on the IR remote control, or right-click the mouse and select Search. Enter your user name and PIN, if requested.
-
Page 31: Playback Recorded Video
TruVision DVR 40 User Manual Enter the text required. 7. Select Search to start the search. When the search is completed a list of all the files found appears. The list may extend over several pages. The most recent file is listed first. -
Page 32: Archiving Recorded Files
2. Go to the Media edit box and select the backup device required. 3. In live mode press the Archive button on the front panel of the TVR 40 or on the IR remote control, or right-click on the mouse and select Archive. Enter your user name and PIN, if requested. The Playback screen appears. - Page 33 TruVision DVR 40 User Manual To archive recorded files found in a search 1. Insert the backup device into the TVR 40. 2. Press the Search button on the front panel or IR remote control, or right-click the mouse and select Search.
-
Page 34: Automatically Backup Recorded Files
Backups are done to an external hard drive. To backup recorded files 1. Connect the external hard drive to the TVR 40. 1. In live mode press the Search button on the front panel or IR remote control, or right-click the mouse and select Search. -
Page 35: Controlling A Ptz Camera
Note: Time has a 24-hour format. 9. Go to the Archiving Delay list box and select the time after activating the TVR 40 for auto backup to start. If the option “0Min” is selected, backup will start immediately OK is pressed. - Page 36 Note: The PTZ preset number is preprogrammed. See section “PTZ settings” on page 82 for further information. The TVR 40 will adjust to the settings of this preset number. 2. If you want to use a different preset PTZ number, repeat step 1 when in the PTZ mode. The unit will re-adjust to that preset number.
-
Page 37: Manually Acknowledging An Alarm
Manually acknowledging an alarm When an alarm is triggered, the alarm indicator on the front of the TVR 40 flashes red to alert you to the alarm. The alarm can be manually acknowledged to silence it. However, the alarm will still be active. -
Page 38: Overview Of The Menu Structure
The menu icon selected has a white action frame around it. Many of the submenus are only available to privileged users, such as the system administrator. You must be in live mode to access the menu mode where you can setup or change the TVR 40 settings in menu mode. -
Page 39: Navigating Through A Menu Screen
To access a menu 1. Press the Menu button on the front panel of the TVR 40 or on the IR remote control, or right-click the mouse and select Menu. Enter your name and PIN, if requested. The main menu appears. -
Page 40: Turning Off The Tvr 40
TruVision DVR 40 User Manual Caution: If there is a power failure during setup, you will loose all user-modified settings. The system will return to the programmed settings. Changes to screen settings can be entered in various ways as shown in Table 6 below. - Page 41 TruVision DVR 40 User Manual...
-
Page 42: Display Settings
TruVision DVR 40 User Manual 5. Display settings Use the Display menu to configure which information is displayed on-screen and how it should look. The following options can be configured: The language of the unit The device ID ... -
Page 43: Selecting A Language
The default language is English. Note: The last language used on the TVR 40 will be the unit’s language when the system is rebooted. 2. When you have made all the changes required in the Display menu, go to OK and press Enter or left-click the mouse to save all changes and return to the main menu. -
Page 44: Setting The Device Id
Setting the device ID When you use the IR remote control to operate the TVR 40, the TVR 40 must have a device ID. The default device ID is “01“. If there is more than one DVR used, each unit must have its own unique device ID as otherwise the IR remote control will control all the units together. -
Page 45: Menu Timeout
Selecting video standard The TVR 40 can support PAL or NTSC video output. PAL is the default format. To select the video standard 1. In the Display menu go to the Video Standard list box and press Enter or left-click the mouse. -
Page 46: Menu Transparency
Setting system time and date You can setup the TVR 40 date and time as well as the Daylight Saving Time (DST). This is the date and time that will appear on screen. You can setup when DST for the TVR 40 starts and stops in the year. It is deactivated by default. -
Page 47: Multiscreen And Sequencing
TruVision DVR 40 User Manual Front panel: Press Enter to enter edit mode. Move the joystick up or down to scroll through the numbers in the date box. Press the joystick again to exit edit mode. Repeat for each date box. - Page 48 TruVision DVR 40 User Manual 2. Go to the Monitor Output list box. Select between monitor output A or B. Monitor A is default. 3. Go to the Display list box. Select the desired multiscreen mode from the drop-down list. Press Enter to select the list box and then move it up or down to scroll through the options.
- Page 49 The live display will automatically switch after 20 seconds. The live display will automatically switch after 30 seconds. For example: If a 16-channel TVR 40 has the 4-screen live mode and the 20-second dwell time selected, the TVR 40 will cycle four camera displays every 20 seconds.
-
Page 50: Camera Settings
TruVision DVR 40 User Manual 6. Camera settings Use the Camera menu to configure the cameras. The following options can be configured: The name of each camera The position of the camera name on screen The camera brightness, contrast, saturation and hue ... -
Page 51: Setting Up The Camera Title
TruVision DVR 40 User Manual The following procedures show how to change camera settings from the Camera menu. They can be changed in any order. All changes made to the Camera menu apply to the selected camera. The camera settings of one camera can easily be copied to another camera. -
Page 52: Modifying The Image Quality
TruVision DVR 40 User Manual Modifying the image quality Different cameras and backgrounds may need to have the screen image modified in order to obtain the best video image. Use this menu to configure the video image. You can setup each camera separately or copy the video parameters of one camera to another camera. -
Page 53: Displaying The Current Time And Date On-Screen
TruVision DVR 40 User Manual Displaying the current time and date on-screen Select the format of the current date and time displayed on-screen, as well as where it appears. To setup a camera’s displayed time and date 1. In the Camera menu select the camera you want to adjust. -
Page 54: Motion Detection
Motion detection The TVR 40 can be setup to trigger an alarm if a camera detects motion. Select the level of sensitivity to motion as well as the target size so that only objects that could be of interest can trigger a motion recording. - Page 55 TruVision DVR 40 User Manual 2. To select the motion detection zone(s) a. Go to the Zone setup button and press Enter or left-click the mouse. The Motion Zone setup screen appears. There is a solid white pane on-screen. The motion zone setup steps are the same as those for mask zone setup (see page 52).
- Page 56 TruVision DVR 40 User Manual d. To clear part of a motion detection zone: Front panel/IR remote control: Move the solid white square to the top of the motion detection zone to be deleted. Press the F1/Analog button. The white pane becomes transparent.
- Page 57 63 for more information. c. Go to Alarm Schedule and select when you want the TVR 40 to respond to a motion alarm. You can select up to seven days in a week and up to four time periods for each a day.
-
Page 58: Privacy Masks
TruVision DVR 40 User Manual 4. Select OK to confirm the changes and to return to the Camera menu. 5. When you have made all the changes required in the Camera menu, go to OK and press Enter or left-click the mouse to save all changes and return to the main menu. Press the Menu button to return to live mode. - Page 59 TruVision DVR 40 User Manual 4. Front panel/IR remote control: Use the following buttons to setup the mask zones: Front panel IR remote control Action buttons buttons Move the white pane to any position Analog Toggle between the white (deactivate) and grey (activate) panes...
-
Page 60: Viewing A Camera Tamper Alarm
TruVision DVR 40 User Manual 8. In the Advanced Settings submenu press OK to return to the Camera menu. 9. When you have made all the changes required in the Camera menu, go to OK and press Enter or left-click the mouse to save all changes and return to the main menu. Press the Menu button to return to live mode. - Page 61 Go to Period 1 and enter the time period for the response. You can set up to four time periods for each day of the week. You must reboot the TVR 40 to make the time periods operational. Note: The daily time periods cannot overlap.
-
Page 62: Setting Up A Video Loss Alarm
Note: The four daily time periods cannotoverlap. 5. Go to the notification options and press Enter or left-click the mouse to enable () or disable how you want the TVR 40 to respond to a video loss tamper alarm. Notification option... - Page 63 TruVision DVR 40 User Manual To copy a camera’s settings to another camera 1. In the Camera menu go to the Camera list box and select the camera whose options you want to copy. 2. Go to Copy to Camera and select the camera to which you want to copy the settings.
-
Page 64: Recording Settings
TruVision DVR 40 User Manual 7. Recording settings Use the Recording menu to setup how the TVR 40 records information. The following options can be configured: Handling information when the HDD is full eSATA record or backup ... -
Page 65: Responding To Full Hdd
No Overwrite When all the HDDs in the TVR 40 are full, the device will handle the event as a “Hard Disk Full” condition and respond according to how this condition has been programmed under the Notification menu. -
Page 66: Using An External Storage Device For Backup
You can use an external storage device, such as an e-SATA HDD, as a backup for video or add its recording capacity to that of the TVR 40 itself. If you change this option, you must reboot the TVR 40 to implement the change. - Page 67 You can select whether the recording is video only (default), or audio and video. If this option is changed, you must reboot the TVR 40 to implement the change. Go to the Stream Type list box and select one of the two options:...
- Page 68 QCIF is the lowest resolution value and 4CIF the highest. If you change this option, you must reboot the TVR 40 to implement the change. Go to the Resolution list box and select one of the options listed: QCIF, CIF (default), 2CIF, and 4CIF.
-
Page 69: Setting Up A Camera's Recording Schedule
TruVision DVR 40 User Manual Setting up a camera’s recording schedule You can setup a recording schedule for selected camera(s). You need to reboot the TVR 40 after changing this option To setup a camera’s recording schedule 1. In the Recording menu go to the Camera list box and select the camera for which you want to do a recording schedule. - Page 70 External alarm output” on page 78). The TVR 40 is recording all the time at a defined rate. The prerecording time is the time before a motion or external alarm is triggered and which is included in the alarm data. It is related to the bit rate.
- Page 71 TruVision DVR 40 User Manual...
-
Page 72: Network Settings
TruVision DVR 40 User Manual 8. Network settings Use the Networking menu to setup the network settings of the TVR 40. The following options can be configured: IP address and settings Subnet mask Gateway IP DNS address ... -
Page 73: Network Settings
In the main menu go to the Network menu icon and press Enter or left-click the mouse. The Network menu appears. Caution: The TVR 40 will automatically reboot when any network parameter is changed and saved. Network settings Use the network menu to set standard network settings. -
Page 74: E-Mail Settings
E-mail settings The TVR 40 has can send e-mail notifications of alarm events through the network. The e-mails can be sent to up to two different addresses. The device can send up to five jpeg images of a recording with an e-mail. -
Page 75: Advanced Ip Settings
1. In the Network menu go to the Advanced Settings setup box and press the joystick for Enter, or left-click the mouse. The Advanced Settings submenu appears. The MAC Address edit box shows the MAC address of the TVR 40 unit. - Page 76 Domain Name. If using the front panel, press the joystick for Enter. Note: Use the FTP IP if the PPPoE function is used, and the TVR 40 gets a dynamic IP address from the ISP. If you set the FTP IP you will get one fixed Internet IP, TVR 40 will send information such as its name, serial number, and current IP to that fixed IP address.
-
Page 77: Pppoe Dial-Up Settings
9. Go to the Time Zone edit boxes and set the time zone in which the TVR 40 is located. 10. Go to the Interval edit box and enter the number of hours after which the TVR 40 should synchronize its time with that of the network server. -
Page 78: Ddns Settings
TruVision DVR 40 User Manual DDNS settings Use this to select the DDNS service. The default DDNS protocol is www.dyndns.com. To setup DDNS 1. In the Network menu go to the DDNS edit box and press the joystick for Enter, or left-click the mouse. - Page 79 TruVision DVR 40 User Manual...
- Page 80 TruVision DVR 40 User Manual...
-
Page 81: Alarm Settings
TruVision DVR 40 User Manual 9. Alarm settings Use the Alarms menu to setup how the TVR 40 responds when an alarm is triggered. You can select how the alarm settings should be handled such as: An external alarm input ... -
Page 82: External Alarm Input
TruVision DVR 40 User Manual When setting up the alarm relay output, you need to set the alarm output time delay. This delay is the time that the alarm output continues after the alarm itself has been deactivated. Consequently the actual alarm output time consists of the alarm input time and alarm output time delay. - Page 83 TruVision DVR 40 User Manual c. Under Alarm Schedule select the schedule for when the TVR 40 will respond to an external alarm. Select the day of the week and then for Period 1 enter the start and end time periods for the selected day.
-
Page 84: External Alarm Output
Acknowledge: The alarm output will not stop until the alarm is manually acknowledged. See page “Manually acknowledging an alarm” on page 31 for further information. Caution: An alarm can only be manually acknowledged locally. Do not select this option if the TVR 40 is controlled over a network. 5 seconds ... - Page 85 TruVision DVR 40 User Manual 3. To select when during a day an alarm output can respond a. Go to the Alarm Output schedule button and press Enter or left-click the mouse. The Alarm Output Schedule submenu appears. b. In the Day list box select the day of the week. Using the numeric buttons on the front panel, or the on-screen numeric keyboard, enter the start and end time periods for the selected day for Period 1.
-
Page 86: Notification Settings
TruVision DVR 40 User Manual Notification settings For each alarm notification type, there are several ways to specify how to handle an alarm event. To setup the notification settings 1. In the Alarms menu go to the Notification setup button and press the joystick for Enter, or left-click the mouse. -
Page 87: 10. Ptz Settings
TruVision DVR 40 User Manual 10. PTZ settings You can control the PTZ functions of the cameras connected to the TVR 40. The PTZ menu allows you to setup the RS-485 and PTZ parameters to match your PTZ protocol such as: ... -
Page 88: Description Of Preset, Preset Tour, And Shadow Tour Options
TruVision DVR 40 User Manual Description of preset, preset tour, and shadow tour options Preset This 3-digit number represents the camera’s position, zoom, focus, and iris. You can save up to 128 preset numbers. Note: The PTZ used must be able to support a preset function. -
Page 89: Using Preset Positions
TruVision DVR 40 User Manual 3. Go to the Protocol list box and select one of the built-in PTZ protocols listed. GE RS-485 ASCII GE RS-485 (default) Infinova VideoTec HIKVISION VCL SpeedDome DM DynaColor Techwin DennardDome EVI-D30 DeltaDome Samsung Siemens... - Page 90 TruVision DVR 40 User Manual To set preset positions 1. In the PTZ menu go to the Preset setup button and press Enter or left-click the mouse. The Set Preset submenu appears. 2. Select the Preset setup button and press the joystick for Enter, or left-click the mouse. Enter your preset number (between 1 and 16) and press Enter, or left-click the mouse, to accept.
- Page 91 TruVision DVR 40 User Manual To tour the preset positions You can tour all preset positions in a camera. First you need to save the steps of preset positions to include in a tour. 1. In the PTZ menu go to the Preset Tour setup box and press the joystick for Enter, or left-click the mouse.
-
Page 92: Using Shadow Tours
TruVision DVR 40 User Manual Using shadow tours A shadow tour allows a preprogrammed motion of the camera. To setup a shadow tour 1. In the PTZ menu go to the Shadow Tour setup button and press the joystick for Enter, or left-click the mouse. -
Page 93: 11. User Settings
TruVision DVR 40 User Manual 11. User settings This section describes how to: Change user PINs Add new users Add or modify operational rights of users The User icon is located in the main menu. The following screen appears when you select the... -
Page 94: Overview Of Users And Pins
However, once you have completed the installation and setup you should change the admin PIN to protect against unauthorized access. Caution: Keep the Admin PIN in a safe place. If you should forget it, you must return the TVR 40 unit to our service center to be reconfigured. -
Page 95: Modifying A User's Pin
To modify a user’s PIN PINs are used to limit access to the TVR 40. Only the administrator can create or delete a PIN. The same PIN can be used by several users. When you create a new user, the default PIN is 0000. -
Page 96: Modifying Operational Rights
TruVision DVR 40 User Manual Using the on-screen alphanumeric keyboard, enter the new user name and press Enter to confirm. The user menu appears with the new name listed. Caution: A new user has no operational rights. They must be allocated. -
Page 97: Setting Up A Mac
Setting up a MAC The MAC address is not the TVR 40 address but that of the PC which will access the TVR 40. If you setup a MAC address, only the PC with that MAC address can access the TVR 40. -
Page 98: Deleting A User
TruVision DVR 40 User Manual 3. Go to the User’s MAC Addr. and press Enter or left-click the mouse. Use the on-screen alpha numeric keyboard to enter t the MAC address. 4. Go to OK and press Enter or left-click the mouse to return to the User menu. Select OK and press Enter or left-click the mouse to save the changes and return to the main menu. -
Page 99: 12. System Settings
TruVision DVR 40 User Manual 12. System settings The System menu allows you to setup the following parameters such as: Handle transaction information Configure RS-232 settings Upgrade the firmware Restore factory defaults Reboot the TVR 40 ... -
Page 100: Capturing Text Insertions
ATM includes NCR, DIEBOLD, WINCOR-NIXDORF, Siemens, OLIVETTI, FUJITSU, Hitachi, etc and POS support through GE ProBridge. The transaction types include query, withdraw, deposit, PIN modification and money transfer etc. The TVR 40 permits the capture of four types of text insertions. See Table 15 on page 95. - Page 101 To setup the TVR 40, you need to enter the following information: ATM through the serial port Type of ATMS machine Transaction type and code Software must be run in the ATM to send the command to the TVR 40 through the RS- 232 port.
-
Page 102: Handling Transaction Information
Receive data sent by ATM through serial port: Go to the Protocol list box and select the protocol parameter. GE ProBridge is default. Enter the values using the on-screen keyboard or the numeric buttons on the front panel. When finished, press Enter or left-click the mouse to... -
Page 103: Configuring The Rs-232
Configuring the RS-232 The following procedure shows how to change the RS-232 settings from the RS-232 submenu. The pre-populated default values are for GE ProBridge. The RS-232 settings can be changed in any order. To configure the RS-232 1. In the System menu go to the RS-232 setup box and press Enter or left-click the mouse. The RS-... -
Page 104: Upgrading The Firmware
232 port to a PC serial port for HyperTerminal control. For the text insert mode, connect serial devices such as ATM machines or GE ProBridge for point-of-service (POS) systems. 3. Select OK to accept the changes and return to the System menu. -
Page 105: Restoring Factory Default Settings
Press Menu, or right-click the mouse, to cancel. If you select the USB mode, you must connect a USB flash memory to the TVR 40 and confirm that the firmware file is in the root directory. Press Enter or left-click the mouse to start the upgrade. -
Page 106: Managing The Hard Drive
3. To format the HDD Caution: Before formatting the HDD, stop all recording. Once formatting is completed, you must reboot TVR 40 as otherwise the unit will not function correctly. a. Go to the HDD list box and select the HDD required. -
Page 107: Viewing System Logs
TruVision DVR 40 User Manual Viewing system logs To view the logs recorded in the TVR 40 You can search the recorded logs by: Options. There are four log options: All, Category & Time, Time, and Category. Main information types. There are four main information types: All, Alarm, Notification, and Operation. -
Page 108: Rebooting The Tvr 40
5. To search for the logs Go to the Search Log button and press Enter or left-click the mouse to start the search. When the search is completed, the TVR 40 will list all matched log information in the window underneath. -
Page 109: Viewing System Information
TruVision DVR 40 User Manual Viewing system information To view TVR 40 system information 1. In the System menu go to the System View edit box and press Enter or left-click the mouse. The System View menu appears. 2. Go to OK and press Enter or left-click the mouse to return to the System menu. - Page 110 TruVision DVR 40 User Manual...
-
Page 111: 13. Troubleshooting And Support
13. Troubleshooting and support This section provides information to help you diagnose and solve various problems that may arise while configuring or using your GE Security product and offers technical support contacts in case you need assistance. Troubleshooting your system... -
Page 112: Contacting Technical Support
TruVision DVR 40 User Manual Contacting technical support For assistance installing, operating, maintaining, and troubleshooting this product, please contact your local supplier Our web address is: www.gesecurity.eu Note: Be ready at the equipment before calling for technical support. -
Page 113: Appendix 1: Specifications
TruVision DVR 40 User Manual Appendix 1: Specifications Video compression MPEG-4AVC (H.264) PAL: 704 x 576, Live resolution NTSC: 704 x 480 Playback resolution QCIF/CIF/2CIF/4CIF Video input 4/8/16 Video input interface BNC (Electrical Level: 1.0 Vp-p, resistance: 75 Ω) Monitor A: One monitor A multiscreen output, BNC connector, NTSC/EIA... - Page 114 TruVision DVR 40 User Manual...
-
Page 115: Index
TruVision DVR 40 User Manual Index Device ID configuring, 60 configuring, 38 Administrator rights, 89 Display parameters configuring, 37 Alarms manually acknowledge, 31 Dwell time setting, 41 setting notification, 80 E-mail notification setup external alarm input, 76 setup, 68 setup external alarm output, 78... - Page 116 TruVision DVR 40 User Manual Language Network sniff, 95 changing, 37 NTSC/PAL Linking devices via a network, 94 changing, 39 Live mode On-screen camera status icons description, 17 Record/Alarm status, 17 full screen display, 19 Password manually cycle full screen displays, 20...
- Page 117 55 setup for viewing, 54 Time and date setting, 40 Transaction information confirguring, 96 Turning off the TVR 40, 34 Turning on the TVR 40, 16 VGA resolution configuring, 40 Video loss alarm setup, 56 Video recording, 61...
-
Page 118: Tvr 40 Menu Map
TVR 40 Menu Map See page 36 See page 44 See page 58 See page 66 See page 75 See page 81 See page 87 See page 93...
Need help?
Do you have a question about the 40 and is the answer not in the manual?
Questions and answers