GE 30 User Manual
Truvision dvr
Hide thumbs
Also See for 30:
- Owner's manual (68 pages) ,
- Installation instructions (2 pages) ,
- Use and care manual (32 pages)
Table of Contents
Advertisement
Quick Links
Advertisement
Chapters
Table of Contents

Related Manuals for GE 30


Summary of Contents for GE 30
- Page 1 Security TruVision DVR 30 User Manual P/N 1068702 • REV A • ISS 10NOV09...
- Page 2 Trademarks and patents GE and the GE monogram are trademarks of General Electric Company. The TruVision DVR 30 name and logo are trademarks of GE Security. Other trade names used in this document may be trademarks or registered trademarks of the manufacturers or vendors of the respective products.
-
Page 3: Table Of Contents
Chapter 1 Product introduction 1 Product overview 2 Chapter 2 Installation 3 Installation environment 4 Unpacking the TVR 30 and its accessories 4 HDD capacity 5 Back panel overview 6 Connecting devices to the unit 7 Chapter 3 Operating instructions 9... - Page 4 Factory defaults 79 Menu defaults 80 Network defaults 80 Appendix C Warranty and support 81 Warranty information 82 Contacting support 82 Appendix D KTD-405 keyboard mapping 83 TVR 30 to KTD-405 keyboard mapping 84 Index 85 TruVision DVR 30 User Manual...
-
Page 5: Product Introduction
Chapter 1 Product introduction Summary This chapter provides an overview of the TVR 30, including its features and functions. Content Product overview 2 TruVision DVR 30 User Manual... -
Page 6: Product Overview
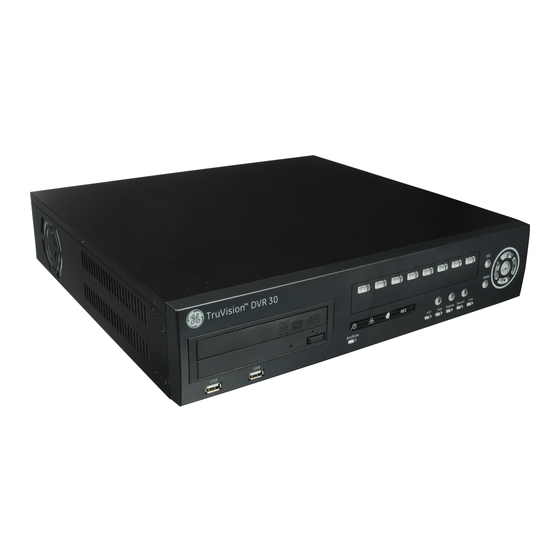
The TruVision DVR 30 (TVR 30) is an integrated digital video recorder that combines the features of a time-lapse audio/video recorder, a multiplexer, and a video server to create a single security solution. -
Page 7: Installation
This chapter provides information on how to install and connect peripherals to your device. Content Installation environment 4 Unpacking the TVR 30 and its accessories 4 HDD capacity 5 Back panel overview 6 Connecting devices to the unit 7 Connecting required devices 7... -
Page 8: Installation Environment
Extremes of heat or cold beyond the specified operating temperature limits may reduce the life expectancy of the TVR 30. Do not install the TVR 30 on top of other hot equipment. Leave 1.75 inches (44 mm) of space between rack mounted TVR 30 units. -
Page 9: Hdd Capacity
• TruVision DVR 30 Quick Reference Guide • Video player application • Record duration calculator HDD capacity Storage capacity for the TruVision DVR 30 varies depending on the model. Refer to Table 1 below for more information. Table 1: TruVision DVR 10 model types Model... -
Page 10: Back Panel Overview
Chapter 2: Installation Back panel overview Figure 1 below shows the back panel controls and connectors on a typical TruVision DVR 30. Figure 1: TVR 30 back panel Video out Network Attached Storage (NAS) port (This device is currently not supported.) -
Page 11: Connecting Devices To The Unit
Chapter 2: Installation Connecting devices to the unit Use Figure 2 below as a visual guide to connect the various peripherals to the TVR 30. Figure 2: Back panel connection diagram Link /Act FD/Col Power Connect up to two CCTV monitors (main and spot) -
Page 12: Connecting External Devices
When connecting external devices to include as part of the entire system, such as a USB drive or any other USB devices, connect those devices only when the unit displays live view. The TVR 30 recognizes external devices only after the unit has gone through the initialization process. -
Page 13: Operating Instructions
Chapter 3 Operating instructions Summary This chapter describes the how to control and navigate through the TVR 30’s menus and options. Content Control interfaces 10 Controlling the TVR 30 10 Front panel overview 11 Status LEDs 12 Using the mouse 12... -
Page 14: Control Interfaces
Chapter 3: Operating instructions Control interfaces The TVR 30 has three control interfaces: • Built-in interface • Display interface • Web browser interface Built-in interface. The built-in interface is displayed on the monitor output. It consists of a main menu and several dialog screens that let you configure and control the device. -
Page 15: Front Panel Overview
Front panel overview The buttons on the front panel control all TVR 30 functions and set the programmable functions. The LED indicators light up or flash to alert you of various conditions. -
Page 16: Using The Mouse
Using the mouse Use the USB mouse provided with the TVR 30 to carry out the same operations as the front panel and remote control. Connect the mouse to the TVR 30 by plugging the mouse USB connector into one of the USB ports on the front panel. The mouse is immediately operational and the pointer should appear. -
Page 17: Mouse Toolbar
The device is recording an alarm event. The device is in sequence mode. The device’s front panel is locked. The device is in archive mode. Indicates the starting point of a video segment for archive while in playback mode. TruVision DVR 30 User Manual... - Page 18 Toggles through the available multiscreen displays including full screen, four-screen, nine-screen, and 16-screen. Monitor Toggles between main and spot monitor. M indicates the main monitor is currently selected. S indicates the spot monitor is currently selected. TruVision DVR 30 User Manual...
- Page 19 Lets you archive video. Archives the video being played back while in playback mode. Launches PTZ mode. Play Plays back video instantly starting at one minute from the current date and time. Hides the function commands. TruVision DVR 30 User Manual...
-
Page 20: Using The Ir Remote Control
Chapter 3: Operating instructions Using the IR remote control The IR remote control buttons are similar to those on the TVR 30 front panel. You can use the remote control to perform any TVR 30 function. Figure 5: IR remote control... -
Page 21: Operating Modes
2. On the remote control, press the DVR ID button, and then press the 1 button. Note: The numeric button depends on the remote ID assigned to the TVR 30. The remote ID assigned is 1 by default. See “Controlling multiple DVRs with one remote control”... -
Page 22: Main Menu Overview
The built-in interface of the TVR 30 includes a main menu screen with eight command buttons. Each command displays a dialog screen that lets you edit a group of TVR 30 settings. The main menu screen is shown in Figure 6 below. Access to different option screens varies depending on your access privileges. -
Page 23: Using The Main Menu
Closing a screen, either by clicking the X button at the top right corner or by right- clicking, automatically saves and applies your changes. You cannot cancel or undo any changes you have entered in a dialog screen. TruVision DVR 30 User Manual... -
Page 24: Using The Virtual Keyboard
Figure 8 on page 21. The virtual keyboard automatically displays when entering values in an edit box field. You can use the front panel, IR remote control, or USB mouse to enter characters with the virtual keyboard. TruVision DVR 30 User Manual... -
Page 25: Exiting The Main Menu
4. When finished, click OK on the virtual keyboard to close the keyboard. Exiting the main menu Click Esc on the mouse toolbar (or right-click) or press Esc on the front panel or remote control to exit the main menu and return to live mode. TruVision DVR 30 User Manual... - Page 26 Chapter 3: Operating instructions TruVision DVR 30 User Manual...
-
Page 27: Basic Operation
Chapter 4 Basic operation Summary This chapter describes the basic operation of the TVR 30 such as how to turn on the unit, log on, control a PTZ camera, play back video, and archive recorded video files. Content Turning on the TVR 30 24... -
Page 28: Turning On The Tvr 30
Chapter 4: Basic operation Turning on the TVR 30 Before turning the TVR 30 power on, connect at least one monitor to the main video out or the VGA interface. Otherwise, you will not be able to see the user interface and operate the device. -
Page 29: Spot Monitor
2. While in live mode, press and hold a numeric key for two seconds on the front panel or remote control. 3. The spot monitor displays the corresponding camera in full screen. The spot monitor only supports full screen mode. TruVision DVR 30 User Manual... -
Page 30: Logging On
Figure 11: Spot monitor function Logging on The TVR 30 is shipped with a predefined user for the system administrator. The default system administrator logon uses “admin” as a user name with a password of 1234. You can modify the admin password but not the admin user name. GE Security recommends that you change the admin password once you have completed the installation and setup to protect against unauthorized access. -
Page 31: Controlling A Ptz Camera
Chapter 4: Basic operation Controlling a PTZ camera PTZ mode lets you to control the PTZ operation of the cameras using a TVR 30 PTZ interface. You can control PTZ cameras using the buttons on the front panel and IR remote control or by using the PTZ control icons on the mouse toolbar. -
Page 32: Calling Up A Preset Ptz Point
3. Click the Preset icon (or press 1 on the front panel or remote control) to access the Set/Go Preset function as shown in the figure below. 4. Enter a preset number. 5. Click Go Preset. The selected camera adjusts to the settings of that preset number. TruVision DVR 30 User Manual... -
Page 33: Playing Back Video
The TVR 30 plays back recorded video from the selected camera starting from the last recorded minute in live mode. Searching video for playback The TVR 30 lets you search and play back recorded video based on the following search criteria: • Date and time •... - Page 34 To search for recorded video using the Calendar Mode: 1. Click Search to display the Search screen. 2. Click Calendar Mode. The Calendar Mode screen displays as shown in the figure below. 3. Select a date from the Calendar. TruVision DVR 30 User Manual...
- Page 35 4. Click an event from the Event List to play video. Searching for recorded video by POS text The TVR 30 lets you to search for video based on text data from a point-of-sale (POS) device connected to the unit. You can search using any of these methods: •...
- Page 36 4. Click POS Search Result to display your search results. 5. Click a search result to play back the resulting video. Note: Make sure the Transaction Overlay (POS) box in the Display screen is set to include playback. TruVision DVR 30 User Manual...
-
Page 37: Playback Controls
When video is paused, use the left or right button to jump back to the previous frame or forward to the next frame. Exiting playback mode To exit playback mode, press Live or click the Live button on the mouse toolbar. TruVision DVR 30 User Manual... -
Page 38: Archiving Recorded Files
If using a digital video disc (DVD), insert the disc into the DVD drive. If both media are found in the TVR 30, the USB device takes precedence over the DVD. 2. Press the Archive button on the front panel or the remote control. The Quick Archive hint screen displays as shown in the figure below. -
Page 39: Using The Archive Screen In Live Mode
If using a digital video disc (DVD), insert the disc into the DVD drive. If both media are found in the TVR 30, the USB device takes precedence over the DVD. 2. Press the Archive button on the front panel, or remote control, or click Archive in the mouse toolbar. -
Page 40: Archiving A Video Segment In Playback Mode
2. Press Archive to mark the start time of the video segment you want to archive. 3. Press Archive again to mark the end time of the video segment you want to archive. This segment is then archived to the media. TruVision DVR 30 User Manual... -
Page 41: Using The Dvr Player
Chapter 4: Basic operation Using the DVR player Use the DVR player to view video clips archived from the TVR 30 on any PC. The DVR player is automatically included when archiving data from the device. When you insert the backup media into the PC, the DVR player automatically runs. -
Page 42: Logging Off
• Automatically log off from live or menu mode when no buttons are pressed for five minutes Turning off the TVR 30 To avoiding potentially damaging the TVR 30, use the proper method to turn off the unit. To turn off or restart the unit: 1. -
Page 43: Using The Web Browser
Using the Web browser to configure the device 41 Searching and playing recorded video 42 Using the mouse to zoom in or out 42 Live dual streaming 42 Bandwidth throttle management 43 Controlling a PTZ camera in the Web browser 43 TruVision DVR 30 User Manual... -
Page 44: Overview
TVR 30 functions. To access the TVR 30, open a Web browser and enter the IP address assigned to the TVR 30 as a Web address. In the log on screen, enter the default user ID and password. -
Page 45: Browser Connections
Check the hard drive health status Browser connections The Web browser interface lets you connect to the TVR 30 up to five times simultaneously. With each connection, you can view up to 16 cameras (streams). You can only view video from one camera for any additional connection to the device. -
Page 46: Searching And Playing Recorded Video
Bandwidth Control Switch button (shown in Figure 18 on page 43) in the Web browser interface and select the appropriate bandwidth setting to enable dual streaming. Predefined bandwidth settings (for the second stream) in the browser include: • 768 kbps TruVision DVR 30 User Manual... -
Page 47: Bandwidth Throttle Management
DVR to a client. This function is helpful for networks that have predefined bandwidth limits. This feature lets you control the TVR 30 in a network-sensitive environment and prohibits the TVR 30 from sending a large amount of network data that can potentially disrupt the network. - Page 48 Chapter 5: Using the Web browser Figure 19: PTZ camera in Web browser TruVision DVR 30 User Manual...
-
Page 49: Chapter 6 Advanced Setup
Chapter 6 Advanced setup Summary This chapter covers the advanced setup of your TVR 30. Advanced setup lets you define your users and access privileges, specify display options, and network configuration. Only users with appropriate access privileges can define and modify advanced configurations. - Page 50 E-mail settings 62 DDNS settings 63 UPnP 63 Display settings 63 Display format 64 Camera title display 64 Unit name display 64 Dwell time 64 Sequence order 65 Event display 65 POS transaction display 65 TruVision DVR 30 User Manual...
-
Page 51: Managing Users
Only the system administrator can customize a user. Customizing a user includes changing the user name, password, and access privileges on the User screen (shown in Figure 21 on page 48). All seven standard users can be customized for the TVR 30. TruVision DVR 30 User Manual... - Page 52 6. Click Mod in the Password box to display the virtual keyboard as shown in the figure below. 7. Enter a new password for the account. Note: You can only enter numerals for passwords. 8. Click OK to return to the User screen. TruVision DVR 30 User Manual...
-
Page 53: Enabling Password
The Privileges screen (shown in Figure 22 on page 50) lets you assign access levels to various functions or privileges of the TVR 30. Access levels range from level 1 (lowest) to level 8 (highest). Additionally, setting an access level to "Anyone" allows anyone to access the function, regardless of their assigned access privileges. -
Page 54: Configuring Cameras
2. Click the Privileges Setup button to display the Privileges screen. The Privileges screen displays a list of all privileges or operating functions for the TVR 30 and the current access level of each. 3. Select an access level for each of the privilege using the drop-down list. -
Page 55: Motion Detection Alarm
The TVR 30 can be configured to display an on-screen alert message and sound an alarm tone. The TVR 30 lets you define the area on screen where the motion is detected, the level of sensitivity to motion, and the target size. -
Page 56: Assigning Ptz Protocol
1. Click Cameras on the main menu to display the Cameras screen. 2. Click the PTZ Setup button to display the PTZ Setup screen. 3. Select a protocol in the PTZ Protocol box. Available protocol values include: TruVision DVR 30 User Manual... -
Page 57: Adjusting Video Image
Adjust the video image’s brightness, contrast, saturation, and hue by selecting a level in the corresponding box. 4. If video is going to be looped out of the device, set the Termination option to Off to avoid a double terminated video signal. TruVision DVR 30 User Manual... -
Page 58: Assigning A Camera Name
The new camera name is displayed. Configuring recording and schedule settings Use the Schedule screen (shown in Figure 25 below) to define how and when the TVR 30 records video. The following options can be configured: • Recording schedule • Video compression •... -
Page 59: Defining A Recording Schedule
1. Click Schedule on the main menu to display the Schedule screen. 2. Click Compression Setup to display the Compression screen. 3. Select a resolution in the Resolution box. 4. Select a format in the Format box. TruVision DVR 30 User Manual... -
Page 60: Defining Recording Quality
Alternatively, you can select the recording resolution and quality to determine the recording schedule. Note: The Record At Weekend command is unavailable if the Weekend Schedule box in the Schedule screen is set to No. Figure 27: Rec Wizard screen TruVision DVR 30 User Manual... -
Page 61: Expert Modes
You can set the resolution and recording quality in normal and event conditions based on the recording schedule. Figure 28: Expert Mode screen TruVision DVR 30 User Manual... -
Page 62: Alarm Settings
Use the Event FPS and Event Quality boxes to select the recording resolution and quality under event conditions. Alarm settings Use the Alarms screen (shown in Figure 29 below) to define how the TVR 30 handles alarms. Configurable settings include: • Remote alert •... -
Page 63: Configuring Remote Alert
Configuring remote alert The TVR 30 can send alarm notifications to a remote PC using compatible monitoring software. Use the Remote Alert screen to define settings that allow the TVR 30 to communicate with the remote PC and to enable this feature. -
Page 64: Network Settings
Network settings Accessing the TVR 30 remotely through a network requires that you define certain network settings. Use the Network screen (shown in Figure 30 below) to define the network settings of the TVR 30, including: • Ethernet settings •... -
Page 65: Advanced Ip Settings
Web browser. Bandwidth throttle lets you throttle the amount of network data from the DVR to a client. Predefined bandwidth throttle settings include: • 192 kbps • 384 kbps • 768 kbps • 960 kbps TruVision DVR 30 User Manual... -
Page 66: E-Mail Settings
For more information in Bandwidth Throttle Management, see “Bandwidth throttle management” on page 43. E-mail settings The TVR 30 has the option to send e-mail notifications of alarm events through the network. Use the Email Setting screen (shown in Figure 32 below) to configure the e-mail settings. -
Page 67: Ddns Settings
6. In the Submit/Update box, select Yes to submit the DDNS information through the network. UPnP If enabled, the UPnP function (Universal Plug and Play) lets a PC connect to the TVR 30 using the same local area network. To enable this function, select On in the UPnP box in the Network screen. -
Page 68: Display Format
Dwell time refers to the amount of time a camera view is displayed before moving into a different camera view. Select a dwell time for the main monitor in the Main Dwell Time box. Select a dwell time for the spot monitor in the Spot Dwell Time box. TruVision DVR 30 User Manual... -
Page 69: Sequence Order
Chapter 6: Advanced setup Sequence order The TVR 30 lets you configure the order of the cameras displayed in sequence mode for both the main monitor and the spot monitor. To configure the order of cameras: 1. Click Display on the main menu to open the Display screen. - Page 70 Chapter 6: Advanced setup TruVision DVR 30 User Manual...
-
Page 71: Chapter 7 System Settings
System settings Summary This chapter covers how to configure the system settings of your TVR 30. System settings lets you define the system date and time, unit name, RS-485 and RS-232 settings, upgrade, and hard drive settings. Only users with appropriate access privileges can define and modify advanced configurations. -
Page 72: Overview
Click System on the main menu to access the System screen. Figure 34: System screen System date and time Configure the TVR 30 system date and time in the Date/Time screen. This screen also lets you enable Daylight Saving Time (DST) and format the date and time displayed on-screen. -
Page 73: Daylight Saving Time
Use the Audio and Remote screen to define the audio output settings and specify the remote ID for the device. To access the Audio and Remote screen, click Audio and Remote Setup on the System screen. TruVision DVR 30 User Manual... -
Page 74: Rs-485 Settings
RS-232 settings Use the Device Setting screen to define settings for the serial port. This port is used to connect point-of-sale (POS) devices to the TVR 30. To access the RS-232 Setting screen, click RS-232 Setting on the System screen. -
Page 75: Importing And Exporting Configuration Settings
Importing and exporting configuration settings Use the Configuration screen to import or export configuration settings. Click Export Config to export the TVR 30’s configuration settings into a configuration file. Click Import Config to import configuration settings from a file. This screen also lets you restore the TVR 30 settings to factory defaults. - Page 76 Change preset config NormalPPS Change Normal PPS on per-channel config NormalSiz Change Normal size on per-channel config EventPPS Change Event PPS on per-channel config EventSiz Change Event size on per-channel config EventAct Change event active setting TruVision DVR 30 User Manual...
-
Page 77: Upgrading The Firmware
[1] This code is only for testing. Upgrading the firmware To upgrade the firmware using the built-in interface: 1. Display the System screen. 2. Click Upgrade to display the Upgrade screen as shown in the figure below. TruVision DVR 30 User Manual... - Page 78 Click Upgrade Firmware to upgrade the firmware through a USB flash drive. Click Firmware Download to connect the device to a network and download the upgrade file. 4. Click Upgrade at the prompt to reboot the TVR 30 and begin the upgrade process. TruVision DVR 30 User Manual...
-
Page 79: Appendix A Specifications
Appendix A Specifications Summary This appendix provides specifications for the TVR 30. Content Product specifications 76 Battery removal 77 TruVision DVR 30 User Manual... -
Page 80: Product Specifications
Relative humidity 10% to 90% Dimensions (W x H x D) 17.3 x 3.54 x 16.3 in (440 x 90 x 413 mm) Weight Approx. 15.42 lb. (7 kg) with 1 HDD and DVD-RW drive TruVision DVR 30 User Manual... -
Page 81: Battery Removal
Appendix A: Specifications Battery removal The TVR 30 unit contains one 3 V Lithium battery. This battery can only be removed by a recycling or service technician. The remote control comes with two AAA alkaline batteries. To remove the remote control batteries: 1. - Page 82 Appendix A: Specifications TruVision DVR 30 User Manual...
-
Page 83: Appendix B Factory Defaults
Appendix B Factory defaults Summary This appendix provides the TVR 30’S factory defaults. Content Menu defaults 80 Network defaults 80 TruVision DVR 30 User Manual... -
Page 84: Menu Defaults
Menu defaults Function Setting Date format M/D/Y Time format 12 HR Normal record speed 30 frames per second (NTSC), 25 frames per second (PAL) at CIF Record quality/FPS Normal Quality Menu timeout 5 minutes Video standard NTSC Disk overwrite mode... -
Page 85: Appendix C Warranty And Support
Appendix C Warranty and support Summary This appendix provides information on warranty and support for the TVR 30. Content Warranty information 82 Contacting support 82 TruVision DVR 30 User Manual... -
Page 86: Warranty Information
Appendix C: Warranty and support Warranty information The warranty period for the TVR 30 is two years from the date of delivery. Contacting support For help installing, operating, maintaining, and troubleshooting this product, refer to this document and any other documentation provided. If you still have questions, contact us during business hours (Monday through Friday, excluding holidays). -
Page 87: Appendix D Ktd-405 Keyboard Mapping
Appendix D KTD-405 keyboard mapping Summary This appendix provides information on how to operate the TVR 30 using the KTD-405 keyboard. Content TVR 30 to KTD-405 keyboard mapping 84 TruVision DVR 30 User Manual... -
Page 88: Tvr 30 To Ktd-405 Keyboard Mapping
Appendix D: KTD-405 keyboard mapping TVR 30 to KTD-405 keyboard mapping TVR 30 KTD-405 Joystick up or hold Esc, and then press the Up Arrow Down Joystick down or hold Esc, and then press the Down Arrow Left Joystick left or hold Esc, and then press the Left Arrow... -
Page 89: Index
25 viewing in multiscreen, 25 logging on, 26 logging out, 38 back panel overview, 6 basic operation turning on the TVR 30, 24 main menu navigating through dialog screens, 19 main menu commands, 18 cameras mouse toolbar, 13... - Page 90 Daylight Saving Time, 69 hard drive settings, 70 RS-232 settings, 70 RS-485 settings, 70 system date and time, 68 turning off the TVR 30, 38 upgrading the firmware, 73 users customizing a user, 47 defining access privileges, 49 enabling password, 49...
Need help?
Do you have a question about the 30 and is the answer not in the manual?
Questions and answers