
Subscribe to Our Youtube Channel
Related Manuals for X-TREME X-370


Summary of Contents for X-TREME X-370
- Page 1 X-Treme™ Electric Scooters X-370 Electric Scooter (Trunk not included. Sold Separately.) Owner’s Manual PLEASE BE SAFE WHEN RIDING ALWAYS WEAR A HELMET AND OBEY ALL LAWS!
-
Page 2: Battery Maintenance And
IMPORTANT BATTERY MAINTENANCE and CHARGING INSTRUCTIONS 1. You MUST charge completely prior to initial use. (Follow charging instructions in your Product Handbook) 2. Charge immediately after each use. Charge before storage. 3. You must charge every 30 days if not in use. 4. - Page 3 IMPORTANT PLEASE READ THIS BEFORE USING THIS PRODUCT READ THIS FIRST! WARNING This product does not conform to Federal Motor Vehicle Standards and is not intended for operation on public streets, roads or highways. Serious injury can result from the unsafe operations of this product. Operator can minimize these risks by using certain safety equipment such as: safety helmet, goggles, gloves, elbow and kneepads and appropriate footwear.
-
Page 4: Quick Reference
Avoid unintentional starts by turning the scooter off while not in use. To avoid the risk of a short circuit in the electrical parts, do not use your X-Treme Electric scooter in the rain and never spray or wash off your scooter with water. ... -
Page 5: Table Of Contents
TABLE OF CONTENTS TABLE OF CONTENTS……………………………….……………....... …… 5-7 GETTING TO KNOW YOUR X-TREME X-370………..…………………………………….. 7 PACKING CONTENTS……………………………………………………………. …….. …… 8 GETTING STARTED………………..…………………………………………………………… 8 Assembly……………………………………………………………………….. ………… 8 Charging………………………………………………………………………....9 Riding………………………………………………………………………... …………… 9 Stopping/Braking…………………………………………………………….. …………… 10 Braking System…..………….………………………………………………. …………… 10 Tires..………………………………..…………………..……………………. …………… 11 MAINTENANCE…………………………………………………………………...... - Page 6 How To Change The Charger Socket…………………………………………………… 25 How To Install/Replace Throttle……………………………………………...………..25 How To Check Wiring…………………………………………………………………….. 25 How To Change Ignition Module…………………………………..……………………. 26 Checking Fuses…………………………………………………………………..………. 26 How To Remove Batteries From Scooter…………………………………..…………... 26-27 How To Replace/Install A Controller…………………………………………………….. 27 How To Install Dash Assembly…………………………………………………………… 27 How To Remove and Insert Pins In Connectors………………………………………..
-
Page 7: Getting To Know Your X-Treme X-370
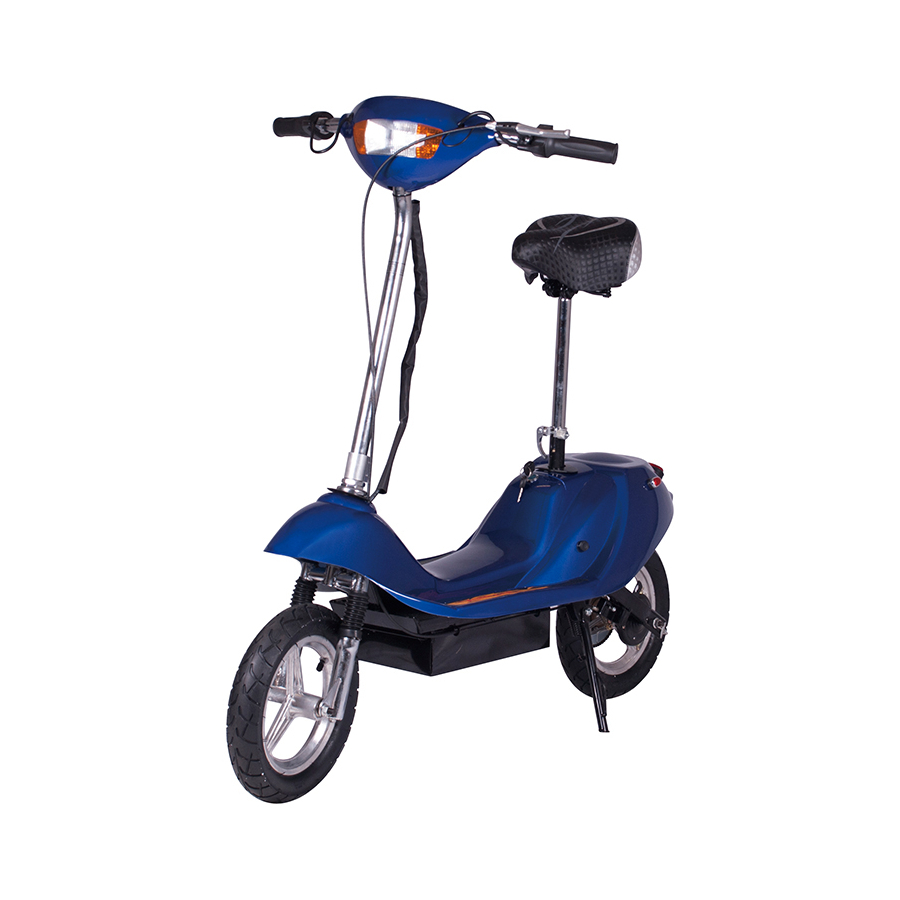
Trunk Rack Installation Diagram………………………………………………………… 41 Front Fork Assembly Diagrams…………………………………………………..…….. 42 Motor Controls Diagram…………………………………………………………..……… 43 Battery Wiring Diagram…………………………………………………………………… 43 GETTING TO KNOW YOUR X-TREME X-360 Speedometer & Voltage Gauges Blinker, Brake & Horn Controls Variable Speed Throttle Headlight with Blinkers Spring Loaded Seat Storage Box –... -
Page 8: Packing Contents
PACKAGE CONTENTS Your X-Treme X-370 comes with the following items in the box. Please locate all of the following: The X-Treme X-370 Scooter 36V Battery Charger Tool Kit Seat & Seat Post Front Wheel & Axle Trunk with Keys & mounting hardware Trunk Rack &... -
Page 9: Charging
4. Turn the Ignition key to the ON position. Gently rotate the THROTTLE GRIP, on the right side of the handlebars. The X-370 will begin to move on its own power. Your scooter has a variable speed hand throttle. You can control the speed of your scooter by... -
Page 10: Stopping/Braking
BRAKING SYSTEM The X-370 uses a hub brake system on the rear wheel of the scooter activated by a hand brake lever on the left side of the handlebar. Squeezing the hand brake lever with your left hand activates the rear brake. -
Page 11: Tires
TIRES The X-Treme X-370 uses an identical tire on the front and rear wheels, which means that the tires can be rotated. Tire wear will differ based on rider weight, riding conditions and care. -
Page 12: Maintenance Schedule
Fig. 9 MAINTENANCE SCHEDULE Proper care of your X-Treme X-370 will insure optimal performance and longer life span. The following are a few maintenance suggestions that will keep your X-Treme X-370 running in top condition: Daily Maintenance Perform each time you ride your X-370 ... -
Page 13: Troubleshooting Guide
TROUBLESHOOTING GUIDE PROBLEM POSSIBLE CAUSE SOLUTION Motor Does Not Start Batteries not connected Connect batteries Power switch is off Turn on power/key Batteries are drained Charge batteries switch Electrical Fault Check all fuses Master power/kill Turn on master power Rear wheel does not Brake too tight Adjust brakes switch off... -
Page 14: Additional Information
If you have questions about our warranty, please contact your dealer. X-Treme Electric Scooters Manufacturers & Wholesale Distributors is not responsible for the proper or improper use of merchandise sold. We care about our customers and urge you to exercise caution and take necessary safety measures to protect yourself while engaging in cycling. -
Page 15: General Information/Tech Support
GENERAL INFORMATION/TECH SUPPORT Step By Step Assembly Attaching Front Wheel Attach the front wheel to the front forks. Enclosed with your scooter is a front wheel and axle along with two sets of nuts and washers for each end. Remove the nuts and washers and insert the axel into the wheel. The black washer goes in between the wheel and fork while the flat washer goes on the outside of the fork and then is secured in place with the nut. - Page 16 body is properly secured, attach the enclosed footpad decals to each side. Attaching Trunk Rack Attach the trunk rack to the scooter. Your trunk rack comes with 2 sets of bolts and nuts. Slide the bottom posts into the holes on the back of the scooter body near the taillight. Secure the posts to the scooter frame using the enclosed bolts and nuts.
- Page 17 Place the two rubber bushings on the rack. Then place the trunk on the rack over the rubber bushings. The two metal plates are placed inside the trunk and secured to the rack with the four enclosed screws and nuts. Attaching Seat Post &...
-
Page 18: Body Removal & Installation Instructions
Ink Pen, Sharpie, or Pencil 1. Set X-370 scooter on a box that holds it stable with both wheels off of the ground. 2. Remove Seat by loosening clamp at base of post, wiggle seat back and forth as you pull up until it is off. -
Page 19: Front Fork Nut Cup/Bearing Assembly
11. Lift the body off of the black frame. You may have to twist and work it a little to get the rubber grommet in the front to come off. X-370 Body Installation Instructions 12. Remove lights on original body - With the Jewelers screwdriver, remove the wires and gold prongs from the White Plugs on the lights. -
Page 20: Rear Wheel Assembly
Rear Wheel Axle Assembly Sprocket side Order of Parts (Listed Left to Right) - Left Side: Nut, Washer, Tensioner, Frame, Large Spacer, Sprocket. Left Side Assembly: Large spacer is placed on the outside of the sprocket in between the sprocket and frame of the scooter. On the outside of the scooter frame, place the chain tensioner and finally washer and nut. -
Page 21: How To Charge Scooter
1) Switch the Master Kill Switch in the On position. Do not turn the key on. 2) Plug the battery charger into the X-370 Charge Socket and an 110v outlet 3) The Charger indicator lights should be Red and Green initially. When fully charged there will be Two Green lights. -
Page 22: Directions To Checking Battery & Charging Connections
6) Retest the scooter. If it works then inspect the back side of the kill switch or contact X-Treme scooters for replacement. ****Reconnect the gold pins back to there original positions. -
Page 23: How To Check Charger Output
tests. 3) Plug the charger into the wall - you should have a green light. Plug the charger into the charger port on the scooter. 4) Take the charger red wire and place on the main red wire terminal on battery and the black charger wire on the last battery black terminal. -
Page 24: How To Remove Free Wheel Clutch
back down onto the cable. - Next fine tune the adjustment by screwing the cable tension screw outward to pull on brake line until proper braking is achieved. - Lock this position down by tightening the nuts. - Avoid adjusting brakes on handlebars because there is a safety switch built into the handles to kill motor while using the brakes. -
Page 25: How To Change The Charger Socket
How To Change The Charger Socket In order to swap out the charging socket, first you must remove the 4 bolts that attach the seat post to deck and 2 bolts on deck up front. Remove foot deck, if bolts get stripped you need to drill off the heads using 1/4"... -
Page 26: How To Change Ignition Module
- Re-assemble the dash. Checking Fuses The X-370 has Two Fuses located under the compartment on the floor board. Use your key to open and remove cover. Located near the rear wheel is the Controller (silver box with the wires coming out of it); carefully go through the connectors until you find the two listed below. -
Page 27: How To Replace/Install A Controller
that may make them a little difficult to remove. If you have trouble you can use the HANDLE end of a sturdy screwdriver to pry them out. If you need you may cut the wires anywhere on the battery pack to separate them. How To Replace/Install A Controller - Remove Main Fuse. -
Page 28: How To Remove And Insert Pins In Connectors
How To Remove and Insert Pins In Connectors Look down inside the connector; you will see a metal pin. The pin is held in place by a small tab that bends outward. Reach inside the front of the connector with a dental pick or jeweler’s screwdriver and bend the tab in then pull the metal pin out the back of the connector. -
Page 29: Troubleshooting - Charger Light Turns Green Right Away
Troubleshooting: Charger Light Turns Green Right Away When you plug your charger into your scooter and the wall outlet the charger light stays green. This is telling me that somewhere between charger socket, controller, fuse holder and batteries you have an open circuit. Please remove the floor plate and check the wires in this area. -
Page 30: Troubleshooting - Scooter Won't Shut Off
Troubleshooting: Scooter Won’t Shut Off Place the scooter off the ground so the rear wheel will not touch the ground. You do not want your scooter to take off. Take the footplate off. Disconnect the throttle clip under the footplate, then turn the scooter on and see if it still runs. If it does, you will need a new controller. -
Page 31: Troubleshooting - Scooter Will Not Run
Scooter is turned on, speed and battery indicators are illuminated but the scooter will not move. X-Treme Electric scooters are manufactured with a safety device called a "Brake Kill Switch". This devise cuts power to the motor whenever the hand brake is engaged. If the... -
Page 32: Troubleshooting - After Fully Charging Powers Only For Short Distance Use
the scooter now operates properly, the safety is adjusted too tight and needs re-adjusted. See step a above. If the scooter still does not run, proceed to step 2 below. 2. Check the ignition. a. Raise the scooter so that the rear wheel does not touch the ground. b. -
Page 33: Troubleshooting - Scooter Takes Off, Will Not Stop
Troubleshooting: Scooter Takes Off – Will Not Stop A) If the scooter is moving when you turn the key to the “on” position without turning the throttle you will need to replace the throttle or controller. B) If scooter takes off without turning the key to “on” – you need to replace the controller. Scooter is not moving and the lights do not work using battery, but lights do work when you plug the charger into the side of the scooter and also plug the charger into the wall-Scooter will not move at all and all lights do not work (lights do work when you plug... -
Page 34: Troubleshooting - Burning Smell
4. To test the module itself, leaving the module connected, you can attach two additional jumper wires to the back of the blinker module, and then to the appropriate positive and negative terminals of the batteries. If the signals begin to work while making direct contact to the battery, you may have faulty wiring between the switch and the module or a bad controller. -
Page 35: Troubleshooting - Horn Does Not Work
attaches the charger socket wires to the controller is securely connected. If all wires are connected properly, proceed to step 4. a. If either of the 2 wires behind the charger socket is not attached, the charger socket needs replaced. Replace charger socket. b. -
Page 36: Troubleshooting - Rear Wheel Does Not Spin Free
Troubleshooting: Rear Wheel Does Not Spin Free 1. Free wheel assembly has broken. Replace with new complete rear wheel assembly. -
Page 37: Frequently Asked Questions
Q: I took the scooter out of the box and it was dead on arrival. We have a safety kill switch built into the X-370 brake handle. During shipment the safety switch sometimes becomes engaged. This is a simple one time fix. Simply loosen up the brake adjustment just a little on the handle bar by turning the brake adjuster on the brake handle in towards the brake handle. -
Page 38: Controller Wiring Diagrams
Controller Wiring Diagram... -
Page 39: Throttle Connector Wiring Diagram
Throttle Connector Wiring... -
Page 40: Removing Terminals From Connectors
Removing Terminals from Connectors... -
Page 41: Turn Signal Diagram
Turn Signal Diagram Trunk Rack Installation Diagam... -
Page 42: Front Fork Assembly Diagrams
Front Fork Assembly Diagrams Order: Bearing Ring, Bearing, Bottom Cup, Scooter Goose Neck, Top Cup, Bearing, Bearing Nut Cup, Lock Nut. Scooter Gooseneck falls between two cups ^... -
Page 43: Motor Controls Diagram
Motor Controls Diagram Battery Wiring Diagram... - Page 44 DO NOT RETURN TO STORE! IF YOU NEED HELP CALL OR GO ONLINE 1-253-777-0690 www.x-tremescooters.com/support/ For General Information or Parts Visit www.x-tremescooters.com 06/13/13...
Need help?
Do you have a question about the X-370 and is the answer not in the manual?
Questions and answers