Table of Contents
Advertisement
Advertisement
Table of Contents
Troubleshooting

Related Manuals for X-TREME X-600


Summary of Contents for X-TREME X-600
- Page 1 X-Treme Electric Scooters X-600 Electric Scooter Owner’s Manual Page1...
-
Page 2: Important Information
Failure to follow these INSTRUCTIONS will VOID YOUR WARRANTY! This PRODUCT IS NOT INTENDED FOR EXTREME or OFF-ROAD Use! Please take care of your X-600! DO NOT JUMP or ABUSE THIS PRODUCT! DO NOT RIDE IN WET/ICY CONDITIONS! Failure to follow these instructions will... - Page 3 IMPORTANT PLEASE READ THIS BEFORE USING THIS PRODUCT READ THIS FIRST! WARNING This product does not conform to Federal Motor Vehicle Standards and is not intended for operation on public streets, roads or highways. Serious injury can result from the unsafe operations of this product. Operator can minimize these risks by using certain safety equipment such as: safety helmet, goggles, gloves, elbow and kneepads and appropriate footwear.
-
Page 4: Quick Reference
Avoid unintentional starts by turning the scooter off while not in use. To avoid the risk of a short circuit in the electrical parts, do not use your X-Treme Electric scooter in the rain and never spray or wash off your scooter with water. ... -
Page 5: Table Of Contents
TABLE OF CONTENTS IMPORTANT INFORMATION…………………………………….……………........... 2-3 QUICK REFERENCE…………………………………………………………………………………………. 4 TABLE OF CONTENTS……………………………….…………….………………………………………… 5-6 GETTING TO KNOW YOUR X-TREME X-600………………….………………………………………….. 8 PACKAGE CONTENTS & GETTING STARTED…………………………………………………………… 9 GETTING STARTED………………..……………………………..….……………………………………….. 9 ASSEMBLY, FUSE INSTALLATION……………………………….…………….........9-10 CHARGING, RIDING & BRAKING..………………………………………………........11 FOLDING AND STORAGE……….………………………..…………..………………………………………12 BRAKING SYSTEM………….…………………………………….…..………………………………………. - Page 6 How To Remove Rear Wheel…………………………………………………………………………… 22 How To Install Seat Extension………………………………………………………………………….. 22 How To Replace/Install Throttle………………………………………………………………………… 23 TROUBLESHOOTING GUIDE……………………………………………………………………………….. 24-29 Troubleshooting: No Power…………………………………………………………………………….. 24 Troubleshooting: After Fully Charging, Powers Only For Short Distance Use……………………. 24-25 Troubleshooting: Scooter Takes Off, Will Not Stop…………………………………………………… 25 Troubleshooting: Scooter On, Not Running……………………………………………………………...
- Page 7 DO NOT RETURN TO STORE! Do not use this vehicle for the first time until you have inflated the tires to the correct PSI and completely charged the battery. Failure to follow these instructions may damage your vehicle and void your warranty. CALL OR GO ONLINE 1-253-777-0690 www.x-tremescooters.com/support/...
-
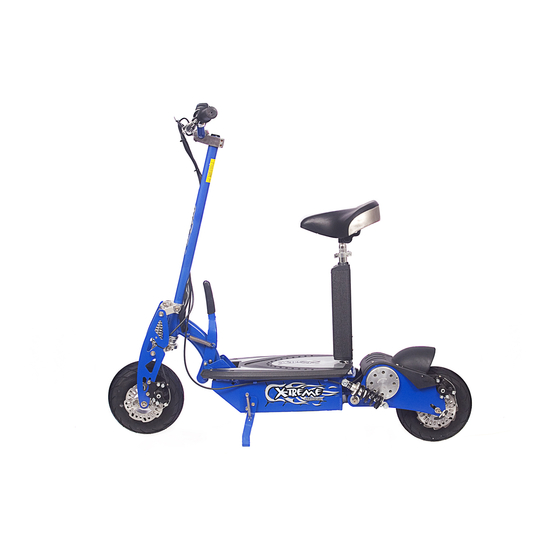
Page 8: Getting To Know Your X-Treme X-600
GETTING TO KNOW YOUR X-TREME X-600 A-BLAZE SIGNATURE SERIES (Photo’s may vary) Page8... -
Page 9: Package Contents & Getting Started
PACKAGE CONTENTS Your X-Treme X-600 A-Blaze Signature Series Scooter comes with the following items in the box. Please locate all of the following: X-Treme X-600 Aiden Blaze Signature Series Scooter 36V Battery Charger Tool Kit User Manual and 20amp Fuses Seat Seat Post &... - Page 10 Assembly – Cont: 6. Insert the 20amp fuse by opening the footplate cover as shown. Insert the fuse into the fuse holder then close the footplate cover. 7. Attach the seat post to the seat post receiver, then attach the clamp to the top of the seat post.
-
Page 11: Charging, Riding & Braking
3. Push the on/off switch (located on the left handlebar) to the ON position. 4. Put one foot on the deck of the X-600 while pushing off with the other foot, gently rotate the THROTTLE GRIP, on the right side of the handlebars. The X-600 will begin to move on its own power. -
Page 12: Folding And Storage
ON again. FOLDING & STORAGE When you are done riding the X-600 you can fold it down for compact storage and transportation. First remove the seat post and seat, then using one hand, push down on the folding handle while gently pushing down on the handlebars. -
Page 13: Tire Pressure
Slime, available from any motorcycle shop, to avoid inconvenient punctures. Empty all air from the tire, prior to loosening the bolt to split the rim. MAINTENANCE RECOMMENDED TOOLS To adjust and service the X-Treme X-600 you will need the following tools: Allen Wrenches: 3/4/5/6 mm Page13... - Page 14 Wrenches: 10/13/13 mm Open end wrench Large Adjustable Crescent Wrench Philips Head Screwdrivers Oil, Grease or Lubricant ADJUSTING THE HEAD UNIT The head unit will come adjusted from the factory. However, riding on rough terrain and general use may cause the head unit to become loose over time. It may be necessary to adjust the head unit from time to time.
-
Page 15: Maintenance
Finally, lock and tighten the rear axle bolts prior to riding. MAINTENANCE SCHEDULE Proper care of your X-Treme X-600 will insure optimal performance and longer life span. The following are a few maintenance suggestions that will keep your X-Treme X-600 running in top condition:... -
Page 16: Troubleshooting Guide
Basic Troubleshooting Guide SYMPTONS POTENTIAL CAUSE SOLUTION The charger light turns 1. This indicates the 1. Continue green & red right away batteries charge adequately batteries for 6-8 charged. hours prior initial use. 2. Bad Fuse or open connection 2. Check Fuse: between charger Look for loose or... -
Page 17: How To Guide
How To Start Scooter When starting the scooter, be sure the fuse in in scooter. Please make sure the battery is charged. When ready to start scooter squeeze left brake handle while starting scooter. There is a safety switch in the left brake handle to start scooter. How To Adjust Chain Tension 1) Loosen the axle nuts. -
Page 18: How To Understand Charger Light Sequence
will slightly change the brake tension to get it where you are comfortable. How To Understand Charger Light Sequence - When you plug your charger into the wall the light should turn green. - Plug your charger into the scooter and it should turn to red for a good period of time. *** This indicates that the charger sees the batteries and charge cycle started. -
Page 19: How To Install Bearings
How To Install Bearings 1) Remove the front/rear wheel. 2) Remove the old bearing. To do this, you will need to insert something, like a screw driver, from the opposite side and simply push it out. 3) Put the new bearings in. You will want to use something like a rubber mallet so you do not crack the bearings. -
Page 20: How To Test Motor Direct To Battery
Largest Connector and working down to the Smallest Connector. This will avoid confusing the connectors. 5) With the Original Controller free of all wire connectors remove from frame. 6) Install the New Controller in its place with the original screws if equipped or with Double Sided Tape. -
Page 21: How To Change Charger Socket
2) Check the wires at the rear of the fuse holder 3) Check all fuses 4) Check the wires that connect the batteries together 5) Check the connections on the controller How To Change Charger Socket 1) In order to swap out the charging socket, first you must remove the 4 bolts that attach the seat post to deck and 2 bolts on deck up front. -
Page 22: How To Replace Fuse
How To Replace Fuse 1) To replace the scooter fuse locate the spare 20amp glass fuse that came with the scooter. 2) Set scooter so that the rear wheel is not touching any surface. 3) Install the new fuse in the Fuse Holder which is located under the foot plate on the left side of the scooter frame near the charger socket. -
Page 23: How To Replace/Install Throttle
How To Replace/Install Throttle You can the remove and reinstall the throttle wire through the steering tube but it is much easier to cut and splice the wires at the handlebar. 1) Remove handlebar grip. 2) Cut throttle wires halfway between the throttle and the handlebar tube. 3) Loosen throttle bolts. -
Page 24: Troubleshooting Guide
Troubleshooting: No Power In this situation we will assume that the battery has been charged or allowed to stand for several hours (a battery will normally self-charge up to a point and make the scooter power up for a fair distance). There are generally two main suspects: 1. -
Page 25: Troubleshooting: Scooter Takes Off, Will Not Stop
current and voltage that can burn you when a shorted circuit occurs. Be absolutely sure you know what you are doing before trying any tests to eliminate a component from consideration of being defective!!! 3. You can take the battery to a shop capable of testing the battery under a loaded condition. Fully charge the battery and carefully remove it. -
Page 26: Troubleshooting: Scooter On, Not Running
Troubleshooting: Scooter On, Not Running Follow the wire from the left handbrake down under the foot plate. Unplug this wire. There is a safety in that brake that will not allow the motor to run when the brake is being applied. Make sure the rear wheel is off of the ground, then try turning the throttle with this unplugged. -
Page 27: Troubleshooting: Scooter Going Slow
Troubleshooting: Scooter Going Slow a) Motor is bad=THIS IS THE MOST COMMON REASON. Maybe the scooter goes fast if you lift the back wheel off the ground, but very slow when you sit on it. Sometimes you will smell the engine burning or you will hear it making a clicking noise. b) Battery needs to be recharged. -
Page 28: Troubleshooting: Scooter Seems Fine Until Sat On, Then Will Not Go Or Pops Fuse
Troubleshooting: Scooter Seems Fine Until Sat On, Then Will Not Go Or Pops Fuse Most common fix - front tire-fork is backwards. Loosen clamp on post and spin tire-fork around. Troubleshooting: Tire Problems Tire will not inflate – have broken inner tube. Replace. Troubleshooting: Scooter Not Showing Full Charge After Charging 8 Hours a) Charger may be bad. - Page 29 accordingly. It is suggested to do this one wire at a time to confirm the wires remain in the correct position or label or diagram in such a way you can reassemble in the correct positions. Page29...
-
Page 30: Diagrams
Page30... -
Page 31: Wiring Diagram
Wiring Diagram Page31... -
Page 32: Other Questions
For additional questions, service instructions, further information and important phone numbers, please go to the X-Treme website at www.x-tremescooters.com Thank you for purchasing an X-Treme X-600 and please tell your friends how much fun you’re having on the X-Treme X-600...
Need help?
Do you have a question about the X-600 and is the answer not in the manual?
Questions and answers
Does x-600 have a reset button. I can’t find a fuse. It appears the fuse shows as being tight on the 3 batteries connected. Batteries show charged but on off switch does not come on