Table of Contents
Advertisement
Quick Links
Advertisement
Table of Contents

Related Manuals for Triax ST-220


Summary of Contents for Triax ST-220
-
Page 1: User Manual
HDTV Combi-Receiver (SAT + TER) ST-220 Part No. 305030 User manual Seite 1 von 72... - Page 2 Copyright © Triax GmbH Änderungen und Irrtümer vorbehalten. Für Druckfehler übernehmen wir keine Haftung. Seite 2 von 72...
-
Page 3: Table Of Contents
Content Content ................... 3 Preamble ..................5 Symbols ..................5 Saftey instructions ................. 6 Basic Saftey Information ............6 Replace the batteries with the same type always......8 Explanation of Safety Inscructions............ 9 Content ..................10 Description ................... 11 General..................11 Productdescription ................. - Page 4 Navigate within the menu ............... 31 Change of channel list (Symbol: TV) ..........32 Installation DVB-S (Symbol: Sat-Antenna) ........37 Installation DVB-T (Symbol: Sat-Antenna) ........44 Sytem settings (Symbol: gearwheel) ..........45 Settings (Symbol: Case) ..............49 External HDD (Symbol: movie role) ..........56 Buttons with special functionality..........
-
Page 5: Preamble
Preamble This manual will help in the • designated, • safe and • advantageous use of digital satellite receiver, also called receiver. We assume that the user of the receiver has general knowledge of consumer electronics devices. Any person that this receiver •... -
Page 6: Safety Instructions
Safety instructions Read the safety instructions carefully before using the receiver operat- ing. Follow all warnings and information on the device and in the manual. Basic Safety Information Electrical Connection In case of malfunction, disconnect the receiver from the power source. - Page 7 Obtain replacement parts only from the manufacturer. Changes to the unit will void the warranty. Caution! Note on power disconnection:The Standby button does not com- pletely disconnect the unit from the mains. The receiver will also be in standby mode to power. To completely turn off (without elec- tricity), press the power switch on the back.
-
Page 8: Replace The Batteries With The Same Type Always
of their country.Never expose batteries open fire or strong heat, as they may explode. Replace the batteries with the same type always Seite 8 von 72... -
Page 9: Explanation Of Safety Instructions
Explanation of Safety Instructions In the manual you will find the following categories of safety instruc- tions: Danger! Instructions with the word DANGER warn of possible personal in- jury. Caution! Instructions with the word CAUTION warn of possible property or environmental damage. -
Page 10: Content
Content Check the delivery after purchase. Pos. Description Receiver Remote Control Batteries Type LR 03/AAA/1,5 V User Manual (not shown) Coaxial Cable, HDMI cable and Scart cable not supplied. Seite 10 von 72... -
Page 11: Description
Description General With this receiver you can receive unencrypted (free-to-air) and en- crypted (depending on type of smartcard with CI module) digital satel- lite channels and digital terrestrial programs. You don’t need not to program the receiver yet. Only perform the first time installation. - Page 12 Amos/Atlantic 4-5° W HispaSat 30° W Eutelsat W2 16° E HellaSat 39° E Astra 23,5° E Astra 28,2° E More features: HDTV & SDTV Upscaling of SDTV-Programms Software-Update via Satellit ASTRA 19,2° Ost (prepared, not ac- tive) or via USB-interface ...
- Page 13 When switching channels you can obtain further programm infor- mation. DiSEqC 1.0, 1.2, USALS is supported TV-Formats adjustable to 4:3, 16:9 and letterbox 8 Timer, Sleep-Timer Electronic Program Guide EPG (up to 7 days, depending on pro- gram) ...
-
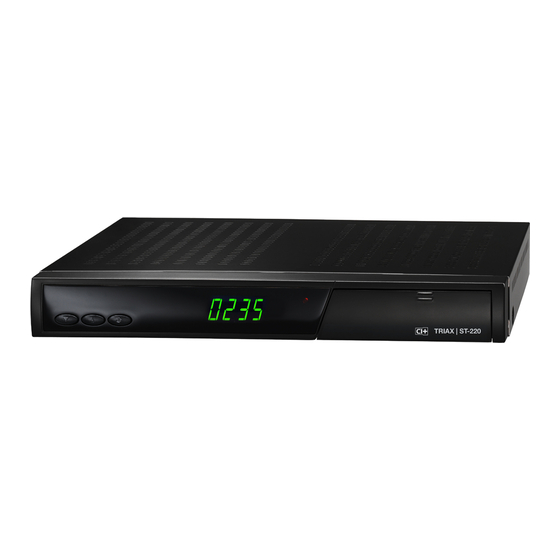
Page 14: Productdescription
Product description Receiver Front Panel Receiver Rear Panel Seite 14 von 72... -
Page 15: Remote Control Unit
Remote control unit Seite 15 von 72... - Page 16 Pos. Symbol Short Description Standby Power on and off (Standby-function) Numeric input of channel numbers TV/R Switch from TV to radio and vise versa V-FMT Change Video resolution, no primal function green Switch to the next channel / move cursor up Volume down / move curser left Switch to previous channel / move cursor down Show EPG...
- Page 17 Pos. Symbol Short description Subtitling AUDIO Change audio stream Buttons reserved for PVR functionality INFO Current channel information Direct access of USB folder MOVIE Direct access to recorded streams Option Multifeed option for sub channels Seite 17 von 72...
-
Page 18: Connect Your Receiver
Connect your receiver Connect your receiver via a coaxial cable to the antenna outlet Coaxial cable is not supplied with this package. Attention! Connect the receiver to the mains when you have connected it to all equipment and the antenna. Otherwise, the receiver may be damaged. -
Page 19: Set-Up With Hdmi Cable
Set-up with HDMI cable Please note that Scart and HDMI cable is not supplied with this package. Seite 19 von 72... -
Page 20: Connectivity With Yuv-Components
Connectivity with YUV-Components Seite 20 von 72... -
Page 21: Connectivity With Digital-Audio-Receivers (Optical Digital Out)
Connectivity with Digital-Audio-Receivers (optical Digital Out) Remote control The remote control uses two Micro type batteries: LR 03/AAA/1,5 V Insert two batteries according to polarity into the battery compartment and replace the battery cover carefully until it locks. Caution! Batteries may contain toxic substances that are hazardous to health and the environment. -
Page 22: Receiver
remote at the front of the receiver and press the corresponding key onceReceiver Caution! Check the connections of all equipment and the antenna before connecting the receiver to the mains. Insert the power plug of the connected devices into the mains socket and turn on the connected equipment. -
Page 23: Erstinstallation
First Time Installation wizard After you have read the safety instructions and the chapter "Connect- ing your receiver" successfully please connect the device to the power supply and the set the power switch on the back to "on". The initial booting takes about 15 seconds (display "boot") During the booting process the display will show "Strt"... -
Page 24: Select Your Country
Select your country In the next step, you specify which country the digital receiver is operated. The selection of the country is with the V- or V +. With the blue function key to go to the next step. Video disply set up the now following step of the installation wizard, select your preferred settings for picture and sound. -
Page 25: Satellite Reception
Satellite reception In this step of the installation wizard, select the satellite you want to see using the CH + or CH- confirm with OK. A standard program list is loading in the background. Press the blue button to the next step Seite 25 von 72... -
Page 26: Dvb-T Reception
DVB-T reception Confirm DVB-T with ok button to run an automatic search for all terrestrial channels. Otherwise exit with submitting End. Seite 26 von 72... -
Page 27: Bedienen
Control the Receiver Information when changing channels When changing channels on the screen for 5 seconds (adjustable via the menu item "Settings - OSD Setup - OSD delay) displays an infor- mation bar. In this you will find the following information Program name Received satellite or reception via DVB-T Current date... -
Page 28: Benutzer-Oberfläche Auf Dem Tv-Bildschirm
On-Screen-Display With the menu in the user interface, you can adjust individual settings of your receiver. This requires the receiver and TV set is switched on and a connected via a cable (e.g. HDMI) Press the "MENU" button. The main menu is displayed. Use the "BACK"... -
Page 29: Menü-Set Up
Menu set up Main Menu Sub menu Channel list TV-Channel list Radio Channel list (Symbol: TV set) Delete all Installation DVB-S Installation DVB-T Installation (Symbol: Sat- Antenna) System set- Language tings TV-System (Symbol: gear wheel) Local Time Timer settings OSD setting Favorite Others Settings... - Page 30 Sudoku Othello Seite 30 von 72...
-
Page 31: Navigate Within The Menu
Navigate within the menu With the different menu you browse using the buttons CH+, CH-, V+, V-. Active menu items will be highlighted. You submit with the OK- button. To exit the menu you have to press the BACK-button. All changes have to be submitted first. -
Page 32: Change Of Channel List (Symbol: Tv)
Change of channel list (Symbol: TV) On the following pages we’ll describe all the submenu and actions with the menu item “change channel list”. Seite 32 von 72... - Page 33 • TV- Channel list The channel you want to change is highlighted with a yellow bar. The editing options on the following 5 keys can be activated 1. FAV: FAV button on the remote control. The "FAV" is raised and thus ena- bled.
- Page 34 the red function key to disable the function. When leaving the menu with the back button, and confirm the prompt with a lock marked pro- grams are blocked. These programs can now be seen only after enter- ing the current PIN. Note: In the menu under System Settings - PIN must be enabled to select channel lock.
- Page 35 Item „ABC“: Press red function key The different filters to sort your channel list will be displayed. Item „edit“: Green function key. The program name of the current sta- tion can be changed. Item „erase“: Select the programs that you want to delete, and press the OK button.
- Page 36 After entering the current password and confirm the prompt all stored TV and radio programs are deleted. By performing the factory set- tings, you can set default program lists again. Seite 36 von 72...
-
Page 37: Installation Dvb-S (Symbol: Sat-Antenna)
Installation DVB-S (Symbol: Sat-Antenna) • Antenna setting Here you can specify whether you want a fixed antenna or an antenna with a rotary motor connected to the receiver have connected. • Satellite list The list of all known satellites is shown. Now you can activate or deac- tivate by pressing the OK button the desired satellite The activation is represented by a heart symbol. - Page 38 • Antenna Setup Instructions for setting "Permanently fixed antennas" Satellite: Satellite selection. The satellites are listed, which are activated in the sub satellite list. Select to edit satellite. LNB frequency: for the selected satellite set the LNB fre- quency. Choose Universal or Unicable (SCR). Default set- ting is universal.
- Page 39 Delete all: You can delete all previously made satellites posi- tions. Not Available when selecting "USALS" in Item rotator type Rotator setting: access to the DiSEqC 1.2 control center. In- dividual satellite positions are stored here. Limitation: Definition of the turning radius.
- Page 40 • TP list In this menu you can edit the transponder which you have activated in the sub menu Satellite list . Edit (red button): Editing the parameters of the selected transponder. Note that this change has effect on the pro- grams of the modified transponderder! ...
- Page 41 The newly created transponder will be created at the end of the tran- sponder list of ASTRA 19.2 ° East and appears accordingly in the transponder list. Seite 41 von 72...
- Page 42 Press the blue button on your remote control. The "TP Scan" window opens. Set the search filter. Start the search by clicking on the following "OK" by press- ing the OK button. Seite 42 von 72...
- Page 43 The new programs will be added at the end of the existing Channel list. Seite 43 von 72...
-
Page 44: Installation Dvb-T (Symbol: Sat-Antenna)
Installation DVB-T (Symbol: Sat-Antenna) • DVB-T Channel Scan Search a specific channel for programs. • DVB-T Auto Scan Search the entire terrestrial frequency range for programs. You can set the filter in order to search only for free or encrypted programs. •... -
Page 45: Sytem Settings (Symbol: Gearwheel)
Sytem settings (Symbol: gear wheel) • Language Language: Select the menu language First Audio Channel: Pre selection of audio language (if of- fered by the broadcaster) Second Audio Channel: Pre selection of audio language ( if offered by the broadcaster) ... - Page 46 Display-Format: 4:3 LB, 4:3 PS, 16:9, Auto Video-Signal: Setting the color scheme. To obtain the HD quality of HD programs CVBS must be set. Digital audio out: select the preferred audio stream • Local time The clock will automatically be set during the initial installa- tion process and can not be changed.
-
Page 47: Timer Setting
• Timer setting With the timer function, you can program the receiver to a specific time an operation such as record. There are 8 independent Timer slots available. Untermenü Beschreibung Timer Number Select the timer 1-8 Timer Mode Once, daily, weekly, off. Timer will be deac- tivated when setting “off”... - Page 48 • PIN (Default Password: 0000) Menu Lock: When enabled, the main menu items that serve the basic setting of the receiver will be blocked. Program lock (Parental control): Enable/Disable to release the locked programs in submenu TV Channel list ...
-
Page 49: Settings (Symbol: Case)
Settings (Symbol: Case) • Information Information about the SW and Loader version currently installed on your receiver. • Factory settings (requires password entry) Reset the receiver to factory settings. All changes made will be lost. The receiver will start up with first time installation menu. Seite 49 von 72... - Page 50 • Games, e.g. Othello / Sudoku The mentioned games are available • Common Interface CI + / CI module and smart card are not included with this package With this receiver, you can also view encrypted programs. You must have the smart card of the party and an appropriate CI or CI + module.
- Page 51 The software update via the USB interface is the fastest and most convenient way of software updates. If you perform a software update, the method via the USB inter- face is preferable. Current software under www.triax- gmbh.de. Update via satellite: The necessary data are preset. The process starts when you confirm "Start"...
- Page 52 Save channel list Save current program on a connected USB storage device. You can edit this list with the channel-list editor on a PC. The finished list can be uploaded on the next submenu item on receiver. Load channel list Uploading an edited list from a USB storage device.
- Page 53 The following features are limited to the USB PVR function. Media Player (only active when inserted USB-readable storage medium) Plug a USB drive into the USB port on the receiver's front panel. De- tected files and folders are displayed. Seite 53 von 72...
- Page 54 Press the EPG button to switch between the different categories. Choose from images, video, recordings and music. Known image files are in the black box also displayed as a preview, if they are marked. Image files (jpg-files) Image files which are shown in the preview can be shown in full-screen by pressing the OK button.
- Page 55 With the “info” button adjust the slideshow to your wishes. Time: Duration of the image-display during the slideshow. Repeat: Enable or disable continuous playback of the slideshow. With the yellow function key remove the currently highlighted picture file in the slideshow list. With the blue function key remove all images from the slideshow list.
-
Page 56: External Hdd (Symbol: Movie Role)
External HDD (Symbol: movie role) When using this main menu item, a USB storage device has to be properly connected. Encrypted recorded programs can only be decrypted with the corresponding CI + / CI module and smart card in- ... - Page 57 the program continue, press the play button. You can see the program now from the time you pressed the PAUSE but- ton. If this item is turned off, then the image is frozen when you press the pause button only. ...
-
Page 58: Buttons With Special Functionality
Buttons with special functionality Switching TV/R With the TV/R button you can switch between TV and the radio func- tion back and forth. During radio broadcasting there will be a wallpaper displayed on the screen. 0 - Sleeptimer The sleep timer can be reached during normal operation over the 0 key. -
Page 59: Ch+ / Ch
TV mode: Display Channel list. Main menu: Confirmation V+ / V- TV- / radio mode: Volume up and down In active channel list: switching 10-by10. In menu: move of cursor CH+ / CH- TV mode/channel list: Switch channel one by one In menu: move of cursor Press the FAV button will display the favorite lists Choose the favorite list you like to access and confirm with OK... -
Page 60: Epg
Electronic Program Guide The EPG provides program information in tabular form, if they are made available from the broadcaster. Information will be provided to the airtime and program content. With V-, V+, CH- and CH+ you move within these EPG tables. Additional information about an event / program is available by select- ing it and then press the OK button. -
Page 61: Info
In the footer, you can select by pressing OK, V-and V + the following commands: Back to previous page (BACK). Back to current airtime. Scroll between the events Browse in 2-hour interval Day way scroll between events. INFO Acoustic signal for directing the satellite antenna For its use, no external USB device has to be connected. -
Page 62: Sub
A stronger and higher signal indicates a better alignment of the antenna. Provides a program a digital subtitle signals, you can turn it on and off with the SUB button. Subtitle refers to these subtitles, which is sent on the program not via teletext. -
Page 63: Button For Pvr Functionality (Optional)
Button for PVR functionality (optional) ● Press once: Direct recording of the current program. Press again: Setting the recording duration in hh: mm Press once to stop recording after confirming the security question. ► Playback button. By pressing this button, the playback of the selected recording is started or continued. -
Page 64: Cleaning The Receiver
Cleaning the receiver Caution! The receiver should not be wet. Never clean it with a wet cloth. Do not use solvent-based cleaning agents such as benzine or thinner. These can damage the surface of the housing. Clean the exterior of the receiver only with a dry cloth. -
Page 65: Tips And Hints
Tips and Hints If the solutions listed here do not eliminate the malfunctions, perform a factory reset as follows: Press and hold the standby button on the front of your receiver for longer than 10 seconds. Now the factory settings will be reloaded. Caution!!! Thereby you lose your personal settings Symptom... - Page 66 FAV button, press one button. Password The default password is 0000 Personal Password Please contact the service hotline if you forgot your password. Channel Editor On the homepage www.triax-gmbh.de you find a channel list editor for download. Seite 66 von 72...
- Page 67 Please turn off receiver with the power switch. External USB USB storage device to be connected again. storage media is Switch on receiver again not detected. The well-known, commercially available USB storage devices are compatible with this receiver. For larger USB hard drives, use an external power supply, in accordance with the instructions of the USB drive.
-
Page 68: Disposal
Disposal Receiver European waste directive 2002/96/EG Don’t throw the receiver in your normal household waste. Check with your municipal or local authorities about possibilities of a umweltund proper disposal of equipment. Batterie Never dispose of batteries in the general household waste. Batteries may contain toxic substances. -
Page 69: Technical Data
Technical Data Receiver Dimension mm (W × D × H) 310 x 200 x 50 Weihgt (g) Receiver 1400 g Remote control 80 g (without batteries) Inputfrequency range Terrestrial 50,5 MHZ – 865 Mhz 950 MHz ~ 2150 MHz IF-Bandwidth 55 MHz/8 MHz (<... - Page 70 YPbPr Components USB 2.0 port CI Slot CI+ interface (1 x) Power Supply AC input voltage 100-240 V ~, 50/60 Hz Supply Voltage ca. 15 W (Operation with Single LNB) ca. 1 W (Stand by) max. 33 W Operating temperature 0 ºC ~ +40 ºC Storage temperature –...
-
Page 71: Declaration Of Conformity
Declaration of Conformity The manufacturer declares that this product complies with the follow- ing directives and standards: Low Voltage Directive 73/23/EWG EN 60 065 Electromagnetic Compatibility Directive 89/336/EWG EN 55 013 EN 55 020 EN 61000-3-2 ... -
Page 72: Seite 3 Von
Support Line only. This procedure saves you time and possible irrita- tion At our technical support line explains you the exact procedure of the warranty, if you need to send in your device. Triax A/S www.triax.com Seite 72 von 72...
Need help?
Do you have a question about the ST-220 and is the answer not in the manual?
Questions and answers