Table of Contents
Advertisement
Advertisement
Table of Contents

Related Manuals for Eaton 9130 UPS


Summary of Contents for Eaton 9130 UPS
- Page 1 Powerware Series ® Eaton 9130 UPS 700–3000 VA User's Guide...
- Page 2 Fire Protection Association, Inc. Phillips is a registered trademark of Phillips Screw Company. All other trademarks are property of their respective companies. ECopyright 2008–2010 Eaton Corporation, Raleigh, NC, USA. All rights reserved. No part of this document may be reproduced in any way without the express written approval of Eaton Corporation.
- Page 3 Class B EMC Statements (Low Voltage Models up to 1500 VA and High Voltage Models up to 3000 VA) FCC Part 15 This equipment has been tested and found to comply with the limits for a Class B digital device, pursuant to NOTE part 15 of the FCC Rules.
-
Page 4: Special Symbols
92/31/EEC, Amending Directive 89/336/EEC relating to EMC The EC Declaration of Conformity is available upon request for products with a CE mark. For copies of the EC Declaration of Conformity, contact: Eaton Power Quality Oy Koskelontie 13 FIN-02920 Espoo Finland... -
Page 5: Table Of Contents
............164201718 Rev 3 www.eaton.com/powerquality Eaton ® 9130 UPS (700–3000 VA) User's Guide... - Page 6 ..............164201718 Rev 3 www.eaton.com/powerquality Eaton ® 9130 UPS (700–3000 VA) User's Guide...
- Page 7 ..........164201718 Rev 3 www.eaton.com/powerquality Eaton ® 9130 UPS (700–3000 VA) User's Guide...
- Page 8 TABLE OF CONTENTS 164201718 Rev 3 www.eaton.com/powerquality Eaton ® 9130 UPS (700–3000 VA) User's Guide...
-
Page 9: Introduction
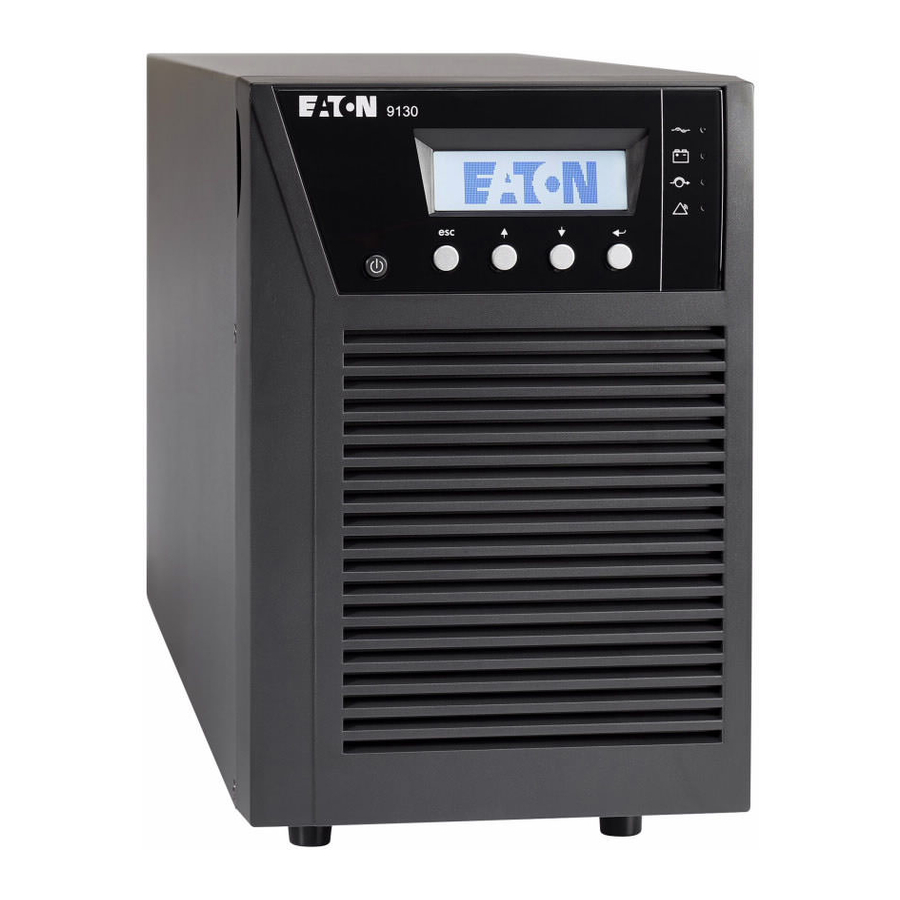
— causing hours of lost productivity and expensive repairs. With the Eaton 9130, you can safely eliminate the effects of power disturbances and guard the integrity of your equipment. Providing... - Page 10 INTRODUCTION Figure 1 shows the Eaton 9130 rackmount UPS, and Figure 2 shows the optional rackmount EBM. Figure 1. The Eaton 9130 Rackmount UPS Figure 2. The Eaton 9130 Rackmount EBM Figure 3 shows the Eaton 9130 tower UPS and optional EBM.
-
Page 11: Safety Warnings
UPS internal battery connector (see Figure 24 on page 64 for rackmount models or Figure 26 on page 67 for tower models). 164201718 Rev 3 www.eaton.com/powerquality Eaton ® 9130 UPS (700–3000 VA) User's Guide... - Page 12 I overensstemmelse med internationale normer og bestemmelser for el-installation må det udstyr, der er forbundet til udgangen af denne UPS, tilsammen ikke overskride en jordafdelingsspænding på mere end 3,5 milliampere. 164201718 Rev 3 www.eaton.com/powerquality Eaton ® 9130 UPS (700–3000 VA) User's Guide...
-
Page 13: Belangrijke Veiligheidsinstructies
Sluit om brandgevaar te voorkomen de apparatuur uitsluitend aan op een circuit voorzien van een overstroombeveiliging voor vertakte circuits van maximaal 100 A in overeenstemming met de NEC (Nationale Elektriciteitsvoorschriften), ANSI/NFPA 70. 164201718 Rev 3 www.eaton.com/powerquality Eaton ® 9130 UPS (700–3000 VA) User's Guide... - Page 14 Ympäristön lämpötila ei saa ylittää 40 °C. Älä käytä lähellä vettä ja vältä kosteita tiloja (95 % maksimi). 164201718 Rev 3 www.eaton.com/powerquality Eaton ® 9130 UPS (700–3000 VA) User's Guide...
- Page 15 La température ambiante ne doit pas dépasser 40 °C. Ne pas utiliser à proximité d'eau ou dans une atmosphère excessivement humide (95 % maximum). 164201718 Rev 3 www.eaton.com/powerquality Eaton ® 9130 UPS (700–3000 VA) User's Guide...
-
Page 16: Wichtige Sicherheitsanweisungen
W A R N U N G Die USV führt lebensgefährliche Spannungen. Alle Reparatur- und Wartungsarbeiten sollten nur von Kundendienstfachleuten durchgeführt werden. Die USV enthält keine vom Benutzer zu wartenden Komponenten. 164201718 Rev 3 www.eaton.com/powerquality Eaton ® 9130 UPS (700–3000 VA) User's Guide... -
Page 17: Avvisi Di Sicurezza
Il presente manuale contiene importanti istruzioni da seguire durante l'installazione e la manutenzione dell'UPS e delle batterie. Leggere integralmente le istruzioni prima di utilizzare l'apparecchiatura e conservare il presente manuale per futuro riferimento. 164201718 Rev 3 www.eaton.com/powerquality Eaton ® 9130 UPS (700–3000 VA) User's Guide... - Page 18 Le batterie devono essere smaltite in modo corretto. Per i requisiti di smaltimento fare riferimento alle disposizioni locali. Non gettare mai le batterie nel fuoco poichè potrebbero esplodere se esposte alle fiamme. 164201718 Rev 3 www.eaton.com/powerquality Eaton ® 9130 UPS (700–3000 VA) User's Guide...
-
Page 19: Viktig Sikkerhetsinformasion
Batterier må fjernes på korrekt måte. Se lokale forskrifter vedrørende krav om fjerning av batterier. Kast aldri batterier i flammer, da de kan eksplodere, hvis de utsettes for åpen ild. 164201718 Rev 3 www.eaton.com/powerquality Eaton ® 9130 UPS (700–3000 VA) User's Guide... - Page 20 Siga as instruções apropriadas ao desfazer‐se das baterias. Consulte os códigos do local para maiores informações sobre os regulamentos de descarte de produtos. Nunca jogue as baterias no fogo, porque há risco de explosão. 164201718 Rev 3 www.eaton.com/powerquality Eaton ® 9130 UPS (700–3000 VA) User's Guide...
- Page 21 Äëÿ îáåñïå÷åíèÿ ñîáëþäåíèÿ òðåáîâàíèé ìåæäóíàðîäíûõ ñòàíäàðòîâ è òðåáîâàíèé ê ðàçâîäêå ýëåêòðè÷åñêèõ öåïåé, ñóììàðíàÿ âåëè÷èíà òîêà óòå÷êè íà çåìëþ âñåãî îáîðóäîâàíèÿ, ïîäêëþ÷åííîãî ê âûõîäó ÈÁÏ, íå äîëæíà ïðåâûøàòü 3,5 ìèëëèàìïåðà. 164201718 Rev 3 www.eaton.com/powerquality Eaton ® 9130 UPS (700–3000 VA) User's Guide...
-
Page 22: Advertencias De Seguridad
Para reducir el riesgo de incendio, realice la conexión únicamente hacia un circuito que cuente con un máximo de 100 amperios de protección contra sobrecorriente de circuito derivado, de acuerdo con el Código Eléctrico Nacional, ANSI/NFPA 70. 164201718 Rev 3 www.eaton.com/powerquality Eaton ® 9130 UPS (700–3000 VA) User's Guide... - Page 23 är kontrollerade och där inga ledande föroreningar förekommer. Omgivande temperatur får ej överstiga 40°C. Använd inte utrustningen nära vatten eller vid hög luftfuktighet (max 95 %). 164201718 Rev 3 www.eaton.com/powerquality Eaton ® 9130 UPS (700–3000 VA) User's Guide...
- Page 24 Håll ej behörig personal borta från batterierna. Batterierna måste avyttras enligt anvisningarna i lokal lagstiftning. Använda batterier får aldrig brännas upp. De kan explodera. 164201718 Rev 3 www.eaton.com/powerquality Eaton ® 9130 UPS (700–3000 VA) User's Guide...
-
Page 25: Installation
NOTE Check the battery recharge date on the shipping carton label. If the date has passed and the batteries were never recharged, do not use the UPS. Contact your service representative. 164201718 Rev 3 www.eaton.com/powerquality Eaton ® 9130 UPS (700–3000 VA) User's Guide... -
Page 26: Unpacking The Cabinet
NOTE Discard the EBM user's guide if you are installing the EBM with a new UPS at the same time. Use the UPS user's guide to install both the UPS and the EBM. 164201718 Rev 3 www.eaton.com/powerquality Eaton ® 9130 UPS (700–3000 VA) User's Guide... -
Page 27: Rackmount Installation
INSTALLATION Rackmount Installation The Eaton 9130 rackmount cabinet comes with all of the hardware required for installation in a standard EIA or JIS seismic rackmount configuration with square and round mounting holes. The rail assemblies adjust to mount in 48-cm (19-inch) racks with front to rear rail distances from 61 to 76 cm (24 to 30 inches) deep. -
Page 28: Rackmount Setup
Figure 4. Do not tighten the screws. Adjust each rail size for the depth of your rack. Rear Rails 8 Pan-Head Screws (6 places) Left Rail Right Rail Figure 4. Assembling the Rails 164201718 Rev 3 www.eaton.com/powerquality Eaton ® 9130 UPS (700–3000 VA) User's Guide... - Page 29 Align the mounting brackets with the screw holes on each side of the UPS and secure with the supplied M4 8 flat-head screws (see Figure 6). 164201718 Rev 3 www.eaton.com/powerquality Eaton ® 9130 UPS (700–3000 VA) User's Guide...
- Page 30 Repeat for any optional cabinets. M6 Cage Nuts (4 places) 16 Pan-Head Screws (4 places) Figure 7. Securing the Front of the Cabinet 164201718 Rev 3 www.eaton.com/powerquality Eaton ® 9130 UPS (700–3000 VA) User's Guide...
-
Page 31: Rackmount Wiring Installation
To remove the cover, remove and retain the two screws on the right side of the cover. Grasp the top and bottom of the cover and slide the cover to the right. 164201718 Rev 3 www.eaton.com/powerquality Eaton ® 9130 UPS (700–3000 VA) User's Guide... - Page 32 Clip the wires of the rightmost connector to the battery panel in its new position. 2000–3000 VA models. Connect red to red, and black to black. Press the two parts tightly together to ensure a proper connection. 164201718 Rev 3 www.eaton.com/powerquality Eaton ® 9130 UPS (700–3000 VA) User's Guide...
- Page 33 If an emergency power-off (disconnect) switch is required by local codes, see “Remote Emergency Power-off” (REPO) on page 56 to install the REPO switch before powering on the UPS. Continue to “UPS Initial Startup” on page 34. 164201718 Rev 3 www.eaton.com/powerquality Eaton ® 9130 UPS (700–3000 VA) User's Guide...
-
Page 34: Connecting The Ebm(S)
To remove the cover, remove and retain the two screws on the right side of the cover. Grasp the sides of the cover and slide the cover to the left and then away from the cabinet. 164201718 Rev 3 www.eaton.com/powerquality Eaton ® 9130 UPS (700–3000 VA) User's Guide... - Page 35 If you are installing more than one EBM, for each additional EBM remove the EBM cable knockout on the top and bottom of the EBM front cover. See Figure 12 for the location of the EBM cable knockouts. 164201718 Rev 3 www.eaton.com/powerquality Eaton ® 9130 UPS (700–3000 VA) User's Guide...
- Page 36 Verify that the EBM connections are tight and that adequate bend radius and strain relief exist for each cable. Up to 1500 VA Models 2000–3000 VA Models Figure 13. Typical EBM Installation 164201718 Rev 3 www.eaton.com/powerquality Eaton ® 9130 UPS (700–3000 VA) User's Guide...
-
Page 37: Tower Installation
Return to Step 4 on page 25 to continue the UPS installation. Tower Installation The Eaton 9130 tower cabinet comes fully assembled and ready to connect. C A U T I O N The cabinet is heavy (see page 78). -
Page 38: Tower Wiring Installation
NOTE A ribbon cable connects the LCD control panel to the UPS. Do not pull on the cable or disconnect it. NOTE Leave ribbon cable connected. Figure 14. Removing the UPS Front Cover 164201718 Rev 3 www.eaton.com/powerquality Eaton ® 9130 UPS (700–3000 VA) User's Guide... - Page 39 To replace the cover, verify that the ribbon cable is protected, then insert the clips on the back of the cover into the cabinet and push firmly to snap the cover into place. 164201718 Rev 3 www.eaton.com/powerquality Eaton ® 9130 UPS (700–3000 VA) User's Guide...
-
Page 40: Connecting The Ebm(S)
EBM cable connection using the retained screws. Verify that the EBM connections are tight and that adequate bend radius and strain relief exist for each cable. Continue to “UPS Initial Startup” on page 34. 164201718 Rev 3 www.eaton.com/powerquality Eaton ® 9130 UPS (700–3000 VA) User's Guide... - Page 41 INSTALLATION Remove cable retention clip. Plug in EBM cable. Rotate clip. Reinstall cable retention clip. 1000–1500 VA Models 2000–3000 VA Models Figure 16. Connecting the EBMs 164201718 Rev 3 www.eaton.com/powerquality Eaton ® 9130 UPS (700–3000 VA) User's Guide...
-
Page 42: Ups Initial Startup
Check the UPS status from the front panel to view the active alarms. Correct the alarms and restart if necessary. 164201718 Rev 3 www.eaton.com/powerquality Eaton ® 9130 UPS (700–3000 VA) User's Guide... - Page 43 UPS display. Deactivate the external REPO switch and restart the UPS. NOTE The internal batteries charge to 90% capacity in less than 3 hours. However, Eaton recommends that the batteries charge for 48 hours after installation or long-term storage. If optional EBMs are installed, see the recharge times listed in Table 25 on page 90.
- Page 44 INSTALLATION 164201718 Rev 3 www.eaton.com/powerquality Eaton ® 9130 UPS (700–3000 VA) User's Guide...
-
Page 45: Operation
Chapter 4 Operation This chapter contains information on how to use the Eaton 9130, including front panel operation, operating modes, UPS startup and shutdown, transferring the UPS between modes, retrieving the Event Log, setting the power strategy, and configuring bypass settings, load segments, and battery settings. -
Page 46: Changing The Language
( and ) to scroll through the menu structure. Press the Enter ) button to select an option. Press the button to cancel or return to the previous menu. 164201718 Rev 3 www.eaton.com/powerquality Eaton ® 9130 UPS (700–3000 VA) User's Guide... - Page 47 Returns all settings to original values Settings Identification UPS Type / Part Number / Serial Number / Firmware Settings User Settings See Table 3 for details. Service Settings This menu is password-protected. 164201718 Rev 3 www.eaton.com/powerquality Eaton ® 9130 UPS (700–3000 VA) User's Guide...
-
Page 48: User Settings
120V (low voltage models) [200V] [208V] [220V] [230V] [240V] 230V (high voltage models) [Autosensing] Output Frequency [50Hz] [60Hz] [Autosensing] Autosensing * See “Configuring Bypass Settings” on page 48. 164201718 Rev 3 www.eaton.com/powerquality Eaton ® 9130 UPS (700–3000 VA) User's Guide... - Page 49 UPSs with separate supply sources for the rectifier and bypass inputs. On Battery Notice Delay [0] [1s] [2s]...[99s] * See “Configuring Bypass Settings” on page 48. 164201718 Rev 3 www.eaton.com/powerquality Eaton ® 9130 UPS (700–3000 VA) User's Guide...
- Page 50 Automatic Battery Support Tests [Enabled] [Disabled] Enabled See “Running Automatic Battery Tests” on page 52. Ambient Temperature Warning [Enabled] [Disabled] Enabled * See “Configuring Bypass Settings” on page 48. 164201718 Rev 3 www.eaton.com/powerquality Eaton ® 9130 UPS (700–3000 VA) User's Guide...
-
Page 51: Operating Modes
Open Input Polarity * See “Configuring Bypass Settings” on page 48. Operating Modes The Eaton 9130 front panel indicates the UPS status through the UPS indicators (see Figure 17 on page 37). Normal Mode During Normal mode, the indicator illuminates solid and the UPS is powered from the utility. -
Page 52: Bypass Mode
The UPS has an overload condition listed in Table 19 on page 84. NOTE The UPS shuts down after a specified delay for overload conditions listed in Table 19 on page 84. The UPS remains on to alarm the fault. 164201718 Rev 3 www.eaton.com/powerquality Eaton ® 9130 UPS (700–3000 VA) User's Guide... -
Page 53: Standby Mode
Verify that the UPS transfers to Standby mode (”UPS on standby”). Press the button on the UPS front panel for at least one second. The UPS front panel display changes status to “UPS starting...”. 164201718 Rev 3 www.eaton.com/powerquality Eaton ® 9130 UPS (700–3000 VA) User's Guide... -
Page 54: Starting The Ups On Battery
Check the UPS status from the front panel to view the active alarms. Correct the alarms and restart if necessary. Press the button until the start screen appears. 164201718 Rev 3 www.eaton.com/powerquality Eaton ® 9130 UPS (700–3000 VA) User's Guide... -
Page 55: Ups Shutdown
Use the connected communication device to view or print the information. The report is delivered in ASCII format. 164201718 Rev 3 www.eaton.com/powerquality Eaton ® 9130 UPS (700–3000 VA) User's Guide... -
Page 56: Setting Power Strategy
Bypass voltage is between the “Bypass Voltage Low Limit” and “Bypass Voltage High Limit” settings. Bypass frequency is within nominal frequency ±5 Hz. The inverter is synchronized with Bypass when the “Unsynchronized Transfers” setting is disabled. 164201718 Rev 3 www.eaton.com/powerquality Eaton ® 9130 UPS (700–3000 VA) User's Guide... -
Page 57: Configuring Load Segments
Press any button to activate the menu options, then select CONTROL and LOAD SEGMENTS. Set the desired load segment ON or OFF, and ENTER to confirm. Set the other load segment if applicable. 164201718 Rev 3 www.eaton.com/powerquality Eaton ® 9130 UPS (700–3000 VA) User's Guide... - Page 58 Set the shutdown delay for one load segment, and ENTER to confirm. Set the other load segment if applicable. NOTE Load segment On/Off commands issued through the Control menu overrule the user settings for load segments. 164201718 Rev 3 www.eaton.com/powerquality Eaton ® 9130 UPS (700–3000 VA) User's Guide...
-
Page 59: Configuring Battery Settings
NOTE The UPS contains one battery string; each EBM contains two battery strings. Press the button to save the setting. Press the button until the start screen appears. 164201718 Rev 3 www.eaton.com/powerquality Eaton ® 9130 UPS (700–3000 VA) User's Guide... -
Page 60: Running Automatic Battery Tests
“Automatic Start Delay” setting. You can also configure UPS restart to depend on the battery charge level, using the “Battery Charge % to Restart” setting. 164201718 Rev 3 www.eaton.com/powerquality Eaton ® 9130 UPS (700–3000 VA) User's Guide... -
Page 61: Communication
See “Rear Panels” on page 91 for rear panel diagrams for each model. Communication Bay REPO Output Input RS-232 Standard Relay Output Contact Figure 18. Communication Options and Control Terminals (PW9130L1000R-XL2U Model Shown) 164201718 Rev 3 www.eaton.com/powerquality Eaton ® 9130 UPS (700–3000 VA) User's Guide... -
Page 62: Installing Communication Options And Control Terminals
Route and tie the cable(s) out of the way. Continue to “Operation” on page 37 to start up the UPS. Communication Options The Eaton 9130 has serial communication capabilities through the USB and RS-232 communication ports or through a connectivity card in the available communication bay. - Page 63 When the selected condition is active, output signals on Pins 1 and 8 shift from Low (positive voltage) to High (negative voltage). When the condition no longer exists, the output signal returns to Low. 164201718 Rev 3 www.eaton.com/powerquality Eaton ® 9130 UPS (700–3000 VA) User's Guide...
-
Page 64: Connectivity Cards
COMMUNICATION Connectivity Cards Connectivity cards allow the UPS to communicate in a variety of networking environments and with different types of devices. The Eaton 9130 has one available communication bay for the following connectivity cards: ConnectUPS -BD Web/SNMP Card - has SNMP and HTTP capabilities as well as monitoring through a Web browser interface;... - Page 65 Bypass” state, the UPS transfers to Bypass model in every condition except frequency converter and generator mode. NOTE Always test the REPO function before applying your critical load to avoid accidental load loss. 164201718 Rev 3 www.eaton.com/powerquality Eaton ® 9130 UPS (700–3000 VA) User's Guide...
-
Page 66: Relay Output Contacts
Controls an optional external battery charger on and off Figure 22 shows a schematic of the relay output contacts. Normally Open Normally Closed Relay Output Common Figure 22. Standard Relay Port Connections 164201718 Rev 3 www.eaton.com/powerquality Eaton ® 9130 UPS (700–3000 VA) User's Guide... -
Page 67: Programmable Signal Inputs
If active, the UPS generates the “Building Alarm 1” alarm. Table 7. Polarity Options Input Description High Active state on high voltage (+Udc) level Active state on low voltage (GND or -Udc) level 164201718 Rev 3 www.eaton.com/powerquality Eaton ® 9130 UPS (700–3000 VA) User's Guide... -
Page 68: Modem Operation
It also gives you a complete record of critical power events, and it notifies you of important UPS or power information. If there is a power outage and the Eaton 9130 UPS battery power becomes low, LanSafe software can automatically shut down your computer system to protect your data before the UPS shutdown occurs. -
Page 69: Ups Maintenance
Batteries used beyond expected service life will often have severely reduced runtimes. Replace batteries at least every 5 years to keep units running at peak efficiency. 164201718 Rev 3 www.eaton.com/powerquality Eaton ® 9130 UPS (700–3000 VA) User's Guide... -
Page 70: Storing The Ups And Batteries
If you store the UPS for a long period, recharge the battery every 6 months by connecting the UPS to utility power. The internal batteries charge to 90% capacity in less than 3 hours. However, Eaton recommends that the batteries charge for 48 hours after long-term storage. -
Page 71: Replacing Rackmount Ups Internal Batteries
Grasp the top and bottom of the cover and slide the cover to the right. NOTE A ribbon cable connects the LCD control panel to the UPS. Do not pull on the cable or disconnect it. 164201718 Rev 3 www.eaton.com/powerquality Eaton ® 9130 UPS (700–3000 VA) User's Guide... - Page 72 Grasp an edge of the battery cover plate and pull it forward gently. Remove and retain the battery cover plate. See Figure 24 for the location of the battery cover plate. 164201718 Rev 3 www.eaton.com/powerquality Eaton ® 9130 UPS (700–3000 VA) User's Guide...
- Page 73 Slide the cover to the left until it aligns with the left front cover. Reinstall the two screws on the right side of the right front cover. 11. Continue to “Testing New Batteries” on page 72. 164201718 Rev 3 www.eaton.com/powerquality Eaton ® 9130 UPS (700–3000 VA) User's Guide...
-
Page 74: Replacing Tower Ups Internal Batteries
NOTE A ribbon cable connects the LCD control panel to the UPS. Do not pull on the cable or disconnect it. NOTE Leave ribbon cable connected. Figure 25. Removing the UPS Front Cover 164201718 Rev 3 www.eaton.com/powerquality Eaton ® 9130 UPS (700–3000 VA) User's Guide... - Page 75 NOTE Verify that the replacement batteries have the same rating as the batteries being replaced. Slide the new battery package into the cabinet. Push the battery package in firmly. 164201718 Rev 3 www.eaton.com/powerquality Eaton ® 9130 UPS (700–3000 VA) User's Guide...
- Page 76 10. Continue to “Testing New Batteries” on page 72. 164201718 Rev 3 www.eaton.com/powerquality Eaton ® 9130 UPS (700–3000 VA) User's Guide...
-
Page 77: Replacing Rackmount Ebms
Top EBM Cable Knockout EBM Cover Hook Bottom EBM Cable Knockout (underneath cover) Figure 27. Removing the EBM Front Cover 164201718 Rev 3 www.eaton.com/powerquality Eaton ® 9130 UPS (700–3000 VA) User's Guide... - Page 78 EBM. Repeat for any additional EBMs. Verify that the EBM connections are tight and that adequate bend radius and strain relief exist for each cable. 164201718 Rev 3 www.eaton.com/powerquality Eaton ® 9130 UPS (700–3000 VA) User's Guide...
-
Page 79: Replacing Tower Ebms
Insert the EBM cable into the UPS battery connector quickly and firmly. Plug the EBM cable(s) into the battery connector(s) as shown in Figure 16 on page 33. Up to four EBMs may be connected to the UPS. 164201718 Rev 3 www.eaton.com/powerquality Eaton ® 9130 UPS (700–3000 VA) User's Guide... -
Page 80: Testing New Batteries
During the battery test, the UPS transfers to Battery mode and discharges the batteries for 25 seconds. The front panel displays “Battery test running” and the percentage of the test completed. 164201718 Rev 3 www.eaton.com/powerquality Eaton ® 9130 UPS (700–3000 VA) User's Guide... -
Page 81: Recycling The Used Battery Or Ups
To keep the UPS firmware updated with the latest improvements and benefits, visit often for updates. You www.eaton.com/powerquality can download the latest firmware version and the instructions for installing it. 164201718 Rev 3 www.eaton.com/powerquality Eaton ® 9130 UPS (700–3000 VA) User's Guide... - Page 82 UPS MAINTENANCE 164201718 Rev 3 www.eaton.com/powerquality Eaton ® 9130 UPS (700–3000 VA) User's Guide...
-
Page 83: Specifications
700–1000 VA PW9130N1500R-EBM2U 48 Vdc 1500 VA Rackmount PW9130N3000R-EBM2U 72 Vdc 2000–3000 VA PW9130N1000T-EBM 36 Vdc 1000 VA PW9130N1500T-EBM 48 Vdc 1500 VA Tower PW9130N3000T-EBM 96 Vdc 2000–3000 VA 164201718 Rev 3 www.eaton.com/powerquality Eaton ® 9130 UPS (700–3000 VA) User's Guide... - Page 84 1500 VA / 1350W Figure 32 on page 92 PW9130G2000R-XL2UAU 2000 VA / 1800W Figure 38 on page 93 PW9130G3000R-XL2UAU 3000 VA / 2700W Figure 42 on page 94 164201718 Rev 3 www.eaton.com/powerquality Eaton ® 9130 UPS (700–3000 VA) User's Guide...
- Page 85 1500 VA / 1350W Figure 58 on page 98 PW9130G2000T-XLAU 2000 VA / 1800W Figure 59 on page 99 PW9130G3000T-XLAU 3000 VA / 2700W Figure 60 on page 99 164201718 Rev 3 www.eaton.com/powerquality Eaton ® 9130 UPS (700–3000 VA) User's Guide...
- Page 86 22.1 kg (48.7 lb) (3.4” 17.2” 16.9”) PW9130N1500R-EBM2U 86.5 430 mm 28.1 kg (62.0 lb) (3.4” 17.2” 16.9”) PW9130N3000R-EBM2U 86.5 600 mm 41.0 kg (90.6 lb) (3.4” 17.2” 23.6”) 164201718 Rev 3 www.eaton.com/powerquality Eaton ® 9130 UPS (700–3000 VA) User's Guide...
- Page 87 Nominal Frequency 50/60 Hz auto-sensing Frequency Range 40–70 Hz before transfer to battery Bypass Voltage Range +10/-15% of nominal (default) Noise Filtering MOVs for normal and common mode noise 164201718 Rev 3 www.eaton.com/powerquality Eaton ® 9130 UPS (700–3000 VA) User's Guide...
- Page 88 180–276 Vac PW9130G3000R-XL2UAU 240V / 13.0A 200*, 208**, 220, 230, 240 180–276 Vac * 100V and 200V are derated by 20%. ** 110V and 208V are derated by 10%. 164201718 Rev 3 www.eaton.com/powerquality Eaton ® 9130 UPS (700–3000 VA) User's Guide...
- Page 89 180–276 Vac PW9130G3000T-XLAU 240V / 12.5A 200*, 208**, 220, 230, 240 180–276 Vac * 100V and 200V are derated by 20%. ** 110V and 208V are derated by 10%. 164201718 Rev 3 www.eaton.com/powerquality Eaton ® 9130 UPS (700–3000 VA) User's Guide...
- Page 90 Aust. 10A to IEC 320-10A PW9130G1500R-XL2UAU IEC C14-10A Aust. 10A to IEC 320-10A PW9130G2000R-XL2UAU IEC C14-10A Aust. 10A to IEC 320-10A PW9130G3000R-XL2UAU IEC C20-16A Aust. 15A to IEC 320-16A 164201718 Rev 3 www.eaton.com/powerquality Eaton ® 9130 UPS (700–3000 VA) User's Guide...
- Page 91 Aust. 10A to IEC 320-10A PW9130G1500T-XLAU IEC C14-10A Aust. 10A to IEC 320-10A PW9130G2000T-XLAU IEC C14-10A Aust. 10A to IEC 320-10A PW9130G3000T-XLAU IEC C20-16A Aust. 15A to IEC 320-16A 164201718 Rev 3 www.eaton.com/powerquality Eaton ® 9130 UPS (700–3000 VA) User's Guide...
- Page 92 <3% THD on linear load; <5% THD on non-linear load Transfer Time Online mode: 0 ms (no break) High Efficiency mode: 5 ms maximum (due to loss of utility) Power Factor Load Crest Factor 3 to 1 164201718 Rev 3 www.eaton.com/powerquality Eaton ® 9130 UPS (700–3000 VA) User's Guide...
- Page 93 (4) C13, (2) Aust 10A (2) IEC-IEC 10A PW9130G2000R-XL2UAU (4) C13, (4) Aust 10A (2) IEC-IEC 10A PW9130G3000R-XL2UAU (4) C13, (1) C19, (3) Aust 10A (2) IEC-IEC 10A, (1) IEC-IEC 15A 164201718 Rev 3 www.eaton.com/powerquality Eaton ® 9130 UPS (700–3000 VA) User's Guide...
- Page 94 (4) Aust 10A None PW9130G1000T-XLAU (4) Aust 10A None PW9130G1500T-XLAU (4) Aust 10A None PW9130G2000T-XLAU (1) C13, (5) Aust 10A None PW9130G3000T-XLAU (1) C19, (5) Aust 15A None 164201718 Rev 3 www.eaton.com/powerquality Eaton ® 9130 UPS (700–3000 VA) User's Guide...
- Page 95 Up to 3,000 meters (9,843 ft) above sea level Transit Altitude Up to 10,000 meters (32,808 ft) above sea level Audible Noise <50 dBA at 1 meter typical Leakage Current <1.5 mA 164201718 Rev 3 www.eaton.com/powerquality Eaton ® 9130 UPS (700–3000 VA) User's Guide...
- Page 96 PW9130L2000R-XL2U PW9130G2000R-XL2U PW9130i2000R-XL2U PW9130G2000R-XL2UEU PW9130G2000R-XL2UAU PW9130L2500R-XL2U PW9130G2500R-XL2U PW9130G2500R-XL2UEU PW9130L3000R-XL2U PW9130G3000R-XL2U PW9130i3000R-XL2U PW9130G3000R-XL2UEU PW9130G3000R-XL2UAU NOTE Battery times are approximate and vary depending on the load configuration and battery charge. 164201718 Rev 3 www.eaton.com/powerquality Eaton ® 9130 UPS (700–3000 VA) User's Guide...
- Page 97 PW9130L1500T-XL PW9130i1500T-XL PW9130G1500T-XLAU PW9130L2000T-XL PW9130G2000T-XL PW9130i2000T-XL PW9130G2000T-XLEU PW9130G2000T-XLAU PW9130L3000T-XL PW9130G3000T-XL PW9130i3000T-XL PW9130G3000T-XLEU PW9130G3000T-XLAU NOTE Battery times are approximate and vary depending on the load configuration and battery charge. 164201718 Rev 3 www.eaton.com/powerquality Eaton ® 9130 UPS (700–3000 VA) User's Guide...
- Page 98 1 EBM: 9 hours; 2 EBMs: 15 hours; 3 EBMs: 21 hours; 4 EBMs: 27 hours Battery Port External three-pole Anderson connector on UPS for connection to EBM 164201718 Rev 3 www.eaton.com/powerquality Eaton ® 9130 UPS (700–3000 VA) User's Guide...
-
Page 99: Rear Panels
Table 15 through Table 21 (pages 80 through 86). For a description of communication features, see Figure 18 on page 53. Figure 28. Models PW9130L700R-XL2U, PW9130L1000R-XL2U Figure 29. Model PW9130G1000R-XL2U Figure 30. Models PW9130i1000R-XL2U, PW9130G1000R-XL2UEU 164201718 Rev 3 www.eaton.com/powerquality Eaton ® 9130 UPS (700–3000 VA) User's Guide... - Page 100 SPECIFICATIONS Figure 31. Model PW9130G1000R-XL2UAU Figure 32. Model PW9130G1500R-XL2UAU Figure 33. Model PW9130L1500R-XL2U Figure 34. Model PW9130i1500R-XL2U 164201718 Rev 3 www.eaton.com/powerquality Eaton ® 9130 UPS (700–3000 VA) User's Guide...
- Page 101 SPECIFICATIONS Figure 35. Model PW9130L2000R-XL2U Figure 36. Model PW9130G2000R-XL2U Figure 37. Models PW9130i2000R-XL2U, PW9130G2000R-XL2UEU Figure 38. Model PW9130G2000R-XL2UAU 164201718 Rev 3 www.eaton.com/powerquality Eaton ® 9130 UPS (700–3000 VA) User's Guide...
- Page 102 SPECIFICATIONS Figure 39. Models PW9130L2500R-XL2U, PW9130L3000R-XL2U Figure 40. Models PW9130G2500R-XL2U, PW9130G3000R-XL2U Figure 41. Models PW9130G2500R-XL2UEU, PW9130i3000R-XL2U, PW9130G3000R-XL2UEU Figure 42. Model PW9130G3000R-XL2UAU 164201718 Rev 3 www.eaton.com/powerquality Eaton ® 9130 UPS (700–3000 VA) User's Guide...
- Page 103 SPECIFICATIONS Figure 43. Model PW9130L700T-XL Figure 44. Model PW9130L1000T-XL Figure 45. Model PW9130L1500T-XL Figure 46. Model PW9130L2000T-XL 164201718 Rev 3 www.eaton.com/powerquality Eaton ® 9130 UPS (700–3000 VA) User's Guide...
- Page 104 SPECIFICATIONS Figure 47. Model PW9130L3000T-XL Figure 48. Model PW9130G1000T-XL Figure 49. Model PW9130G2000T-XL Figure 50. Model PW9130G3000T-XL 164201718 Rev 3 www.eaton.com/powerquality Eaton ® 9130 UPS (700–3000 VA) User's Guide...
- Page 105 SPECIFICATIONS Figure 51. Model PW9130i700T-XL Figure 52. Model PW9130G1000T-XLEU and PW9130i1000T-XL Figure 53. Model PW9130i1500T-XL Figure 54. Models PW9130G2000T-XLEU and PW9130i2000T-XL 164201718 Rev 3 www.eaton.com/powerquality Eaton ® 9130 UPS (700–3000 VA) User's Guide...
- Page 106 SPECIFICATIONS Figure 55. Models PW9130G3000T-XLEU and Figure 56. Model PW9130G700T-XLAU PW9130i3000T-XL Figure 57. Model PW9130G1000T-XLAU Figure 58. Model PW9130G1500T-XLAU 164201718 Rev 3 www.eaton.com/powerquality Eaton ® 9130 UPS (700–3000 VA) User's Guide...
- Page 107 SPECIFICATIONS Figure 59. Model PW9130G2000T-XLAU Figure 60. Model PW9130G3000T-XLAU 164201718 Rev 3 www.eaton.com/powerquality Eaton ® 9130 UPS (700–3000 VA) User's Guide...
- Page 108 SPECIFICATIONS 164201718 Rev 3 www.eaton.com/powerquality Eaton ® 9130 UPS (700–3000 VA) User's Guide...
-
Page 109: Troubleshooting
Chapter 8 Troubleshooting The Eaton 9130 is designed for durable, automatic operation and also alerts you whenever potential operating problems may occur. Usually the alarms shown by the control panel do not mean that the output power is affected. Instead, they are preventive alarms intended to alert the user. - Page 110 The batteries are disconnected. Verify that all batteries are properly connected. If LED is on. the condition persists, contact your service representative. 1 beep every second. 164201718 Rev 3 www.eaton.com/powerquality Eaton ® 9130 UPS (700–3000 VA) User's Guide...
- Page 111 The UPS is in Standby mode. Supply power to the connected equipment: Press UPS output receptacles. the On/Off button for at least 1 second, until the front panel displays “UPS starting...”. 164201718 Rev 3 www.eaton.com/powerquality Eaton ® 9130 UPS (700–3000 VA) User's Guide...
- Page 112 Check that the “Serial Port Configuration” setting is work. speed is set incorrectly for USB. set to 9600 bps. See “User Settings” on page 40. USB requires 9600 bps. 164201718 Rev 3 www.eaton.com/powerquality Eaton ® 9130 UPS (700–3000 VA) User's Guide...
-
Page 113: Silencing The Alarm
A replacement or repair unit will be shipped, freight prepaid for all warrantied units. Help NOTE For critical applications, immediate replacement may be available. Call the Desk for the dealer or distributor nearest you. 164201718 Rev 3 www.eaton.com/powerquality Eaton ® 9130 UPS (700–3000 VA) User's Guide... - Page 114 TROUBLESHOOTING 164201718 Rev 3 www.eaton.com/powerquality Eaton ® 9130 UPS (700–3000 VA) User's Guide...
- Page 115 This limited warranty (this “Warranty”) applies only to the original End-User (the “End-User”) of any Eaton 9120, 9125, 9130, 9135, 9140, and FERRUPS up to 3.1 kVA Products (individually and collectively, the “Product”) purchased on or after June 1, 2004, and cannot be transferred. This Warranty applies even in the event that the Product is initially sold by Company for resale to an End-User.
- Page 116 Product is sold, Company shall have no obligation under this Warranty. Also during such time, the period of this Warranty shall continue to run and the expiration of this Warranty shall not be extended upon payment of any overdue or unpaid amounts. 164201718 Rev 3 www.eaton.com/powerquality Eaton ® 9130 UPS (700–3000 VA) User's Guide...
- Page 117 In the USA, call the Customer Reliability Center 7x24 at 800-356-5737. Outside of the USA, call your local Eaton product sales or service representative. For comments or questions about this Warranty, write to the Customer Quality Representative, 3301 Spring Forest Road, Raleigh, North Carolina 27616 USA.
- Page 118 In the USA, call the Customer Reliability Center 7x24 at 800-356-5737. Outside of the USA, contact your local Eaton product sales or service representative. For comments or questions about this Load Protection Guaranty, write to the Customer Quality Representative, 3301 Spring Forest Road, Raleigh, North Carolina 27616 USA.
Need help?
Do you have a question about the 9130 UPS and is the answer not in the manual?
Questions and answers
Is there any periodic maintenance with the Eaton 9130 rackmount UPS?
The periodic maintenance required for the Eaton 9130 rackmount UPS includes:
- Keeping the area around the UPS clean and dust-free.
- Cleaning the outside of the system with a vacuum cleaner if the atmosphere is very dusty.
- Maintaining the UPS at an ambient temperature of 25°C (77°F) for full battery life.
- Replacing the UPS internal batteries and Extended Battery Modules (EBMs) as needed.
- Testing new batteries.
- Recycling used batteries or the UPS properly.
- Updating the UPS firmware when necessary.
This answer is automatically generated