Eaton Powerware 9135 User Manual
Two-in-one ups 5000/6000 va
Hide thumbs
Also See for Powerware 9135:
- User manual (82 pages) ,
- Specifications (6 pages) ,
- Manual (4 pages)
Table of Contents
Advertisement
Quick Links
Download this manual
See also:
User Manual
Advertisement
Table of Contents
Troubleshooting

Related Manuals for Eaton Powerware 9135


Summary of Contents for Eaton Powerware 9135
- Page 1 Powerware 9135 Two-in-One UPS ® 5000/6000 VA User’s guide...
- Page 2 34008709/AA...
- Page 3 ENGLISH Safety guidelines Read before installing product Safety of persons ◗ The UPS has its own internal power source (the battery). Consequently, the power outlets may be energised even if the UPS is disconnected from the AC-power source. ◗ Dangerous voltage levels are present within the UPS. It should be opened exclusively by qualified service personnel. ◗...
- Page 4 DEUTSCH Sicherheitshinweise Vor Installation der Anlage lesen Personenschutz ◗ Die USV verfügt über eine eigene interne Stromversorgung (Batterie). Die Ausgangsstecker können daher unter Spannung stehen, auch wenn die USV nicht an das Netz angeschlossen ist. ◗ Gefährliche Spannung im Geräteinnern. Das Gerät darf ausschließlich von Fachkräften geöffnet werden. ◗...
- Page 5 ESPAÑOL Consignas de seguridad Leer imperativamente antes de instalar el producto Seguridad de personas ◗ El UPS dispone de su propia fuente de energía interna (batería). Las tomas de salida pueden, por lo tanto, estar bajo tensión, incluso cuando el UPS está desconectado de la red eléctrica. ◗...
- Page 6 - Page 4 34008709/AA...
- Page 7 Powerware 9135 Two-in-One UPS ® 5000/6000 VA User’s Guide ENGLISH...
- Page 8 - Page 2 34008709EN/AA...
-
Page 9: Environmental Protection
® To discover the entire range of EATON Powerware products and the options available for the PW9135 range, we invite you ® to visit our web site at www.powerware.com or contact your EATON Powerware representative. Environmental protection ® EATON Powerware has implemented an environmental-protection policy. - Page 10 Introduction Pictograms Important instructions that must always be followed. Information, advice, help. Visual indication. Action. Audio signal. In the illustrations on the following pages, the symbols below are used: LED off LED on LED blinking - Page 4 34008709EN/AA...
-
Page 11: Table Of Contents
Contents Presentation Standard positions ........................7 Tower position ..........................7 Rack position ..........................7 Rear panels........................... 8 PW9135 5000 / PW9135 6000 ...................... 8 PW9135 EBM (optional battery module)..................8 Display and control panel ......................9 Options ............................9 Battery extensions for UPS backup times up to 80 minutes ............9 Installation Unpacking and contents check .................... - Page 12 Contents Troubleshooting Troubleshooting LED (30)......................26 ® Troubleshooting not requiring EATON Powerware after-sales support ......26 ® Troubleshooting requiring EATON Powerware after-sales support ........27 Life Cycle Monitoring (LCM) Description..........................28 Secure your installation power continuity ..................28 Reset or disable LCM ........................28 Maintenance Hot swapping the power sub-module..................29 Hot swapping the battery sub-module ..................29...
-
Page 13: Presentation
1. Presentation 1.1 Standard positions Tower position Dimensions (H x W x D) in mm / Inches PW9135 5000 444.5 x 131 x 700 / 17.5 x 5.16 x 27.56 PW9135 6000 444.5 x 131 x 700 / 17.5 x 5.16 x 27.56 PW9135 EBM 444.5 x 131 x 650 / 17.5 x 5.16 x 25.6... -
Page 14: Rear Panels
1. Presentation 1.2 Rear panels PW9135 5000 / PW9135 6000 (1) Two groups of 2 programmable (10A) SWITCHED SWITCHED GROUP 2 GROUP 1 outlets for connection of equipment (2) Groups of 4 (10A) outlets for connection of equipment (3) Groups of 2 (16A) outlets for connection of equipment (4) 12A thermal switch (5) 20A thermal switch... -
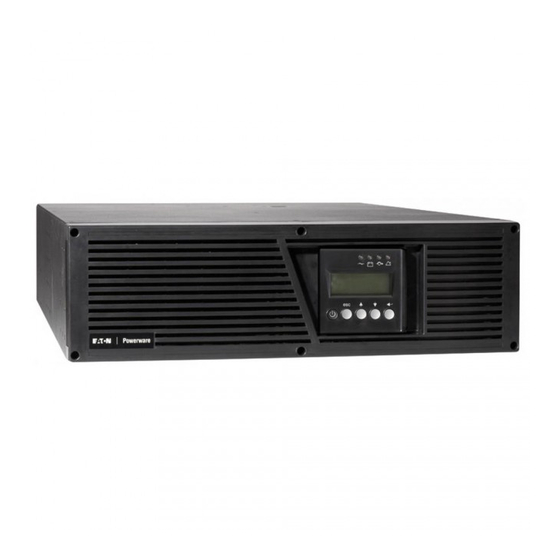
Page 15: Display And Control Panel
1. Presentation 1.3 Display and control panel (20) Load powered LED (21) Operation on battery LED (22) Operation on bypass LED (23) Alphanumeric display (24) Escape (cancel) button (25) (26) Function buttons (scroll down / scroll up) (27) Enter (confirm) button (29) UPS ON/OFF button (30) Fault LED 1.4 Options... -
Page 16: Installation
2. Installation 2.1 Unpacking and contents check (40) PW9135 5000 or 6000 UPS. (46) Screw driver. (41) Two sets of tower stands. (49) 4 IEC 10A output cables. (42) RS232 communications cable. (43) Product documentation. (44) 4 cable lockers. (45) Telescopic rails for rack enclosure with mounting hardware. -
Page 17: Installation In Tower Position
2. Installation 2.3 Installation in tower position Follow steps 1 to 3 to adjust the tower stands for the upright position. Always keep 150 mm free space behind the UPS rear panel. The distance between the tower stands should be 450 mm. - Page 11 34008709EN/AA... -
Page 18: Installation In Rack Position
2. Installation 2.4 Installation in rack position Adjustment of the orientation of the logo and control panel UPS module rack mounting PW9135 is very heavy. To ease its rack integration, we strongly recommend to remove the battery tray as shown below: 1 - Remove the 6 fixing screws to free the main front panel bezel. -
Page 19: Ups Or Battery Module Rack Mounting
Follow steps 1 to 4 for rack mounting the UPS onto the rails. ® The rails and the necessary mounting hardware are supplied by EATON Powerware Note for step 1: it is possible to adjust the position of both front mounting ears. -
Page 20: Communication Ports
PW9135 provides 3 communication methods that can be used simultaneously: ® ◗ 2 COM ports provide RS232 or USB communications using EATON Powerware SHUT protocol. Compatible with most power management software applications. Please, note that both ports cannot be used at the same time. -
Page 21: Remote Power Off Communication Port
2. Installation Remote Power Off communication port (16) (see page 8) Installation of a Remote Power Off function must be carried out in compliance with applicable regulations. In order to fully de-energize devices and PW9135 with the RPO port, it is necessary: ◗... -
Page 22: Required Protective Devices And Cable Cross-Sections
2. Installation 2.6 Required protective devices and cable cross-sections Recommended upstream protection UPS power rating Upstream circuit breaker The indicated protection ensures discrimination for each output circuit PW9135 5000 D curve - 32A downstream of the UPS. If these recommendations are not followed, PW9135 6000 D curve - 32A protection discrimination is not achieved and... -
Page 23: Connection Of Input/Output Power Cables To Ups Terminals
2. Installation 2.7 Connection of input/output power cables on UPS terminals ◗ This type of connection must be carried out by qualified electrical personnel. ◗ Before carrying out any connection, check that the battery circuit breaker (19) (see page 8) and that the upstream protection device (Normal AC source) is open ("0"). -
Page 24: Connection Of Iec Cables To Output Receptacles
To program shutdown of outlets (2) during operation on battery power and thus optimise the available backup time, the EATON ® Powerware communication software is required. 2 - Fit the connection securing system (44) that prevents the plugs from being pulled out accidentally. -
Page 25: Operation
3. Operation 3.1 Initial start-up 1 - Check that the battery switch (60) (see section 2.2, page 10) on top cover is connected. 2 - Set the upstream circuit breaker (not " " included) to the ON/OFF position (ON). The equipments are powered via the Normal AC source, but not protected by the UPS. -
Page 26: Operating Modes
3. Operation 3.3 Operating modes Normal mode This is the standard operating mode, set by default in the factory. Under normal condition (Normal AC source available): LED (20) is ON. The equipments are protected by the UPS. Eco mode The main advantage of the Eco mode (see glossary) is that it reduces the consumption of electrical power. -
Page 27: Operation On Battery Power
3. Operation 3.4 Operation on battery power When the Normal AC source is not available, the load continues to be protected by the UPS. Power is supplied by the battery. Transfer to battery power LEDs (20), (21) are ON. The audio alarm beeps every 10 seconds. The equipments are protected by the UPS and supplied by the battery. -
Page 28: Ups Shutdown
3. Operation 3.6 UPS shutdown " " 1 - Press the ON/OFF button (29) more than 3s. The buzzer beeps once, and the load is no longer protected by the UPS. It is powered via the Normal AC source. If the UPS is set in frequency converter mode, the equipments will not be powered. -
Page 29: Access To Measurements And Personalisation Data
4. Access to measurements and personalisation data 4.1 Display organisation 4.2 Access to measurements Press the scroll button (26) (see section 1.3, page 9) to access measurements for voltage, current, frequency, power output and battery capacity. 4.3 Access to UPS set-up and maintenance using the control panel (23) ◗... -
Page 30: Ups Set-Up
4. Access to measurements and personalisation data 4.4 UPS set-up Local settings Function Factory setting Options Language English French, German, Italian, Portuguese, Spanish Date / Time Format International US (MM-DD-YYYY/HH:MM AM/PM) (DD-MM-YYYY/HH :MM) Date / Time Change GMT + 1 MM-DD-YYYY/HH :MM adjustable (Continental Europe) Audible Alarm... -
Page 31: Maintenance
UPS reads number of From 0 to 95 Ah 5 Ah increment battery modules connected Deep Disch Protect Protection against deep discharge. ® If disable, EATON Powerware warranty will be void 4.5 Maintenance Function Sub-Function Option / Display Comments Model... -
Page 32: Troubleshooting
" " In case of LCM WARNING , refer to LCM section (see section 6). 5.2 Troubleshooting not requiring EATON Powerware® after-sales support " " Press the Enter button (27) to display the details below : Displayed details... -
Page 33: Troubleshooting Requiring Eaton Powerware® After-Sales Support
5. Troubleshooting 5.3 Troubleshooting requiring EATON Powerware® after-sales support Note: In case of multiple fault, press the " " Enter button (27) and the scroll button (25) to get access to further details. Display Signification Correction POWER MODULE Internal power sub-module fault detected. -
Page 34: Life Cycle Monitoring (Lcm)
6. Life Cycle Monitoring (LCM) 6.1 Description This function, embedded in the UPS, displays messages, on screen and communication channels, at every important stage of the UPS’s life, allowing you to: " " Press the Enter button (27) to display LCM warning details. -
Page 35: Maintenance
7. Maintenance 7.1 Hot swapping the power sub-module This operation must be carried out by qualified electrical personnel only. This operation can be performed without interrupting the equipments. Disconnecting the power sub-module : 1 - Remove the 6 fixing screws to free the main front panel bezel. - Page 36 7. Maintenance Reconnecting the battery sub-module : Carry out the above instructions in reverse order. ® ◗ To ensure safety and high performance, use only batteries supplied by EATON Powerware - Page 30 34008709EN/AA...
-
Page 37: Appendices
8. Appendices 8.1 Technical specifications PW9135 5000 PW9135 6000 PW9135 EBM Output power 5000 VA / 6000 VA 3500 W 4200 W Electrical supply network ◗ Rated input voltage Single phase 230 V ◗ Input voltage range 120 / 156 V to 280 V ◗... -
Page 38: Glossary
Programmable These outlets can be automatically shut down during operation on battery power (shutdown time ® outlets delays can be programmed with the EATON powerware power management products). The UPS has two sets of two programmable outlets. Relay contacts Contacts supplying information to the user in forme of signals. - Page 39 - Page 33 34008709EN/AA...
- Page 40 34008709EN/AA...
Need help?
Do you have a question about the Powerware 9135 and is the answer not in the manual?
Questions and answers