Table of Contents
Advertisement
Advertisement
Table of Contents

Related Manuals for Muratec MFX-3550


Summary of Contents for Muratec MFX-3550
- Page 1 Muratec MFX-3550 User Guide English...
- Page 2 This user’s guide is provided for information purposes only. All information included herein is subject to change without notice. Muratec is not responsible for any direct or indirect damages, arising from or related to use of this user’s guide. Muratec and the Muratec logo are trademarks of Murata Machinery Limited.
-
Page 3: Safety Information
Safety information These warnings and precautions are included in order to prevent injury to you and others, as well as preventing any potential damage to your machine. Be sure to read and understand all of these instructions before using the machine. Use common sense for operating any electrical appliance and whenever using your machine. - Page 4 During an electrical storm or for a If the plug does not easily enter the period of non-operation,remove the electrical outlet, do not attempt to force it in. power plug from the electrical outlet. Call an electrician to change the electrical This could result in electric shock or outlet, or this could result in electric shock.
- Page 5 with at least two people. result in fire. The machine could fall, causing human injury or machine damage. Do not place the machine on an unstable Make sure you plug the power cord into a surface. grounded electrical outlet. The machine could fall, causing human injury Otherwise, this could result in electric shock or fire.
- Page 6 toner cartridge or fuser unit. can cause damage to the machine. It can cause an explosion or fire. In case of damage due to the use of recycled supplies, a service fee will be charged. When changing the toner cartridge or removing jammed paper, be careful not to let toner dust touch your body or clothes.
-
Page 7: Regulatory Information
Regulatory information This machine is designed for our sound environment and certified with several regulatory statements. LASER SAFETY STATEMENT The printer is certified in the U.S. to conform to the requirements of DHHS 21 CFR, chapter 1 Subchapter J for Class I(1) laser products, and elsewhere is certified as a Class I laser product conforming to the requirements of IEC 825. -
Page 8: Ozone Safety
OZONE SAFETY During normal operation, this machine produces ozone. The ozone produced does not present a hazard to the operator. However, it is advisable that the machine be operated in a well ventilated area. If you need additional information about ozone, request your nearest Samsung dealer. MERCURY SAFETY Contains Mercury, Dispose According to Local, State or Federal Laws.(U.S.A. -
Page 9: Radio Frequency Emissions
This marking on the product, accessories or literature indicates that the product and its electronic accessories (e.g. charger, headset, USB cable) should not be disposed of with other household waste at the end of their working life. To prevent possible harm to the environment or human health from uncontrolled waste disposal, please separate these items from other types of waste and recycle them responsibly to promote the sustainable reuse of material resources. -
Page 10: United States Of America
apparatus as set out in the interference-causing equipment standard entitled “Digital Apparatus”, ICES-003 of the Industry and Science Canada. Cet appareil numérique respecte les limites de bruits radioélectriques applicables aux appareils numériques de Classe A prescrites dans la norme sur le matériel brouilleur: “Appareils Numériques”, ICES-003 édictée par l’Industrie et Sciences Canada. -
Page 11: Ringer Equivalence Number
RUSSIA ONLY FAX BRANDING The Telephone Consumer Protection Act of 1991 makes it unlawful for any person to use a computer or other electronic device to send any message via a telephone facsimile machine unless such message clearly contains in a margin at the top or bottom of each transmitted page or on the first page of the transmission the following information: 1. - Page 12 equipment on your telephone line should be less than five in order to assure proper service from the telephone company. In some cases, a sum of five may not be usable on your line. If any of your telephone equipment is not operating properly, you should immediately remove it from your telephone line, as it may cause harm to the telephone network.
- Page 13 If the wires in the mains lead do not match the colors marked in your plug, do the following: You must connect the green and yellow wire to the pin marked by the letter “E” or by the safety ‘Earth symbol’ or colored green and yellow or green. You must connect the blue wire to the pin which is marked with the letter “N”...
- Page 14 REGULATORY COMPLIANCE STATEMENTS Wireless Guidance Low power, Radio LAN type devices (radio frequency (RF) wireless communication devices), operating in the 2.4 GHz/5 GHz Band, may be present (embedded) in your printer system. The following section is a general overview of considerations while operating a wireless device. Additional limitations, cautions, and concerns for specific countries are listed in the specific country sections (or country group sections).
-
Page 15: Openssl License
manufacturer System Restoration Kit, or contact manufacturer Technical Support for additional information. OPENSSL LICENSE Copyright (c) 1998-2001 The OpenSSL Project. All rights reserved. Redistribution and use in source and binary forms, with or without modification, are permitted provided that the following conditions are met: 1. - Page 16 and the following disclaimer in the documentation and/or other materials provided with the distribution. 3. All advertising materials mentioning features or use of this software must display the following acknowledgement: "This product includes cryptographic software written by Eric Young (eay@cryptsoft.com)" The word 'cryptographic' can be left out if the rouines from the library being used are not cryptographic related:-).
- Page 17 CHINA ONLY...
-
Page 19: Finding More Information
About this user’s guide This user’s guide provides information about basic understanding of the machine as well as detailed explanation on each step during actual usage. Valuable for both novice and professional users can refer to this as a guide for installing and using the machine. Read the safety information before using the machine. - Page 20 and installing accessories. Network You can set the network environment from your computer using network-managing Website programs, such as SetIP, SyncThru™ Web Admin Service, etc.This Website will be convenient for network administrators who need to manage many machines simultaneously. SetIP program is provided in the software CD. Driver Help This help provides you with help information on printer driver and instructions for setting up the options for printing.
-
Page 21: Features Of Your New Product
Features of your new product Your new machine is equipped with a number of special features that improve the quality of the documents you print. SPECIAL FEATURES Print with excellent quality and speed You can print with a resolution of up to 1200 dpi effective output. Your machine prints A4-sized paper at up to 33 ppm and letter-sized paper at up to 35 ppm. -
Page 22: Features By Models
systems. (See System requirements.) Your machine is equipped with a USB interface and a network interface. Copy originals in several formats Your machine can copy multiple image copies from the original document on a single page. (See 2-up or 4-up copying (N-up).) The print quality and image size may be adjusted and enhance at the same time. -
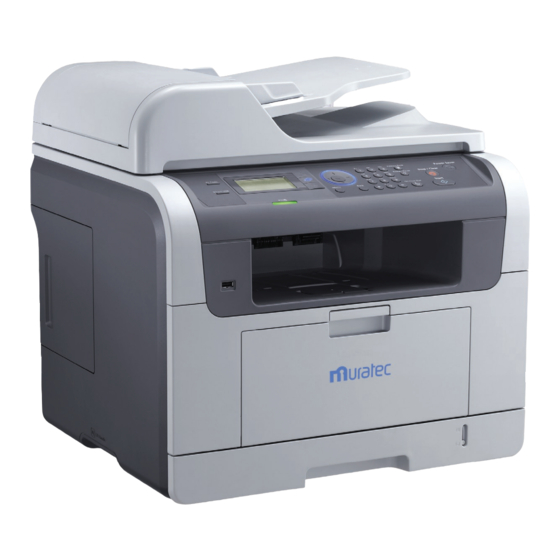
Page 23: Machine Overview
Introduction This chapter gives you an overview of your machine: This chapter includes: Machine overview Control panel overview Understanding the Status LED Introducing the useful buttons MACHINE OVERVIEW Front view Document feeder cover Front door Document feeder width guides Document output tray Document feeder input tray USB memory port Document feeder output tray... -
Page 24: Rear View
SCX-5635HN only. Rear view Network port Duplex unit USB port Rear door USB host port Power receptacle Optional tray 2 cable connector Power-switch Telephone line socket Control board cover Extension telephone socket (EXT) CONTROL PANEL OVERVIEW You can copy both sides of the ID Card like a driver’s license to a single side of ID Copy paper. -
Page 25: Understanding The Status Led
Back Sends you back to the upper menu level. 12 Numeric keypad Dials fax number, and enters the number value for document copies or other options. Allows you to store frequently used fax numbers and email addresses or search Address Book for stored fax numbers or email addresses. -
Page 26: Menu Button
STATUS DESCRIPTION The machine is not in the power save mode. Blue The machine is in the power save mode. Menu button When you want to know the machine status and set your machine to use an advanced feature, click Menu button. -
Page 27: Getting Started
Getting started This chapter gives you step-by-step instructions for setting up the USB connected machine and software. This chapter includes: Setting up the hardware Supplied software System requirements Installing USB connected machine’s driver Sharing your machine locally SETTING UP THE HARDWARE This section shows the steps to set up the hardware, as is explained in the Quick Install Guide. -
Page 28: Supplied Software
2. Unpack the machine and check all the enclosed items. 3. Remove all the tapes. 4. Install the toner cartridge. 5. Load paper. (See Loading paper in the tray.) 6. Make sure that all cables are connected to the machine. 7. -
Page 29: System Requirements
Printer Description (PPD) file: Use this file to run your machine from a Linux computer and print documents. SANE: Use this driver to scan documents. Smart Panel: This program allows you to monitor the machine’s status and alerts you when an error occurs during printing. SetIP: Use this program to set your machine’s TCP/IP addresses. - Page 30 RedHat Enterprise Linux WS 4, 5 (32/64bit) Fedora Core 1~7 (32/64bit) Mandrake 9.2 (32bit), 10.0, 10.1 (32/64bit) Mandriva 2005, 2006, 2007 (32/64bit) SuSE Linux 8.2, 9.0, 9.1 (32bit) SuSE Linux 9.2, 9.3, 10.0, 10.1, 10.2 (32/64bit) SuSE Linux Enterprise Desktop 9, 10 (32/64bit) Ubuntu 6.06, 6.10, 7.04 (32/64bit) Debian 3.1, 4.0 (32/64bit) Pentium IV 2.4GHz (IntelCore2)
- Page 31 If necessary, select a language from the drop-down list. 4. Select Typical installation for a local printer. and then click Next. If your machine is not already connected to the computer, the following window will appear.
- Page 32 After connecting the machine, click Next. If you don’t want to connect the machine at this time, click Next, and No on the following screen. The installation will then start and a test page will not be printed at the end of the installation.
- Page 33 1. Make sure that the machine is connected to your computer and powered on. 2. Insert the supplied software CD into your CD-ROM drive. 3. Double-click the CD-ROM icon that appears on your Macintosh desktop. 4. Double-click the MAC_Installer folder. 5.
- Page 34 The supplied software CD provides you with the Unified Linux Driver package for using your machine with a Linux computer easily in UI based management tool.(See Using the Linux Unified Driver Configurator.) 1. Make sure that the machine is connected to your computer and powered on. 2.
-
Page 35: Sharing Your Machine Locally
If the printer driver does not work properly, uninstall the driver and reinstall it. Follow the steps below steps to uninstall the driver for Linux. 1. Make sure that the machine is connected to your computer and powered on. 2. When the Administrator Login window appears, type in “root” in the Login field and enter the system password. - Page 36 1. Install your printer driver. (See Installing USB connected machine’s driver.) 2. Click the Windows Start menu. 3. Select All programs > Accessories > Window Explorer. 4. Enter in IP address of the host computer and press Enter in your keyboard. In case host computer requires User name and Password, fill in User ID and password of the host computer account.
-
Page 37: Network Setup
Network setup This chapter gives you step-by-step instructions for setting up the network connected machine and software. This chapter includes: Network environment Introducing useful network programs Using a wired network Using a wireless network NETWORK ENVIRONMENT You need to set up the network protocols on the machine to use it as your network machine. You can set up the basic network settings through the machine's control panel. -
Page 38: Using A Wired Network
(See Using SyncThru™ Web Service.) SyncThru™ Web Admin Service Web-based machine management solution for network administrators. SyncThru™ Web Admin Service provides you with an efficient way of managing network devices and lets you remotely monitor and troubleshoot network machines from any site with corporate internet access. SetIP This utility program allows you to select a network interface and manually configure the IP addresses for use with the TCP/IP protocol. - Page 39 your machine has a control panel, you can also change IP address using the machine's control panel. In an office environment, we recommend that you contact a network administrator to set this address for you. IP setting using control panel 1.
- Page 40 MAC Address : Find the machine’s MAC address from the Network Configuration Report and enter it without the colons. For example, 00:15:99:29:51:A8 becomes 0015992951A8. MAC address is a hardware serial number of the machine’s network interface and can be found in the Network Configuration Report. IP Address: Enter a new IP address for your machine.
-
Page 41: Network Parameter Setting
open the SetIPapplet.html page that shows the printer’s name and IP address information. 4. Highlight the printer information row and select the Setup icon, which is the second icon from the left in the application menu bar. A TCP/IP Configuration window will open. If the printer was not shown in the information row, select the Manual Setting icon (third from left) to open the TCP/IP Configuration window. - Page 42 Then the Set IP Address window appears. Do as follows: 1. Select a printer to be set with a specific IP address from the list. 2. Configure an IP address, subnet mask, and gateway for the printer manually and click Configure to set the specific IP address for the network printer.
- Page 43 3. Click Next, and go to step 6. 4. You can also set the network printer via SyncThru Web Service, an embedded web server. Click Launch SWS on Set IP Address windows. Your machine’s embedded website opens. 5. The list of machines available on the network appears. Select the machine you want to install from the list and then click Next.
- Page 44 4. Select the components you want to remove and then click Next. 5. When your computer asks you to confirm your selection, click Yes. The selected driver and all of its components are removed from your computer. 6. After the software is removed, click Finish. Macintosh 1.
- Page 45 If the printer driver does not work properly, uninstall the driver and reinstall it. Follow steps below to uninstall the driver for Macintosh. 1. Make sure that the machine is connected to your computer and powered on. 2. Insert the supplied software CD into your CD-ROM drive. 3.
- Page 46 Ad-hoc mode An Ad-hoc mode network provides peer to peer communication. In an Ad-hoc mode network, wireless devices and computers communicate directly with each other, without using an access point. Printing Network Configuration Report You can print a Network Configuration Report from the machine’s control panel that will show the current machine’s network settings.
-
Page 47: Installing The Program
Setting IP address Firstly, you have to set up an IP address for network printing and managements. In most cases a new IP address will be automatically assigned by a DHCP (Dynamic Host Configuration Protocol Server) located on the network. In a few situations the IP address must be set manually. - Page 48 ROM drive.) 3. Double-click Application > SetIP. 4. Double-click Setup.exe to install this program. 5. Click OK. If necessary, select a language from the drop-down list. 6. Follow the instructions in the window and complete the installation. Starting the program 1.
-
Page 49: Restoring Factory Default Settings
7. Click Exit to close the SetIP program. 8. If necessary, restart the computer’s firewall. IP setting using SetIP Program (Macintosh) For using SetIP program, disable the computer firewall before continuing by performing the following: 1. Open System Preferences. 2. Click Security. 3. -
Page 50: Configuring The Machine's Wireless Network
2. When the SyncThru™ Web Service window opens, click Network Settings. 3. Click Reset. Then, click Clear for network. 4. Turn off and restart machine to apply settings. You can also set the factory default settings on the control panel. Select Clear Settings in Network menu. - Page 51 1. The wireless network interface card on your machine searches for wireless network in the area and shows the results. 2. Press the up/down arrow to select a network you want to use in Search List and press OK. You can select a network using SSID. 3.
- Page 52 the network. Enter the WEP Key using number keypad after selecting SharedKey and then press OK. WPA-PSK or WPA2-PSK: You can select WPA-PSK or WPA2-PSK to authenticate the print server based on WPA Pre-Shared Key. This uses a shared secret key (generally called Pre Shared Key passphrase) which is manually configured on the access point and each of its clients.
- Page 53 4. Select the one Network Name(SSID) in the list.
- Page 54 SSID: SSID (Service Set Identifier) is a name that identifies a wireless network. Access points and wireless devices attempting to connect to a specific wireless network must use the same SSID. The SSID is case-sensitive. Operation Mode: Operation Mode refers to the type of wireless connections. Ad-hoc: allows wireless devices to communicate directly with each other in a peer-to- peer environment.
- Page 55 6. The confirmation window appears, please check your wireless setup. If the setup is right, click Apply. 7. Click OK. Disconnect the network cable (standard or crossover). Your machine should then start communicating wirelessly with the network. In case of Ad-hoc mode, you can use a wireless LAN and wired LAN simultaneously.
- Page 56 Make sure that the network setup for your machine is completed. All applications should be closed on your computer before beginning installation. 1. Insert the supplied software CD into your CD-ROM drive. The software CD should automatically run and an installation window appear. If the installation window does not appear, click Start and then Run.
- Page 57 1. Select a printer to be set with a specific IP address from the list. 2. Configure an IP address, subnet mask, and gateway for the printer manually and click Configure to set the specific IP address for the network printer. 3.
- Page 58 If you do not see your machine on the list, click Update to refresh the list, or select Add TCP/IP Port to add your machine to the network. To add the machine to the network, enter the port name and the IP address for the machine. To verify your machine’s IP address or the MAC address, print a Network Configuration page.
- Page 59 address should have been set. 2. Insert the supplied software CD into your CD-ROM drive. 3. Double-click the CD-ROM icon that appears on your Macintosh desktop. 4. Double-click the MAC_Installer folder. 5. Double-click the Installer icon. 6. Enter the password and click OK. 7.
- Page 60 6. Enter the password and click OK. 7. The Installer window opens. Click Continue. 8. Select Uninstall and click Uninstall. 9. When the message which warns that all applications will close on your computer appears, click Continue. 10. When the uninstall is done, click Quit.
-
Page 61: Altitude Adjustment
Basic setup After installation is complete, you may want to set the machine’s default settings. Refer to the next section if you would like to set or change values. This chapter gives you step-by-step instructions for setting up the machine. This chapter includes: Altitude adjustment Changing the display language... -
Page 62: Changing The Display Language
machine’s display screen. CHANGING THE DISPLAY LANGUAGE To change the language that appears on the display, follow the steps below: 1. Press Menu on the control panel. 2. Press the up/down arrow to highlight System Setup and press OK. 3. Press the up/down arrow to highlight Machine Setup and press OK. 4. -
Page 63: Setting Sounds
3. Press the up/down arrow to highlight Machine Setup and press OK. 4. Press the up/down arrow to highlight Default Mode and press OK. 5. Press the up/down arrow to select the mode you want. 6. Press OK to save the selection. 7. -
Page 64: Keypad Letters And Numbers
Press the button until the correct letter appears on the display. For example, to enter the letter O, press 6, labeled with MNO. Each time you press 6, the display shows a different letter, M, N, O, m, n, o and finally 6. You can enter special characters, such as space, plus sign, and etc. -
Page 65: Using Power Saving Feature
Using power saving feature When you are not using the machine for a while, use this feature to save power. 1. Press Menu on the control panel. 2. Press the up/down arrow to highlight System Setup and press OK. 3. Press the up/down arrow to highlight Machine Setup and press OK. 4. -
Page 66: Changing The Font Setting
Setting the paper source 1. Press Menu on the control panel. 2. Press the up/down arrow to highlight System Setup and press OK. 3. Press the up/down arrow to highlight Paper Setup and press OK. 4. Press the up/down arrow to highlight Paper Source and press OK. 5. -
Page 67: Setting Job Timeout
Russian: CP866, ISO 8859/5 Latin Cyrillic Hebrew: Hebrew 15Q, Hebrew-8, Hebrew-7 (Israel only) Greek: ISO 8859/7 Latin Greek, PC-8 Latin/Greek Arabic & Farsi: HP Arabic-8, Windows Arabic, Code Page 864, Farsi, ISO 8859/6 Latin Arabic OCR: OCR-A, OCR-B SETTING JOB TIMEOUT When there is no input for a certain period of time, the machine exits the current menu and goes in to the default settings. -
Page 68: Media And Tray
Media and tray This chapter provides information on how to load originals and print media into your machine. This chapter includes: Preparing originals Loading originals Selecting print media Changing the tray size Loading paper in the tray Printing on special media Setting the paper size and type selecting an output location PREPARING ORIGINALS... -
Page 69: In The Document Feeder
2. Place the original face down on the scanner glass. And align it with the registration guide at the top left corner of the glass. 3. Close the scanner lid. Leaving the scanner lid open while copying may affect copy quality and toner consumption. Dust on the scanner glass may cause black spots on the printout. -
Page 70: Selecting Print Media
2. Load the original face up into the document feeder. Make sure that the bottom of the original stack matches the paper size marked on the document input tray. 3. Adjust the document width guides to the paper size. Dust on the document feeder glass may cause black lines on the printout. Always keep the glass clean. -
Page 71: Media Sizes Supported In Each Mode
The type, size and weight of the print media for your machine are described in print media specifications. (See Print media specifications Desired outcome: The print media you choose should be appropriate for your project. Brightness: Some print media are whiter than others and produce sharper, more vibrant images. Surface smoothness: The smoothness of the print media affects how crisp the printing looks on the paper. - Page 72 1. With one hand press and hold the guide lock, and with the other hand, hold the paper length guide and support guide together. Slide the paper length guide and support guide to locate them in the correct paper size slot. 2.
-
Page 73: Loading Paper In The Tray
Do not push the paper width guide too far causing the media to warp. If you do not adjust the paper width guide, it may cause paper jams. LOADING PAPER IN THE TRAY Tray 1 / optional tray Load the print media you use for the majority of your print jobs into tray 1. Tray 1 can hold a maximum of 250 sheets of plain paper. - Page 74 2. When you print a document, set the paper type and size for the tray. For information about setting the paper type and size on the control panel. (See Setting the paper size and type.) If you experience problems with paper feeding, check whether the paper meets the media specification.
- Page 75 3. Load the paper with the side to be printed on facing up. 4. Squeeze the multi-purpose tray paper width guides and adjust them to the width of the paper. Do not force too much, or the paper will bent resulting in a paper jam or skew. When printing the special media, you must follow the loading guideline.
-
Page 76: Printing On Special Media
PRINTING ON SPECIAL MEDIA The table below shows the available special media for each tray. When using special media, we recommend you feed one paper at a time. Check the maximum input number of media for each tray. (See Print media specifications TYPES TRAY 1 OPTIONAL TRAY... - Page 77 If you need to do the printing job with a wrinkled envelopes, open the rear door. Then pull down the pressure levers on each side. When selecting envelopes, consider the following factors: Weight: The weight of the envelope paper should not exceed 90 g/m otherwise, jam may occur.
- Page 78 flaps and strips might cause wrinkling, creasing, or jams, and may even damage the fuser. For the best print quality, position margins no closer than 15 mm from the edges of the envelope. Avoid printing over the area where the envelope’s seams meet. Transparency To avoid damaging the machine, use only transparencies designed for use in laser printers.
-
Page 79: Preprinted Paper
Condition: Do not use labels with wrinkles, bubbles, or other indications of separation. Make sure that there is no exposed adhesive material between labels. Exposed areas can cause labels to peel off during printing, which can cause paper jams. Exposed adhesive can also cause damage to machine components. -
Page 80: Setting The Paper Size And Type
process, wet ink can come off preprinted paper, reducing print quality. SETTING THE PAPER SIZE AND TYPE After loading paper in the paper tray, set the paper size and type using the control panel. These settings will apply to copy and fax modes. For computer printing, select the paper size and type in the application program you use on your computer. - Page 81 1. Output tray 2. Rear door The machine sends output to the output tray by default. To use the output tray, make sure that the rear door is closed. If paper coming out of the output try has problems, such as excessive curl, try printing to the rear door.
-
Page 82: Printer Driver Features
Printing This chapter explains common printing tasks. This chapter includes: Printer driver features Basic printing Opening printing preferences Using help Using special print features Changing the default print settings Setting your machine as a default machine Printing to a file (PRN) Macintosh printing Linux printing Printing with PS driver... -
Page 83: Basic Printing
Multiple pages per sheet (2, 4) Fit to page printing Reduce and enlarge printing Different source for first page Watermark Overlay Double-sided printing (duplex) The machine with Duplex feature prints both side of a paper. BASIC PRINTING Your machine allows you to print from various Windows, Macintosh, or Linux applications. The exact steps for printing a document may vary depending on the application you use. -
Page 84: Canceling A Print Job
The basic print settings including the number of copies and print range are selected within the Print window. To take advantage of the printer features provided by your printer driver, click Properties or Preferences in the application’s Print window to change the print setting. (See Opening printing preferences. -
Page 85: Using A Favorite Setting
Using a favorite setting The Presets option, which is visible on each preferences tab except for Samsung tab, allows you to save the current preferences settings for future use. To save a Presets item: 1. Change the settings as needed on each tab. 2. -
Page 86: Using Help
3. Click Save. When you save Presets, all current driver settings are saved. To use a saved setting, select it from the Presets drop down list. The machine is now set to print according to the setting you selected. To delete s saved setting, select it from the Presets drop down list and click Delete. You can also restore the printer driver’s default settings by selecting Default Preset from the Presets drop down list. -
Page 87: Printing Booklets
1. To change the print settings from your software application, access Printing Preferences. (See Opening printing preferences.) 2. Click the Basic tab, select Poster Printing in the Type drop-down list. 3. Select the page layout you want. Specification of the page layout: Poster 2x2: Document will be enlarged and be divided into 4 pages. -
Page 88: Change Percentage Of Your Document
Do not print on both sides of the special media, such as labels, envelopes, or thick paper to print on both sides of paper. It may cause a paper jam or damage the machine. 1. To change the print settings from your software application, access Printing Preferences. (See Opening printing preferences.) 2. -
Page 89: Using Watermarks
1. To change the print settings from your software application, access Printing Preferences. (See Opening printing preferences.) 2. Click the Paper tab. 3. Select the paper size you want from the Fit to page . 4. Select the Size, Source, and Type in Paper Options. 5. -
Page 90: Using Overlay
2. Click the Advanced tab, select Edit from the Watermark drop-down list. The Edit Watermarks window appears. 3. Select the watermark you want to edit from the Current Watermarks list and change the watermark message and options. 4. Click Update to save the changes. 5. -
Page 91: Changing The Default Print Settings
2. To change the print settings from your software application, access Printing Preferences. (See Opening printing preferences.) 3. Click the Advanced tab. 4. Select the desired overlay from the Text drop-down list. 5. If the overlay file you want does not appear in theText drop-down list, select Edit from the list and click Load. -
Page 92: Macintosh Printing
3. Right-click your machine and select Set as Default Printer. PRINTING TO A FILE (PRN) You will sometimes need to save the print data as a file. To create a file: 1. Check the Print to file box at the Print window. 2. -
Page 93: Changing Printer Settings
4. Open the File menu and click Print. 5. Choose the number of copies you want and indicate which pages you want to print. 6. Click Print. Changing printer settings You can use advanced printing features provided by your machine. Open an application and select Print from the File menu. -
Page 94: Printer Features
Pages per Sheet: This option determines how many pages to be printed on one page. (See Printing multiple pages on one sheet of paper.) Layout Direction: This option allows you to select the printing direction on a page similar to the examples on UI. -
Page 95: Toner Save Mode
Reverse Duplex Printing: This option allows you to select general print order compared to duplex print order. If this option does not appear, your machine does not have this feature. Fit to Page: This option allows you to scale your print job to any selected paper size regardless of the document size. -
Page 96: Printing Multiple Pages On One Sheet Of Paper
Printing multiple pages on one sheet of paper You can print more than one page on a single sheet of paper. This feature provides a cost-effective way to print draft pages. 1. Open an application, and select Print from the File menu. 2. -
Page 97: Linux Printing
If you print more than 2 copies, the first copy and the second copy might print on same sheet of paper. Avoid printing on both sides of paper when you are printing more than 1 copy. LINUX PRINTING Printing from applications There are a lot of Linux applications that allow you to print using Common UNIX Printing System (CUPS). - Page 98 4. Change the print job properties using the following four tabs displayed at the top of the window.
-
Page 99: Printing Files
General: This option allows you to change the paper size, the paper type, and the orientation of the documents. It enables the duplex feature, adds start and end banners, and changes the number of pages per sheet. Text: This option allows you to specify the page margins and set the text options, such as spacing or columns. -
Page 100: Configuring Printer Properties
Configuring Printer Properties Using the Printer Properties window provided by the Printers configuration, you can change the various properties for your machine as a printer. 1. Open the Unified Driver Configurator. If necessary, switch to Printers configuration. 2. Select your machine on the available printers list and click Properties. 3. -
Page 101: Layout Tab
3. Select your machine’s PS driver from the Select Printer list. To take advantage of the printer features provided by your printer driver, click Properties or Preferences in the application’s Print window to change the print setting. (See Understanding PS driver’s Printing Preferences.) 4. -
Page 102: Print On Both Sides
Orientation This option allows you to select the direction in which the information is printed on a page. Portrait: This option prints across the width of the page, letter style. Landscape: This option prints across the length of the page, spreadsheet style. Rotate Landscape: This option allows you to rotate the page, 180 degrees. -
Page 103: Pages Per Sheet
Page Order This option allows you to select the printout order. Front to Back: Pages are printed out in regular order. Back to Front: Pages are printed out in reverse order. Pages Per Sheet You can select the number of pages to print on a single sheet of paper. To print more than one page per sheet, the pages will be reduced in size and arranged in the order you specify. - Page 104 Paper Source: This option allows you to choose which tray to use. Media: This option allows you to choose which media to use.
-
Page 105: Basic Copy
Copying This chapter gives you step-by-step instructions for copying documents. This chapter includes: Basic copy Changing the settings for each copy Changing the default copy settings Using special copy features Copying on both sides of originals Deciding the form of copy output Setting copy timeout BASIC COPY This is the normal and usual procedure for copying your originals. -
Page 106: Changing The Darkness
current copy job will be canceled and return to their default status after the machine completes the copy in progress. Changing the darkness If you have an original containing faint marking and dark images, you can adjust the brightness to make a copy that is easier to read. -
Page 107: Changing The Default Copy Settings
holding the up/down arrow allows you to quickly scroll to the number you want. 7. Press OK to save the selection. 8. Press Stop/Clear to return to ready mode. When you make a reduced copy, black lines may appear at the bottom of your copy. CHANGING THE DEFAULT COPY SETTINGS The copy options, including darkness, original type, copy size, collation and number of copies, can be set to those most frequently used. -
Page 108: Poster Copying
4. Press OK on the control panel. Your machine begins scanning the front side and shows Place Rear Side Press OK. 5. Turn the original over and place it on the scanner glass, where arrows indicate as shown then, close the scanner lid. 6. -
Page 109: Clone Copying
1. Press Copy on the control panel. 2. Press Menu on the control panel. 3. Press the up/down arrow to highlight Copy Feature and press OK. 4. Press the up/down arrow to highlight Layout and press OK. 5. Press the up/down arrow to highlight Poster Copy and press OK. 6. -
Page 110: Deciding The Form Of Copy Output
1->2Side Long: Prints pages to be read like a book. 1->2Side Short: Prints pages to be read by flipping like a note pad. 6. Press OK to save your selection. 7. Start copying a document. DECIDING THE FORM OF COPY OUTPUT You can set the machine to sort the copy job. - Page 111 4. Press the up/down arrow to highlight Timeout and press OK. 5. Press the up/down arrow until the time setting you want highlights. Selecting Off means that the machine does not restore the default settings until you press Start to begin copying, or Stop/Clear to cancel.
-
Page 112: Scan To Email
Scanning Scanning with your machine lets you turn pictures and text into digital files that can be stored on your computer. This chapter includes: Basic scanning method Scanning originals and sending through email (Scan to Email) Scanning originals and sending to your computer (Scan to PC) Scanning originals and sending via SMB/FTP (Scan to server) Setting authentication for authorized user Using Samsung Scan Manager... -
Page 113: Setting Up An Email Account
You can scan the originals and email the scanned image to several destinations from the machine by email. Setting up an email account To scan and send an image as an email attachment, you need to set up network parameters using SyncThru™... -
Page 114: Storing Email Addresses
8. If the displays asks if you want to send the email to your account, press the left/right arrow to highlight Yes or No and press OK. This prompt does not appear if you have activated the Auto Send To Self option in the SMTP Client Setup on SyncThru Web Service. -
Page 115: Printing Address Book
5. Press the up/down arrow until the name and address you want highlights. You can search upwards or downwards through the entire memory in index(numerical) order. Searching with a particular first letter 1. Press Scan/Email and Address Book on the control panel. 2. -
Page 116: For Network Connected Machine
You can use Twain driver to scan quickly in Scan Manager program. You can also scan by pressing Window’s Start > Control Panel > Samsung Scan Manager > Quick Scan. For network connected machine Make sure the printer driver is installed on your computer using the software CD, since the printer driver includes the scan program. - Page 117 5. Click Add. 6. Select the Index number, from 1 to 20. 7. Enter a name in Alias for the Setup. This name will be displayed on your machine. 8. Select IP Address or Host Name. 9. Enter the server address in dotted decimal notation or a host name. 10.
-
Page 118: Registering Local Authorized Users
SETTING AUTHENTICATION FOR AUTHORIZED USER If you have connected your machine to a network and set up the network parameters correctly, you can scan and send images over the network. To send a scanned image through email or via network server safely, you must register account information of authorized users to your local machine using SyncThru™... -
Page 119: Set Scan Button Tab
Set Scan Button tab Scan Destination Available Destination List: Shows the list of applications currently linked to scanned images in the PC’s registry. Select the program you want to use and click the right arrow and add to Front Panel Destination List. Front Panel Destination List: Shows the list of applications to open scanned image. -
Page 120: Network Scanner
Local Scanner Select when your machine is connected via USB or LPT port. Network Scanner Select when your machine is connected via network port. Auto detection on the network: Automatically detects your machine. IP address: Enter in your machine’s IP address to detect your machine. CHANGING THE SCAN FEATURE SETTINGS Your machine provides you with the following setting options to allow you to customize your scan jobs. -
Page 121: Changing The Default Scan Settings
CHANGING THE DEFAULT SCAN SETTINGS To avoid having to customize the scan settings for each job, you can set up default scan settings for each scan type. 1. Press Scan/Email. 2. Press Menu on the control panel. 3. Press the up/down arrow to highlight Scan Setup and press OK. 4. -
Page 122: Windows Vista
11. Click Finish. Windows Vista 1. Make sure that the machine is connected to your computer and powered on. 2. Load originals face up into the document feeder, or place a single original face down on the scanner glass. (See Loading originals.) 3. -
Page 123: Linux Scanning
4. Click Devices and click Browse Devices. 5. For Mac OS X 10.4: Select your machine in Twain devices option. Make sure that Use TWAIN software checkbox is checked, and click Connect. If a warning message appears, click Change Port.. to select port. If TWAIN UI appears, from the Preference tab, click Change Port.. - Page 124 If you use only one machine device and it is connected to the computer and turned on, your scanner appears on the list and is automatically selected. If you have two or more scanners connected to your computer, you can select any scanner to work at any time.
-
Page 125: Adding Job Type Settings
7. Drag the pointer to set the image area to be scanned in the Preview Pane. 8. Change the scan options in the Image Quality and Scan Area sections. Image Quality: This option allows you to select the color composition and the scan resolution for the image. -
Page 126: Using The Image Manager
2. Click Save As. 3. Enter the name for your setting. 4. Click OK. Your setting is added to the Saved Settings drop-down list. To save a Job Type setting for the next scan job: 1. Select the setting you want to use from the Job Type drop-down list. 2. - Page 127 Zoom Out Zooms the image out. Zooms the image in. Zoom In Scale Allows you to scale the image size; you can enter the size manually, or set the rate to scale proportionally, vertically, or horizontally. Allows you to rotate the image; you can select the number of degrees from Rotate the drop-down list.
-
Page 128: Preparing To Fax
Faxing This chapter gives you information about using your machine as a fax machine. This chapter includes: Preparing to fax Sending a fax Receiving a fax Adjusting the document settings Forwarding a fax to other destination Setting up address book Printing sent fax report automatically You cannot use this machine as a fax via the internet phone. -
Page 129: Sending A Fax Manually
3. Press the up/down arrow to highlight Machine Setup and press OK. 4. Press the up/down arrow to highlight Machine ID and press OK. 5. Enter your name or the company name using the number keypad. You can enter alphanumeric characters using the number keypad, and include special symbols by pressing the 1 button. -
Page 130: Confirming A Transmission
6. Press Start when you hear a high-pitched fax signal from the remote fax machine. When you want to cancel a fax job, press Stop/Clear at any time while sending. Confirming a transmission When the last page of your original has been sent successfully, the machine beeps and returns to ready mode. -
Page 131: Delaying A Fax Transmission
Another No.? prompt and press OK. 12. If an original is placed on the scanner glass, select Yes to add another pages. Load another original and press OK. When you have finished, select No at the Another Page? prompt. The machine begins sending the fax to the numbers you entered in the order in which you entered them. -
Page 132: Sending A Priority Fax
When you have finished, select No at the Another Page? prompt. The machine scans the original into memory. 6. Press Stop/Clear to return to ready mode. Canceling a reserved delay fax job You can add additional documents to the delayed fax job which is saved in memory. 1. -
Page 133: Receiving Manually In Tel Mode
6. Press the up/down arrow until the fax reception mode you want highlights. Fax: Answers an incoming fax call and immediately goes into the fax reception mode. Tel: Receives a fax by pressing On Hook Dial and then Start. Ans/Fax: Is for when an answering machine attached to your machine. Your machine answers an incoming call, and the caller can leave a message on the answering machine. -
Page 134: Receiving In Secure Receiving Mode
to answer several different telephone numbers. The particular number someone uses to call you is identified by different ringing patterns, which consist of various combinations of long and short ringing sounds. This feature is often used by answering services who answer telephones for many different clients and need to know which number someone is calling in on to properly answer the phone. -
Page 135: Printing Received Faxes On Both Sides Of The Paper
8. Press Stop/Clear to return to ready mode. When a fax is received in secure receiving mode, your machine stores it in memory and shows Secure Receive to let you know that there is a fax received. Printing received faxes 1. -
Page 136: Forwarding A Fax To Other Destination
Before starting a fax, change the following settings according to your original’s status to get the best quality. Resolution The default document settings procedure good results when using typical text-based originals. However, if you send originals that are of poor quality, or contain photographs, you can adjust the resolution to produce a higher quality fax. -
Page 137: Forwarding A Sent Fax To Other Destination By A Fax
When you forward a fax by an email, you firstly set the mail server and IP address in SyncThru™ Web Service. (See Using SyncThru™ Web Service.) Forwarding a sent fax to other destination by a fax You can set the machine to forward every fax you sent to other destination by faxing. 1. -
Page 138: Forwarding A Received Fax To Other Destination By An Email
Subsequent sent faxes will be forwarded to the specified email address. Forwarding a received fax to other destination by an email 1. Press Fax on the control panel. 2. Press Menu on the control panel. 3. Press the up/down arrow to highlight Fax Feature and press OK. 4. -
Page 139: Setting Up Address Book
SETTING UP ADDRESS BOOK You can set up Address Book with the fax numbers you use most frequently. Your machine provides you with the following features for setting up Address Book: Before beginning to store fax numbers, make sure that your machine is in Fax mode. Speed dial numbers You can store up to 200 frequently-used fax numbers in speed dial numbers. -
Page 140: Searching Address Book For An Entry
1. Press Fax on the control panel. 2. Press Address Book on the control panel. 3. Press the up/down arrow to highlight New & Edit and press OK. 4. Press the up/down arrow to highlight Group Dial and press OK. 5. -
Page 141: Printing Sent Fax Report Automatically
6. Press the up/down arrow until the name and number you want highlights. You can search upwards or downwards through the entire memory in alphabetical order. Searching sequentially through the memory 1. Press Fax on the control panel. 2. Press Address Book on the control panel. 3. -
Page 142: Using Usb Memory Device
Using USB memory device This chapter explains how to use a USB memory device with your machine. This chapter includes: About USB memory device Scanning to an USB memory device Printing from a USB memory device backing up data managing usb memory ABOUT USB MEMORY DEVICE USB memory devices are available with a variety of memory capacities to give you more room for storing documents, presentations, music and videos, high resolution photographs, or whatever other... -
Page 143: Scanning To An Usb Memory Device
Do not remove the USB memory device while it is in use. The machine warranty does not cover damage caused by user’s misuse. If your USB memory device has certain features, such as security settings and password settings, your machine may not automatically detect it. For details about these features, see USB memory device’s User’s Guide. -
Page 144: Printing From A Usb Memory Device
Original Type: Sets the original document’s type Resolution: Sets the image resolution Scan Color: Sets the color mode. If you select Mono in this option, you cannot select JPEG in Scan Format. Scan Format: Sets the file format in which the image is to be saved. When you select TIFF or PDF, you can select to scan multiple pages. -
Page 145: Restoring Data
Backing up data 1. Insert a USB memory device into the USB memory port on your machine. 2. Press Menu on the control panel. 3. Press the up/down arrow to highlight System Setup and press OK. 4. Press the up/down arrow to highlight Machine Setup and press OK. 5. -
Page 146: Formatting A Usb Memory Device
Formatting a USB memory device 1. Insert a USB memory device into the USB memory port on your machine. 2. Press Direct USB on the control panel. 3. Press the up/down arrow to highlight File Manage and press OK. 4. Press the up/down arrow to highlight Format and press OK. 5. -
Page 147: Fax Setup
Machine status and advanced feature This chapter explains how to browse the current status of your machine, and the method of setting for the advanced machine setup. Read this chapter carefully in order to use your machine's diverse features. This chapter includes: Fax setup Copy setup Scan setup... - Page 148 options are On, Off, and On-Error, which prints only when a transmission is not successful. This function allows users to know what fax messages have been sent by showing sent Image messages in the transmission report. The first page of the message is turned into an image file than is printed on the transmission report so the users can see what messages have been sent.
-
Page 149: Change Default
mode. Duplex Set this duplex feature to save paper. When the machine prints the received fax Print data, it prints them on both sides of the paper. For details about this feature, see Printing received faxes on both sides of the paper. -
Page 150: Printing A Report
#of Copies You can enter the number of copies using the number keypad. You can set the machine to sort the copy job. Collation For further details, see Deciding the form of copy output Reduce/Enlarge Reduces or enlarges the size of a copied image. Adjusts the brightness level to make a copy that is easier to read, when the Darkness original contains faint markings and dark images. -
Page 151: Clearing Memory
This list shows the status of the user-selectable options. You may print this list to Configuration confirm your changes after changing settings. This list shows all of the email addresses currently stored in the machine’s memory. Address Book This report shows the fax number, the number of pages, the elapsed time of the Send Report job, the communication mode, and the communication results for a particular fax job. -
Page 152: Menu Overview
Fax Rcv Clears all records of received faxes. Report NETWORK You may set up the network with the machine's display screen. Before doing that, you must have the relevant information concerning the type of network protocols and computer system you use. If you are not sure which setting to use, contact your network administrator to configure this machine to the network. - Page 153 Dial Mode Receiving Receive Mode Ring to Answer Stamp RCV Name Rcv Start Code Auto Reduction Discard Size Junk Fax Setup DRPD Mode Duplex Print Change Default Resolution Darkness Auto Report Copy Feature Reduce/Enlarge Darkness Original Type Layout Copy Setup Duplex Print Change Default # of Copies...
- Page 154 Scan Size Original Type Resolution Scan Color Scan Format Email Default Scan Size Original Type Resolution Scan Color Scan Format FTP Default Scan Size Original Type Resolution Scan Color Scan Format SMB Default Scan Size Original Type Resolution Scan Color Scan Format System Setup Machine Setup...
- Page 155 Ringer Reports All Reports Configuration Address Book Send Report Sent Report Fax Rcv Report Schedule Jobs JunkFax Report Network Info. User Auth List Maintenance CLR Empty Msg Supplies Life Toner Low Alert Serial Number Paper Stacking Clear Setting All Settings Fax Setup Copy Setup Scan Setup...
-
Page 156: Management Tools
Management tools This chapter introduces management tools provided to help you make full use of your machine. This chapter includes: Introducing useful management tools Using SyncThru™ Web Service Using the Smart Panel program Smarthru Office Using the Linux Unified Driver Configurator INTRODUCING USEFUL MANAGEMENT TOOLS The programs below help you to use your machine conveniently. - Page 157 Information tab: This tab gives you general information about your machine. You can check things, such as the machine’s IP address, remaining amount of toner, ethernet information, firmware version, and so on. You can also print reports such as an error report and so on. Machine Settings tab: This tab allows you to set options provided by your machine.
- Page 158 Enter the machine IP address (http://xxx.xxx.xxx.xxx) in the address field and press the Enter key or click Go. 2. Your machine’s embedded website opens. 3. From the Machine Settings, select E-mail Notification Setup. 4. Set required settings. Set SMTP server information and other settings to use E-mail notification function.After setting the network environment, select the recipient list.
-
Page 159: Using The Smart Panel Program
2. Your machine’s embedded website opens. 3. Select Support. 4. Enter the name of machine administrator, phone number, location or E-mail address.. 5. Click Apply. If the firewall is activated, the E-mail may not be sent successfully. In that case, contact the a network administrator. -
Page 160: Understanding Smart Panel
Or, if you are a Windows user, you can launch it from the Start menu, select Programs or All Programs > your printer driver name > Smart Panel. If you have already installed more than one Muratec machine, first select the correct machine model you want in order to access the corresponding Smart Panel. -
Page 161: Smarthru Office
If you connect your machine to a network, the SyncThru™ Web Service window appears instead of the Printer Settings Utility window. Driver Set all of the machine options you need in the Printer Preferences window. This Setting feature is available only for Windows. (See Opening printing preferences.) Opening the Troubleshooting Guide... - Page 162 1. Click the SmarThru icon in the tray area of the windows taskbar to activate the SmarThru Office launcher. 2. Click the scanning icon to open the scanning window. 3. Scan Setting window opens. Select Allows you to select between the Local or Network scanner. Scanner Select Allows you to save settings frequently used for future use.
-
Page 163: Using The Linux Unified Driver Configurator
4. Set scan settings and click Scan. Printing 1. Click the SmarThru icon in the tray area of the Windows taskbar to active the SmarThru Office launcher. 2. Click the printing icon to open the printing window.. 3. Select the file you want to print. 4. -
Page 164: Opening The Unified Driver Configurator
Unified Driver Configurator is a tool primarily intended for configuring machine devices. Since a machine device combines the printer and scanner, the Linux Unified Driver Configurator provides options logically grouped for printer and scanner functions. There is also a special machine port option responsible for the regulation of access to a machine printer and scanner via a single I/O channel. - Page 165 Switches to Printers configuration. Shows all of the installed machine. Shows the status, model name and URI of your machine. The printer control buttons are, as follows: Refresh: Renews the available machines list. Add Printer: Allows you to add a new machines. Remove Printer: Removes the selected machine.
-
Page 166: Scanners Configuration
Shows all of the machine classes. Shows the status of the class and the number of machines in the class. Refresh: Renews the classes list. Add Class: Allows you to add a new machine class. Remove Class: Removes the selected machine class. Scanners configuration In this window, you can monitor the activity of scanner devices, view a list of installed machine devices, change device properties, and scan images. -
Page 167: Ports Configuration
Switches to Scanners configuration. Shows all of the installed scanners. Shows the vendor, model name and type of your scanner. Properties: Allows you to change the scan properties and scan a document. Ports configuration In this window, you can view the list of available ports, check the status of each port and release a port that is stalled in a busy state when its owner has terminated the job for any reason. - Page 168 Switches to Ports configuration. Shows all of the available ports. Shows the port type, device connected to the port, and status Refresh: Renews the available ports list. Release port: Releases the selected port. Sharing Ports Between Printers and Scanners Your machine may be connected to a host computer via a parallel port or USB port. Since the machine device contains more than one device (printer and scanner), it is necessary to organize proper access of “consumer”...
-
Page 169: Printing A Machine Report
Maintenance This chapter provides information for maintaining your machine and the toner cartridge. This chapter includes: Printing a machine report Finding the serial number Cleaning a machine Storing the Toner cartridge Tips for moving & storing your machine PRINTING A MACHINE REPORT You can print the machine's information and job report. -
Page 170: Cleaning The Inside
Cleaning the inside During the printing process, paper, toner, and dust particles can accumulate inside the machine. This buildup can cause print quality problems, such as toner specks or smearing. Cleaning the inside of the machine clears and reduces these problems. 1. -
Page 171: Cleaning The Scan Unit
5. Reinsert the toner cartridge and close the front door. 6. Plug in the power cord and turn the machine on. Cleaning the scan unit Keeping the scan unit clean helps ensure the best possible copies. We suggest that you clean the scan unit at the start of each day and during the day, as needed. -
Page 172: Handling Instructions
Muratec does not recommend or approve the use of non-Muratec brand toner cartridges in your printer including generic, store brand, refilled, or remanufactured toner cartridges. Muratec's printer warranty does not cover damage to the machine caused by the use of a refilled, remanufactured, or non-Muratec brand toner cartridge. -
Page 173: Troubleshooting
Troubleshooting This chapter gives helpful information for what to do if you encounter an error. This chapter includes: Redistributing toner Clearing original document jams Tips for avoiding paper jams Clearing paper jams Understanding display messages Solving other problems REDISTRIBUTING TONER When the toner cartridge is near the end of its life: White streaks or light printing occurs. -
Page 174: Clearing Original Document Jams
touching this area. 4. Hold the toner cartridge by the handle and slowly insert the cartridge into the opening in the machine. Tabs on the sides of the cartridge and corresponding grooves within the machine will guide the cartridge into the correct position until it locks into place completely. 5. - Page 175 3. Gently remove the jammed paper from the document feeder. If you see no paper in this area, go to step 5. 4. Close the document feeder cover. Reload the pages you removed, if any, in the document feeder. 5. Open the scanner lid. 6.
-
Page 176: Tips For Avoiding Paper Curls
7. Close the scanner lid. Load the removed pages back into the document feeder. TIPS FOR AVOIDING PAPER CURLS 1. Open the rear door. 2. Pull down the pressure lever on each side about 45 degrees. 3. Close the rear door. Only use when the printout has more than 20mm curl. -
Page 177: Clearing Paper Jams
Do not use creased, damp, or highly curled paper. Do not mix paper types in a tray. Use only recommended print media. (See Setting the paper size and type.) Ensure that the recommended side of the print media is facing down in the tray, or facing up in the multi-purpose tray. - Page 178 1. Pull out optional tray 2. 2. Remove the jammed paper from the machine. If the paper does not move when you pull or if you do not see the paper in this area, stop and go to the next step. 3.
-
Page 179: Inside The Machine
2. Open and close the front door to resume printing. Inside the machine Click this link to open an animation about clearing a jam. The fuser area is hot. Take care when removing paper from the machine. 1. Open the front door and pull the toner cartridge out, lightly pushing it down. 2. - Page 180 1. Open and close the front door. The jammed paper is automatically ejected from the machine. If you do not see the jammed paper, go to next step. 2. Gently pull the paper out of the output tray. If you do not see the jammed paper or if there is any resistance when you pull, stop and go to the next step.
-
Page 181: In The Duplex Unit Area
7. Pull the jammed paper out. 8. Return the lever, door and guide to their original position. 9. Close the rear door. Printing automatically resumes. In the duplex unit area Click this link to open an animation about clearing a jam. If the duplex unit is not inserted correctly, a paper jam may occur. - Page 182 If the paper does not come out with the duplex unit, remove the paper from the bottom of the machine. Insert the duplex unit into the machine. If you still do not see the paper, go to the next step. 3.
-
Page 183: Understanding Display Messages
UNDERSTANDING DISPLAY MESSAGES Messages appear on the control panel display to indicate the machine’s status or errors. Some error messages are shown with graphics to help you troubleshoot problem. Checking display messages 1. When errors occur, Check Status appears on the display and press OK. 2. - Page 184 Enter Again You entered an unavailable item. Enter the correct item again. File Format isNot The selected file format is not Use the correct file format. Supported supported. Fuser error There is a problem in the machine. Turn the machine off and turn it on again.
- Page 185 remove received fax job Network Error There is a problem with the network. Check the network. If the problem persists, ask the system There is a administrator or the person who problem with the has set up your local network.. network.
- Page 186 Replace with new one Fuser Door is The fuser door is not securely latched. Close the fuser door until it locks open.Close it into place. Retry Redial? The machine iswaiting for a You can press OK toimmediately specifiedtime interval to rediala redial, orStop/Clear to cancel the previously busystation.
- Page 187 Using a cartridge beyond this stage can result in printing quality issues. (See Replacing the toner cartridge.) Muratec does not recommend using non-genuine Muratec toner cartridge such as refilled or remanufactured. Muratec cannot guarantee non-genuine Muratec toner cartridge's quality.
-
Page 188: Solving Other Problems
installed and the optional tray 2. If the problem persists, call for service. Tray2 has a The machine cannot communicate the Check the cable connecting the problem optional tray 2. machine and the optional tray 2. If the problem persists, call for Communication service. -
Page 189: Printing Problems
Printing problems CONDITION POSSIBLE CAUSE SUGGESTED SOLUTIONS The machine does not The machine is not Check the power cord connections. Check print. receiving power. the power switch and the power source. The machine is not Select your machine as your default selected as the default machine in your Windows. -
Page 190: Printing Quality Problems
match. tray.Or, ensure that the paper size in the printer driver settings matches the paper selection in the software application settings you use. The machine prints, The machine cable is loose Disconnect the machine cable and but the text is wrong, or defective. - Page 191 the paper may be too moist or rough. (See Print media specifications If the entire page is light, the print resolution setting is too low or the toner save mode is on. Adjust the print resolution and turn the toner save mode off. See the help screen of the printer driver.
- Page 192 amount of background shading. Remove the old toner cartridge and, install a new one. (See Replacing the toner cartridge.) Toner smear If toner smears on the page: Clean the inside of the machine. (See Cleaning the inside.) Check the paper type and quality. (See Print media specifications Remove the toner cartridge and then, install a new one.
- Page 193 specifications Turn the stack of paper over in the tray. Also try rotating the paper 180° in the tray. Wrinkles or creases Ensure that the paper is loaded properly. Check the paper type and quality. (See Print media specifications Turn the stack of paper over in the tray. Also try rotating the paper 180°...
-
Page 194: Copying Problems
machine: Turn the stack of paper over in the tray. Also try rotating the paper 180° in the tray. Change the printer option and try again. Go to Printing Preferences, click Paper tab, and set type to Thin. (See Opening printing preferences.) An unknown image repetitively Your machine is probably being used at an altitude of 1,500 m... -
Page 195: Fax Problems
Make sure that the machine cable is not defective. Switch the cable with a known good cable. If necessary, replace the cable. Check that the scanner is configured correctly. Check scan setting in the SmarThru Office or the application you want to use to make certain that the scanner job is being sent to the correct port (for example, USB001). -
Page 196: Samsung Scan Manager Problem
Check to see if the display shows any error message. If it does, clear the problem The machine does not send. Make sure that the original is loaded in the document feeder or on the scanner glass. Check the fax machine you are sending to, to see if it can receive your fax. -
Page 197: Common Windows Problems
selected in the driver. not been configured to select the Device Settings tab, and set recognize the optional the tray option of the Installable Options section to Installed. tray. When printing a The resolution setting in Make sure that the resolution setting in document in Macintosh the printer driver may your printer driver matches the one in... -
Page 198: Common Macintosh Problems
Linux 9.2 (cups-1.1.21) has a problem with ipp (Internet Printing Protocol) printing.Use the socket printing instead of ipp or install a later version of CUPS (cups-1.1.22 or higher). The machine It is a known problem that occurs when a color machine is used on version 8.51 does not print or earlier of Ghostscript, 64-bit Linux OS, and has been reported to whole pages,... - Page 199 illustrations are missing. printing options. It will take longer to print when you print a PDF file as an image. The document has printed, but the print Update your MAC OS to OS MAC OS X 10.3.3. or job has not disappeared from the spooler higher.
-
Page 200: Specifications
Specifications This chapter guides you about this machine’s specifications such as various features. This chapter include: General specifications Printer specifications Scanner specifications Copier specifications Facsimile specifications Print media specifications GENERAL SPECIFICATIONS The symbol * optional feature depending on machines. ITEM DESCRIPTION Document feeder Up to 50 sheets 80 g/m... -
Page 201: Printer Specifications
External dimension(W x 466 x 435 x 458 mm D x H) (18.3 x 17.1 x 18 inches) without optional tray Weight(Including 18.8 Kg (41.45 lbs) consumables) Package weight Paper: 3.4 Kg (7.42 lbs) Plastic: 1.1 Kg (2.42 lbs) Fusing temperature 180 °C (356 °F) Sound Pressure Level, ISO 7779. -
Page 202: Copier Specifications
Effective scanning Scanner glass: 297 mm (11.7 inches) length Document feeder: 348 mm (13.7 inches) Effective scanning Max. 208 mm (8.2 inches) width Color bit depth 24 bit Mono bit depth 1 bit for lineart & halftone 8 bit for gray scale Due to the applications for scanning, the maximum resolution might differ. - Page 203 TRAY1 / OPTIONAL TYPE SIZE DIMENSIONS MULTIPURPOSE TRAY TRAY Plain paper Letter 215.9 x 279 mm 60 to 90 g/m 60 to 163 g/m (16 to (8.5 x 11 inches) to 24 lb bond) 43 lb bond) Legal 215.9 x 355.6 mm 250 sheets of 50 sheets of 80 (8.5 x 14 inches)
- Page 204 If media weight is over 90 g/m (24 lb bond), use the multi-purpose tray. Maximum capacity may differ depending on media weight, thickness, and environmental conditions. Smoothness: 100 to 250 (sheffield)
- Page 205 Glossary The following glossary helps you get familiar with the product by understanding the terminologies commonly used with printing as well as mentioned in this user’s guide. 802.11 802.11 is a set of standards for wireless local area network (WLAN) communication, developed by the IEEE LAN/MAN Standards Committee (IEEE 802).
- Page 206 Collation Collation is a process of printing a multiple-copy job in sets. When collation is selected, the device prints an entire set before printing additional copies. Control Panel A control panel is a flat, typically vertical, area where control or monitoring instruments are displayed.
- Page 207 file size. DRPD Distinctive Ring Pattern Detection. Distinctive Ring is a telephone company service which enables a user to use a single telephone line to answer several different telephone numbers. Duplex A mechanism that will automatically flip over a sheet of paper so that the machine can print (or scan) on both sides of the paper.
- Page 208 a back-up roller. After toner is transferred onto the paper, the fuser unit applies heat and pressure to ensure that the toner stays on the paper permanently, which is why paper is warm when it comes out of a laser printer. Gateway A connection between computer networks, or between a computer network and a telephone line.
- Page 209 IPX/SPX IPX/SPX stands for Internet Packet Exchange/Sequenced Packet Exchange. It is a networking protocol used by the Novell NetWare operating systems. IPX and SPX both provide connection services similar to TCP/IP, with the IPX protocol having similarities to IP, and SPX having similarities to TCP.
- Page 210 Modified Huffman (MH) is a compression method for decreasing the amount of data that needs to be transmitted between the fax machines to transfer the image recommended by ITU-T T.4. MH is a codebook-based run-length encoding scheme optimized to efficiently compress white space. As most faxes consist mostly of white space, this minimizes the transmission time of most faxes.
- Page 211 Portable Document Format (PDF) is a proprietary file format developed by Adobe Systems for representing two dimensional documents in a device independent and resolution independent format. PostScript PostScript (PS) is a page description language and programming language used primarily in the electronic and desktop publishing areas.
- Page 212 Server Message Block (SMB) is a network protocol mainly applied to share files, printers, serial ports, and miscellaneous communications between nodes on a network. It also provides an authenticated Inter-process communication mechanism. SMTP Simple Mail Transfer Protocol (SMTP) is the standard for e-mail transmissions across the Internet. SMTP is a relatively simple, text-based protocol, where one or more recipients of a message are specified, and then the message text is transferred.
- Page 213 Uniform Resource Locator (URL) is the global address of documents and resources on the Internet. The first part of the address indicates what protocol to use, the second part specifies the IP address or the domain name where the resource is located. Universal Serial Bus (USB) is a standard that was developed by the USB Implementers Forum, Inc., to connect computers and peripherals.
Need help?
Do you have a question about the MFX-3550 and is the answer not in the manual?
Questions and answers