
Related Manuals for Liebert DM


Summary of Contents for Liebert DM
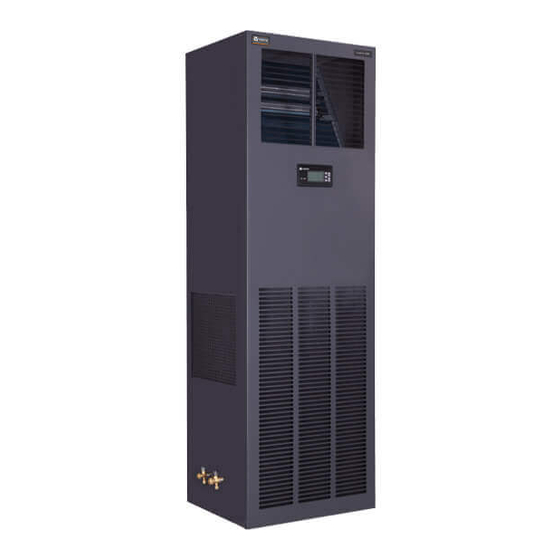
- Page 1 Precision Cooling For Business-Critical Continuity ™ Liebert DM 16kW Air Conditioner ® User Manual...
-
Page 2: User Manual
Liebert_DM 16kW Air Conditioner User Manual Version V1.0 Revision date March 5, 2013 31012820 Emerson Network Power provides customers with technical support. Users may contact the nearest Emerson local sales office or service center. Copyright © 2013 by Emerson Network Power Co., Ltd. All rights reserved. -
Page 4: Table Of Contents
Contents Chapter 1 Overview ................................1 1.1 Model Description ..............................1 1.2 Product Introduction .............................. 1 1.3 Main Components ..............................1 1.3.1 Indoor Unit ..............................1 1.3.2 Outdoor Unit .............................. 2 1.3.3 Controlling System ............................ 2 1.3.4 Controller ..............................2 1.4 Environment Requirements .......................... - Page 5 3.2.2 Connecting Power Cable Of Indoor Unit ....................23 3.2.3 Connecting Control Cables ........................24 3.2.4 Connecting Extension Component Solenoid Valve (For Site Installation)..........25 3.3 Wiring Of Outdoor Unit ............................26 3.3.1 Connecting Power Cables For Outdoor Unit .................... 26 3.3.2 Connecting Control Signal Cables Of Outdoor Unit .................
- Page 6 6.1.5 Infrared Humidifier ........................... 52 6.1.6 Electric Reheat ............................54 6.1.7 Cooling System ............................54 6.1.8 Replacing The Compressor ........................56 6.2 Operation and maintenance of outdoor unit ......................57 6.2.1 Maintenance ............................57 6.2.2 Troubleshooting ............................58 Chapter 7 Troubleshooting ..............................59 Appendix 1 SiteMonitor Software Introduction ........................
-
Page 8: Chapter 1 Overview
1.1 Model Description The model description of Liebert_DM 16kW air conditioner is shown in Figure 1-1. DM E 16 U M H 2 Version C - cooling only ; O - with heater ; H - with heater and humidifier Power supply : M - three phase / 50 Hz / 400 V Air path : U - upflow ;... -
Page 9: Outdoor Unit
The panel of micro-processing controller is shown in Figure 1-2. LCD screen UP button ON/OFF button ENTER button ESC button DOWN button Running indicator Alarm indicator Figure 1-2 The panel of micro-processing controller DM Series 16kW Air Conditioner User Manual... -
Page 10: Environment Requirements
Chapter 1 Overview 1.4 Environment Requirements 1.4.1 Operation Environment See Table 1-1 for the details. Table 1-1 Operation enviroment requirement Item Requirement Indoor: 0℃~40℃ Environment temperature Outdoor: -15℃~+45℃ Protection level (outdoor unit) IP55 Altitude <1000m. Above that, derating is required Operation voltage range 380V (-10% ~ +15%), 3N ~ 50Hz 1.4.2 Storage Environment... -
Page 11: Chapter 2 Mechanical Installation
1. Removing the side boards and top cover Liebert_DM 16kW air conditioner uses the international packaging. You can use a hammer or straight screwdriver to straighten the hook, as shown in Figure 2-3. Figure 2-3 Straighten the hook DM Series 16kW Air Conditioner User Manual... -
Page 12: Inspection
Chapter 2 Mechanical Installation At first, straighten all the hooks that fix side board I, and remove side board 1. Then straighten all the hooks that fix side board 2, and remove side board 2. At last remove top cover 3, as shown in Figure 2-4. 1816 x 976 x 2175mm 1790 x 950 x 2020mm Figure 2-4 Remove side boards and top cover... -
Page 13: System Installation Arrangement
2. The top end of the back bend must be installed higher than the highest copper pipe of the condenser. DM Series 16kW Air Conditioner User Manual... -
Page 14: Mechanical Paremeters
Chapter 2 Mechanical Installation Outdoor unit Back bend ( higher than the highest copper pipe of condenser ) Liquid line ( do not expose liquid line to sun ) Indoor unit Trap Slope dicharge The earth surface Humidifier water in Condenser water out Seal... - Page 15 If the height of the plenum selected for air conditioner unit exceeds 600mm, consult the factory for non-standard production.. Outdoor unit The appearance of outdoor unit is shown in Figure 2-11. The dimensions and mechanical parameters of outdoor unit are shown in Figure 2-12. DM Series 16kW Air Conditioner User Manual...
-
Page 16: Installing Indoor Unit
Chapter 2 Mechanical Installation 风机 Electrical control box(there is a fan speed 电控盒(内有风 controller inside) 机转速控制器) Pressure sensor 压力传感器 Figure 2-11 Appearance of outdoor unit 1385 Figure 2-12 Dimensions and mechanical parameters of outdoor unit 2.4 Installing Indoor Unit 2.4.1 Preparing Equipment room The requirements of equipment room are as follows: 1. -
Page 17: Requirement Of Maintenance Space
Figure 2-13 Installation place of indoor unit (unit: mm) 2.4.3 Requirement Of Maintenance Space Leave more than 600mm of maintenance space in the front and two sides of the indoor unit, as shown in Figure 2-13. DM Series 16kW Air Conditioner User Manual... -
Page 18: Installation Procedures
Chapter 2 Mechanical Installation 2.4.4 Installation Procedures The installation procedures of indoor unit are as follows: 1. Make the mounting base according to the dimensions in Figure 2-14 and the requirements in Table 2-2. You can make it by yourself or contact Emerson Network Power Co., Ltd. for non-standard production. Front side of cabinet Rubber cushion(top) Angle steel... -
Page 19: Space Requirements
2.5.3 Mounting base dimension Mounting base for horizontal installation The mounting base for horizontal installation is shown in Figure 2-17 and the mounting base dimensions of each model are listed in Table 2-3. DM Series 16kW Air Conditioner User Manual... - Page 20 Chapter 2 Mechanical Installation Amplified part figure Installation holes (8 holes in total ) Bottom view Front view Side view Figure 2-17 Mounting base dimensions for horizontal installation (unit: mm) Table 2-3 Mounting base dimensions for horizontal installation (unit: mm) Dimension Model (L' ×...
-
Page 21: Piping
Figure 2-19. The OD of the pipe is 25mm. If the draining pipe is used by three or more units, the minimal OD of the pipe should be 40mm. Note Because the humidifier contains boiling water, the plastic pipe must be rated higher than 90℃. DM Series 16kW Air Conditioner User Manual... - Page 22 Chapter 2 Mechanical Installation Water supply pipe of infrared humidifier Connector of condensation water drain pipe T o i n f r a r e d h u m i d i f i e r w a t e r p a n T o c o n d e n s a t i o n w a t e r T o c o n d e n s a t i o n w a t e r p a n o f e v a p o r a t o r...
- Page 23 For installation valve of the check valve, refer to Figure 2-6. DM Series 16kW Air Conditioner User Manual...
-
Page 24: Charging Refrigerant And Adding Refrigerant Oil
Chapter 2 Mechanical Installation 2.6.2 Charging refrigerant and adding refrigerant oil 1. Charging with refrigerant The Liebert_DM 16kW air conditioner had been charged with 2bar nitrogen to keep pressure at the factory. In project installation, see the unit nameplate for the initial charging capacity of Liebert_DM 16kW air conditioner. If the connecting pipe between the indoor unit and the outdoor unit is longer than 10m, add refrigerant to the system in order to ensure normal system operation. - Page 25 The knock-out dimensions of side panels are shown in Figure 2-24 and Figure 2-25. 4-Φ64 knock-out 4-Ф 64敲落孔 2-Φ25 knock-out 2-Ф 25敲落孔 49.2 50.8 Figure 2-24 Left side panel 4- Ф 35 knock-out Figure 2-25 Right side panel DM Series 16kW Air Conditioner User Manual...
-
Page 26: Removing Transport Fastener And Vibration Absorber
Chapter 2 Mechanical Installation 2.8 Removing Transport Fastener And Vibration Absorber In order to protect partial components from damaging and distorting due to bumping, impact and resonation, fasteners and vibration absorbers are mounted at certain locations before delivery. Remove the fasteners and vibration absorbers before installation and commissioning. - Page 27 Figure 2-28 Removing protection foam Protection foam Pump Protection foam Figure 2-29 Protection foam 2. Remove four self-tapping screws and remove the front cover plate of the infrared humidifier connection box, as show in Figure 2-30. DM Series 16kW Air Conditioner User Manual...
- Page 28 Chapter 2 Mechanical Installation Remove secf-tapping screw (4 pcs) Remove front cover plate of infrared humidifier connection box Figure 2-30 Removing front cover plate of infrared humidifier connection box 3. Lead the cable of high water-level test switch through the cable hole (see Figure 2-28) and insert the cable terminal into the HWA cable terminal in the connection box, as shown in Figure 2-31.
-
Page 29: Component Adjustment
9. The water level regulator of the infrared humidifier has been unscrewed to the required height. 10. The debris (such as transportation material, structure material and tools) inside or around the equipment has been cleaned. After confirming the preceding points, you can then start the electrical installation. DM Series 16kW Air Conditioner User Manual... -
Page 30: Chapter 3 Electrical Installation
Chapter 3 Electrical Installation Chapter 3 Electrical Installation This chapter introduces the electrical installation of the Liebert_DM 16kW air conditioner, which includes work introduction, installation notes, wiring of indoor unit, connecting power cables for outdoor unit and installation inspection. 3.1 Work Introduction And Notes Wires to connect on-site 1. -
Page 31: Connecting Control Cables
Every unit is supplied with one water sensor. You should connect one end of the sensor to terminal 51, and the other end to the common terminal 24. The number of sensors in parallel connection is not limited, but there is only one water alarm for each unit. DM Series 16kW Air Conditioner User Manual... -
Page 32: Connecting Extension Component Solenoid Valve (For Site Installation)
Chapter 3 Electrical Installation Remote shutdown Terminals 37 and 38 can be connected to the remote shutdown switch. By default, terminals 37 and 38 are shorted. Remove the shorting wire if a remote shutdown signal is needed. Note When terminals 37 and 38 are open, the unit is shut down. When two remote shutdown signals are to be connected, connect the connection cable 39-3# of the control board to terminal 37B#, instead of 37#, and series connect the terminals 38B# and 37# (the cable is not provided). -
Page 33: Wiring Of Outdoor Unit
The wiring terminals are located on the fan speed controller board (see Figure3-5). Their distribution is shown in Figure3-6 and the definitions are listed in Table3-3. Refer to Appendix 3 Circuit Diagram of DMC16M2 for detailed connections. DM Series 16kW Air Conditioner User Manual... -
Page 34: Installation Inspection
Chapter 3 Electrical Installation J8(SCRTemp) LCD and keys J3(HP1) J4(HP2) J14(HP2) J15(HP1) J5(Out Temp) J11(RS232) J7(Fan1Sta) J10(Fan2Sta) J6(CompSta) Figure 3-6 Layout of wiring terminals Table 3-3 Definitions of wiring terminals Silk print Definition Definition of pins PE: protection earth L1, L2, L3: three-phase AC input AC I/O terminal U, V, W: three-phase AC output, which connects with the power supply terminals... -
Page 35: Hmi
The keys and LCD are on the upper right corner of the fan speed controller, as shown in Figure 3-6. Their appearance is shown in Figure 3-7. ENT key ESC key UP key DOWN key Figure 3-7 Keys and LCD DM Series 16kW Air Conditioner User Manual... -
Page 36: Operation Description Of Hmi
Chapter 3 Electrical Installation 3.3.5 Operation Description Of HMI Initial Interface The LCD will display alternately ‘F01’ and the bigger one of condensing pressure 1 and condensing pressure 2 when the fan speed controller is powered on initially. The ‘F01’ is the maximum pressure logo. However, the pressure value will be displayed as ‘88.8’... - Page 37 A01: SCR over temperature ESC key A02: Fan 1 over temperature A03: Fan 2 over temperature A04: Pressure sensor failure A05: EEPROM read fault A06: SCR temperature sensor failure A07: Abnormal frequency UP key DM Series 16kW Air Conditioner User Manual...
- Page 38 Chapter 3 Electrical Installation Historical alarm main menu interface Press the ENT key to enter the historical alarm submenu interface when the current main interface shows ‘H--’ (the symbol of historical main menu). The switching operation processes and orders of the historical main menu are shown in the following figure.
-
Page 39: Chapter 4 System Start-Up And Commissioning
2. Check that the power or control circuits are reliably connected. Fasten all the connecting terminals. 3. The power cables and the low voltage control cables are laid away from each other. DM Series 16kW Air Conditioner User Manual... -
Page 40: Commissioning Procedures
Chapter 4 System Start-up And Commissioning 4. Check the phase sequence. The phase sequences of all three-phase devices have been adjusted consistent before delivery. During commissioning, you only need to ensure the phase sequence of a random three-phase device is correct. -
Page 41: Commissioning Complete Inspection
4.2.3 Commissioning Complete Inspection 1. Check that all output functions are automatic. 2. Check that the temperature & humidity settings and control precisions are set reasonable. 3. Make sure all the other functions are set reasonable. DM Series 16kW Air Conditioner User Manual... -
Page 42: Chapter 5 Precision Air Conditioner Controller
Chapter 5 Precision Air Conditioner Controller Chapter 5 Precision Air Conditioner Controller This chapter expounds the appearance, control button, indicator, control interface and menu structure of PACC11Z precision air conditioner controller (controller for short). The controller adopts menu operation. It is used to monitor, display and operate the precision air conditioner (AC) to maintain the environment within the setting range. -
Page 43: Indicator
Figure 5-2. As for which OFF interface will be displayed, it depends on the off mode of the AC unit. 2008/12/02 09:14:04 D01 I01 2008/12/02 09:14:04 D01 I01 2008/12/02 09:14:04 Standby OFF Remote Shutdown Unit OFF Figure 5-2 OFF Interface DM Series 16kW Air Conditioner User Manual... -
Page 44: Main Interface
Chapter 5 Precision Air Conditioner Controller 5.4.2 MAIN Interface If the AC unit is turned on, after successful communication, the MAIN interface will appear on the LCD screen, as shown in Figure 5-3. If no control button is pressed within 2min, the controller will enter a screen-protection state (the back lighting is off) until any control button is pressed. -
Page 45: Password Interface
The Main Menu includes eight submenus, displayed in two screens, as shown in Figure 5-5. For details, refer to Appendix5 Alarm Control Menu Table. For quick index of the menus, refer to 5.5.1Guide On Finding Menus. DM Series 16kW Air Conditioner User Manual... -
Page 46: Alarm Menu
Chapter 5 Precision Air Conditioner Controller Main Menu 1/ 2 Main Menu 2/ D01 I10 D01 I10 Set Time /Date Alarm Menu Graph Menu Set Point Control Run Hours System Status On/Off Record System Menu Team Work Figure 5-5 Main Menu interface To select a submenu, press the UP or DOWN button to move the cursor to the required item. - Page 47 Event: when an alarm is generated, you can find alarm record in the Alarm Status and Alarm History menu. No any prompt exits. Off: when an alarm is generated, no record and prompt will appear. DM Series 16kW Air Conditioner User Manual...
-
Page 48: Set Point Control
Chapter 5 Precision Air Conditioner Controller The tenth screen is the Customer Input menu, used to set alarm control and normal status. Select a submenu and enter its interface, as shown in Figure 5-11. The Alarm Control items can be set to On, Event or Off. Their logic definitions are the same as others. -
Page 49: System Status
Alarm: Enable High TEMP Alarm: 35 C High TEMP Alarm: 35 C Low TEMP Alarm: 15 C Low TEMP Alarm: 15 C TEMP Calibration: 00 C TEMP Calibration: 00 C Figure 5-17 NTC interfaces DM Series 16kW Air Conditioner User Manual... -
Page 50: System Menu
Chapter 5 Precision Air Conditioner Controller Power status The Power Status menu is shown in Figure 5-18. You can inquire the input power status of the unit listed in Figure 5-18. Power Status D01 I10 A-Phase Voltage: 220V B-Phase Voltage: 220V C-Phase Voltage: 220V Power Freg: 00.0Hz Figure 5-18 Power status interface... - Page 51 3. Air loss detect The Air Loss Detect menu is shown in Figure 5-26. Air Loss Detect [2] D01 I10 Detect Mode: △T TEMP Alarm Offset: 15 C Figure 5-26 Air loss detect interface DM Series 16kW Air Conditioner User Manual...
- Page 52 Chapter 5 Precision Air Conditioner Controller Sensor calibration The Sensor Calibration menu is shown in Figure 5-27. Sensor Calibration [3] D01 I10 Return Air TEMP: 00 C Return Air HUM: 00%rH Figure 5-27 Sensor Calibration interface Communication The Communication menu is shown in Figure 5-28. For detailed setting ranges of the menu items, refer to Appendix 6 Parameter Setting Table.
-
Page 53: Set Time/Date
You can change the current system data (Y/M/D) and time (H:M:S) through the menu. Press the ENTER button after changing and the changed system data and time will be displayed automatically on the interface. Set Time/Date D01 I10 2008/11/28 10: 53: 40 Figure 5-34 Set time/data interface DM Series 16kW Air Conditioner User Manual... -
Page 54: Graph Menu
Chapter 5 Precision Air Conditioner Controller 5.5.8 Graph Menu Select Main Menu 2/2 -> Graph Menu to enter the Graph Menu menu, as shown in Figure 5-35. Through the menu, you can inquire the return air temperature and humidity graphs, which reflect the temperature and humidity changes over a period of time in the past. -
Page 55: On/Off Record
2: It is applicable to the case with an uneven temperature & humidity load. Each unit independently computes the individual requirement. 3: It is applicable to the case with an uneven temperature & humidity load. The lead unit distributes the requirement for each unit. DM Series 16kW Air Conditioner User Manual... -
Page 56: Help Menu
Chapter 5 Precision Air Conditioner Controller Team Work [2] 2/2 Team Work [2] 1/2 D00 I00 D00 I00 — — — Mode: Single Units QTY: 01 — — — — Standby: 00 Cascade: No — — — — Rotate By: 0 Rotate At 12:00 —... -
Page 57: Chapter 6 System O&M
In particular, check the connection parts such as HP/LP switches and solenoid valves, and replace the component if it is found loosened or in poor connection. 7. Replace the electric components that are detected faulty, such as faulty control fuses (or MCBs) and control boards. DM Series 16kW Air Conditioner User Manual... -
Page 58: Dust Filter
The detector should be placed away from any water pool or drainage trench on the floor, 2m ~ 2.5m away from the machine. Do not place it directly under the machine. The recommended location for the water leak detector is shown in Figure 6-1. Liebert system Location of leak detection sensor... -
Page 59: Fan Kit
2. Unplug all the control lines of the humidifier and cut off the cable ties that binds the humidifier power cables. In the single-door system, the plugs of the humidifier are sealed in the niche above the lamp, and you need to open the cover DM Series 16kW Air Conditioner User Manual... - Page 60 Chapter 6 System O&M plate in front of the humidifier before you can reach the plugs. The plugs of the double-door and triple-door systems are located to the left of the humidifier and are accessible directly. 3. After draining the water in the water pan, remove the drainage pipe, remove the fixing screws on both sides of the humidifier, and then pull out the humidifier.
-
Page 61: Electric Reheat
When the cooling system is faulty, you can locate the fault by referring to certain parameters of system operation. DM Series 16kW Air Conditioner User Manual... - Page 62 Chapter 6 System O&M Suction Pressure The compressor may stop when the suction pressure drops below the setting of the low-pressure switch. On the other hand, too high suction pressure will undermine the cooling effect the refrigerant does to the compressor motor, leading to the damage of the compressor.
-
Page 63: Replacing The Compressor
Do not remove the rubber covers from the suction opening and exhaust opening of the new compressor too early. The time that the openings are exposed to the air should not exceed 15mins so as to prevent the compressor refrigeration oil from absorbing water and bringing the water into the system. DM Series 16kW Air Conditioner User Manual... -
Page 64: Operation And Maintenance Of Outdoor Unit
Chapter 6 System O&M 7. Install the new compressor, and connect the pipes and electric cables. 8. Pump the system vacuum and add refrigerant in accordance with the commissioning regulations. 9. Power on the system by following the ordinary startup commissioning procedures and check the system operation parameters. -
Page 65: Troubleshooting
1. The frequency of power supply Abnormal voltage is wrong Replace the fan speed controller board and compare frequency 2. The fan speed controller has the result of two boards hardware fault DM Series 16kW Air Conditioner User Manual... -
Page 66: Chapter 7 Troubleshooting
Chapter 7 Troubleshooting Chapter 7 Troubleshooting This chapter introduces the troubleshooting. You can read this part by referring to the part concerning the alarms. Caution 1. Certain circuits carry lethal voltages. Only professional technicians are allowed to maintain the machine. 2. - Page 67 Use a jumper to close shot terminals P35-6 and P35-5. If the contactor closes, replace the series-connected safety device, and remove the jumper Humidifier lamp Replace the lamp burned DM Series 16kW Air Conditioner User Manual...
- Page 68 Chapter 7 Troubleshooting Table 7-5 Troubleshooting of heating system Symptom Possible causes Handling method No heating demand Check the controller Heating system does not In the case of two-level heating, check terminals P34-6 and P34-7. If start, the contactor does Safety device of the the heating system then starts to work, it means the safety device is not close...
- Page 69 ___ 3. Check the control program ___ 1. Clean the water pipe system ___ 4. Check the contactor action ___ 2. Check the water flow regulating valve Signature _________________________________________________________ Note: copy this table for filing. DM Series 16kW Air Conditioner User Manual...
-
Page 70: Appendix 1 Sitemonitor Software Introduction
SiteMonitor monitoring software is developed by Emerson Network Power Co., Ltd. (Emerson for short) to monitor the UPS, AC (CM+, DM , Deluxe), and LTS series static transfer system (STS) developed by Emerson; it can also perform centralized monitoring and handling over various ambient signals, such as temperature, humidity, smoke and fog, water logging, infrared, through optional equipment, like ambient signal adapter. -
Page 71: Appendix 2 Circuit Diagram Of Dme16
High pressure switch 1 HP1-COM HP1-NC J7 1 EXH1 EXH2 C OM DLT1-NO Discharge line temperature switch 1 DLT1-COM LP1-COM LIQ1 LIQ2 SPARE Low pressure switch 1 LP1-NC CP1-NO1 CP1-NO2 Figure 2 Circuit diagram of DME16 DM Series 16kW Air Conditioner User Manual... -
Page 72: Appendix 3 Circuit Diagram Of Dmc16M2
Appendix 3 Circuit Diagram of DMC16M2 Appendix 3 Circuit diagram of DMC16M2 Pressure sensor 1 Compressor Pressure sensor 2 Orange signal Black Black J9 3 2 1 J3 HP1 J4 HP2 J14 HP2 J15 HP1 J5 OutTemp J11 RS232 J7 Fan1Sta J10 Fan2Sta J6 CompSta L1 PE... -
Page 73: Appendix 4 Menu Structure
Manual mode A-phase voltage On/off mode Monitor on/off B-phase voltage Power status Level 1 C-phase voltage Password setup Level 2 Power freg Parameter backup Parameter reset Restored backup Restored defauct Figure 4 menu structure DM Series 16kW Air Conditioner User Manual... -
Page 74: Appendix 5 Alarm Control Menu Table
Appendix 5 Alarm Control Menu Table Appendix 5 Alarm Control Menu Table Alarm control High TEMP Low TEMP High HUM Low HUM Discharge TEMP1 Discharge TEMP2 Coil1 frost Coil2 frost Fan1 overload Fan 2 overload Fan3 overload Short cycle1 Short cycle2 Air loss Clogged filter Remote shutdown... -
Page 75: Appendix 6 Parameter Setting Table
LP1 Lock On, Event LP2 Lock On, Event High TEMP On, Event, Off Low TEMP On, Event, Off High HUM On, Event, Off Low HUM On, Event, Off IR HUM Error On, Event, Off DM Series 16kW Air Conditioner User Manual... - Page 76 Appendix 6 Parameter Setting Table Menu Parameter Default Setting range OEM HUM Error On, Event, Off HUM Low Water On, Event, Off Fan Hours Exceeded On, Event, Off C1 Hours Exceeded On, Event, Off C2 Hours Exceeded On, Event, Off Heat1 Hours Exceeded On, Event, Off Heat2 Hours Exceeded...
- Page 77 0 ~ 15 Cascade Yes, No Rotate By 1 ~ 8 Team Work Rotate At 0 ~ 23 Perform One Rotation Yes, No NONE, EVERY, MON, Rotate Frequency NONE TUE, WED, THU, FRI, SAT, SUN DM Series 16kW Air Conditioner User Manual...
- Page 78 Emerson Network Power Asia Pakistan Australia T: 1800-065345 T: 92-42-36622526 to 28 F: 92-42-36622530 F: 61-2-97810252 Indonesia Philippines T: 62-21-2513003 T: 63-2-7207400 F: 62-21-2510622 F: 63-2-6203693 Japan Singapore T: 81-3-54038564 T: 65-64672211 F: 81-3-54032919 F: 65-64670130 Korea Thailand T: 82-2-34831500 T: 66-2-6178260 F: 82-2-5927886 F: 66-2-6178277 to 78...
Need help?
Do you have a question about the DM and is the answer not in the manual?
Questions and answers