
Related Manuals for Liebert InteleCool 2


Summary of Contents for Liebert InteleCool 2
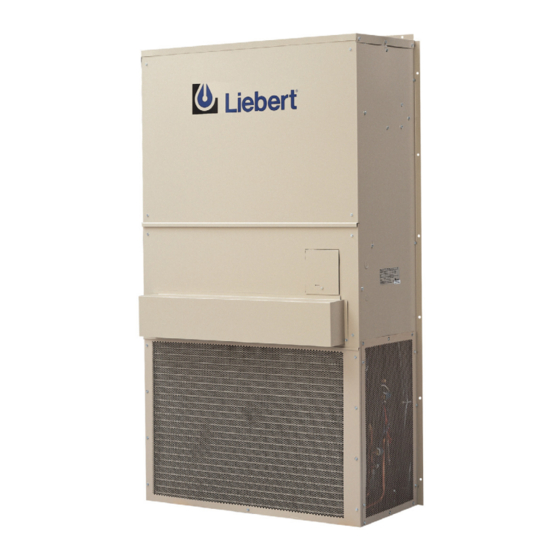
- Page 1 Liebert InteleCool2 ™ User Manual - Outdoor Wall-Mount Air Conditioner,1.5 - 5 Tons, 50 & 60 Hz Precision Cooling For Business-Critical Continuity...
-
Page 3: Table Of Contents
Optional Features........ - Page 4 Refrigerant Lines ............15 6.5.2 Discharge Pressure.
- Page 5 Motor parts, heater, Economizer, 1.5- and 2-ton units ....... . .
- Page 6 Figure i Model number designation External Telecommunication 0=Standard Supply & Return Openings 3=4 or 5 Ton Unit With 3 Ton Supply & Return Openings 0 = Standard F = Fixed Outside Air Damper E = Economizer Nominal Btuhs (1000) H = Hermetic Compressor S = Scroll Compressor R = Right Compressor L = Left Compressor...
-
Page 7: Introduction
Evaporator air is supplied by a direct drive blower package. Fans are centrifugal, double width, dou- ble inlet. Filter The filter is 2 inches deep, pleated, with a minimum efficiency rating of 20% (based on ASHRAE stan- dard 52.1). Located within the cabinet, the filter is serviceable from the front of the unit. Cabinet The exterior cabinet is constructed of painted steel. -
Page 8: Optional Features
A normally open set of contacts is provided to terminals 2 and 3 of the customer terminal strip for monitoring the status of the lock out relay when this option is sup- plied without the Common Alarm option. -
Page 9: Refrigeration System Options
1-2-4-8 day sequence. Unit lead selector, unit 1 & 2 power-on LEDs, unit 1 or 2 lead unit LEDs, 48 hour program save on loss of power, industry standard connections and 24V power from each unit. The DUC provides auto sequencing and displays on-status and operating- status parameters. -
Page 10: Installation
To install the unit, follow the instructions below. 1. Verify that an adequate structural support is provided for the unit. 2. Using a chalk line, mark the outside wall with a level horizontal line, where the bottom of the unit is to rest. -
Page 11: Figure 1 Unit Mounting Dimensions
The condensate drain tubing should be checked to be certain that it is placed through the hole provided in the base pan. 11" 11" 11" (279mm) (279mm) (279mm) M ref. InteleCool 2 dimensional data in. (mm) 9-3/8 9-13/32 20-3/4 25-1/16 (238) (239) (203) (527) -
Page 12: Ducting
(customer supplied or Liebert option). DO NOT RUN CONTROL WIRING WITH HIGH VOLTAGE! 2.5.1 Power Connections All power and control wiring and ground connections must be in accordance with the National Electri- cal Code and local codes Use copper wiring only. -
Page 13: Figure 2 Low Volt Wiring Terminals
It also contains a two-stage heat/two-stage cool thermostat with individual heat and cool set points. Light emitting diodes (LEDs) indicate Lead Unit 1 or 2 and power from Unit 1 or 2. The schedule for lead/lag switchover is adjustable by moving jumpers on the printed cir- cuit board. -
Page 14: Figure 3 Mounting Minimum Position Potentiometer On Actuator
Units supplied with Economizer requiring outside air can be adjusted as follows: 1. Run motor to fully closed position and disconnect 24 VAC from terminals TR and TR1. 2. Connect minimum position potentiometer to terminals P and P1. (See Figure 3. T and T1 are disconnected.) 3. -
Page 15: Checklist For Complete Installation
HECKLIST FOR OMPLETE ___ 1. Proper clearance for service access has been maintained. ___ 2. Equipment is level and mounting fasteners are tight. ___ 3. Ducting completed, if required. ___ 4. Line voltage to power wiring matches equipment nameplate. ___ 5. Power wiring connections completed to disconnect switches, including earth ground. Proper phase rotation has been observed so that scroll compressor will rotate in the correct direction. -
Page 16: Start -U P Procedure
Verify that installation is complete by using the Checklist for Complete Installation. 1. Disconnect all power to the InteleCool2 unit. 2. Adjust remote control to prevent compressor, heat and fan operation. 3. Turn on main breaker and check line voltage on main unit disconnect switch. Line voltage must be within ±... -
Page 17: Figure 4 Refrigeration System
Liquid refrigerant then passes through the thermal expansion valve and into the evap- orator. The expansion reduces the pressure and temperature to complete the cycle. Figure 4 Refrigeration system Compressors: Hermetic Reciprocating (1.5, 2 and 3 ton units) or Scroll Optional compressor location available Evaporator Liquid line... -
Page 18: Figure 5 Enthalpy Control Setting
5.2.1 Enthalpy Sensor The enthalpy sensor responds to the total heat content of the outdoor air to provide changeover from compressorized cooling to free-cooling operation. -
Page 19: Table 3 Recommended Applications For Control Options
Contact closures between the 24 VAC (R) and different control connections supply control voltage to the electric panel components responsible for the desired function. Operating modes are controlled by contact closures as follows: Table 2 Operating modes/contact closures Connection Operating Mode... -
Page 20: Anti-Short Cycle Timer - Standard
A normally open set of contacts is provided to terminals 2 and 3 of the customer terminal strip for monitoring the status of the lock out relay when this option is sup- plied without the Common Alarm option. -
Page 21: Maintenance
6.5.2 Discharge Pressure Discharge pressure can be increased or decreased by load conditions or condenser efficiency. The high-pressure switch will shut the compressor/contactor at its cut-out setting of 400 PSIG (2758 kPa). See 5.4.2 - High Pressure (Standard). Maintenance... -
Page 22: Thermostatic Expansion Valve
To adjust the superheat setting when an adjustable valve is used: 1. Remove the valve cap from the base of the valve. 2. Turn the adjustment stem counter-clockwise to lower the superheat. 3. Turn the adjustment stem clockwise to increase the superheat. -
Page 23: Electrical Failure
1. Disconnect power. 2. Attach suction and discharge gauges to access fittings. 3. Recover refrigerant using standard recovery procedures and equipment. Use a filter drier when charging the system with recovered refrigerant. -
Page 24: Table 7 Table
Evacuate the system twice to 1500 microns, and the third time to 500 microns. Break the vacuum each time with dry nitrogen to 2 PSIG (13.8 kPa). 10. Charge the system with refrigerant. Refer to unit serial tag for refrigerant charge amount. -
Page 25: Table 5 Intelecool2 Dimensional Data In. (Mm)
34" (864mm) in front and 30" (762mm) each side, or 36" (914mm) when mounted adjacent to another unit, for component access. For recommended minimum clearances, refer to 2.1.2 - Location Con- siderations. See Table 5 below for dimensions. Table 5 InteleCool2 dimensional data in. -
Page 26: Table 6 Technical Data, 60 Hz
650 (1100) 710 (1210) 570 (970) 620 (1050) 0.25 (0.19) 0.25 (0.19) 16 x 32.5 x 2 - one 16 x 32.5 x 2 - one (40.6 x 82.5 x 5) (40.6 x 82.5 x 5) 330 (150) 330 (150) -
Page 27: Table 7 Technical Data, 60 Hz, Continued
Total 115°F (46.1°C)** Sensible Evaporator Air Flow - Dry Coil (Derate ESP by 0.2 - IN WG (50 Pa) for ET348 and ET360) External Static Pressure 0.0 - IN WG (0.0 Pa) 0.1 - IN WG (25 Pa) 0.2 - IN WG (50 Pa) 0.3 - IN WG (75 Pa) -
Page 28: Table 8 Technical Data, 50 Hz
1700 (1000) 1220 (720) 1590 (930) 1160 (680) 1460 (860) 1100 (650) 1330 (780) 0.19 (0.25) 0.19 (0.25) 16 x 32.5 x 2 - one (40.6 x 82.5 x 5) 3/4 (1.9) 150 (330) 150 (330) 159 (350) 159 (350) Scroll... -
Page 29: Table 9 Technical Data, 50 Hz, Continued
Evaporator Air Flow - Dry Coil (Derate ESP by 0.15 - IN WG (50 Pa) for ET347 and ET359) External Static Pressure 0.0 Pa (0.0 - IN WG) 25 Pa (0.1 - IN WG) 50 Pa (0.2 - IN WG) 75 Pa (0.3 - IN WG) 100 Pa (0.4 - IN WG) 125 Pa (0.5 - IN WG) Evaporator Air Flow - Wet Coil (Derate ESP by 0.15 - IN WG (50 Pa) for ET347 and ET359) -
Page 30: Table 10 Optional Heater Capacity, 60 Hz
15 kW Capacity @ 220V-1ph Capacity @ 240V-1ph Capacity @ 200V-3ph Capacity @ 230V-3ph Capacity @ 240V-3ph Capacity @ 380V-3ph Capacity @ 415V-3ph Heater Capacity - kW 1.5 Ton 2 Ton 3 Ton 3.756 3.756 3.756 4.592 4.592 4.592 5.000 5.000 5.000... -
Page 31: Table 12 Electrical Data, 60 Hz - Amps
* 15 kW heat option @ 208/230 - 1 phase requires two electrical feeds. Circuit 1 supplies the compressor, condenser, 10 kW heat and the evaporator motor. Circuit 2 supplies the remaining 5 kW heat. 5 kW Heat 10 kW Heat 23.4 29.3... -
Page 32: Table 13 Electrical Data, 50 Hz - Amps
* 15 kW heat option @ 220/240 - 1 phase requires two electrical feeds. Circuit 1 supplies the compressor, condenser, 10 kW heat and the evaporator motor. Circuit 2 supplies the remaining 5 kW heat. 5 kW Heat 10 kW Heat 23.4 29.3... -
Page 33: Table 14 Troubleshooting Guide
ROUBLESHOOTING Table 14 Troubleshooting guide Problem Probable Cause Unit will not start No power to unit Control voltage circuit breaker open Shut off by external thermostat or stat is defective No cooling Low refrigerant charge Compressor contactor not pulling in No output from thermostat Unit cycles on... -
Page 34: Maintenance Inspection Checklist
Compressor Section ___ 1. Check for leaks ___ 2. Vibration isolation Air Cooled Condenser ___ 1. Condenser coil clean ___ 2. Motor mount tight ___ 3. Bearings free ___ 4. Refrigerant lines properly supported Refrigeration Cycle ___ 1. Check suction pressure ___ 2. -
Page 35: Table 15 Refrigeration System Parts, 1.5 And 2 Ton Units
10.0 P ARTS Table 15 Refrigeration system parts, 1.5 and 2 ton units Figure Part Name/ Description Run capacitor, recip comp Cap. 25μF, 370V Cap. 30μF, 370V Run capacitor, scroll comp Cap. 30μF, 370V Cap. 40μF, 370V Compressors, reciprocating Comp. 220/240-1 Comp. -
Page 36: Table 16 Refrigeration System Parts, 3 Ton Units
Table 16 Refrigeration system parts, 3 ton units Figure Part Name / Description Run capacitor, recip comp Cap. 40μF, 370V Run capacitor, scroll comp Cap. 40μF, 370V Cap. 50μF, 370V Compressors, reciprocating Comp. 220/240-1-50 Comp. 200/240-3 Comp. 380/460-3 Comp. 200/230-1 Compressors, scroll Comp. -
Page 37: Table 17 Refrigeration System Parts, 4-Ton Units
Table 17 Refrigeration system parts, 4-ton units Figure Part Name/ Description Run capacitor, scroll comp Cap. 40μF, 370V Compressors, scroll Comp. 208/230-3 Comp. 380/460-3 Comp. 200/230-1 Pressure switches High pressure - 400 psi Fan cycle switch - 170 psi Low Pressure - 35 psi Adj Pr Sw for Adj FCC Filter drier 7-10... -
Page 38: Table 18 Refrigeration System Parts, 5-Ton Units
Table 18 Refrigeration system parts, 5-ton units Figure Part Name/ Description Run capacitor, scroll comp Cap. 60μF, 370V Compressors, scroll Comp. 200/240-3 Comp. 380/460-3 Comp. 200/230-1 Pressure switches High pressure - 400 psi Fan cycle switch - 170 psi Low Pressure - 35 psi Adj Pr Sw for Adj FCC Filter drier 7-10... -
Page 39: Table 19 Electric Panel, 1.5- And 2-Ton Units
Table 19 Electric panel, 1.5- and 2-ton units Figure Part Name / Description 11-3 Transformer 208/230V 159463P1 11-3 Transformer 360/460V 159463P2 Circuit breakers 11-1 No heat 11-1 5 kW heat 11-1 10 kW heat 11-1 15 kW heat 11-1A Heater breaker... -
Page 40: Table 20 Electric Panel Parts, 3-Ton Units
No heat 11-1 5 kW heat 11-1 10 kW heat 11-1 15 kW heat 11-1A Heater breaker Contactor, compressor 11-4 2 pole 11-4 3 pole 11-4 3 pole Contactor, heater, 5 kW 11-9 2 pole 11-9 3 pole Contactor, heater, 10 kW... -
Page 41: Table 21 Electric Panel Parts, 4-Ton Unit
11-1 5 kW heat 11-1 10 kW heat 11-1 15 kW heat 11-1A Heater breaker Contactor, compressor 11-4 2 pole 11-4 3 pole 11-4 3 pole Contactor, heater, 5 kW 11-9 2 pole 11-9 3 pole Contactor, heater, 10 kW... -
Page 42: Table 22 Electric Panel Parts, 5-Ton Unit
11-1 5 kW heat 11-1 10 kW heat 11-1 15 kW heat 11-1A Heater breaker Contactor, compressor 11-4 2 pole 11-4 3 pole 11-4 3 pole Contactor, heater, 5 kW 11-9 2 pole 11-9 3 pole Contactor, heater, 10 kW... -
Page 43: Table 23 Motor Parts, Heater, Economizer, 1.5- And 2-Ton Units
Table 23 Motor parts, heater, Economizer, 1.5- and 2-ton units Figure Part Name/ Description Condenser fan motors Standard Motor 1/8 Hp, 208/230V (std) Motor 1/8 Hp, 380/460V (std) Fan prop, 2 blade, 20", 28-deg High ambient option 1/5 Hp, 208/230V (high amb) 1/5 Hp, 380/460V (high amb) Fan prop, 4 blade, 20", 22-deg... -
Page 44: Table 24 Motor Parts, Heater, Economizer, 3-Ton Units
13-3 Enthalpy control 13-4 Mixed air sensor 13-5 Push rod 13-6 Linkage, ball type 13-7 Filter, 20%, 2" x 16" x 32.5" ET035S ET035N 220-240V 200-240V 380-415V Part # 1 Ph 50 Hz 3 Ph 50 Hz 3 Ph 50 Hz... -
Page 45: Table 25 Motor Parts, Heater, Economizer, 4-Ton Units
Min position potentiometer 13-3 Enthalpy control 13-4 Mixed air sensor 13-5 Push rod 13-6 Linkage, ball type 13-7 Filter, 20%, 2" x 21" x 36.25" ET047N ET047M ET347N ET347M 200-230V 380-415V Part # 3 Ph 50 Hz 3 Ph 50 Hz... -
Page 46: Table 26 Motor Parts, Heater, Economizer, 5-Ton Units
Min position potentiometer 13-3 Enthalpy control 13-4 Mixed air sensor 13-5 Push rod 13-6 Linkage, ball type 13-7 Filter, 20%, 2" x 21" x 36.25" ET059N ET059M ET359N ET359M 200-230V 380-415V Part # 3 Ph 50 Hz 3 Ph 50 Hz... -
Page 47: Figure 8 Crankcase Heater (Reciprocating Compressor Only)
Figure 7 Condenser/piping assembly Figure 8 Crankcase heater (reciprocating compressor only) Retainer Crankcase heater cartridge Compressor Parts... -
Page 48: Figure 9 Evaporator Blower
Figure 9 Evaporator blower Figure 10 Evaporator coil and expansion valve 8 9 10 TEV systems Parts... - Page 49 Figure 11 Electric panels Evaporator “MF” Parts 380/460V, 3 phase 200/240V, 3 phase 200/240V, 1 phase...
- Page 50 Parts Figure 12 Heater assembly 5kW &10kW 15kW 5kW, 10kW & 15kW 5kW, 10kW & 15kW 208/230V, 1 phase 208/230V, 1 phase 208/230V, 3 phase 380/460V, 3 phase (Parallel) (Parallel) (Delta) (Wye) Connection Connection Connection Connection 159171G1 & G2, 159171G3 & G15 159171G4, G5 &G6 159171G7, G8, G10, G11&...
- Page 51 Parts Figure 13 Economizer assembly Figure 14 Common alarm assembly...
- Page 52 Parts Figure 15 Soft start device To compressor capacitor...
- Page 53 Parts Notes...
- Page 54 Parts...
- Page 56 Connectivity Embedded Power DC Power Systems Integrated Cabinet Solutions Business-Critical Continuity, Emerson Network Power and the Emerson Network Power logo are trademarks and service marks of Emerson Electric Co. ©2006 Emerson Electric Co. Technical Support / Service monitoring@emersonnetworkpower.com Outside the US: 614-841-6755 upstech@emersonnetworkpower.com...
Need help?
Do you have a question about the InteleCool 2 and is the answer not in the manual?
Questions and answers