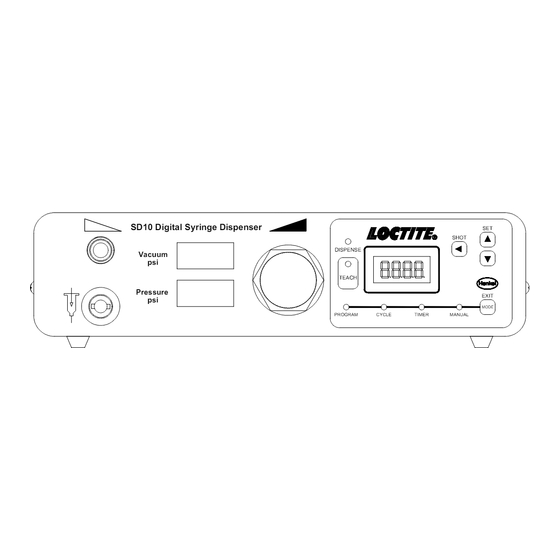
Summary of Contents for Loctite SD10
- Page 1 EQUIPMENT Operation Manual SD10 Digital Syringe Dispenser SHOT DISPENSE Vacuum TEACH Pressure EXIT MODE PROGRAM CYCLE TIMER MANUAL Loctite® SD10 Digital Syringe Dispenser Part Number 1514629...
-
Page 2: Table Of Contents
TABLE OF CONTENTS 1 Please observe the following..................3 1.1 Emphasized sections .................... 3 1.2 Items Supplied ....................... 3 1.3 For your safety ....................... 4 1.4 Usage ........................4 2 Description - Typical System Set-Up ................5 2.1 Operating Elements ....................6 2.2 Theory of Operation .................... -
Page 3: Please Observe The Following
As a result of technical development, the illustrations and descriptions in this instruction manual can deviate in detail from the actual unit delivered. 1.2 Items Supplied 1 SD10 Digital Syringe Dispenser 1 Foot switch 1 User manual 1 Power Supply... -
Page 4: For Your Safety
Always wear goggles, when operating with pressurized air! 1.4 Usage The Loctite® SD10 Digital Syringe Dispenser (1514629) is a self-contained dispenser system and suitable for the precise application of Loctite® brand products at manual workstations such as in workshops, laboratories and industrial installations. -
Page 5: Description - Typical System Set-Up
2 Description - Typical System Set-Up Front Panel SD10 Digital Syringe Dispenser SHOT DISPENSE Vacuum TEACH Pressure EXIT MODE PROGRAM CYCLE TIMER MANUAL Rear Panel 24VDC Output Power Power Foot Input Switch Switch XS-1 Air Input For Service, Spare Parts, & Repairs... -
Page 6: Operating Elements
The Loctite® SD10 Digital Syringe Dispenser (1514629) is connected to an external pneumatic supply. The control unit of the SD10 Digital Syringe Dispenser regulates the dispensing pressure and dispense time in order to dispense a repeatable volume of product. The built-in vacuum regulator prevents dripping of the product during pauses in... -
Page 7: Technical Data
3 Technical Data 3.1 Energy Requirements 3.1.1 Electrical Power supply 110 –240 VAC; 50 –60 Hz Power consumption Approx. 40 W Internal control voltages 5 VDC; 24 VDC 3.1.2 Pneumatics Pneumatic supply min. 2 bar (29 psi); max. 12 bar (174 psi) Filtered 10 μm, oil-free, non-condensing Quality If the required quality is not... -
Page 8: Installations
4 Installations 4.1 Environmental Conditions – No condensing humidity – No splashing water 4.2 Placement When the syringe piston is missing and the syringe is handled in an improper manner, the product can enter and contaminate the dispenser. Place the control unit in an elevated position above the syringe! ... -
Page 9: Set Up
5.2 Set Up 5.2.1 Purging Air from the Syringe To avoid air bubbles during dispensing, the tip of the syringe must be purged of air. Hold the syringe over a container since product will flow out! Press the power switch to the position I (ON). ... -
Page 10: Programs
If the dispense quantity is achieved too slowly, increase the dispense pressure and check the dispense quantity again. Repeat this sequence until the desired dispense quantity is achieved in an acceptable amount of time. 5.2.3 Programs This mode of operation is used for precise repeatable dispensing. ... -
Page 11: Cycle Mode
Using the Teach Mode to set the dispense time. Press the button until the LED above TIMER is lit. Press the button until the light above it flashes. Pressure the button or foot switch for the desired amount of time. ... -
Page 12: Cares And Maintenance
6 Cares and Maintenance 6.1 Care Occasionally the o-ring of the syringe adaptor (12) should be lubricated with silicone grease. This will prolong the life of the o-ring. Clean hands after application of grease to assure surfaces to be bonded are clean. Otherwise bonding might fail. -
Page 13: Troubleshooting
7 Troubleshooting Type of malfunction Possible causes Correction –No power voltage present. Check the power voltage. –Power switch (8) is in position O Switch power switch (8) to position The digital display (OFF). I (ON). does not light. –Power fuse has failed. Check/replace fuse. -
Page 14: Replacement Parts And Accessories
9 Warranty WARRANTY Henkel expressly warrants that all products referred to in this Instruction Manual for (1514629) Henkel SD10 Digital Syringe Dispenser) (hereafter called "Products") shall be free from defects in materials and workmanship. Liability for Henkel shall be limited, as its option, to replacing those Products which are shown to be defective in either materials or workmanship or to credit the purchaser the amount of the purchase price thereof (plus freight and insurance charges paid therefor by the user). - Page 15 Henkel Corporation Henkel Canada Corporation Henkel Corporation One Henkel Way 2225 Meadowpine Boulevard Automotive/ Metals H.Q. Rocky Hill, CT 06067-3910 Mississauga, Ontario L5N 7P2 32100 Stephenson Hwy, CANADA Madison Heights 48071 Henkel Capital, S.A. de C.V. Henkel Singapore Pte Ltd Henkel (China) Company Ltd.


Need help?
Do you have a question about the SD10 and is the answer not in the manual?
Questions and answers