Table of Contents
Advertisement
Available languages
Available languages
Advertisement
Chapters
Table of Contents

Subscribe to Our Youtube Channel
Related Manuals for Loctite 97105


Summary of Contents for Loctite 97105
- Page 1 97105 / 97106 97107 / 97108...
- Page 4 97105 97107 97106 97108 97110 97109 97125 97127 97007- 97009 97003 / 97004 97102 97123 97204 97103 97111 97112 97112 97115 97113 97113 97116 97116 97114 97114 97121 97134 97135 97121 97134 97135 97136 97136 97118 97119...
- Page 5 Deutsch 6 – 22 English 23 – 39...
-
Page 6: Table Of Contents
Inhaltsverzeichnis Bitte beachten Sie ..........Hervorhebungen . -
Page 7: Bitte Beachten Sie
= 2. Handlungsschritt, Weißer Pfeil = 3. Handlungsschritt. Lieferumfang 1 0,5 l-Produkttank 97105 oder 0,5 l-Produkttank 97106 (Automatikbehälter mit Füllstandsanzeige) oder 2 l-Produkttank 97107 oder 2 l-Produkttank 97108 (Automatikbehälter mit Füllstandsanzeige) ; 1 Anschlußkabel Produktbehälter (nur Automatikbehälter 97106 bzw. 97108);... -
Page 8: Zu Ihrer Sicherheit
Das Produkt nur im LOCTITE-Originalgebinde einsetzen! Einsatzbereich Mit dem 0,5 Liter-Produkttank 97105 oder 97106 kann LOCTITE-Produkt direkt aus den Original- gebinden 250 ml (für anaerobe Produkte) und 500 g (für Cyanacrylate) sowie aus den US-Original- gebinden für Cyanacrylate verarbeitet werden. -
Page 9: Gerätebeschreibung
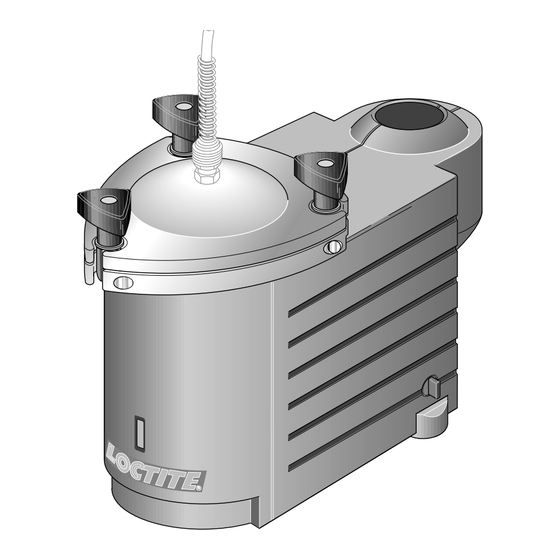
Gerätebeschreibung Anzeigen, Bedienelemente und Anschlüsse Siehe Abbildung Seite 3. Deckel Deckelverschraubung Produktanschluß 1/4“ (für Produktschlauch 1/4“) Der Produktanschluß 3/8“ ist mit einem Produktschlauch 3/8“ im Lieferumfang des Dosierventils enthalten. LED-Anzeige, analog (nur Automatikbehälter) 2 grüne LED’s = Solange eine dieser LED’s leuchtet, ist genügend Produkt in der Flasche vorhanden. 7 gelbe LED’s = Nachfüllen (Refill). -
Page 10: Funktionsbeschreibung
Funktionsbeschreibung Die LOCTITE-Originalflasche wird in den Produkttank eingesetzt. Der geschlossene Produkttank wird vom LOCTITE-Steuergerät 97101, 97102 oder 97103 mit geregelter Druckluft versorgt. Solange das Dosierventil geöffnet ist, wird durch pneumatischen Druck auf die Flüssigkeitsoberfläche in der LOCTITE-Originalflasche das Produkt durch die Produktleitung gefördert. -
Page 11: Technische Daten
+10 °C bis +40 °C (+50 °F bis +104 °F) Lagertemperatur – 10 °C bis +60 °C (+14 °F bis +140 °F) Gewicht 97105 (97106) / 97107 (97108) 3,55 kg (3,75 kg) / 6,30 kg ( 6,50 kg) Installieren Umgebungsbedingungen –... -
Page 12: Einstellen Des Füllstandsensors (Nur Automatikbehälter)
Installieren Einstellen des Füllstandsensors (nur Automatikbehälter) Der Füllstandsensor muß entsprechend der verwendeten Produktart und Flaschengröße eingestellt werden, damit er ordnungsgemäß arbeitet. (3) Deckelverschraubung 2 lösen und Deckel 1 abnehmen. Befestigungsschrauben entfernen und Gehäuse aufklappen. Anschlußkabel am Produkttank, Gerätestecker XS2, sowie am Steuergerät, Buchse XS2, befestigen. -
Page 13: Anschließen Der Geräte
Diese Einstellung, wenn sie korrekt ist, mit einer vollen Flasche und erneut mit der leeren Flasche prüfen. Leere Produktflasche herausnehmen. Gehäuse zuklappen. Befestigungsschrauben wieder einsetzen und festziehen. Anschließen der Geräte Anschließen des Produkttanks 97105 bzw. 97107 97102 97101 1: S 2: R... - Page 14 Installieren Anschließen eines Automatikbehälters an das Steuergerät 97102 oder 97103 97106 97102 97103 97108 1: S ta rt 2: R es er vo ir L o c ti te (I re in Ge la n 90 –2 ca t.n rm an d ) L o.
-
Page 15: Dosieren
Dosieren Erste Inbetriebnahme Vor dem Lösen der Deckelverschraubung 2 muß der Produkttank entlüftet (drucklos) sein! Produkttank 97105 bzw. 97107: Entlüftungsventil 5 auf Stellung (entlüften) umschalten. Nur Automatikbehälter: Der Automatikbehälter ist entlüftet, wenn am Steuergerät 97102 oder 97103 der Netzschalter auf Stellung O (AUS) umgeschaltet ist oder die Digitalanzeige keinen Druck anzeigt. -
Page 16: Nachfüllen Des Produktbehälters (Auswechseln Der Produktflasche)
Dosieren Nachfüllen des Produktbehälters (Auswechseln der Produktflasche) Die Flasche im Produkttank nie völlig entleeren! Der Eintritt von Luft in die Produktleitung führt zu Störungen bei der Dosierung. Wenn Luftblasen beim Dosieren auftreten, muß geprüft werden, ob der Produktbehälter leer ist. Beim Dosieren von Cyanacrylat-Klebstoffen den Produktbehälter sofort nachfüllen, weil Luft in der Produktleitung zu Aushärtungen von Produkt führt! Bei Verwendung eines Automatikbehälters kann nach der Leermeldung kein Start mehr ausgelöst... -
Page 17: Außerbetriebnahme
Dosieren Außerbetriebnahme Die Druckluftversorgung unterbrechen. Außerbetriebnahme für längere Stillstandszeiten Bei Arbeitspausen von länger als 14 Tagen das System außer Betrieb nehmen, um Aushärtungen von Produkt zu vermeiden. Die Druckluftversorgung unterbrechen. Produktschlauch und Dosierventil gemäß Kapitel 6 reinigen. Erneute Inbetriebnahme Die Druckluftversorgung wiederherstellen. Inbetriebnahme nach längeren Stillstandszeiten Installation gemäß... -
Page 18: Beseitigen Von Störungen
– Berstscheibe zerstört. Berstscheibe auswechseln (siehe unten). Tankgehäuse. – Entlüftungsventil 5 offen oder defekt. Entlüftungsventil 5 schließen. Loctite Service. LED Anzeige 4 leuchtet nicht. – Stecker bzw. Buchse des Anschluß- Netzschalter (Steuergerät) auf Stellung O (Nur Automatikbehälter!) kabels Produktbehälter lose. - Page 19 Steuergerät 97103: Taste bzw. drücken. – Produktbehälter defekt. Loctite Service. Auswechseln der Berstscheibe Bei Überschreitung der maximal zulässigen Druckluftversorgung wird der Produkttank durch die Berstscheibe entlüftet. Die zerstörte Berstscheibe muß ausgewechselt werden. Deckelverschraubung 2 lösen und Deckel 1 abnehmen.
-
Page 20: Technische Unterlagen
Technische Unterlagen Zubehör und Ersatzteile Pos. Nr. Bezeichnung Loctite-Bestellnummer 0,5 l-Tank Ersatzteilset (3 O-Ringe, Silikonfett, 3 Dreikantgriffe, 3 Auffangbehälter)......97250 2 l-Tank Ersatzteilset (1 O-Ring, Silikonfett, 3 Dreikantgriffe, 3 Auffangbehälter)......97253 Berstscheibe....................97251 Anschlußkabel Produktbehälter, 2 m.............97213 Flaschenhalter (für 2 l-Tank mit Füllstandsanzeige) ........97202 Wartungseinheit ...................97120... -
Page 21: Steckerbelegung (Nur Automatikbehälter)
Technische Unterlagen Steckerbelegung Niemals externe Spannung an Pol 9 von XS2 anlegen! XS2: Ein Automatischer Produkttank 97106 / 97108 Steuergerät XS2 Automatiktank Signal Tank nachfüllen Tank leer Tank nachfüllen Tank leer 0 VDC Tank-Ventil Tank-Ventil max. 1,8 W Tank- erkennung + 24 VDC XS2: Zwei Automatische Produkttanks 97106 / 97108 Steuergerät XS2... -
Page 22: Anhang
Soweit sich nachstehend nichts anderes ergibt, sind weitergehende Ansprüche des Bestellers – gleich aus welchen Rechtsgründen – ausgeschlossen. Loctite haftet deshalb nicht für Schäden, die nicht am Liefergegenstand selbst entstanden sind; insbesondere haftet Loctite nicht für entgangenen Gewinn oder sonstige Vermögensschäden des Bestellers. - Page 23 Contents Please observe the following ........24 Emphasized Sections .
-
Page 24: Please Observe The Following
1 Bottle Nesting Block (2 l-Automatic Reservoir 97108 only); 3 Dripcups; 1 Instruction Manual 97105 … 97108. As a result of technical development, the illustrations and descriptions in this instruction manual can deviate in detail from the actual unit delivered. -
Page 25: For Your Safety
Usage With the 0.5 liter Reservoir 97105 or 97106, LOCTITE Products can be applied directly from the original 250 ml (for anaerobic products) and 500 g (for cyanacrylate) packages as well as from the original US packaging for cyanacrylate. -
Page 26: Description
Description Displays, Operating Elements and Connections See the illustration on page 3. Cover Cover screw fasteners Product connection 1/4“ (for 1/4“ product hose) The 3/8“ product connection together with a 3/8“ product hose is included with the dispensing valve. LED indicators, analog (automatic reservoir only) 2 green LED’s = As long as one of these LED’s lights, adequate product is available in the bottle. -
Page 27: Theory Of Operation
The original LOCTITE bottle is inserted into the reservoir. The closed reservoir is supplied with regulated, pressurized air from the LOCTITE controller 97101, 97102 or 97103. As long as the dispensing valve is open, pneumatic pressure on the surface of the fluid in the original LOCTITE bottle transports the product through the product line. -
Page 28: Technical Data
+10 °C to +40 °C (+50 °F to +104 °F) Storage temperature – 10 °C to +60 °C (+14 °F to +140 °F) Weight 97105 (97106) / 97107 (97108) 3,55 kg (3,75 kg) / 6,30 kg ( 6,50 kg) Installation Environmental Conditions –... -
Page 29: Adjusting The Level Sensor (Automatic Reservoir Only)
Installation Adjusting the Level Sensor (Automatic Reservoir Only) The level sensor must be adjusted according to the type of product used and the size of the bottle in order to function properly. Loosen the (3) reservoir knobs 2 and remove lid 1. Remove the screws and open the housing. -
Page 30: Connection Of The Equipment
Check this adjustment with a full bottle and the empty bottle again, if it is correct. Remove the empty product bottle. Close the housing. Insert and tighten the screws. Anschließen der Geräte Anschließen des Produkttanks 97105 bzw. 97107 97102 97101 1: S... - Page 31 Installation Connection of the Automatic Reservoir to the Controller 97102 or 97103 97106 97102 97103 97108 1: S ta rt 2: R es er vo ir Lo ct (Ir el 90 –2 in Ge an d ca t.n rm an o.
-
Page 32: Dispensing
First Operation Before loosening the cover screw fasteners 2, the reservoir must be depressurized (pressure-free)! Reservoir 97105 or 97107: Set the depressurizing valve 5 to position (depressurize). Automatic reservoir only: The automatic reservoir is depressurized when the power switch on the controller 97102 or 97103 is switched to the O (OFF) position or the digital display indicates no pressure. -
Page 33: Refilling The Product Reservoir (Replacing The Product Bottle)
Dispensing Refilling the Product Reservoir (Replacing the Product Bottle) Never completely empty the bottle in the reservoir! The entry of air into the product line causes problems with dispensing. When air bubbles occur during dispensing, check if the product reservoir is empty. For the dispensing of cyanacrylate adhesives, refill the product reservoir immediately since air in the product line results in curing of the product! When using an automatic reservoir, starts can no longer be initiated after the empty message. -
Page 34: Shutdown
Dispensing Shutdown Disconnect the pneumatic supply from the unit. Shutdown for Longer Periods of Non-use For pauses in the work of longer than 14 days, place the system out of operation to prevent curing of the product. Disconnect the pneumatic supply from the unit. Clean the product hose and dispensing valve according to Chapter 6. -
Page 35: Troubleshooting
Replace the rupture disc (see below). reservoir housing. – Depressurizing valve 5 open or defect. Close the depressurizing valve 5. Loctite service. – Loose plug or socket of the tank cord on Switch the power switch (controller) to LED indicator 4 does not light. - Page 36 Controller 97102: Press button Controller 97103: Press button – Product reservoir defect. Loctite Service. Replacing the Rupture Disc When the maximum allowable air supply pressure is exceeded, the reservoir is depressurized by the bursting of the rupture disc. he punctured rupture disc must be replaces.
-
Page 37: Documentation
Documentation Accessories and Spare Parts Pos. No. Description Loctite Order No. 0,5 l-Reservoir Spare Part Kit (3 O-rings, silicone grease, 3 handles, 3 dripcups) ........97250 2 l-Reservoir Spare Part Kit (1 O-ring, silicone grease, 3 handles, 3 dripcups) ..........97253 Rupture Disc....................97251 Tank Cord, 2 m ....................97213... -
Page 38: Pin Connection Convention (Automatic Reservoir Only)
Documentation Pin Connection Convention (Automatic Reservoir only) Never connect any external voltage on pin 9 of XS2! XS2: One Automatic Reservoir 97106 / 97108 Controller XS2 Automatic Reservoir Signal Tank REFILL Tank EMPTY Tank REFILL Tank EMPTY 0 VDC Tank Valve Tank Valve max. -
Page 39: Annex
A claim of defect in materials or workmanship in any Products shall be allowed only when it is submitted to Loctite in writing within one month after discovery of the defect or after the time the defect should reasonably have been discovered [and in any event within twelve months after the delivery of the Products to the purchaser]. - Page 40 Loctite (Ireland) Ltd. Tallaght Business Park Whitestown, Tallaght, Dublin 24, Ireland © 1994 Loctite Corporation 8950077 – 05/99...
Need help?
Do you have a question about the 97105 and is the answer not in the manual?
Questions and answers