
Related Manuals for Husqvarna SG 13 B


Summary of Contents for Husqvarna SG 13 B
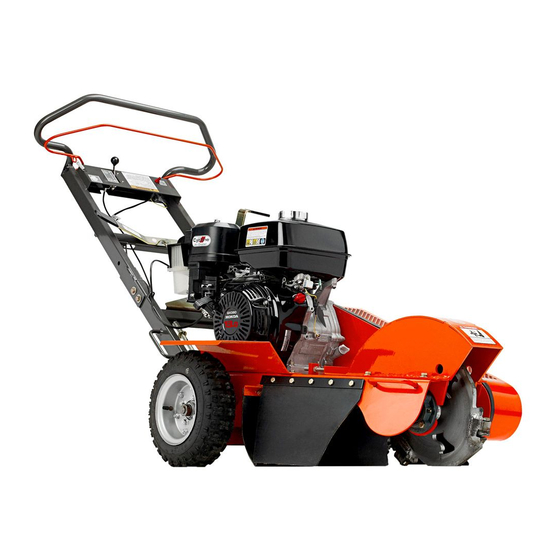
- Page 1 Operator Manual SG13B / 966042601 / 2009-03 Please read the operator’s manual carefully and make sure you understand the instructions before using the machine.
-
Page 2: Table Of Contents
CONTENTS INTRODUCTION ............... 4 OPERATION ..............26 Good Service .............. 4 Preparation ............... 26 Serial Number ............. 4 Starting The Engine ..........27 SYMBOLS AND DECALS ..........5 Handle Engine Switch..........28 SAFETY ................7 OP Grip Bar .............. 28 General use .............. -
Page 3: Introduction
Before the machine was your dealer for more information. delivered it underwent inspection and was adjusted If you sell your Husqvarna machine, make sure to give by your dealer. When you need spare parts or support the operator’s manual to the new owner. -
Page 4: Symbols And Decals
Decals and machine-mounted instructions Missing or illegible decals must be replaced before using the machine. Model designation Husqvarna logo Husqvarna Crown logo Starting procedure Throttle General precautions Handle adjustment Use ear and eye protection... - Page 5 Avoid slopes that are too steep to use the machine Handle adjustment. safely. Decal 11 Clear any debris prior to use. No step. Decal 4 Decal 12 Wear goggles or safety glasses and ear protection O = off, I = on when using the unit. HUSQVARNA...
-
Page 6: Safety
Do not use the machine until you have read the operator’s manual carefully and understand the instructions given. All maintenance work or adjustments not described in this manual must be performed by an authorized Husqvarna service workshop. 8011-208c Read this manual carefully before starting the machine. WARNING! - Page 7 From a safety Overexposure to vibration may lead point of view, use only Husqvarna original spare to circulatory or nerve damage, parts. particularly in people who have impaired circulation.
-
Page 8: Preparations
Ask your dealer about approved protective clothing and approved protective equipment recommended by Husqvarna. HUSQVARNA... -
Page 9: Operating
The engine emits carbon monoxide, which is a colorless, poisonous gas. Do not use the machine in enclosed 8011-291c spaces. Smoking near the machine is strictly prohibited. 10 - HUSQVARNA... -
Page 10: Movement/Transport
Shut off the machine if children enter the work area. • Never allow children to operate the machine. • Be particularly careful near corners, bushes, trees or other objects that obstruct view. 8011-206b Never allow children to operate the machine. HUSQVARNA... -
Page 11: Fuel System
Avoid overfilling. If you spill gasoline on the machine, wipe up the spill and wait until it has 8061-024 Close the fuel valve. evaporated before starting the engine. Change garments if gasoline is spilled on clothing. 8011-222b Fueling always poses an element of risk 12 - HUSQVARNA... -
Page 12: Maintenance
• Never use a machine with a defective muffler. • Reduce the risk of fire by removing grass, leaves and other debris that may have caught in the machine. 8011-210c Keep the machine clean. HUSQVARNA... -
Page 13: Protection Equipment
PROTECTION EQUIPMENT Personal Protection Equipment Consult your Husqvarna dealer when selecting protective equipment. Dealers have a broad assortment of equipment for professionals (such as forestry workers) and knowledge about occupational environment requirements and protective levels. Before using the stump grinder, you may need to cut back the object with a power saw. -
Page 14: Set-Up
Screw yoke onto the rod assembly until rod is even or through threaded portion of yoke about ¼" (6.35 mm). SPRING YOKE Attach brake rod assembly to brake handle on the upper handle bar assembly. BRAKE HANDLE BRAKE ROD ASSEMBLY HUSQVARNA... - Page 15 Remove air cleaner and double wire clamp from engine. CLAMP Route the wire harness from engine and the throttle cable through guide and handle crossmember. THREAD WIRE HARNESS Connect upper and lower wire harness together, AND THROTTLE CABLE yellow to yellow—black to black. GUIDE 16 - HUSQVARNA...
- Page 16 Test proper wire length by pulling on the handle adjustment lever and raising and lowering the handle to maximum position without any pull on harness. Reattach air cleaner to engine. Remove unit from pallet. THROTTLE CABLE HUSQVARNA...
-
Page 17: Controls
CONTROLS Main Components and Controls 8064-005 Handle Engine Operator Presence Grip Bar Rear Lifting Handles Brake Lever Handle Adjustment Bar Cutter Drive Belt Guard Throttle Front Lifting Handles Engine Switch Cutting Wheel 18 - HUSQVARNA... -
Page 18: Engine
It is connected to the throttle on the handle. If the cable should bind or break, you can reduce the throttle with the lever on the engine as an emergency measure to slow the engine speed to an idle and stop the cutting wheel. 8011-034 HUSQVARNA... -
Page 19: Starter
Move the lever back to the right once the engine starts. Forgetting the choke is evident if the engine runs roughly and produces black smoke. This also results in increased fuel consumption. 8060-024 20 - HUSQVARNA... -
Page 20: Air Filter
(2) minutes before refueling The engine muffler is equipped with a heat protective cowling but still becomes hot when the engine is running. Avoid touching the muffler when it is warm. There is a risk for burns. HUSQVARNA... -
Page 21: Oil Dipstick
Used engine oil is a health hazard and legislation prohibits disposal on the ground or in nature; it should always be disposed of at a workshop or appropriate disposal location. Avoid skin contact; wash with soap and water in case of spills. 8011-187 22 - HUSQVARNA... -
Page 22: Fuel Tank
The engine is equipped with a centrifugal clutch that is connected to the crankshaft. When the engine speed increases, the drive for the cutting wheel engages automatically. The centrifugal clutch is maintenance-free; it is not possible for the user to make adjustments. 8011-247 HUSQVARNA... -
Page 23: Operator Presence (Op) Grip Bar
A second switch with the same function is activated by the OP grip bar. To start the engine, the control panel switch must be set to the ON position and the OP grip bar must be held in. 24 - HUSQVARNA... -
Page 24: Brake
Pull the handle backwards and set the handle at a suitable working height. Engagement rods are spring loaded to insure positive locking when released, but always make sure bolts are locked into place after adjustments are made. HUSQVARNA... -
Page 25: Operation
• Make sure that everyone, including children and animals, maintains a distance of at least 50 feet (15 M) from the machine. Debris can be thrown out and injure people and animals. 8011-193 26 - HUSQVARNA... -
Page 26: Starting The Engine
When the engine is cold, it may be best to move the lever back in several stages. Find the position where the engine runs smoothly. 8060-024 Throttle Set the throttle on the handle to the SLOW (START) / DISENGAGE position. HUSQVARNA... -
Page 27: Handle Engine Switch
DO NOT let go of the starter handle when extended. Return the handle to the recoil position. Throttle Keep the throttle at idle. When the throttle is increased, the cutting wheel will begin rotating. 8011-127 28 - HUSQVARNA... -
Page 28: Procedure
Place the cutting blade near the top front edge of the tree stump. Set the brake to lock position. 8011-201c Set the throttle to SLOW (START) DISENGAGE. Set engine switch on handlebar to ON. 8060-026 HUSQVARNA... - Page 29 1" (2.5 cm) after each pass until the front edge of the stump is gone. IMPORTANT INFORMATION If the cutting wheel is too low, the machine may start to “climb” over the stump and become unstable. 8011-203a 30 - HUSQVARNA...
-
Page 30: Operating On Hills
NEVER use the machine on grades of 10° or steeper. Transport The Husqvarna stump grinder can be transported in a truck, trailer, van or a large SUV (Sport Utility Vehicle). The stump grinder is equipped with four lifting handles (two on each side) so that two people can lift the machine if necessary. -
Page 31: Normal Shutdown
Close the fuel valve. Turn the lever all the way to the left. Emergency Shutdown Release the OP grip bar. Wait until the blade stops. Make sure that the blade is resting against the ground and has stopped completely before continuing. 8060-024 32 - HUSQVARNA... -
Page 32: Maintenance
Grease the wheels (standard lithium base) Check tire air pressure (25 psi max) First change after 20 hours. In dusty conditions maintenance is required at shorter intervals. Before each use. Performed by authorized service workshop. Performed every second year. Grease every 4 hours. HUSQVARNA... -
Page 33: Cyclone Filter
Refit the components. Place the air channels in the cyclone housing. Insert cyclone housing into position and make sure it fits in the upper portion. DO NOT use force; rather coax it into place before refitting the screws. 8011-212 34 - HUSQVARNA... -
Page 34: Air Filter
(2). 8011-126 Remove the foam rubber pre-filter and clean using a mild detergent. Squeeze dry with a clean cloth. Soak it with new engine oil. Wind the filter in an absorbent cloth and squeeze out excess oil. 8011-030 HUSQVARNA... -
Page 35: Sludge Reservoir
Mount the paper filter in the air filter housing and tighten the wing nut. Refit the pre-filter on the paper filter. Refit the cyclone filter with the air filter cowling. 8011-032 Sludge Reservoir Close the fuel valve. 8060-024 36 - HUSQVARNA... -
Page 36: Idle Adjustment
Turn the idle screw so that the engine idles at 1250-1550 RPM. Increase the idle speed with the throttle and move it right back to idle position. Check engine speed again. 8011-128 HUSQVARNA... -
Page 37: Ignition System
A used spark plug should be turned 8011-054 1/8-¼ of a turn from the seated position. A new spark plug should be turned ½ a turn from the seated position. Replace the ignition cable shoe. 38 - HUSQVARNA... -
Page 38: Drive Belt
¼ - " (6 - 10 mm) from the original position. Loosen screws holding cover plate to belt guard backing plate. 8060-227 Undo the two screws (A) on each side of the cutting shroud. COVER PLATE SCREWS 8062-006 HUSQVARNA... -
Page 39: Cutting Wheel
8011-229 Cutting Wheel TOOTH CUTTER (CARBIDE FACE) WARNING! The cutters can come loose from the cutting wheel if the bolts are not sufficiently tight. Comply with the recommended torque settings. Tighten the screws 30 ft/lbs. (133 Nm). 40 - HUSQVARNA... -
Page 40: Removing/Refitting Wheels
Tighten so handle snaps down when locked but unlocks easily when handle is moved forward. Brake CLEVIS PIN is properly adjusted when wheel will not turn when you try to push or pull unit. HAIR PIN HUSQVARNA... -
Page 41: Two Minute Rule
Do not exceed 70 bar/1000 PSI water pressure when cleaning. Lubricate the machine after cleaning. This is particularly important if the machine is to be stored. 8011-210c 42 - HUSQVARNA... -
Page 42: Lubrication
LUBRICATION HUSQVARNA... -
Page 43: Engine Oil
Check that the rubber gasket is in position and screw the dipstick back into place. DO NOT tighten it askew or too hard or you may damage the threads. Wipe up any spilled oil. 8060-028 8011-046 44 - HUSQVARNA... -
Page 44: Throttle Cable
Tip: Fill a small plastic bag with oil and tape it so that it seals against the casing and allow the cable to hang vertically from the bag overnight. If you do not succeed in lubricating the cable, it must be replaced. 8011-234 HUSQVARNA... -
Page 45: Troubleshooting
Replace the spark plug Build-up on electrodes, short circuit Check electrode gap and clean or replace spark plug Faulty ignition unit Contact an authorized service workshop Low compression Serious interior engine damage or Contact an authorized service faulty valves workshop 46 - HUSQVARNA... - Page 46 Parking brake slips Adjust the brake tension in the manner described in the operator’s manual Check for damage on the brake rod or lever Check for wear on the brake pads. replace as necessary HUSQVARNA...
-
Page 47: Storage
Service When ordering spare parts, please specify the purchase year, model, type, and serial number. Always use genuine Husqvarna parts. An annual check-up at an authorized service workshop is a good way to ensure that your machine performs its best the following season. -
Page 48: Technical Data
" thick disc (157.5 mm x 9.5 mm) Cut Depth Approx 10" (25.4 cm) Dimensions Length 62"- 73" (157- 185 cm) depending on handle position Width 27" (69 cm) Height 24"- 43" (61 - 109 cm) depending on handle position Weight 249 lb. (112.9 kg) HUSQVARNA... - Page 49 SPARK PLUG TRANSISTOR IGNITION OIL LEVEL GUARD 8064-008 ENGINE HARNESS CONSOLE HARNESS ENGINE ON/OFF SWITCH (DISCONNECTED) COLOR CODE Y - YELLOW B - BLACK TRANSISTOR IGNITION SPARK PLUG ON/OFF SWITCH MODULE SAFETY SWITCH OIL LEVEL GUARD 8064-009 50 - HUSQVARNA...
-
Page 50: Service Journal
Fill in the sales papers, etc. Delivery service has been carried out. No remaining notes. Certified: After the first 20 hours Change engine oil. Change oil in reduction gear, where applicable. Check that belts and chains are properly adjusted. Tighten screws and nuts. HUSQVARNA... - Page 51 SERVICE JOURNAL Action Date, stamp, signature 52 - HUSQVARNA...
- Page 52 SERVICE JOURNAL Action Date, stamp, signature HUSQVARNA...
- Page 53 SERVICE JOURNAL Action Date, stamp, signature 54 - HUSQVARNA...
- Page 54 SECTION 1: LIMITED WARRANTY Husqvarna Professional Products, Inc (“Husqvarna”) warrants the original purchaser the Husqvarna branded product to which this warranty apply (the “Product”) that the Product shall be free from defects in material and workmanship from the date of purchase for the period of the applicable “Warranty Schedule” of the Product as set forth below. Additional limitations are described in Section 2 through 6, inclusive.
- Page 55 Proof of purchase must be presented to the authorized Husqvarna retailer in order to obtain warranty service. This proof must include date purchased, model number, serial number, and complete name and address of the selling retailer. To obtain the benefit of this warranty, the product believed to be defective must be delivered to an authorized Husqvarna retailer in a timely manner, no later than thirty (30) days from date of the operational problem or failure.
- Page 56 P/N 115 151327 IR 03/03/09...
Need help?
Do you have a question about the SG 13 B and is the answer not in the manual?
Questions and answers