Xerox 4110 Getting Started
Xerox copier/printer getting started
Hide thumbs
Also See for 4110:
- User manual (520 pages) ,
- Configuration and setup (108 pages) ,
- System administration manual (92 pages)

Related Manuals for Xerox 4110


Summary of Contents for Xerox 4110
- Page 1 Version 3.2, January 2008 701P46273 Xerox 4590 Copier/Printer Xerox 4110 Copier/Printer Getting Started...
- Page 2 Xerox®, The stylized X, and all Xerox product names and product numbers mentioned in this publication are trademarks of XEROX CORPORATION. Other company brands and product names may be trademarks or registered trademarks of the respective companies and are also acknowledged.
-
Page 3: Table Of Contents
Loading paper in Tray 8 (Post-Process Inserter) ... 3-8 X er o x 4 5 90 / 4110 C o pi e r /P r i n te r G e t ti n g Sta r te d... - Page 4 Tab l e o f c on te n ts Loading tab stock into any tray ......3-9 Loading tab stock into Tray 5 (Bypass) or Tray 8 (Post-Process Inserter).
- Page 5 Other countries ....... . . 6-14 X er o x 4 5 90 / 4110 C o pi e r /P r i n te r G e t ti n g Sta r te d...
- Page 6 Tab l e o f c on te n ts X e r o x 4 59 0 /4 11 0 Co p ie r / Pr in t er G et ti n g Sta r te d...
-
Page 7: Product Overview
Be sure to periodically check www.xerox.com for the latest information for your product. X er o x 4 5 90 / 4110 C o pi e r /P r i n te r G e t ti n g Sta r te d... -
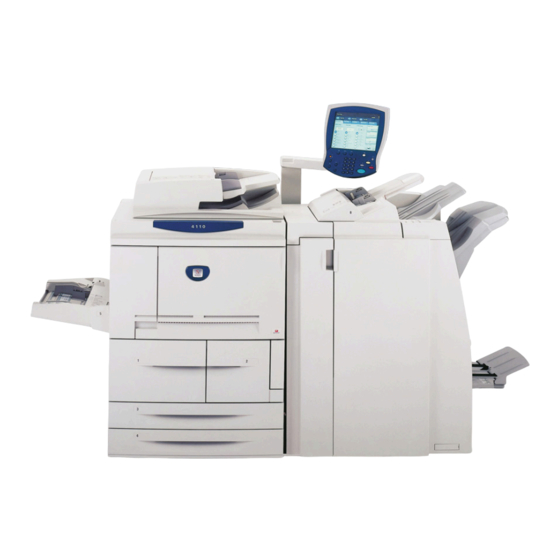
Page 8: Machine Components
1. P r o d uc t O v e r v i ew Machine components WARNING: To prevent personal injury, do not touch any labeled area that indicates High Temperature. 1- 2 X e r o x 4 59 0 /4 11 0 Co p ie r / Pr in t er G et ti n g Sta r te d... - Page 9 *The Oversized High Capacity Feeder (OHCF) is not available with the 4590 Copier/Printer. X er o x 4 5 90 / 4110 C o pi e r /P r i n te r G e t ti n g Sta r te d...
- Page 10 1. P r o d uc t O v e r v i ew 1- 4 X e r o x 4 59 0 /4 11 0 Co p ie r / Pr in t er G et ti n g Sta r te d...
- Page 11 1. P r o d uc t O v e r v i ew Component Function Left cover Open to access the top cover and to remove paper jams. Front cover Open to remove paper jams. Confirmation indicator This lights when a document is loaded correctly. Document guides Use these guides to align the edges of the document.
- Page 12 1. P r o d uc t O v e r v i ew D Finisher 1- 6 X e r o x 4 59 0 /4 11 0 Co p ie r / Pr in t er G et ti n g Sta r te d...
- Page 13 1. P r o d uc t O v e r v i ew Component Function Post-process inserter Load paper for cover or transparency separators. Paper loaded here is (Cover/Transparency not used for copying. separator tray) / Tray 8 Decurl button For lighter weight paper especially, press this button to decurl the output.
- Page 14 1. P r o d uc t O v e r v i ew D2 Finisher Component Function Staple cartridge Contains staples; remove this cartridge to replace staples and clear staple jams. Staple waste container Container for staple waste; remove this cartridge when full (D2 Finisher only).
-
Page 15: Power On/Off
1. P r o d uc t O v e r v i ew Power on/off Switch on the power before operating the machine. The machine warms up in approximately five minutes after which you can make copies. Switch off the machine at the end of the day or when it is not in use for a long period of time. -
Page 16: Power Off
1. P r o d uc t O v e r v i ew Power off Perform the following to power off the machine: 1. Before switching off the power ensure that all copy or print jobs have completely finished. Furthermore, ensure that the <Online>... -
Page 17: Power Saver Mode
Sleep Mode than it does from a Low Power Mode. X er o x 4 5 90 / 4110 C o pi e r /P r i n te r G e t ti n g Sta r te d... -
Page 18: User Interface (Ui)
1. P r o d uc t O v e r v i ew User Interface (UI) The User Interface (UI) consists of the Control Panel and Touch Screen. The following describes the names and functions of components on the control panel. Component Function Control panel... - Page 19 Online indicator machine or is receiving data from a client. X er o x 4 5 90 / 4110 C o pi e r /P r i n te r G e t ti n g Sta r te d 1-13...
- Page 20 1. P r o d uc t O v e r v i ew 1- 1 4 X e r o x 4 59 0 /4 11 0 Co p ie r / Pr in t er G et ti n g Sta r te d...
-
Page 21: Basic Operation
Copying • Printing • Scanning • Printing local disk documents X er o x 4 5 90 / 4110 C o pi e r /P r i n te r G e t ti n g Sta r te d... -
Page 22: Basic Copying And Scanning
2. B a s i c O p e r at i on Basic copying and scanning This function and its related features copies original documents Copying: and does one of the following: • Immediately prints output copies of the original document. •... -
Page 23: Document Glass
Load documents face-up into the DADF. Remove any paper clips and staples before loading documents. X er o x 4 5 90 / 4110 C o pi e r /P r i n te r G e t ti n g Sta r te d... - Page 24 2. B a s i c O p e r at i on c. When the documents are loaded correctly, the Confirmation indicator lights. d. Move the document guide until it just touches the edge of the documents. NOTE: When loading documents in the DADF, the timing for lifting up the document feeder tray may be set.
- Page 25 • If you are scanning documents, proceed to Step 8. X er o x 4 5 90 / 4110 C o pi e r /P r i n te r G e t ti n g Sta r te d...
- Page 26 2. B a s i c O p e r at i on 4. Select Copy. If the previous settings still remain, press the Clear All button. 2- 6 X e r o x 4 59 0 /4 11 0 Co p ie r / Pr in t er G et ti n g Sta r te d...
- Page 27 NOTE: The features shown above may vary depending on your machine configuration. X er o x 4 5 90 / 4110 C o pi e r /P r i n te r G e t ti n g Sta r te d...
- Page 28 2. B a s i c O p e r at i on 7. Enter the desired number of copies by pressing the corresponding numbers on the keypad. • A maximum quantity of 9999 can be entered. • The entered number appears on the upper right of the display.
- Page 29 NOTE: For the purpose of this procedure, the Scan to Mailbox feature is used. 9. Select Scan to Mailbox. X er o x 4 5 90 / 4110 C o pi e r /P r i n te r G e t ti n g Sta r te d...
- Page 30 2. B a s i c O p e r at i on If the previous settings still remain, press the Clear All button. 10. Select a mailbox to which the data will be saved. NOTE: If you have the optional Color Scanner Kit installed, the lower portion of the screen show above will be different.
-
Page 31: Canceling A Copy Or Scan Job
Job Status button on the Control Panel. X er o x 4 5 90 / 4110 C o pi e r /P r i n te r G e t ti n g Sta r te d 2-11... -
Page 32: Printing
2. B a s i c O p e r at i on 4. From the Job Status screen, choose the job to cancel, and then select Stop. Printing Use the following procedure when printing from your client workstation. NOTE: The printing steps and screens may vary depending on the application software you are using. -
Page 33: Print Copy & Print Jobs Documents Procedure
1. Press the All Services button. 2. Select Check Mailbox. X er o x 4 5 90 / 4110 C o pi e r /P r i n te r G e t ti n g Sta r te d 2-13... - Page 34 2. B a s i c O p e r at i on 3. Select Copy & Print Jobs. 4. Select a mailbox. 5. Select Document List. 2- 1 4 X e r o x 4 59 0 /4 11 0 Co p ie r / Pr in t er G et ti n g Sta r te d...
- Page 35 8. Select the desired item or items. 9. Select Print. X er o x 4 5 90 / 4110 C o pi e r /P r i n te r G e t ti n g Sta r te d 2-15...
- Page 36 2. B a s i c O p e r at i on 2- 1 6 X e r o x 4 59 0 /4 11 0 Co p ie r / Pr in t er G et ti n g Sta r te d...
-
Page 37: Loading Paper
Ensure that the tray is set for the same size and orientation as it was before paper was depleted. X er o x 4 5 90 / 4110 C o pi e r /P r i n te r G e t ti n g Sta r te d... -
Page 38: Loading Paper In Trays 1 And 2
3. L o ad i ng Pa p er Loading paper in Trays 1 and 2 Use the following procedure for loading paper in trays 1 and 2. NOTE: When the machine runs out of paper during a copy or print job, the UI displays a message. -
Page 39: Loading Paper In Trays 3 And 4
Ensure that the paper guides fit correctly into the slots on the tray and release the levers. X er o x 4 5 90 / 4110 C o pi e r /P r i n te r G e t ti n g Sta r te d... -
Page 40: Loading Paper In Tray 5 (Bypass)
3. L o ad i ng Pa p er b. Ensure that the paper guides are adjusted to the same size as the paper in the tray. KEY POINT: Do not load paper above the MAX line. 6. Gently push the tray in until it stops. Loading paper in tray 5 (Bypass) If you copy or print to a paper size that is different from the paper loaded in the trays, use Tray 5, the Bypass for your copy or print... -
Page 41: Loading Paper In Optional (Hcf) Trays 6 And 7
KEY POINT: Do not load paper above the MAX line. 3. Gently push the tray in until it stops. X er o x 4 5 90 / 4110 C o pi e r /P r i n te r G e t ti n g Sta r te d... -
Page 42: Load Paper In The Optional Oversized High Capacity Feeder
3. L o ad i ng Pa p er Load paper in the optional Oversized High Capacity Feeder (Tray 6) NOTE: This optional tray is not available with the 4590 Copier/ Printer. 1. Pull out the tray towards you until it stops. When pulling out the paper tray, do it slowly. - Page 43 X er o x 4 5 90 / 4110 C o pi e r /P r i n te r G e t ti n g Sta r te d...
-
Page 44: Loading Paper In Tray 8 (Post-Process Inserter)
3. L o ad i ng Pa p er Loading paper in Tray 8 (Post-Process Inserter) Use the following procedure for loading paper into the Post-Process Inserter (Tray 8), KEY POINT: The Post-Process Inserter (Tray 8) is used when your desired output includes separators, or covers; therefore, it cannot have an image copied on to it. -
Page 45: Loading Tab Stock Into Any Tray
(the Bypass tray); refer to the illustration below: X er o x 4 5 90 / 4110 C o pi e r /P r i n te r G e t ti n g Sta r te d... -
Page 46: Load Tab Paper In Trays 3 To 4
3. L o ad i ng Pa p er Load tab paper in trays 3 to 4 1. Pull out the tray towards you until it stops. When pulling out the paper tray, do it slowly. If WARNING: pulled out with too much force, the tray can hit and injure your knees. -
Page 47: Loading Tab Paper In Tray 5 (Bypass)
Insert the paper slowly to the end along the paper guide. X er o x 4 5 90 / 4110 C o pi e r /P r i n te r G e t ti n g Sta r te d 3-11... -
Page 48: Loading Tab Paper In Tray 8 (Post-Process Inserter)
3. L o ad i ng Pa p er Loading tab paper in Tray 8 (Post-process inserter) 1. Hold the center of the paper guides and slide them to the desired paper size. 2. If the paper in already printed on, load the paper with the printed side facing up and with the tab side to be fed first. -
Page 49: Change/Confirm The Tray Settings
Copier/Printer. Select Save to return to the Tray screen. X er o x 4 5 90 / 4110 C o pi e r /P r i n te r G e t ti n g Sta r te d 3-13... -
Page 50: Copy/Print On Tabs
3. L o ad i ng Pa p er Select Save to return to the Paper Tray Attributes screen. Choose one of the following: a. If you want to change the attributes for another tray, repeat Step 2. - Step 9. b. -
Page 51: Network Print On Tabs With The Pcl Print Driver
Select the desired copies/quantity and OK to print the job. X er o x 4 5 90 / 4110 C o pi e r /P r i n te r G e t ti n g Sta r te d... -
Page 52: Network Print On Tabs With The Ps Print Driver
3. L o ad i ng Pa p er Network print on tabs with the PS print driver From your computer, open the desired document to print. Select File > Print. Select the desired printer (4110/4590). Select Properties. For Paper/Output, select: •... -
Page 53: Maintenance
1-800-599-2198. Staples are not included under metered price plans and ordered separately by calling 1-800-822-2200. X er o x 4 5 90 / 4110 C o pi e r /P r i n te r G e t ti n g Sta r te d... -
Page 54: Customer Replaceable Units (Crus)
Call 1-800-821-2797 to order a new Dry Ink/Toner Waste Container. KEY POINT: Please have your machine serial number and your Xerox 4110/4590 customer number ready when you call to order supplies. 4- 2 X e r o x 4 59 0 /4 11 0 Co p ie r / Pr in t er G et ti n g Sta r te d... -
Page 55: Problem Solving
Refer to your User Guide for more detailed information on various image quality problems. X er o x 4 5 90 / 4110 C o pi e r /P r i n te r G e t ti n g Sta r te d... -
Page 56: Paper Jams
5. P r o b le m S o l v in g Paper jams When a paper jams occurs, the machine stops and an alarm sounds. The UI displays a message. Follow the instructions for removing the jammed paper. If the paper tears while attempting to remove it, ensure that you remove any torn pieces from the machine. -
Page 57: Safety And Notices
Safety and Notices Safety notices This Xerox product and the recommended supplies are designed and tested to meet strict safety requirements. These include safety agency approval and compliance to established environmental standards. Please read the following instructions carefully before operating the product, and refer to them as needed to ensure the continued safe operation of your product. -
Page 58: Disconnect Device
If any of the following conditions occur, immediately switch off the power to the machine and disconnect the power cord from the electrical outlet. Call an authorized Xerox service representative to correct the problem. •... -
Page 59: Laser Safety
This product contains laser warning labels. These labels are intended for use by the Xerox Service Representative and are placed on or near panels or shields that require special tools for removal. Do not remove any of the panels. There are no operator serviceable areas in these covers. -
Page 60: Europe And Other Markets
This product contains laser warning labels. These labels are intended for use by the Xerox Service Representative and are placed on or near panels or shields that require special tools for removal. Do not remove any of the panels. There are no operator serviceable areas inside these covers. -
Page 61: Safety Standards
There are no parts behind these covers that you can maintain or service. Do not perform any maintenance procedures unless you have been trained to do them by a Xerox representative, or unless a procedure is specifically described in one of the manuals included with your press. -
Page 62: Operational Safety
6. S a fe t y a nd N o ti c es Operational safety Your Xerox equipment and supplies were designed and tested to meet strict safety requirements. These include safety agency examination, approval, and compliance with established environmental standards. -
Page 63: Ozone Safety
Xerox installation procedures, ensures that concentration levels meet safe limits. If you need additional information about ozone, request the Xerox publication, OZONE by calling 1-800-828-6571 in the USA. For a French language version, call 1-800-828-6571 in the USA, then press 2. -
Page 64: In Canada (Ices-003)
Council Directive 99/5/EC and applicable local laws or regulations as applicable. Safety extra low voltage approval This Xerox product is in compliance with various governmental agencies and national safety regulations. All system ports meet the Safety Extra Low Voltage (SELV) circuits for connection to customer-owned devices and networks. -
Page 65: Certifications In Europe
6 . S a fe ty a nd No ti c e s Certifications in Europe The CE marking that is applied to this product symbolizes Xerox Declaration of Conformity with the following applicable Directives of the European Union as of the dates indicated:... -
Page 66: It's Illegal
6. S a fe t y a nd N o ti c es It’s illegal... In the USA Congress, by statute, has forbidden the reproduction of the following subjects under certain circumstances. Penalties of fine or imprisonment may be imposed on those guilty of making such reproductions. - Page 67 6 . S a fe ty a nd No ti c e s Stamps and other representatives of value, of whatever denomination, which have been or may be issued under any Act of Congress. Adjusted Compensation Certificates for Veterans of the World Wars.
-
Page 68: In Canada
6. S a fe t y a nd N o ti c es In Canada Parliament, by statute, has forbidden the reproduction of the following subjects under certain circumstances. Penalties of fines or imprisonment may be imposed on those guilty of making such copies. -
Page 69: In Other Countries
Xerox ENERGY STAR equipment is preset at the factory. Your machine will be delivered with the timer for switching to Low Power Mode from the last copy/print output, set at 15 minutes. -
Page 70: Product Recycling And Disposal
This product may contain one or more Perchlorate-containing Perchlorate Material devices, such as batteries. Special handling may apply, please www.dtsc.ca.gov/hazardouswaste/perchlorate. If your product is not part of the Xerox program and you are managing its disposal, please follow the instructions provided in the above paragraph. European union...
Need help?
Do you have a question about the 4110 and is the answer not in the manual?
Questions and answers