
Related Manuals for A&D GP-61KS


Summary of Contents for A&D GP-61KS
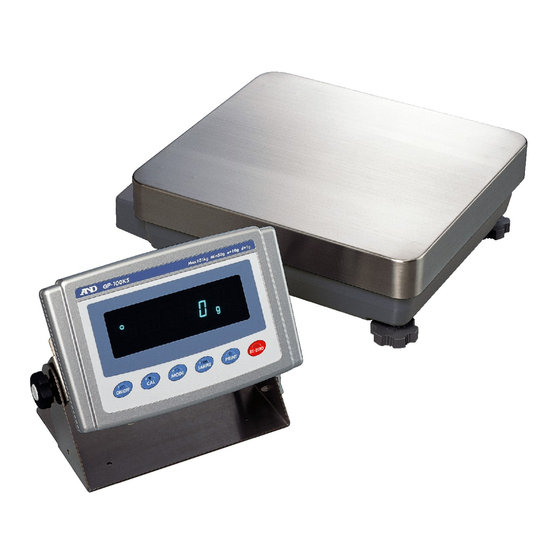
- Page 1 GP SERIES GP-12K/GP-20K /GP-30K/GP-32K GP-40K/GP-60K/GP-61K GP-100K/GP-102K GP-30KS/GP-32KS GP-60KS/ GP-61KS/GP-100KS Precision Balance INSTRUCTION MANUAL WM+PD4000273D...
- Page 2 © 2006 A&D Company Ltd. All rights reserved. No part of this publication may be reproduced, transmitted, transcribed, or translated into any language in any form by any means without the written permission of A&D Company Ltd. The contents of this manual and the specifications of the instrument covered by this manual are subject to change for improvement without notice.
-
Page 3: Table Of Contents
CONTENTS Basic operation 1. INTRODUCTION ..........................3 1-1 About This Manual ..........................3 1-2 Features ..............................3 1-3 Compliance ............................5 2. UNPACKING THE BALANCE ......................7 2-1 Unpacking ............................7 2-2 Installing the Balance ..........................8 3. PRECAUTIONS..........................9 3-1 Before Use ............................9 3-2 During Use ............................9 3-3 After Use............................10 3-4 Power Supply ............................10 3-5 Display Symbols and Key Operation .................... - Page 4 9-8 Data Format Examples ........................46 9-9 Clock and Calendar Function......................48 9-10 Comparator Function ........................50 9-11 Adding the Comparison Results ......................52 9-12 Main Display Comparison Function ....................52 10. ID NUMBER AND GLP REPORT ....................54 10-1 Setting the ID Number........................54 10-2 GLP Report .............................55 11.
-
Page 5: Basic Operation
1. INTRODUCTION This manual describes how the GP series balance works and how to get the most out of it in terms of performance. Read this manual thoroughly before using the balance and keep it at hand for future reference. 1-1 About This Manual This manual consists of the following five parts: Basic operation ...... - Page 6 Hold Function, provided for weighing a moving object such as an animal. Multiple Weighing Units, with most of the common units used around the world. Density Mode, for calculating the density of a solid. Accumulation Function, adding the weight values and outputting the sum. Adjustable Display Position, the standard type balance has a swing-arm to adjust the display position for optimum viewing.
-
Page 7: Compliance
1-3 Compliance Compliance with FCC Rules Please note that this equipment generates, uses and can radiate radio frequency energy. This equipment has been tested and has been found to comply with the limits of a Class A computing device pursuant to Subpart J of Part 15 of FCC rules. These rules are designed to provide reasonable protection against interference when equipment is operated in a commercial environment. -
Page 9: Unpacking The Balance
2. UNPACKING THE BALANCE 2-1 Unpacking The balance is a precision instrument. Unpack the balance carefully. Keep the packing material to be used for transporting the balance in the future. The packing contents depend on the balance model. See the illustrations to confirm that everything is contained. -
Page 10: Installing The Balance
Separate display type: GP-30KS/32KS/60KS/61KS/100KS Note Please confirm that the AC adapter type is correct for your local voltage and receptacle type. 2-2 Installing the Balance Install the balance as follows: 1. Refer to “3. PRECAUTIONS” for installing the balance. 2. Adjust the leveling feet to level the balance. Confirm it using the bubble spirit level. 3. -
Page 11: Precautions
3. PRECAUTIONS To get the optimum performance from the balance and acquire accurate weighing data, note the following: 3-1 Before Use Install the balance in an environment where the temperature and humidity are not excessive. The best operating temperature is about 20°C / 68°F at about 50% relative humidity. -
Page 12: After Use
This balance uses a strong magnet as part of the balance assembly, so please use caution when weighing magnetic materials such as iron. If there is a problem, use the underhook on the bottom of the balance to suspend the material away from the influence of the magnet. -
Page 13: Display Symbols And Key Operation
3-5 Display Symbols and Key Operation Key operation Key operation affects how the balance functions. The basic key operations are: “Press and release the key immediately” or “Press the key” = normal key operation during measurement “Press and hold the key” Display symbols Each key, when pressed or when pressed and held, functions as follows: When pressed... -
Page 14: Smart Range Function
3-6 Smart Range Function The GP-32K, GP-32KS and GP-102K are equipped with two ranges. The precision range has a higher resolution. The standard range has normal resolution. The range is switched automatically, depending on the value displayed. Pressing the RE-ZERO key allows weighing in the precision range, regardless of the tare value. -
Page 15: Weighing Units
4. WEIGHING UNITS 4-1 Units With the GP series balance, the following weighing units and weighing modes are available : A unit or mode can be selected and stored in the function table as described in “4-2 Changing the Units”. If a weighing mode (or unit of weight) has been turned off, that mode or unit will be missing in the sequence. - Page 16 The tables below indicate the weighing capacity and the minimum display for each unit, depending on the balance model. Unit GP-12K GP-20K GP-30K GP-61K GP-40K Minimum Minimum GP-30KS GP-61KS display display Capacity Capacity Gram 12000.0 21000.0 31000.0 61000.0 41000.0 Kilogram 12.0000...
- Page 17 Unit GP-32K/ GP-32KS Standard range Precision range Capacity Minimum display Capacity Minimum display Gram 31000 6100.0 Kilogram 31.000 0.001 6.1000 0.0001 Ounce (Avoir) 1093.50 0.05 215.170 0.005 Pound 68.345 0.005 13.4480 0.0005 Pound/Ounce 68L 5.5 13L 7.17 0.01 Troy Ounce 996.65 0.05 196.120...
-
Page 18: Changing The Units
4-2 Changing the Units The units or modes can be selected and stored in the function table. The sequence of displaying the units or modes can be arranged so as to fit the frequency of use in the function table. Select a unit or mode and arrange the sequence of display as follows: 1 Press and hold the SAMPLE key until ba5fnc of the function table is displayed, then release the key. -
Page 19: Weighing
5. WEIGHING 5-1 Basic Operation (Kilogram Mode) 1 Place a container on the weighing pan, if necessary. Press the RE-ZERO key to cancel the weight (tare). The balance displays 0. 0 000 kg. (The decimal point position depends on the balance model.) 2 Place a sample on the pan or in the container. -
Page 20: Counting Mode (Pcs)
5-2 Counting Mode (PCS) This is the mode to determine the number of objects in a sample based on the standard sample unit mass. Unit mass means the mass of one sample. The smaller the variables in each sample unit mass is, the more accurate the counting will be. -
Page 21: Counting Operation
Counting operation 7 Place the samples to be counted on the pan. Note Up to 50 unit masses can be stored in memory for the multiple sample. For details, refer to “11. DATA MEMORY”. Counting mode using the ACAI function The ACAI is a function that improves the accuracy of the unit mass automatically by increasing the number of samples as the counting process proceeds. -
Page 22: Percent Mode (%)
5-3 Percent Mode (%) This is the mode to display the weight value in percentage compared to a 100% reference mass and is used for target weighing or checking the sample variable. Selecting the percent mode 1 Press the MODE key to select % (percent mode). -
Page 23: Accumulation Function
5-5 Accumulation Function The accumulation function adds the weighing data and displays the total value. To use the accumulation function, set the “Accumulation function (add)” parameter of the function table as described below. Note While the accumulation function is in use, the data memory function is not available. When using the accumulation function, make sure that the “Data memory (data)”... - Page 24 Using the accumulation function Use the keys below to operate the accumulation function. MODE key: Displays the weighing data and the total value alternately each time it is pressed. Will not change the unit while the accumulation function is in use. RE-ZERO key: Sets the display to zero while the weighing data is displayed.
-
Page 25: Response Adjustment / Self Check Function
6. RESPONSE ADJUSTMENT / SELF CHECK FUNCTION This function detects the influence on weighing that is caused by drafts and/or vibration at the place where the balance is installed and sets the response characteristic automatically. When this function is selected, the balance self-checks the performance at the same time. Two modes of response adjustment are available: automatic and manual. -
Page 26: Manual Response Adjustment
Notes If improper performance is found in the self check, the balance displays CH no. Contact the local A&D dealer for repair. If the automatic response adjustment fails, the balance displays CH ng. Check the ambient conditions such as breeze and vibration, also check the weigning pan. Then, perform the adjustment again. -
Page 27: Calibration
20 kg, 30 kg, 40 kg GP-60K/ GP-60KS 30 kg, 40 kg, 50 kg, 60 kg -15 g to +15 g GP-61K/ GP-61KS 30 kg, 40 kg, 50 kg, 60 kg -1.5 g to +1.5 g GP-100K/GP-100KS 60 kg, 80 kg, 100 kg... -
Page 28: Automatic Self Calibration (Calibration Due To Changes In Temperature)
Display This indicator means “the balance is measuring calibration data”. Do not allow vibration or drafts to affect the balance while this indicator is displayed. 7-2 Automatic Self Calibration (Calibration due to changes in temperature) This function automatically calibrates the balance when the balance detects an ambient temperature change. -
Page 29: Calibration Using The Internal Mass (One-Touch Calibration)
7-3 Calibration Using the Internal mass (One-Touch Calibration) This function calibrates the balance using the internal mass. The only operation required is to press the CAL key. Operation 1 Plug in the AC adapter and warm up the balance for at least 30 minutes with nothing on the weighing pan. -
Page 30: Calibration Using An External Weight
7-4 Calibration Using an External Weight This function calibrates the balance using an external weight. Operation 1 Plug in the AC adapter and warm up the balance for at least 30 minutes with nothing on the pan. Calout 2 Press and hold the CAL key until displayed, then release the key. - Page 31 5 Confirm that there is nothing on the pan and press the PRINT key. The balance measures the zero point. Do not allow vibration or drafts to affect the balance. The balance displays the calibration weight value. 6 Place the displayed calibration weight on the pan and press the PRINT key.
-
Page 32: Calibration Test Using An External Weight
7-5 Calibration Test Using an External Weight This function tests the balance weighing accuracy using an external mass and outputs the result. This is available only when the “GLP output (info)” parameter is set to “1” or “2”. (Calibration test does not perform calibration.) Operation 1 Connect the AC adapter and warm up the balance... - Page 33 5 Confirm that there is nothing on the pan and press the PRINT key. The balance measures the zero point and displays the measured value. Do not allow vibration or drafts to affect the balance. The balance displays the target weight value. 6 Place the displayed target weight on the pan and press the PRINT key.
-
Page 34: Correcting The Internal Mass Value
Correction reference value Correction range GP-12K 10 kg GP-20K -5.0 g to +5.0 g GP-30K/GP-30KS 20 kg GP-32K/ GP-32KS GP-61K/ GP-61KS GP-40K 40 kg GP-60K/ GP-60KS 60 kg -50 g to +50 g GP-100K/GP-100KS 100 kg -50 g to +50 g... - Page 35 Operation 1 Calibrate the balance using the internal mass. (one-touch calibration) Then, place an external weight and confirm the value to be corrected. In the example, the value is to be corrected by 0.6 gram in 20 kilograms. 2 Press the ON:OFF key to turn off the display. 3 While pressing and holding the PRINT key and the SAMPLE key, press the ON:OFF key.
-
Page 36: Function Switch And Initialization
8. FUNCTION SWITCH AND INITIALIZATION 8-1 Permit or Inhibit The balance stores parameters that must not be changed unintentionally (e.g. Calibration data for accurate weighing, Data for adapting to the operating environment, Control data for the RS-232C interface). There are five switches for the purpose of protecting these parameters. Each switch can select either “permit”... -
Page 37: Initializing The Balance
8-2 Initializing the Balance This function returns the following parameters to factory settings. Calibration data Function table The sample unit mass value (counting mode), 100% reference mass value (percent mode) The data that is stored in the balance using the data memory function External calibration weight and target weight value Function switch settings Liquid density and temperature in the density mode... -
Page 38: Function Table
9. FUNCTION TABLE The function table reads or rewrites the parameters that are stored in the balance. These parameters are maintained in non-volatile memory, even if the AC adapter is removed. 9-1 Structure and Sequence of the Function Table The function table menu consists of two layers. The first layer is the “Class” and the second layer is the “Item”. -
Page 39: Details Of The Function Table
9-3 Details of the Function Table... - Page 41 Caution The balance may not transmit the data completely at the specified refresh rate, depending on the baud rate or data added to the weighing data such as time, date and ID number.
-
Page 42: Description Of The Class "Environment, Display
9-4 Description of the Class “Environment, Display” Condition ( Cond Cond 0 This parameter is for sensitive response to the fluctuation of a weight value. Used for powder target weighing, weighing a very light sample or when quick response weighing is required. After setting, the balance displays FAST. - Page 43 Zero tracking ( trc ) This function tracks zero point drift caused by changes in the environment and stabilizes the zero point. When the weighing data is only a few digits, turn the function off for accurate weighing. Note Digit, when used for the GP series balance, indicates the smallest displayable weighing value. trc 0 The tracking function is not used.
-
Page 44: Description Of The Item "Data Output Mode
9-5 Description of the Item “Data output mode” The parameter setting of “Data output mode (prt)” applies to the performance when the “Data memory (data)” parameter is set to “2” (to store the weighing data) and when the data is transmitted using the RS-232C interface. -
Page 45: Description Of The Item "Data Format
Interval memory mode The weighing data is periodically stored in memory. dout prt 3 Required setting Interval memory mode dout data 2 Data memory function is used. Stores weighing data. dout Interval time dout 5-td1, 2, or 3 Adds the time and date. Optional setting Example “For periodical weighing without a computer command and to output... - Page 46 5if type 2 KF format This is the Karl-Fischer moisture meter format and is used when the peripheral equipment can only communicate using this format. This format consists of fourteen characters excluding the terminator. This format has no header characters. The polarity sign is placed before the data, with spaces in place of leading zeros, if the data is not zero or overloaded.
-
Page 47: Description Of The Data Format Added To The Weighing Data
9-7 Description of the Data Format Added to the Weighing Data ID number dout 5-id 1 The number to identify a specific balance. This format consists of seven characters excluding the terminator. Data number dout d-no 1 This format outputs the data number just before the data is transmitted using the RS-232C interface. This format consists of six characters excluding the terminator. -
Page 48: Data Format Examples
9-8 Data Format Examples... - Page 49 Note When “Pound Ounce” is selected, the data is output with the unit of ounce (oz).
-
Page 50: Clock And Calendar Function
9-9 Clock and Calendar Function The balance is equipped with a clock and calendar function. When the “GLP output (info)” parameter is set to “1” or “2” and the “Time/Date output (5-td)” parameter is set to “1”, “2” or “3”, the time and date are added to the output data. - Page 51 Confirming the date 6 The current date is displayed with all the digits blinking. To change the display order of year (y), month (n) and day (d), press the MODE key. The date is output in the order as specified. When the date is correct and the operation is to be finished, press the CAL key and proceed to step 8.
-
Page 52: Comparator Function
9-10 Comparator Function The results of the comparison are indicated by HI OK LO on the display. Operating conditions: No comparison Comparison when the weighing data is stable or overloaded, excluding “near zero” Comparison when the weighing data is stable or overloaded, including “near zero” Continuous comparison, excluding “near zero”... -
Page 53: Setting Example
Weighing input mode Press the RE-ZERO key. The balance displays 0. 0 g. Place a sample, with a mass that corresponds to the upper limit value, on the pan. Press the PRINT key to store the upper limit value. Remove the sample. The balance displays Cp lo . With Cp lo displayed, press the PRINT key. -
Page 54: Adding The Comparison Results
Cp lnt 9 With displayed, press the PRINT key. The current setting of the tolerance value is displayed with all the digits blinking. When the current setting is not to be changed, press the PRINT or CAL key to proceed to step10. When the current setting is to be changed, press the RE-ZERO key. - Page 55 Setting the function table 2 Press and hold the SAMPLE key until ba5fnc of the function table is displayed, then release the key. 3 Press the SAMPLE key several times to display Cp fnc . 4 Press the PRINT key. 5 Press the SAMPLE key several times to display Cp-b 0 .
-
Page 56: Id Number And Glp Report
10. ID NUMBER AND GLP REPORT The ID number is used to identify the balance when Good Laboratory Practice (GLP) is used. The ID number is maintained in non-volatile memory even if the AC adapter is removed. The GLP output format is selected at “GLP output (info)” of the function table and can be output to a personal computer or printer using the RS-232C serial interface. -
Page 57: Glp Report
10-2 GLP Report Set the following parameters to output the report. To print the report, set the “GLP output (info)” parameter to “1” and use MODE 3 of the AD-8121B. For details on using the printer, refer to “15-1 Connection to the AD-8121B Printer”. To output the report to a personal computer using the RS-232C interface, set the “GLP output (info)”... - Page 58 Calibration report using an external weight When the setting is “info 1”: When the setting is “info 2”: Calibration test report using an external weight (Calibration test does not perform calibration.) When the setting is “info 1”: When the setting is “info 2”:...
- Page 59 Title block and end block When weight values are recorded as GLP data, a “Title block” is inserted at the beginning and an “End block” is inserted at the end of a group of weight values in the GLP report. Note To output the report to an AD-8121B , use MODE 3 of the AD-8121B.
-
Page 60: Data Memory
11. DATA MEMORY Data memory is a function to store weighing data, calibration data and unit mass in memory. Of the data in memory, the balance can only display the weighing data. The weighing data and calibration data in memory are available for outputting at one time to a printer or personal computer. One of the following data sets can be stored: Weighing data (Up to 200 sets. -
Page 61: Memory For Weighing Data
11-2 Memory for Weighing Data The data memory function can store 200 sets of weighing data (100 set if time and date are added). Even if the AC adapter is removed, the data is maintained in non-volatile memory. It is not necessary that the printer or computer be continually connected to the balance, because the balance stores the weighing data in memory. - Page 62 The following commands can not be used during data storage. Query command for weighing data. Query command for stable weighing data. Query command for weighing data. Query command for continuous weighing data. Setting the function table Parameter settings for each output mode are as follows: Item Data output Auto...
- Page 63 Recalling the memory data Confirm that the “Data memory (data)” parameter is set to “2”. 1 Press and hold the PRINT key until reCall is displayed, then release the key. 2 Press the PRINT key to enter the memory recall mode. The type of data appears in the upper left of the display as shown to the right: Recall the data in memory using the following keys RE-ZERO key...
-
Page 64: Memory For Calibration And Calibration Test Data
11-3 Memory for Calibration and Calibration Test Data Calibration data (when and how it is performed) and calibration test data can be stored in memory. All the data in memory is available to be output at one time to a printer or personal computer. Up to 50 data sets of the latest calibration or calibration test can be stored. -
Page 65: Memory For Unit Mass In The Counting Mode
11-4 Memory for Unit Mass in the Counting Mode The data memory function can store 50 sets of unit mass for the counting mode. Even if the AC adapter is removed, the data is maintained in non-volatile memory. Among the 50 sets, “p01”... - Page 66 Weighing input mode In the weighing input mode, the specified number of samples is placed on the pan to store the unit mass. Re-storing the unit mass or performing Automatic Counting Accuracy Improvement (ACAI) on the re-stored unit mass is possible. Follow the procedure described in “5-2 Counting Mode (PCS)”. Use the following keys to store a unit mass in weighing input mode.
-
Page 67: Memory For Comparator Settings
11-5 Memory for Comparator Settings The data memory function can store 20 sets of upper and lower limit values for the comparator mode. The reference value or tolerance value for the comparator mode can not be stored in memory. The upper and lower limit values in memory can be recalled easily using the MODE key and used for weighing. - Page 68 Digital input mode In the digital input mode, the upper and lower limit values are entered digitally using the keys. The display in the digital input mode is shown below. The digit to be changed blinks Use the following keys to store upper and lower limit values in digital input mode. SAMPLE key select digit...
-
Page 69: Memory For Tare Value
Recalling the upper and lower limit values (Quick selection mode) The procedure below describes an easy way to recall the upper and lower limit values to be used for weighing. When the recalled upper and lower limit values are to be changed, refer to “Storing the upper and lower limit values”. - Page 70 Storing the tare value To store a new tare value: Recall the stored tare value to be changed (“t01” to “t20”). Then, change the recalled tare value using the digital input mode or the weighing input mode, and store the new value.
- Page 71 Weighing input mode In the weighing input mode, a sample tare container is placed on the pan to store the tare value. Notes Pressing the CAL key will interrupt the operation and the balance will return to the tare value confirmation mode (step 3 in “Storing the tare value”).
- Page 72 Recalling the tare value (Quick selection mode) The procedure below describes an easy way to recall the tare value to be used for weighing. When the recalled tare value is to be changed, refer to “Storing the tare value”. 1 Set the “Data memory (data)” parameter to “5”. 2 Press the MODE key to enter the tare value recalling mode.
-
Page 73: Data Memory: Quick Selection Mode
11-7 Data Memory: Quick Selection Mode The data memory has a quick selection mode, to recall data in memory quickly. Using the quick selection mode, the comparator settings or the tare value, whichever is selected in the function table, can be recalled, by a simple operation, using the MODE key. Note While the data memory function is in use, unit selection using the MODE key is not available. -
Page 74: Data Memory: Confirmation And Storage Mode
11-8 Data Memory: Confirmation and Storage Mode The confirmation and storage mode can change and store the recalled data. Of the three types of memory data listed below, one may be selected in the function table, and is available for changes using this mode. Unit mass in the counting mode Comparator settings Tare value... -
Page 75: Programmable-Unit
12. PROGRAMMABLE-UNIT This is a programmable unit conversion function. It multiplies the weighing data in kilograms by an arbitrary coefficient set in the function table and displays the result. The coefficient must be within the range between the minimum and maximum shown below. If the coefficient set is beyond the range, an error is displayed and the balance returns to the coefficient setting mode, prompting to enter an appropriate value. -
Page 76: Density Measurement
13. DENSITY MEASUREMENT The GP series balance is equipped with a density mode. It calculates the density of a solid using the weight of a sample in air and the weight in liquid. The density mode was not selected for use when the balance was shipped from the factory. To use the mode, change the function table and activate the density mode. - Page 77 (2) Selecting a parameter to set. 1 Press the SAMPLE key to select a parameter to set. Each pressing of the key switches the parameter. 2 Press the RE-ZERO key to enter the inputting mode of the parameter selected. (3) Setting the parameter. A.
- Page 78 C. Entering the density of a liquid. Two ways to set the density of a liquid are available in the function table, Liquid density input (ldin): by entering the water temperature or by entering the density directly. • Enter the water temperature (ldin 0) The water temperature currently set (unit:°C, factory setting : 25°C) is displayed.
-
Page 79: I/O Unit Specifications (Standard)
14. I/O UNIT SPECIFICATIONS (Standard) 14-1 RS-232C//External Contact Input D-Sub 25 pin numbers D-Sub 25 pin assignments Pin No. Signal name Interface type Direction Description Frame ground RS-232C Input Receive data RS-232C Output Transmit data RS-232C Input Ready to send RS-232C Output Clear to send... - Page 80 External contact input By connecting pin 18 to pin 7, or pin 19 to pin 7, for more than 100 ms, the same operation as performed by pressing the RE-ZERO key or the PRINT key, will be performed. Use of example The external input connector (AX-HDB-25P/CTF) and the foot switch (AX-SW128) are sold separately.
-
Page 81: Connection To Peripheral Equipment
15. CONNECTION TO PERIPHERAL EQUIPMENT 15-1 Connection to the AD-8121B Printer Set the following parameters to use the AD-8121B printer. Function setting Description dout prt Selects a print mode. dout ap-p 0-2 Selects the polarity for the auto print mode. dout ap-b 0-2 Selects the auto print difference. -
Page 82: Using Windows Communication Tools (Winct)
15-3 Using Windows Communication Tools (WinCT) When Windows is used as an operating system in a personal computer, the provided WinCT software can be used to transmit the weighing data to the personal computer. The WinCT software has two communication methods: “RsCom” and “RsKey”. For details on WinCT, refer to the WinCT instruction manual. -
Page 83: Commands
16. COMMANDS 16-1 Command List Note A command has a terminator added, that is specified using “5if Crlf” of the function table, and is sent to the balance. Commands to query weighing data Cancels the S or SIR command. Requests the weighing data immediately. Requests the weighing data when stabilized. -
Page 84: Acknowledge Code And Error Codes
16-2 Acknowledge Code and Error Codes When the “Serial interface function (5if)” parameter is set to “erCd 1”, the balance outputs <AK> code or error code to each command as follows: <AK> (06h) Acknowledge in ASCII code. When the balance receives a command to request data and can not process it, the balance transmits an error code (EC, Exx). -
Page 85: Maintenance
17. MAINTENANCE Do not disassemble the balance. Contact the local A&D dealer if the balance needs service or repair. Use the original packing material for transportation. Do not use organic solvents to clean the balance. Clean the balance with a lint free cloth that is moistened with warm water and a mild detergent. -
Page 86: Error Codes
Sample and container Has the sample absorbed or lost moisture due to the ambient conditions such as temperature and humidity? Has the temperature of the container been allowed to equalize to the ambient temperature? Refer to “3-2 During Use”. Is the sample charged with static electricity? Refer to “3-2 During Use”. Is the sample of magnetic material such as iron? Caution is required for weighing magnetic materials. - Page 87 Display Error code Description Weighing pan Error The weight value is too light. Confirm that the weighing pan is properly installed and calibrate the balance. Sample mass error The balance can not store the sample for the counting mode or for the percent mode because it is too light. Use a larger sample.
-
Page 88: Asking For Repair
Display Error code Description Memory type error Type of memory set in the function table and type of data stored are different. For details, refer to “11. DATA MEMORY”. Communications error EC, E00 A protocol error occurred in communications. Confirm the format, baud rate and parity. Undefined command error EC, E01 An undefined command was received. -
Page 89: Specifications
19. SPECIFICATIONS GP-12K GP-20K GP-30K GP-32K GP-40K GP-30KS GP-32KS Weighing capacity 12 kg 21 kg 31 kg 31 kg 41 kg Maximum display 12.0084 kg 21.0084 kg 31.0084 kg 31.008 kg 41.0080 kg (See bottom for the description of ∗) 6.1009 kg∗... - Page 90 Approx. 14VA (supplied to the AC adapter ) External dimensions (WxDxH, mm) 372 x 615 x 130 373 x 615 x 130 (GP-60KS/ GP-61KS: (GP-100KS: 346 x 443 x 130 ) 344 x 442 x 130 ) ∗∗∗∗ ∗∗∗∗ Net weight Approx.
-
Page 91: External Dimensions
20. EXTERNAL DIMENSIONS Standard Type: GP-12K/20K/30K/32K/40K/60K/61K/100K/102K Note The size in parentheses is for the GP-100K/102K Unit: mm... - Page 92 Separate Display Type: GP-30KS/32KS/60KS/61KS/100KS Note The size in parentheses is for GP-100KS Unit: mm...
-
Page 93: Options
21. OPTIONS AD-8121B Printer Compact dot-matrix printer Statistical function, clock and calendar function, interval print function, graphic print function, dump print mode 5 x 7 dots, 16 characters per line Print paper (AX-PP143, 45 (W) x 50 (L) mm , ø65 mm) AC adapter or alkaline battery OP-04: Comparator output (relay/ with a buzzer)/RS-232C/Current loop Generates a relay output corresponding to HI , OK and LO in the display. -
Page 94: Terms/Index
22. TERMS/INDEX Terms Stable value The stable weight data, indicated by the illuminated stabilization indicator. Environment Ambient conditions such as vibration, drafts, temperature, static electricity and magnetic fields which affect the weighing operation. Store To save the weighing data, unit mass or calibration data using the data memory function. - Page 95 Index Cp Hi ..............37 Cp in ..............37 Keys and symbols Cp lmt ..............37 ON/OFF key ..........11 Cp ref ..............37 SAMPLE key ...........11, 12 Cp-b ..............37 MODE key..........11, 13 Cp-lo ..............37 Cp-r ..............37 CAL key............11 Crlf PRINT key .............11 ..............
- Page 96 Gross indicator ............41 Permit ..............34 Grounding terminal..........7, 8 Power consumption ........... 87, 88 PRINT key............11, 16 Printer bracket ............91 - H - Prior notice indicator of automatic self calibration ..11 Hold ............37, 40 Processing indicator ..........11 Hold function ............
- Page 97 MEMO...
- Page 98 MEMO...
Need help?
Do you have a question about the GP-61KS and is the answer not in the manual?
Questions and answers