
Subscribe to Our Youtube Channel
Related Manuals for Gefen GTV-AUDDEC-N


Summary of Contents for Gefen GTV-AUDDEC-N
- Page 1 HD Switcher 3GSDI Audio Embedder w/ Audio Decoding DISPLAYS SOURCES GTV-AUDDEC-N User Manual Rev A4...
-
Page 2: Important Safety Instructions
4x1 HD Switcher w/ Audio Decoding Important Safety Instructions GENERAL SAFETY INFORMATION Read these instructions. Keep these instructions. Heed all warnings. Follow all instructions. Do not use this product near water. Clean only with a dry cloth. Do not block any ventilation openings. Install in accordance with the manufacturer’s instructions. -
Page 3: Warranty Information
Gefen warrants the equipment it manufactures to be free from defects in material and workmanship. If equipment fails because of such defects and Gefen is notified within two (2) years from the date of shipment, Gefen will, at its option, repair or replace the equipment, provided that the equipment has not been subjected to mechanical, electrical, or other abuse or modifications. - Page 4 4x1 HD Switcher w/ Audio Decoding is a trademark of Gefen, LLC. Important Notice Gefen, LLC reserves the right to make changes in the hardware, packaging, and any accompanying documentation without prior written notice. HDMI, the HDMI logo, and High-Definition Multimedia Interface are trademarks or registered trademarks of HDMI Licensing in the United States and other countries.
- Page 5 3GSDI Audio Embedder 4x1 HD Switcher w/ Audio Decoding Operating Notes • The Digital Audio Decoder for HDMI has 8 RCA outputs, intended to be used with a separate amplifier, and supports a maximum of six discrete channels of audio. 2 additional connectors are available for bi-amping the front left and right channels.
- Page 6 4x1 HD Switcher w/ Audio Decoding Features and Packing List Features • Supported HDMI Features: ► Resolutions up to 1080p Full HD ► HDCP compliant ► 12-bit Deep Color ► 3DTV pass-through ► Lip Sync pass-through • Supported audio formats: LPCM, Dolby® Pro Logic, Dolby® Pro Logic II, Dolby® Digital •...
-
Page 7: Packing List
The 4x1 HD Switcher w/ Audio Decoding ships with the items listed below. If any of these items are not present in your box when you first open it, immediately contact your dealer or Gefen. • 1 x 4x1 HD Switcher w/ Audio Decoding •... -
Page 8: Table Of Contents
3GSDI Audio Embedder 4x1 HD Switcher w/ Audio Decoding Table of Contents Getting Started Panel Layout ......................2 Front ......................2 Back ......................4 IR Remote Control Unit ..................6 Back ......................8 Installing the Battery ..................9 Setting the IR Channel .................. 9 Installation ...................... - Page 9 4x1 HD Switcher w/ Audio Decoding Table of Contents Appendix Menu System Summary ..................80 Main Menu ....................80 Speaker Size Menu ..................82 Speaker Level Menu ................... 83 Speaker Distance Menu ................85 Tone Control Menu ..................87 Audio Setup Menu ..................88 Misc Setup Menu ..................
-
Page 11: 01 Getting Started
HD Switcher w/ Audio Decoding DISPLAYS SOURCES 01 Getting Started Panel Layout ......................2 Front ......................2 Back ......................4 IR Remote Control Unit ..................6 Back ......................8 Installing the Battery ..................9 Setting the IR Channel .................. 9 Installation ...................... -
Page 12: Panel Layout
Getting Started Panel Layout Front Panel Name Description This IR sensor receives commands from the included IR Remote Control Unit. Mute ► This button will cycles between Mute-On and Mute-Off modes. When the Mute-On mode is enabled, all audio output will be muted. While in the Menu System this button will cycle through available options in the right direction when a feature has been selected... - Page 13 Getting Started Panel Layout Name Description Volume ▼ Press this button to decrease the volume level of the audio outputs. While in the Menu System, this button is used to scroll down through the current menu options. Using the Menu System for more information.
-
Page 14: Back
Getting Started Panel Layout Back Panel Name Description Line Out These RCA connectors are only used in (Front Bi-Amp) Bi-Amp mode. Line Out Use RCA cables to connect with an external (Surround, C, Sub, Front) amplifier. Line In (L / R) L/R RCA-type audio inputs for analog audio. - Page 15 HDMI Out Connect an HDMI cable between this connector and an HDTV display. IR Ext Connect an IR Extender (Gefen part no. EXT-RMT-IREXTN) to this port to extend the range of the IR remote control unit. Trigger (Out -/+) Provides 11.5 V DC when the Switch is powered ON.
-
Page 16: Ir Remote Control Unit
Getting Started IR Remote Control Unit Name Description MUTE Press this button to mute or unmute the audio output. MODE Press this button to cycle through each of the available audio modes. These buttons are the equivalent of the A/S/D/W/ ENTER Input ◄, Volume ▼, Mute ►, Volume ▲, and Mode / OK buttons on the front panel. - Page 17 Getting Started IR Remote Control Unit Name Description COAX Press this button to select the S/PDIF audio input source. POWER Press this button to toggle between power ON and standby mode . The Power LED indicator will indicate the current power state. Standby Mode / Powering the Switcher for more information.
-
Page 18: Back
Getting Started IR Remote Control Unit Bottom (shown with cover removed) Name Description DIP switch bank Use these DIP switches to set the IR channel of the remote. See Setting the Remote IR Channel for details. Primary battery slot Holds the battery for operating the remote. (shown without battery) Use only 3V CR2032-type batteries. -
Page 19: Installing The Battery
Getting Started IR Remote Control Unit Installing the Battery The IR remote control unit ships with two batteries. Only one battery is required for operation. The second battery is a spare. Use only 3V CR2032-type batteries. Remove the back cover the IR Remote Control unit. Insert the included battery into the primary battery slot. -
Page 20: Installation
S/PDIF AUDIO CABLE SPEAKER CABLE Game Console TRIGGER CABLE IR Extender RS-232 CABLE Electric Screen Cable Box HDMI CABLE GTV-AUDDEC-N Blu-ray Player C - N D D E - A U G T V HD Display Amplifier p [D 10 80... -
Page 23: Operating The 4X1 Hd Switcher W/ Audio Decoding
HD Switcher w/ Audio Decoding DISPLAYS SOURCES 02 Operating the 4x1 HD Switcher w/ Audio Decoding Front Panel Controls ................... 14 Home Screen ....................14 Standby Mode / Powering the Switcher ............14 Selecting the Input Source ................15 Adjusting the Volume .................. 16 Muting the Audio Output ................ -
Page 24: Front Panel Controls
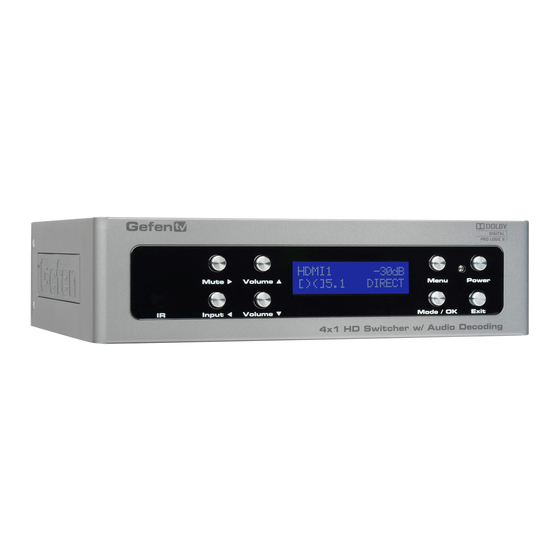
Operating the 4x1 HD Switcher w/ Audio Decoding Front Panel Controls Home Screen The Home Screen displays information regarding the current settings of the Switcher. The Home Screen is also used in conjunction with navigating the built-in Menu System. After powering on the Switcher, the Home Screen will be displayed. The Home Screen indicates the currently selected A/V input, the current volume setting, the audio input format, and the audio processing mode: Audio Gain... -
Page 25: Selecting The Input Source
Operating the 4x1 HD Switcher w/ Audio Decoding Front Panel Controls Selecting the Input Source Press the Input ◄ button to cycle through each input source. The table below lists which inputs are active for each selection. A/V Input Displays the currently selected A/V input H1 HD -10db... -
Page 26: Adjusting The Volume
Operating the 4x1 HD Switcher w/ Audio Decoding Front Panel Controls Adjusting the Volume Use the Volume ▲ and Volume ▼ buttons to increase or decrease the audio output gain. The ▲ or ▼ buttons on the IR Remote Control can also be used to control the audio output gain. -
Page 27: Changing The Audio Processing Mode
Operating the 4x1 HD Switcher w/ Audio Decoding Front Panel Controls Changing the Audio Processing Mode Successively press the Mode / OK button on the front panel to cycle through the different audio processing modes. The Mode button on the IR Remote Control can also be used to cycle through the audio modes. -
Page 28: Using The Menu System
Operating the 4x1 HD Switcher w/ Audio Decoding Using the Menu System The 4x1 HD Switcher w/ Audio Decoding comes with a built-in menu system which provides control over additional audio features. The following examples demonstrate some of the more common features of the 4x1 HD Switcher w/ Audio Decoding. Setting the Speaker Size Speaker size is determined by the ability of a speaker to reproduce low frequencies. -
Page 29: Main Menu
Operating the 4x1 HD Switcher w/ Audio Decoding Using the Menu System Press the Exit button to save the changes and return to the Speaker Size menu. Press the Exit button a second time to return to the home screen. H1 HD -30DB NONE... -
Page 30: Setting The Speaker Levels
Operating the 4x1 HD Switcher w/ Audio Decoding Using the Menu System Setting the Speaker Levels When using the IR Remote Control, the INFO | TEST TONE button is used to produce a test tone to adjust the output level of each channel. The test tone can also be enabled or disabled using the TEST command. -
Page 31: Setting The Speaker Distance
Operating the 4x1 HD Switcher w/ Audio Decoding Using the Menu System Setting the Speaker Distance Setting the correct speaker distance is required to make sure that the sounds from each speaker reach your ear at precisely the same time. The distance for each speaker can be set in 1.5 foot (0.5 meter) increments within a range of 0 feet - 33 feet (10 meters). - Page 32 Operating the 4x1 HD Switcher w/ Audio Decoding Using the Menu System Using the IR Remote Control From the home screen, press the MENU button. Use the ▲ or ▼ buttons to navigate to the Speaker Distance menu: MAIN MENU SPEAKER DISTANCE Press the ENTER button.
-
Page 33: Adjusting The Tone Control
Operating the 4x1 HD Switcher w/ Audio Decoding Using the Menu System Adjusting the Tone Control The Tone Control menu provides the ability to adjust the bass and treble to personal preference. Treble and bass can be increased or decreased in 1 dB intervals, within a range of -12 dB to +12 dB. - Page 34 Operating the 4x1 HD Switcher w/ Audio Decoding Using the Menu System Using the IR Remote Control From the home screen, press the MENU button. Use the ▲ or ▼ buttons to select the Tone Control menu: MAIN MENU TONE CONTROL Press the ENTER button.
-
Page 35: Setting The Audio Processing Mode
Operating the 4x1 HD Switcher w/ Audio Decoding Using the Menu System Setting the Audio Processing Mode The 4x1 HD Switcher w/ Audio Decoding, allows any of five audio processing modes to be associated with a selected input. For example, you may want to select the Multichannel Stereo audio processing mode with the optical (TOSLINK) input. -
Page 36: Audio Setup
Operating the 4x1 HD Switcher w/ Audio Decoding Using the Menu System Using the front panel buttons Example 1: Assigning the optical (TOSLINK) input with the Multichannel Stereo audio processing mode: From the home screen, press the Menu button. Use the Volume ▲ or Volume ▼ buttons to navigate to the Audio Setup menu: MAIN MENU AUDIO SETUP... - Page 37 Operating the 4x1 HD Switcher w/ Audio Decoding Using the Menu System Example 2: Assigning the analog L/R inputs with the Dolby Pro Logic II audio processing mode: Starting from Step 5, on the previous page, use the Volume ▼ button to select the analog L/R option: AUDIO SETUP AUD LR...
- Page 38 Operating the 4x1 HD Switcher w/ Audio Decoding Using the Menu System Using the IR Remote Control Example 1: Assigning the optical (TOSLINK) input with the Multichannel Stereo audio processing mode: From the home screen, press the MENU button. Use the ▲ or ▼ buttons to select the Audio Setup menu: MAIN MENU AUDIO SETUP...
- Page 39 Operating the 4x1 HD Switcher w/ Audio Decoding Using the Menu System Using the IR Remote Control (continued) Example 2: Assigning the analog L/R inputs with the Dolby® Pro Logic II audio processing mode: Starting from Step 5, on the previous page, use the ▼ button to select the analog L/R option: AUDIO SETUP AUD LR...
-
Page 40: Dynamic Range Compression
Operating the 4x1 HD Switcher w/ Audio Decoding Using the Menu System Dynamic Range Compression Dynamic Range Compression (DRC) applies compression to the output signal, preventing the signal from becoming too loud. The default setting for Dynamic Range Compression is OFF. - Page 41 Operating the 4x1 HD Switcher w/ Audio Decoding Using the Menu System Using the IR Remote Control From the home screen, press the MENU button. Use the ▲ or ▼ buttons to navigate to the Audio Setup menu. MAIN MENU AUDIO SETUP Press the ENTER button.
-
Page 42: Audio Enhancement Modes
Operating the 4x1 HD Switcher w/ Audio Decoding Using the Menu System Audio Enhancement Modes The 4x1 HD Switcher w/ Audio Decoding provides four distinct audio enhancement modes. Each of these modes provide a different audio listening experience. Available Modes Mode (LCM display) Description NIGHT... - Page 43 Operating the 4x1 HD Switcher w/ Audio Decoding Using the Menu System Press the ◄ or ► button to change to change the audio enhancement mode. In the illustration below, the audio enhancement mode has been set to Night mode: AUDIO SETUP ENHA.
-
Page 44: Setting The Unit Of Measurement
Operating the 4x1 HD Switcher w/ Audio Decoding Using the Menu System Setting the Unit of Measurement When adjusting the speaker distance, either feet or meters can be specified. Using the front-panel buttons From the home screen, press the Menu button. Use the Volume ▲ or Volume ▼ buttons to navigate to the Misc Setup menu. - Page 45 Operating the 4x1 HD Switcher w/ Audio Decoding Using the Menu System Using the IR remote control From the home screen, press the MENU button. Use the ▲ or ▼ buttons to select the Misc Setup menu. MAIN MENU MISC SETUP Press the ENTER button.
-
Page 46: Setting The Edid Mode
Operating the 4x1 HD Switcher w/ Audio Decoding Using the Menu System Setting the EDID Mode The 4x1 HD Switcher w/ Audio Decoding has three EDID modes (INT, EXT, and MIX). • INT Mode The internal (local) EDID is used instead of the EDID from the display device. EDID features newer than HDMI 1.3 are removed from the EDID data structure when the display is read. - Page 47 Operating the 4x1 HD Switcher w/ Audio Decoding Using the Menu System Using the IR Remote Control To set the EDID mode, press the MENU button from the home screen. Use the ▲ or ▼ buttons to navigate to the Misc Setup menu. MAIN MENU MISC SETUP Press the ENTER button.
-
Page 48: Setting The Ir Channel
Operating the 4x1 HD Switcher w/ Audio Decoding Using the Menu System Setting the Switcher IR Channel When controlling the 4x1 HD Switcher w/ Audio Decoding using the IR Remote Control Unit, the IR channel on the 4x1 HD Switcher w/ Audio Decoding must be the same as the IR channel set on the IR Remote Control Unit. -
Page 49: Resetting To Factory-Default Settings
Operating the 4x1 HD Switcher w/ Audio Decoding Using the Menu System Resetting to Factory-Default Settings If the 4x1 HD Switcher w/ Audio Decoding needs to be reset for any reason or if you need to set the unit to factory (default) settings, follow the instructions below. Using the front-panel buttons From the home screen, press the Menu button. - Page 50 Operating the 4x1 HD Switcher w/ Audio Decoding Using the Menu System Using the IR remote control From the home screen, press the MENU button. Use the ▲ or ▼ buttons to navigate to the Misc Setup menu. MAIN MENU MISC SETUP Press the Mode / OK button.
-
Page 51: Hdcp Setup
Operating the 4x1 HD Switcher w/ Audio Decoding Using the Menu System HDCP Setup The HDCP Setup submenu provides the option to disable HDCP detection on the selected input. Some sources (such as computers) will enable HDCP if an HDCP-compliant display is detected. - Page 52 Operating the 4x1 HD Switcher w/ Audio Decoding Using the Menu System Use the Volume ▲ or Volume ▼ buttons to select the next input. Repeat steps 6 - 7 as necessary. Press the Exit button to save the changes and return to the Misc Setup menu. 10.
-
Page 55: 03 Advanced Operation
HD Switcher w/ Audio Decoding DISPLAYS SOURCES 03 Advanced Operation RS-232 Configuration ..................46 RS-232 Interface ..................46 RS-232 Settings ..................46 RS-232 Commands ..................... 47... -
Page 56: Configuration
Advanced Operation RS-232 Configuration RS-232 Interface DE-9 DA-15 RS-232 Controller AV Processor DB-25 Only TXD, RXD, and GND pins are used. DC-37 RS-232 Settings Description Setting 19200 Baud rate DD-50 Data bits None Parity Stop bits None Hardware flow control IMPORTANT: When sending RS-232 commands, a carriage return must be included at the end of the command. -
Page 57: Commands
Advanced Operation RS-232 Commands Command Description AUDIO Selects between S/PDIF, TOSLINK, or Analog audio input BASS Increases or decreases the bass Sets the size of the Center speaker Sets the distance for the Center speaker Sets the distance for the Front Left speaker DFLT Sets the 4x1 HD Switcher w/ Audio Decoding to factory (default) settings... - Page 58 Advanced Operation RS-232 Commands AUDIO The AUDIO command selects between S/PDIF, TOSLINK, or analog audio inputs. The currently selected video input is unaffected. Syntax: AUDIO param1 Parameters: Value [0 ... 3] param1 Value Description HDMI S/PDIF (coax) TOSLINK (optical) Analog L/R To return the current audio input, use the following command syntax: AUDIO ? Note:...
- Page 59 Advanced Operation RS-232 Commands BASS The BASS command sets the bass level. Syntax: BASS param1 Parameters: param1 Value (dB) [-12 ... 12] To return the current audio input, use the following command syntax: BASS ? Note: The + or - character can also be used, instead of specifying a value, in order to increase or decrease the bass level by 1 dB.
- Page 60 Advanced Operation RS-232 Commands The CT command sets the size of the Center speaker. Syntax: CT param1 Parameters: param1 Value [0 ... 2] Value Description Small Large Off (disable Center speaker) To return the current size setting for the Center speaker, use the following command syntax: CT ? Examples:...
- Page 61 Advanced Operation RS-232 Commands The DC command sets the distance of the Center speaker. Syntax: DC param1 Parameters: param1 Distance (feet) [0 ... 20] To return the current distance setting of the Center speaker, use the following command syntax: DC ? Examples: DC 5 >...
- Page 62 Advanced Operation RS-232 Commands The DFL command sets the distance of the Front Left speaker. Syntax: DFL param1 Parameters: param1 Distance (feet) [0 ... 20] To return the current distance setting of the Front Left speaker, use the following command syntax: DFL ? Examples: DFL 10...
- Page 63 Advanced Operation RS-232 Commands DFLT The DFLT command sets the 4x1 HD Switcher w/ Audio Decoding to the factory-default settings. Syntax: DFLT 1 Parameters: The value of 1 must be specified as part of this command. No return value is available. Example: DFLT 1 >...
- Page 64 Advanced Operation RS-232 Commands The DFR command sets the distance of the Front Right speaker. Syntax: DFR param1 Parameters: param1 Distance (feet) [0 ... 20] To return the current distance setting of the Front Right speaker, use the following command syntax: DFR ? Examples: DFR 10...
- Page 65 Advanced Operation RS-232 Commands The DRC command enables / disables Dynamic Range Control. Syntax: DRC param1 Parameters: param1 Value [0 ... 1] Value Description DRC Off DRC On To return the current DRC state, use the following command syntax: DRC ? Example: DRC 0 >...
- Page 66 Advanced Operation RS-232 Commands The DSB command sets the distance of the Subwoofer. Syntax: DSB param1 Parameters: param1 Distance (feet) [0 ... 20] To return the current distance setting of the Subwoofer, use the following command syntax: DSB ? Examples: DSB 6 >...
- Page 67 Advanced Operation RS-232 Commands The DSL command set the distance of the Surround Left speaker. Syntax: DSL param1 Parameters: param1 Distance (feet) [0 ... 20] To return the current distance setting of the Surround Left speaker, use the following command syntax: DSL ? Examples: DSL 2...
- Page 68 Advanced Operation RS-232 Commands The DSR command set the distance of the Surround Right speaker. Syntax: DSR param1 Parameters: param1 Distance (feet) [0 ... 20] To return the current distance setting of the Surround Right speaker, use the following command syntax: DSR ? Examples: DSR 2...
- Page 69 Advanced Operation RS-232 Commands EDID The EDID command sets the EDID mode. The 4x1 HD Switcher w/ Audio Decoding will automatically power-cycle after the command has been executed. Syntax: EDID param1 Parameters: Mode [0 ... 2] param1 Value Description EDID Mix Internal EDID External EDID To return the current distance setting of the Surround Right speaker, use the following...
- Page 70 Advanced Operation RS-232 Commands The ENH command set the audio enhancement mode. See Audio Enhancement Modes more information on this feature. Syntax: ENH param1 Parameters: Mode [0 ... 3] param1 Value Description Night Mode Voice Mode Volume Mode To return the current audio enhancement mode setting, use the following command syntax: ENH ? Examples: ENH 3...
- Page 71 Advanced Operation RS-232 Commands The FLR command sets the size of the Front Left / Front Right speakers. Syntax: FLR param1 Parameters: param1 Value [0 ... 1] Value Description Small Large To return the current size setting for the Front Left / Front Right speakers, use the following command syntax: FLR ? Examples:...
- Page 72 Advanced Operation RS-232 Commands HDMI The HDMI command sets the active HDMI input. This command does not affect the current audio input. Syntax: HDMI param1 Parameters: Value [1 ... 4] param1 Value Description HDMI In 1 HDMI In 2 HDMI In 3 HDMI In 4 To return the current video input, use the following command syntax: HDMI ?
- Page 73 Advanced Operation RS-232 Commands HELP The HELP command displays a list of the available RS-232 commands. Syntax: HELP ? Parameters: The ? character must be specified as part of this command. Example: HELP ? > COMMAND LIST :PWR AUDIO BASS DFLT EDID HDMI...
- Page 74 Advanced Operation RS-232 Commands INFO The INFO command returns the current hardware and firmware version. Syntax: INFO ? Parameters: The ? character must be specified as part of this command. Example: INFO ? > FW 2.1D page | 64...
- Page 75 Advanced Operation RS-232 Commands INTYPE The INTYPE command returns the current audio input format. Syntax: INTYPE ? Parameters: The ? character must be specified as part of this command. Return values: Value Description None (no signal) Linear PCM 2.1 Linear PCM 5.1 Dolby®...
- Page 76 Advanced Operation RS-232 Commands The IR command sets the IR channel for the 4x1 HD Switcher w/ Audio Decoding. Syntax: IR param1 Parameters: param1 Value [0 ... 3] Value Description IR channel 1 IR channel 2 IR channel 3 IR channel 4 To return the current IR channel, use the following command syntax: IR ? Examples:...
- Page 77 Advanced Operation RS-232 Commands The MD command sets the audio mode. See Setting the Audio Processing Mode for more information on this feature. Syntax: MD param1 Parameters: Value [0 ... 4] param1 Value Description Dolby® Pro Logic Surround Direct Input Downmix to Stereo L/R Multichannel Surround Downmix to Mono...
- Page 78 Advanced Operation RS-232 Commands MUTE The MUTE command mutes / un-mutes the audio output. This command also Syntax: MUTE param1 Parameters: param1 Value [0 ... 2] Value Description Disable muting Enabling muting Mute toggle (from previous state) To return the current muting state, use the following command syntax: MUTE ? Examples: MUTE 1...
- Page 79 Advanced Operation RS-232 Commands The PWR command is used to power-on or place the 4x1 HD Switcher w/ Audio Decoding in standby mode. Syntax: PWR param1 Parameters: Value [0 ... 2] param1 Value Description Standby mode Power On Toggle power (from previous state) To return the current power state, use the following command syntax: PWR ? Note:...
- Page 80 Advanced Operation RS-232 Commands The SLR command sets the size of the Surround Left / Surround Right speakers. Syntax: SLR param1 Parameters: param1 Value [0 ... 2] Value Description Small Large Off (disable Surround speakers) To return the current size setting for the Surround Left / Surround Right speakers, use the following command syntax: SLR ? Examples:...
- Page 81 Advanced Operation RS-232 Commands STAT The STAT command enables / disables the feedback when using RS-232 commands. Syntax: STAT param1 Parameters: param1 Value [0 ... 1] Value Description Disable feedback Enable feedback To return the current feedback state, use the following command syntax: STAT ? Examples: STAT 0...
- Page 82 Advanced Operation RS-232 Commands The SUB command enables / disables the Subwoofer. Syntax: SUB param1 Parameters: param1 Value [0 ... 1] Value Description Disable Subwoofer Enable Subwoofer To return the current state of the Subwoofer, use the following command syntax: SUB ? Examples: SUB 0...
- Page 83 Advanced Operation RS-232 Commands SUBV The SUBV command sets the audio gain of the Subwoofer. Syntax: SUBV param1 Parameters: param1 Value (dB) [-12 ... 12] To return the current audio gain of the Subwoofer, use the following command syntax: SUBV ? Examples: SUBV 4 >...
- Page 84 Advanced Operation RS-232 Commands TEST The TEST command sends a test tone to the specified speaker. Only one speaker can play the test tone at a time. Syntax: TEST param1 Parameters: Value [0 ... 6] param1 Value Description Front Left Center Front Right Surround Right...
- Page 85 Advanced Operation RS-232 Commands TREB The TREB command sets the treble level. Syntax: TREB param1 Parameters: param1 Value [-12 ... 12] To return the current audio input, use the following command syntax: TREB ? Note: The + or - character can also be used, instead of specifying a value, in order to increase or decrease the treble level by 1.
- Page 86 Advanced Operation RS-232 Commands TVTYPE The TVTYPE command sets the video broadcast format. Syntax: TVTYPE param1 Parameters: param1 Value [0 ... 1] Value Description NTSC To return the current format setting, use the following command syntax: TVTYPE ? Examples: TVTYPE 0 >...
- Page 87 Advanced Operation RS-232 Commands The VOL command sets the audio output volume. Syntax: VOL param1 Parameters: param1 Value (dB) [-60 ... 12] To return the current volume setting, use the following command syntax: VOL ? Note: The + or - character can also be used, instead of specifying a value, in order to increase or decrease the volume level by 1 dB.
-
Page 89: 04 Appendix
HD Switcher w/ Audio Decoding DISPLAYS SOURCES 04 Appendix Menu System Summary ..................80 Main Menu ....................80 Speaker Size Menu ..................82 Speaker Level Menu ................... 83 Speaker Distance Menu ................85 Tone Control Menu ..................87 Audio Setup Menu ..................88 Misc Setup Menu .................. -
Page 90: Menu System Summary
Appendix Menu System Summary Main Menu H1 HD -01db None direct Menu ▲ MAIN MENU SPEAKER size ▲ Exit ▲ MAIN MENU SPEAKER LEVEL ▲ Exit ▲ MAIN MENU SPEAKER DISTANCE ▲ Exit ▲ MAIN MENU TONE CONTROL ▲ Exit ▲... - Page 91 Appendix Menu System Summary Exit ▲ main menu misc ▲ Exit ▲ main menu EXIT Exit ▲ page | 81...
-
Page 92: Speaker Size Menu
Appendix Menu System Summary Speaker Size Menu MAIN MENU SPEAKER SIZE Mode / OK ▲ SPEAKER SIZE FRONT L/R(SMALL) ▲ Exit ▲ SPEAKER SIZE CENTER (SMALL) ▲ Exit ▲ SPEAKER SIZE SURR L/R (SMALL) ▲ Exit ▲ SPEAKER SIZE (ONSUB) ▲... -
Page 93: Speaker Level Menu
Appendix Menu System Summary Speaker Level Menu MAIN MENU SPEAKER LEVEL Mode / OK ▲ SPEAKER LEVEL FRONT L (+00db) ▲ Exit ▲ SPEAKER LEVEL CENTER (+00db) ▲ Exit ▲ SPEAKER LEVEL Front R (+00db) ▲ Exit ▲ SPEAKER LEVEL SURR R (+00db) ▲... - Page 94 Appendix Menu System Summary Exit ▲ SPEAKER LEVEL (+10db) ▲ Exit ▲ SPEAKER LEVEL EXIT Exit ▲ page | 84...
-
Page 95: Speaker Distance Menu
Appendix Menu System Summary Speaker Distance Menu MAIN MENU SPEAKER DISTANCE Mode / OK ▲ SPEAKER DISTANCE FRONT L (03.0m) ▲ Exit ▲ SPEAKER DISTANCE CENTER (02.0M) ▲ Exit ▲ SPEAKER DISTANCE Front R (03.0m) ▲ Exit ▲ SPEAKER DISTANCE SURR R (02.0m) ▲... - Page 96 Appendix Menu System Summary Exit ▲ SPEAKER DISTANCE (03.0m) ▲ Exit ▲ SPEAKER DISTANCE EXIT Exit ▲ page | 86...
-
Page 97: Tone Control Menu
Appendix Menu System Summary Tone Control Menu MAIN MENU TONE CONTROL Mode / OK ▲ TONE CONTROL BASS (+05db) ▲ Exit ▲ TONE CONTROL TREBLE (+00db) ▲ Exit ▲ TONE CONTROL EXIT Exit ▲ page | 87... -
Page 98: Audio Setup Menu
Appendix Menu System Summary Audio Setup Menu MAIN MENU AUDIO SETUP Mode / OK ▲ AUDIO SETUP COAXIAL FAV PROC ▲ Exit ▲ AUDIO SETUP OPTICAL FAV PROC ▲ Exit ▲ AUDIO SETUP AUD LR FAV PROC ▲ Exit ▲ AUDIO SETUP HDMI 1 FAV PROC... - Page 99 Appendix Menu System Summary Exit ▲ AUDIO SETUP HDMI 3 FAV PROC ▲ Exit ▲ AUDIO SETUP HDMI 4 FAV PROC ▲ Exit ▲ AUDIO SETUP ( OFF ) ▲ Exit ▲ AUDIO SETUP ENHA. ( NIGHT+) ▲ Exit ▲ AUDIO SETUP EXIT Exit...
-
Page 100: Misc Setup Menu
Appendix Menu System Summary Misc Setup Menu MAIN MENU MISC SETUP Mode / OK ▲ MISC SETUP DIST.UNIT(METER) ▲ Exit ▲ MISC SETUP EDID ADJ.(INT) ▲ Exit ▲ MISC SETUP IR ChANNEL ( 1 ) ▲ Exit ▲ MISC SETUP Factory Default ▲... - Page 101 Appendix Menu System Summary Exit ▲ MISC SETUP EXIT Exit ▲ page | 91...
-
Page 102: Specifications
Appendix Specifications Supported Formats Audio (5.1 channels max.) • Dolby® Digital • Dolby® Pro Logic • Dolby® Pro Logic II • LPCM Electrical Maximum Pixel Clock • 225 MHz Connectors Video Inputs • 4 x HDMI Type A, 19-pin, female Video Output •... - Page 103 Appendix Specifications page | 93...
- Page 104 Stretch it, Switch it, Split it, Control it. Gefen’s got it. ® 20600 Nordhoff St., Chatsworth CA 91311 1-800-545-6900 818-772-9100 fax: 818-772-9120 www.gefentv.com support@gefentv.com This product uses UL listed power supplies.
Need help?
Do you have a question about the GTV-AUDDEC-N and is the answer not in the manual?
Questions and answers