Table of Contents
Advertisement
Quick Links
Advertisement
Table of Contents

Related Manuals for Christie Projector


Summary of Contents for Christie Projector
- Page 1 USER MANUAL...
-
Page 2: Table Of Contents
Connecting to a Video/ Laser Disk/ DVD Player... 8 2.4.3 Connecting to External Speakers.......10 Mouse Functions............11 Projector Basics............12 3. OPERATION Turning On & Turning Off The Projector......15 Basic Operation............16 Remote Control Features..........19 Using The Menu............20 3.5.1 Adjusting the Image......... 21 3.5.2... - Page 3 Important Information Precautions Please read this manual carefully before using your Vivid Red projector and keep this user manual for your future reference. Labels & Markings This symbol warns the user that the presence of uninsulated voltage within the unit may be sufficient to constitute the risk of electric shock.
-
Page 4: The Projector
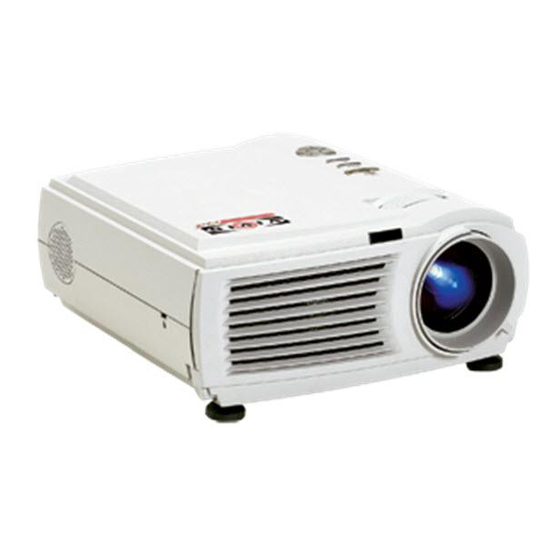
1. Introduction 1.1 The Projector The product is a high brightness, high-resolution video / data projector. It has the following key features: · 3-chip 0.9" D-ILA light engine · 1365 x 1024 native panel resolution (SXGA) · Input pixel formats from 640 x 480 (VGA) up to 1600 x 1200 (UXGA) ·... -
Page 5: Components
Introduction 1.2 Components Vivid Red Projector x 1 Laser pointer remote control x 1 Power cable x 1 DATA VOL+ AAA batteries x 2 Mouse connection cable x 1 Audio cable x 1 RGB cable x 1 AV cable x 1... -
Page 6: Setting Up Your Projector
2.Set up a screen or select a non-glossy white wall onto which you can project your image. Adjustment Adjust the height of the projector using the 2 adjusters on the front. Lift the front of the projector while pressing the adjustment levers on the front side of the projector. -
Page 7: Power Connection
Installation & Setup Ceiling Mount If the projector is mounted on the ceiling and the image is upside down, use the Menu and Up, Down, Left, Right button on your projector keypad or on the remote control to correct the orientation. -
Page 8: External Connection
Installation & Setup 2.4 External The rear panel of the projector provides the variety of inputs. The projector can be connected to a computer, video, DVD player, laser disc Connection player, etc. 2.4.1 Connecting to The projector can connect to a computer capable of VGA, SVGA, XGA, SXGA and UXGA output. - Page 9 NOTE: Use the Macintosh adapter to connect a Macintosh computer to the projector, otherwise it may result in a blank screen. Remove the small cover on the Macintosh adapter. Set the DIP switches in accordance with the resolution you want to use.
-
Page 10: Connecting To A Video/ Laser Disk/ Dvd Player
If the video source uses a RCA connector, you will need the RCA cable to connect to the projector. Connect the yellow RCA plug on one end of RCA cable to the projector's video jack, and connect the other end of the yellow RCA plug to your video source. - Page 11 Installation & Setup Connecting to a Video / Laser Disk / DVD Player COMPUTER V.SYNC. H/C.SYNC. B/B-Y R/R-Y L- AUDIO -R VIDEO PC AUDIO AUDIO OUT MOUSE S-VIDEO RS232C To B/B-Y, G-Y, R/R-Y To S-VIDEO terminal To VIDEO & AUDIO To AUDIO terminal terminal (used to connect...
-
Page 12: Connecting To External Speakers
Installation & Setup An external speaker system can connect to the projector to gain maximum 2.4.3 Connecting to benefit from the projector's built-in sound function. External Turn off the projector and speaker system if they are on. Speakers Connecting the stereo audio cable's miniplug to the projector's Audio Out jack. -
Page 13: Mouse Functions
Connecting the Mouse: Connecting the big end of the PS/2 mouse cable (9 pin) to the projector mouse port. Connecting the small end of the PS/2 mouse cable (6 pin) to the computer's mouse port. -
Page 14: Projector Basics
AC input Adjustment levers Ventilation Focus ring Height adjuster Height adjuster Rear/ Side Features Security Lock * Adjustment levers Height adjuster I/O terminal panel Speaker Remote sensor Security Lock Note: The projector can connect to a commercially available security cable (Kensington's). -
Page 15: Bottom Features
2. Power Button & Power Indicator Use this button to turn the power on and off when the main power switch on the SOURCE side of the projector is switched on and the projector is in standby mode. MENU 3. Source Button... - Page 16 Operation I/O Terminal Features COMPUTER V.SYNC. H/C.SYNC. B/B-Y R/R-Y L- AUDIO -R VIDEO PC AUDIO AUDIO OUT MOUSE S-VIDEO RS232C...
-
Page 17: Turning On & Turning Off The Projector
Projector Turning On the Projector: 1. Turn on the main power switch on the side of the projector, the projector will go into its standby mode and the power indicator will glow orange. 2. Press the Power button on the projector control keypad or on the remote control, the power and lamp indicator will glow green and the projector will be ready to use. -
Page 18: Basic Operation
Adjusting the Tilt Feet 1. Lift the front edge of the projector. 2. Press the adjustment levers on the front of the projector and hold the levers. 3. Lower the front of the projector to desired height and release the lever to lock the tilt feet. -
Page 19: Adjusting The Focus
Operation Selecting the Desired Image Press the Video button on the remote control to cycle through the video inputs.(Composite, S-Video, Component) Press the Data button on the remote control to cycle through the RGB graphics inputs. (RGB, Component, DVI) Press the Source button on the control keypad to start source auto scan through composite Video, S-Video, component video (if connecting BNC with video source), Analog RGB, component RGB (if connecting BNC with computer source), and DVI. -
Page 20: Correcting The Keystone Distortion
Operation Adjusting Digital Zoom of the Image Zoom 1. Press the Zoom button on the remote control. button 2. Use Vol+ button to enlarge the Image, Vol- LAMP POWER LASER MENU POWER button to return the enlarged image to its MENU LASER KEYSTONE ZOOM... -
Page 21: Remote Control Features
Power Button 11. Freeze Button While the power is applied, main power switch on the side of the projector is switched on, use This button will freeze a picture. Press again to this button to turn on/ off your projector. -
Page 22: Using The Menu
Operation Range of Use of the Wireless Remote Control 1. Press Menu button. 3.5 Using The Menu The menu screen is displayed. Example : When RGB is selected for the input source. 2. Select the menu item you wish to adjust with Up /Down buttons on the remote control or on the control keypad... - Page 23 Remove the last indications of noise or shaded areas that remain on the screen after completing the adjustment. Frequency (RGB only) Control the horizontal size to match the projector to the computer. Color (Video only) Adjust the depth of the colors. Press Left button to make it lighter, Right button to make the color deeper.
-
Page 24: Adjusting Advanced Control
Operation 3.5.2 Adjusting Advanced Control RGB Advanced Menu Video Advanced Menu Sharpness Adjust the sharpness level by pressing Left/ Right buttons to choose. User Red Adjust the strength of the red color. Press Left button to make it weaker, Right button to make it stronger. User Green Adjust the strength of the green color. - Page 25 RGB. When the input source is the video, select YUV. Image Orientation Select "Inverted" to turn the image upside down when you put the projector on the ceiling. Rear Projection Select "On" to reverse the image when you put the projector behind the translucent screen.
- Page 26 The maximum keystone correction is 15 degrees upward and downward with the projector placed horizontally on the ground plane. Zoom Use the zoom scale to enlarge the image or to return the enlarged image to its original size.
-
Page 27: Selecting The Video Standard
Operation 3.5.5 Setting the Audio Mute Audio Menu Mute the sound by selecting "On", back to normal by selecting "Off". Source Select the audio source from video input or RGB input. Mode Set the audio to be mono or stereo. Volume Adjust the volume by pressing Left button to decrease the volume, Right button to increase the volume. -
Page 28: Warnings And Guidelines
Section 6, Specifications. Do not operate the projector close to water, such as near a swimming pool. " Do not place the projector on an unstable cart, stand or table. If the projector is to be ceiling mounted, only use the Christie-approved ceiling mount fixture. - Page 29 Only use attachments or accessories recommended by Christie, such as Attachments the specific power cord supplied. Use of other attachments or accessories with this projector may result in the risk of fire, shock or personal injury. WARNING Use only the AC power cord supplied. Do not attempt operation if the AC supply and cord are not within the specified voltage and power range.(see section 6)
- Page 30 The projector should never be placed near or over a radiator or heat register. The projector should not be placed in an enclosure unless proper ventilation is provided. Do not place the unit on top of a carpet or cushion.
-
Page 31: Cleaning
If continuing to use the lamp after the replacing lamp message has been displayed on screen, the lamp bulb may shatter, and pieces of glass may scatter inside the projector and out into the room. Do not touch them as the pieces of glass may cause injury. If this happens, contact... -
Page 32: Replacing The Air Filter
Right button to select. 3. Lamp timer will reset to 0 hour usage. There are two air filter sponges in the bottom of the Vivid Red projector to 4.4 Replacing the capture dust or dirt and should be replaced whenever the lamp module is Air Filter replaced. -
Page 33: Common Problems & Solutions
" Does not turn on Check that the power cable is plugged in and that power switch on the side of projector is switched on, and power button on the projector control keypad or remote control is pressed on. "... -
Page 34: Specifications
6. SPECIFICATION 6.1 Specifications Model Number: Vivid Red Display Technology 0.9" LCOS D-ILA x 3 Resolution SXGA (1365 x 1024) Projection Lamp 200W UHP lamp, 1500 hours typical Brightness 1100 ANSI lumens typical Brightness Uniformity 85% typical Contrast Ratio 500:1 (full on / full off) typical... -
Page 35: Glossary
7. Appendices 7.1 Glossary This appendix defines the specific terms used in this manual. The ratio of the width of an image to its height. Aspect ratio Brightness The balance of light and dark shades in an image. Contrast (ratio) The degree of difference between the lightest and darkest areas of the image. -
Page 36: Menu Tree
Appendices 7.2 Menu Tree Image RGB Image Signals Brightness Advanced Contrast H Position Options V Position Phase Utilities Frequency Audio Video Image Signals Source Brightness Contrast Standard H Position V Position Color Tint Detail RGB Image Signals Sharpness User Red User Green User Blue Scaling... -
Page 37: Throw Distance
Appendices 7.3 Throw Distance Screen width (in) Throw distance measured from screen to front feet (centers) of projector Projection Distance (ft) Screen Size Projection Distance (L) Screen Size Height Width (inch) (cm) (inch) (cm) (inch) (cm) (ft) 1.2 - 1.6 3.9- 5.12... -
Page 38: Serial Communication Cable
7.4 Serial Communication Cable Standard RS-232 cable, with 9-pin D connectors Male / Female adapter (null modem) Computer / Switcher Projector (male) (female port) Standard RS-232 cable, 9-pin male D connector to 25-pin female Male / Female adapter (null modem)
Need help?
Do you have a question about the Projector and is the answer not in the manual?
Questions and answers