Table of Contents
Advertisement
Quick Links
D I G I T A L
S Y S T E M S
Operating Instructions
For
35mm Film Projector
Manual Turret Model P35GPS(Z)-MT
Automatic Turret Model P35GPS(Z)-AT
115VAC, 60Hz Motor or 220VAC, 50Hz Motor
TD-621: Version 3.8
C
D
S
H R I S T I E
I G I T A L
Y S T E M S
1 0 5 5 0 C a m d e n D r i v e
C y p r e s s , C A 9 0 6 3 0
Tel: 714-236-8610
Fax: 714-503-3385
Advertisement
Table of Contents

Subscribe to Our Youtube Channel
Related Manuals for Christie P35GPS-AT


Summary of Contents for Christie P35GPS-AT
-
Page 1: Operating Instructions
D I G I T A L S Y S T E M S Operating Instructions 35mm Film Projector Manual Turret Model P35GPS(Z)-MT Automatic Turret Model P35GPS(Z)-AT 115VAC, 60Hz Motor or 220VAC, 50Hz Motor TD-621: Version 3.8 H R I S T I E... - Page 2 HRISTIE the P35GPS Film Projector are not responsible in any way for any liabilities or loss resulting from the use or misuse of this document. Copyright © 1998 by Ultramittent©...
-
Page 4: Table Of Contents
4.3. Film Threading and Operating Procedure ... 4-2 5. MAINTENANCE ... 5-1 5.1. General Maintenance ... 5-1 5.2. Visual Inspection ... 5-1 5.3. Cleaning... 5-2 5.4. Removal of Assemblies ... 5-2 5.4.1. Removal of the Trap and Gate Assembly... 5-2 CHRISTIE DIGITAL SYSTEMS P35GPS Projector March, 2004... - Page 5 7.1. Motor... 7-1 7.1.1. SYMPTOM: Motor Not Working... 7-1 7.2. Ultramittent Assembly ... 7-2 7.2.1. SYMPTOM: Excessive Ticking ... 7-2 7.2.2. SYMPTOM: Excessive Film Noise ... 7-2 7.2.3. SYMPTOM: Film Instability (Jump)... 7-2 CHRISTIE DIGITAL SYSTEMS P35GPS Projector March 2004...
- Page 6 7.4.1. SYMPTOM: Excessive Noise... 7-3 7.4.2. SYMPTOM: Excessive Belt Dust ... 7-3 7.4.3. SYMPTOM: Excessive Belt Failure ... 7-3 7.5. Changeover Assembly ... 7-3 7.5.1. SYMPTOM: Operating Inconsistently... 7-3 7.5.2. SYMPTOM: Not Operating ... 7-3 CHRISTIE DIGITAL SYSTEMS P35GPS Projector March, 2004...
- Page 7 B-11: Inner Timing Belt Tensioner Assembly ...B-19 B-12: Central Pivot Analog Soundhead Assembly ...B-20 B-13: Central Pivot Digital Soundhead Assembly...B-22 B-14: Intermittent Shoe Closure ...B-25 Appendix C: Schematic Diagrams ... C-1 Index ... C-5 CHRISTIE DIGITAL SYSTEMS P35GPS Projector March 2004...
- Page 8 Figure 3-1: Installing the Projector ... 3-2 Figure 3-2: Tools and Materials Required for Assembly and Maintenance ... 3-3 Figure 3-3: Projector Wiring Diagram (50- and 60-Hz models) ... 3-4 Figure 3-4: Table of A-C Terminal Connections... 3-5 Figure 4-1: Threading Diagram ... 4-3 Figure 5-1: Schedule for Periodic Maintenance Operations...
- Page 9 Table B-13: Central Pivot Digital Soundhead Assembly Parts List...B-24 Figure B-14: Intermittent Shoe Closure Assembly (P/N 120651M001) ...B-25 Table B-14: Intermittent Shoe Closure Assembly Parts List ...B-26 Table C- 1: Schematic Diagrams for P35GPS Projector ...C-1 CHRISTIE DIGITAL SYSTEMS P35GPS Projector March 2004...
-
Page 10: Introduction
1.1. O N T E N T S O F T H E This manual contains installation, operation, and operator maintenance procedures for P35GPS Projector models having serial numbers P-1201 and up. The material CHRISTIE covered includes: • general description •... -
Page 11: Warning
A U T I O N CAUTION: Indicates the presence of a hazard that could cause damage to projection system. 1 . 3 . 3 . O T E NOTE: Provides additional information. CHRISTIE DIGITAL SYSTEMS P35GPS Projector March, 2004... -
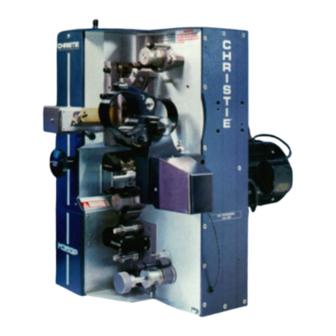
Page 12: General Description
• all models available in 50 Hz or 60 Hz 2.2. P E C I F I C A T I O N S Standard specifications for the P35GPS projector family are listed in the Table shown in Figure 2-1, below. POWER REQUIREMENTS:... -
Page 13: Ultramittent Assembly
7. Apperture plate (121117-00x) 8. Intermittent Shoe closure (120651M001) 9. Shutter belt Cover (598931-533) *Manual or Motorized Figure 2-2: Projector, Operator Side CHRISTIE DIGITAL SYSTEMS P35GPS Projector March, 2004 10. **Sound-head Assembly-(Analog- (96260-001,Digital-196220-002) 11. Aperture Drive Assembly (121435-001) 12. Fan Grill (598931-547) 13. -
Page 14: Outer Timing Belt
10. Sound-drum Shaft (196315-001) 24. Digital LED Supply (194834-001) 25. Turret Control Module (121428-001) 26. Flanged Idler Assembly (194880-001) CHRISTIE DIGITAL SYSTEMS P35GPS Projector March, 2004 27. Analog Power Supply (194908-001) 28. Upper Sprocket Pulley (194858-001) 29. Jackshaft Assembly (194810-001) 30. -
Page 16: Projector Installation And Assembly
P35GPS projector are outlined in the Table in Figure 3-2. 1. Loosen but do not remove nut on projector mounting stud (item 4 in Figure 3-1). Verify that lock washer (item 5 in Figure 3-1) and flat washer (item 6 in Figure 3-1) are correctly positioned on mounting stud. - Page 17 (item 1 in Figure 3-1). Insert hex head bolt, with lock washer and flat washer, into upper left opening of projector mount. Rotate hex head bolt four full turns. 3. Lift and mount projector to console or pedestal. Thread two remaining hex head bolts with lock washer and flat washer.
-
Page 18: Solar Cell Wiring
3.3. L E C T R I C A L Before wiring the projector, refer to Figure 3-3 for the wiring interface diagram. Use stranded wire. Strip and tin the wire prior to connection. Use crimp connectors on all sound connections. - Page 19 A - C P R O J E C T O R A-C wiring to the projector requires stranded, 14-gauge wire. Be sure to follow local and national electrical codes for A-C wiring. The terminal connection numbers in the table in Figure 3-4 refer to terminals TB-1 in Figure 3-3.
- Page 20 Changeover coil CLOSE (A-C, switched externally) Framing lamp, cooling fan, and changeover (A-C neutral). Figure 3-4: Table of A-C Terminal Connections The voltage and frequency rating of the projector (shown on the nameplate) must match the power line frequency and voltage being used.
-
Page 22: Operating The Projector
O P E R A T I N G T H E P R O J E C T O R 4.1. E N E R A L Before operating the projector, verify that all phases of installation and assembly have been completed. • Verify that cover for belt side of projector is installed before and during operation. -
Page 23: Constant-Speed Sprocket Assembly
1. Set Ultramittent to its rest position. There should be no sprocket movement when manual turndown knob (N) is turned. 2. Center framing knob (P) by aligning mark on knob with line on projector housing marked CENTER FRAME 3. Swing out pad rollers (B, F, and L) on upper constant-speed sprocket assembly (A), center constant-speed sprocket assembly (G), and lower constant-speed sprocket assembly (M). - Page 24 F: Center constant-speed sprocket pad roller G: Center constant-speed sprocket assembly H: Lateral guide roller J: Sound-head Assembly CHRISTIE DIGITAL SYSTEMS P35GPS Projector March, 2004 K: Lateral guide roller L: Lower constant-speed sprocket pad roller M: Lower constant-speed sprocket assembly...
- Page 25 • Framing lamp is functional with picture changeover in either position. • If film reel is used, be sure take-up tension is in accordance with reel manufacturer’s instructions. CHRISTIE DIGITAL SYSTEMS P35GPS Projector March, 2004...
-
Page 26: Belts
E N E R A L A I N T E N A N C E Use the program outlined in the schedule in Figure 5-1 to maximize projector life and operating efficiency. Procedures for these operations are described in the referenced sections of this manual. -
Page 27: Cleaning
L E A N I N G Projector should be kept clean at all times 1. Remove dust and foreign matter from projector and assemblies. Use soft, lint-free cloth, or spray with compressed air at force no greater than 20 psi. -
Page 28: Outer Timing Belt
1. Remove outer timing belt (see Section 5.4.2). 2. Loosen adjustable inner idler pulley screw (item 1 in Figure 5-3). 3. Remove inner timing belt (item 10 in Figure 5-3). CHRISTIE DIGITAL SYSTEMS P35GPS Projector March, 2004 E L T... -
Page 29: Shutter Timing Belt
1. Loosen three Allen head screws securing jack-shaft assembly to mainframe (item 5 in Figure 5-4). 2. Pull jack-shaft assembly down approximately 0.5 inch. 3. Remove shutter timing belt (item 1 in Figure 5-4). CHRISTIE DIGITAL SYSTEMS P35GPS Projector March, 2004 Figure 5-3: Inner Timing Belt E L T... - Page 30 Remove turndown knob (lower sprocket assembly only). c) Remove three Allen head screws from operating side of mainframe. d) Carefully slide sprocket assembly out of non-operating side of mainframe. CHRISTIE DIGITAL SYSTEMS P35GPS Projector March, 2004 1: Shutter Timing Belt...
-
Page 31: Ultramittent Assembly
3. Remove Ultramittent shoe closure assembly. 4. Remove four Allen head screws and washers securing Ultramittent assembly to mainframe. 5. Carefully slide Ultramittent assembly out from non-operating side of projector. 5 . 4 . 7 . L E D S E M O V A L O F Refer to item 10 on page 2-2 and on page 2-3. -
Page 32: Removal Of Motor Assembly
5 . 4 . 1 2 . R E M O V A L O F Refer to item 12 on page 2-2. 1. Remove four screws and washers securing fan to top plate of projector. 2. Pull fan up and remove A-C plug. 3. Remove fan. - Page 33 P 3 5 G P S D u a l L e n s T u r r e t P r o j e c t o r CHRISTIE DIGITAL SYSTEMS P35GPS Projector March, 2004...
-
Page 34: Calibration, Alignment, And Adjustment Procedures
A D J U S T M E N T P R O C E D U R E S The projector has been factory aligned, calibrated, and adjusted prior to shipment. The following paragraphs contain the necessary information to calibrate, align, and adjust the various components and assemblies. -
Page 35: Preliminary Procedures
6. Turn cinema processor's pre-amplifier Hf adjustments clockwise until real-time analyzer shows flat frequency response to 16 kHz. 7. Verify that both channels have identical frequency response. CHRISTIE DIGITAL SYSTEMS P35GPS Projector March, 2004 R O C E D U R E S... -
Page 36: Alignment Procedure
1. Turn LED power supply down (CCW) to minimum. 2. Connect video cable to Digital Reader Assembly. 3. Turn on digital processor. 4. Apply AC power to projector and verify that LEDs are operational. CHRISTIE DIGITAL SYSTEMS P35GPS Projector March, 2004... - Page 37 7. Adjust lateral positioning (item 5 in Figure 6-2) to center image on CCD. It should read zero ±0.5 mils on DRAS or QC software. 8. Magnification should be 100 ±2%; adjust focal distance if necessary. CHRISTIE DIGITAL SYSTEMS P35GPS Projector March, 2004 1: Clamp mounting...
-
Page 38: Dashpot Adjustment
1. Turn hex-slotted screw counter clockwise at bottom of dashpot assembly through access hole in projector bottom plate, until friction of dashpot is at lowest point. 2. Run wow and flutter test film and increase friction by turning hex slotted screw, at bottom of dashpot assembly, clockwise until best result is obtained. -
Page 39: Outer Timing Belt
1. Loosen shutter clamp screws (item 8 in Figure 5-4) just enough that shutter can be rotated on its shaft. 2. Turn projector by hand with manual turndown knob until Ultramittent sprocket is in top position. Sprocket should not move while turndown knob is being turned. - Page 40 6 . 6 . 1 . E N E R A L E S C R I P T I O N Turret System for the P35GPS Projector is a mechanical device holding two CHRISTIE lenses in a rotating plate about a central axis.
-
Page 41: 6.6.4. Timing Adjustments - Turret And Aperture Motor
6.6.4. Timing Adjustments – Turret and Aperture Motor The turret motor and the aperture motor are controlled from the PC board, which is mounted on the non-operator side of the projector. Both motors are timed. One timer goes to the position; another timer goes to the FLAT adjusted with a trimpot located at the lower side of the PC board. -
Page 42: Optical Image Alignment And Adjustment Procedures
FLAT focused. If necessary, move projector head using mounting plate adjustments. 4. Run RP-40 loop; adjust so that projected image is level with respect to bottom and side masking. -
Page 44: Troubleshooting Procedures
7 . 1 . 1 . S Y M P T O M : M 1. Check power to motor. Verify that projector is plugged in, and that manual switch is set 2. Check start capacitor. 3. Check for motor overheating/thermal shutdown. If motor is hot, wait until it has cooled off before attempting to restart. -
Page 45: Symptom: Excessive Ticking
7 . 3 . 3 . S Y M P T O M : S 1. Check alignment of pad roller. Adjust as needed. CHRISTIE DIGITAL SYSTEMS P35GPS Projector March, 2004 S S E M B L Y X C E S S I V E... - Page 46 7 . 6 . 1 . S Y M P T O M : E Remove shutter belt. Localize noise to driver or jack-shaft. CHRISTIE DIGITAL SYSTEMS P35GPS Projector March, 2004 X C E S S I V E O I S E...
- Page 47 1. Lens clamping screws too tight. Adjust as necessary. 2. Focus adjustment threaded out of range. 3. Bushing are binding on lens barrel shafts. CHRISTIE DIGITAL SYSTEMS P35GPS Projector March, 2004 H U T T E R T R E A K...
- Page 48 Adjust bushing at base of hinge. 7 . 8 . 4 . S Y M P T O M : T Adjust bushing at base of hinge. CHRISTIE DIGITAL SYSTEMS P35GPS Projector March, 2004 U R R E T I N G E...
-
Page 50: Part Number Description
Upper Constant-Speed Sprocket Assembly 194856-002 Center Constant-Speed Sprocket Assembly 194857-001 Lower Constant-Speed Sprocket Assembly Table A-1: P35GPS Projector Replaceable Assemblies and Components CHRISTIE DIGITAL SYSTEMS P35GPS Projector March, 2004 A p p e n d i x A Section 5.4.6 5.4.6 5.4.6... - Page 51 Rubies for Lateral Guides 598931-528 Outer Timing Belt (two-sided) 598931-533 Shutter Timing Belt 598931-704 Visible Red LED Table A-1: P35GPS Projector Replaceable Assemblies and Components (Continued) CHRISTIE DIGITAL SYSTEMS P35GPS Projector March, 2004 Section 5.4.10 5.4.6 5.4.6 5.4.8 5.4.8 5.4.7 5.4.8...
- Page 52 11. Inner Timing Belt Tensioner Assembly 12. Central Pivot Analog Soundhead Assembly 13. Central Pivot Digital Soundhead Assembly. 14. Intermittent Shoe Closure Assembly. CHRISTIE DIGITAL SYSTEMS M35GPS Projector March, 2004 A p p e n d i x B Appendix...
-
Page 53: B-1: Changeover Douser Assembly
Item Description Mounting Plate, Solenoid Solenoid, Modified PCB Changeover Filter Assembly Block, Friction Plunger, Solenoid Cable, Flexible Shaft CHRISTIE DIGITAL SYSTEMS P35GPS Projector March, 2004 O W S E R S S E M B L Y Part Number 121196P001 121205-001... - Page 54 Cable, Flexible Shaft Screw SHC, 6-32 x 0.1875 in (0.47625 cm) L Plunger, Spring 1/4-20x3/4 Nut, Hex, Jam (THIN), 1/4-20, Brass Inst. Changeover Upgrade CHRISTIE DIGITAL SYSTEMS M35GPS Projector March, 2004 A p p e n d i x B 598931-046 598931-434...
-
Page 55: B-2: Automatic Curved Trap And Gate Assembly
U T O M A T I C U R V E D R A P A N D A T E S S E M B L Y Figure B-2: Automatic Curved Trap and Gate Assembly (P/N 196556-001) CHRISTIE DIGITAL SYSTEMS P35GPS Projector March, 2004... - Page 56 Pin, Dowel, 0.125 in (0.3175 cm) DIA x 0.25 in (0.635 cm) L (2) Screw, SHC, 4-40 UNC x 0.5 in (1.27 cm) L (2) Guide, Film Threading Shaft, Gate CHRISTIE DIGITAL SYSTEMS M35GPS Projector March, 2004 A p p e n d i x B Part Number 121158-001...
- Page 57 Bushing, Thread Catch Knob, Catch Screw, Button Head , 6-32 UNC x 0.25 in (0.635 cm) L Pin, Dowel, 0.125 in (0.3175 cm) DIA x 0.375 in (0.9525 cm) L (2) CHRISTIE DIGITAL SYSTEMS P35GPS Projector March, 2004 598931-428 120659-001 598931-090...
- Page 58 Pin,-Spring, 0.0625 in (15875 cm) DIA x 0.375 in (0.9525 cm) L (2) Table B-2: Parts List for Automatic Curved Trap and Gate Assembly (Continued) CHRISTIE DIGITAL SYSTEMS M35GPS Projector March, 2004 A p p e n d i x B...
-
Page 59: B-3: Fixed Idler Assembly
Item Description Standoff Roller, Isolator Idler, 30-Groove Retainer, Bearing Screw, Flat Head Socket, ¼-20 x 1.0 in (2.54 cm) L Table B-3: Fixed Idler Assembly Parts List CHRISTIE DIGITAL SYSTEMS P35GPS Projector March, 2004 Part Number 194740-001 121120-001 194895-001 119061P002... -
Page 60: B-4: Fixed Idler Assembly, Flanged
Retainer, Bearing Screw, Flat Head Socket, ¼-20 x 1.0 in (2.54 cm) L Table B-4: Fixed Idler Roller Assembly, Flanged, and Parts List CHRISTIE DIGITAL SYSTEMS M35GPS Projector March, 2004 L A N G E D A p p e n d i x B... -
Page 61: B-5: Jackshaft Assembly
(2.2225 cm) OD x 0.2812 in (0.714248 cm) THK Jackshaft Tolerance Ring AN 087037-S Spacer, Jackshaft Housing Washer, Wave .397 ID x .484 OD x .009 in THK Table B-5: Jackshaft Assembly Parts List CHRISTIE DIGITAL SYSTEMS P35GPS Projector March, 2004 Part Number 194766-001 598931-448 598931-607... - Page 62 E N T E R A N D S S E M B L Y Figure B-6: Upper and Center Constant-Speed Sprocket Assembly (P/N 194856-001 -002) CHRISTIE DIGITAL SYSTEMS M35GPS Projector March, 2004 P P E R O N S T A N T...
-
Page 63: B-6: Center And Upper Constant-Speed Sprocket Assembly
Washer, Lock, #4 Washer, Plated Flat, #4, Constant Speed Washer, Wave Screw, Truss 10-32 x 0.375 in (0.9525 cm) L (2) Table B-6: Center and Upper Constant-Speed Sprocket Assembly Parts List CHRISTIE DIGITAL SYSTEMS P35GPS Projector March, 2004 Part Number 119055-002 598931-107... - Page 64 A p p e n d i x B Figure B-7: Lower Constant-Speed Sprocket Assembly (P/N 194857-001) CHRISTIE DIGITAL SYSTEMS M35GPS Projector B-13 March, 2004...
- Page 65 Washer, Wave (2) Pulley, Lower Knob, Turndown Screw, Head, C-Sink,82°, 10-32 x 0.75 in (1.905 cm) L (2) Shim Spacer Table B-7: Lower Constant-Speed Sprocket Assembly (P/N 194857-001) CHRISTIE DIGITAL SYSTEMS P35GPS Projector March, 2004 Part Number 598931-486 598931-107 194833-001...
- Page 66 A p p e n d i x B B-8: H U T T E R R I V E R S S E M B L Y Figure B-8: Shutter Driver Assembly (P/N 194866-001) CHRISTIE DIGITAL SYSTEMS M35GPS Projector B-15 March, 2004...
- Page 67 Pin, Dowel, 0.125 in (0.3175 cm) DIA x 0.375 in (0.9525 cm) L (2) Screw, Set, Hex Socket Cup,6-32x 3/16 Retaining Ring (Internal) Bore 15/16” Dia. Wave Washer .392 ID Table B-8: Shutter Driver Assembly Parts List CHRISTIE DIGITAL SYSTEMS P35GPS Projector March, 2004 Part Number 194827-001 598931-607 194999-001...
-
Page 68: B-9: 30-Groove Flanged Idler Assembly
Ball Bearing, 0.5 in (1.27 cm) ID x 1.125 in (2.8575 cm) OD x 0.3125 in (0.79375 cm) THK Table B-9: 30-Groove Flanged Idler Assembly Parts List CHRISTIE DIGITAL SYSTEMS M35GPS Projector March, 2004 D L E R S S E M B L Y... -
Page 69: B-10: Outer Timing Belt Tensioner Assembly
Washer, Split, 0.25 in (0.635 cm) ID Screw, SHC, ¼-20 x 1.0 in (2.54 cm) L Table B-10: Outer Timing Belt Tensioner Assembly Parts List CHRISTIE DIGITAL SYSTEMS P35GPS Projector March, 2004 E L T E N S I O N E R... -
Page 70: Table B-11 Inner Timing Belt Tensioner Assembly Parts List
Washer, Split, 0.25 in (0.635 cm) ID Screw, SHC, ¼-20 x 1.0 in (2.54 cm) L Table B-11: Inner Timing Belt Tensioner Assembly Parts List CHRISTIE DIGITAL SYSTEMS M35GPS Projector March, 2004 E L T E N S I O N E R... -
Page 71: B-12: Central Pivot Analog Soundhead Assembly
Dowel Pin 1/8Dia x 1/2 Screw, SCH 8-32 x 5/8 Spring Pin Clamp, Mount Analog Reader Shaft-35MM Film Roller CHRISTIE DIGITAL SYSTEMS P35GPS Projector March, 2004 I V O T N A L O G O U N D H E A D... -
Page 72: Table B-12 Central Pivot Analog Soundhead Assembly Parts List
Screw, Socket Head Cap 8-32 x 5/8” Screw, 8-32 x ½” O-ring, 1 ½” Table B-12: Central Pivot Analog Soundhead Assembly Parts List CHRISTIE DIGITAL SYSTEMS M35GPS Projector March, 2004 ID x 1-5/8” OD x 1/16 A p p e n d i x B 598931-119... -
Page 73: B-13: Central Pivot Digital Soundhead Assembly
Base Plate, Sound Head Dowel Pin 1/8Dia x ½ Screw, SCH 8-32 x 5/8 Spring Pin CHRISTIE DIGITAL SYSTEMS P35GPS Projector March, 2004 I V O T I G I T A L O U N D H E A D... - Page 74 Clamp Mount Analog / Digital Sound Head Mount Bracket Analog / Digital Dowel Pin 1/8Dia x 1/2 Screw Socket Head Cap 8-32 x 5/8 CHRISTIE DIGITAL SYSTEMS M35GPS Projector March, 2004 A p p e n d i x B 515500-016...
-
Page 75: Table B-13: Central Pivot Digital Soundhead Assembly Parts List
Digital Power Supply Assembly LED Power Supply Assembly Shim Spacer .010 THK. (Optional) (Not Shown) O-ring, 1 ½” ID x 1/16” Table B-13: Central Pivot Digital Soundhead Assembly Parts List CHRISTIE DIGITAL SYSTEMS P35GPS Projector March, 2004 598931-044 196122-001 (Not Shown) -
Page 76: B-14: Intermittent Shoe Closure
Washer, Split #6 Screw, SHC, 6-32 UNC x 0.875 in (2.2225 cm) L Screw, SHC, 8-32 UNC x 0.375 in (0.9525 cm) L (2) CHRISTIE DIGITAL SYSTEMS M35GPS Projector March, 2004 A p p e n d i x B... -
Page 77: Table B-14: Intermittent Shoe Closure Assembly Parts List
Screw, Set, Hex, 10-32 UNC x 0.25 in (.635 cm) L (2) Spring Compression, Extension Arm Screw, Set, Hex 10-32 UNC x 0.1875 in (0.4763 cm) L Loctite 271 Table B-14: Intermittent Shoe Closure Assembly Parts List CHRISTIE DIGITAL SYSTEMS P35GPS Projector March, 2004 598931-832 598931-294 120653-001... -
Page 78: Table C- 1: Schematic Diagrams For P35Gps Projector
A P P E N D I X C : S C H E M A T I C D I A G R A M S Table C- 1 lists the schematics for the P35GPS projector that are included with this manual. - Page 79 P 3 5 G P S D u a l L e n s T u r r e t P r o j e c t o r CHRISTIE DIGITAL SYSTEMS P35GPS Projector March, 2004...
- Page 80 A p p e n d i x C CHRISTIE DIGITAL SYSTEMS P35GPS Projector March, 2004...
- Page 81 P 3 5 G P S D u a l L e n s T u r r e t P r o j e c t o r CHRISTIE DIGITAL SYSTEMS P35GPS Projector March, 2004...
-
Page 82: Index
Digital Soundhead Assembly Removal Dual Lens Turret Installation Dual-Lens Turret Electric Changeover Assembly Removal CHRISTIE DIGITAL SYSTEMS P35GPS Projector March, 2004 I N D E X Electrical Connections 4-2, 4-3 4-2, 4-3 4-2, 4-3 A p p e n d i x C... -
Page 83: Installation
Removal Lens Installation Maintenance Cleaning Frequency Visual Inspection Manual Turn-Down Knob Motor Assembly Removal Motor Pulley CHRISTIE DIGITAL SYSTEMS P35GPS Projector March, 2004 Outer Timing Belt Removal P35-BT P35-FL P35GPS Projector Optional Features 4-2, 4-3 Standard Specifications P35GPS Projector Shipping Configuration... - Page 84 Trap and Gate Assembly Removal Ultramittent 2-1, 4-2, 4-3, 4-4 Ultramittent Assembly CHRISTIE DIGITAL SYSTEMS P35GPS Projector March, 2004 Removal 4-3, 4-4 Visual Inspection A p p e n d i x C...
-
Page 85: March
This warranty does not apply to parts of any Christie product, which have been opened, disassembled, repaired, or altered by anyone other than Christie, or subjected to misuse or abuse. Christie shall not be liable for any consequential damages. CHRISTIE DIGITAL SYSTEMS P35GPS Projector March, 2004 WARRANTY COVERING CHRISTIE DIGITAL SYSTEMS "Christie")
Need help?
Do you have a question about the P35GPS-AT and is the answer not in the manual?
Questions and answers