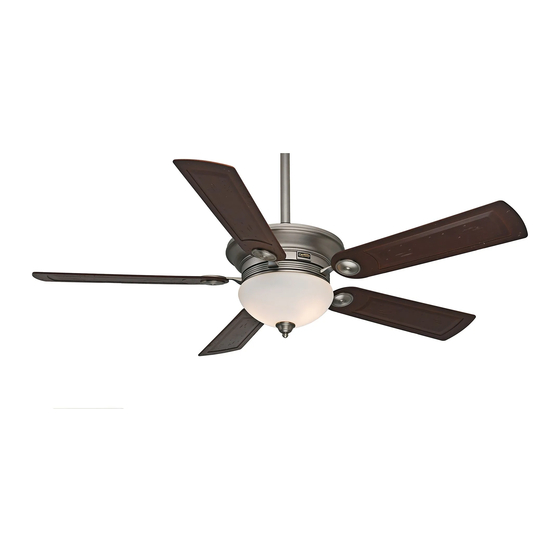
Casablanca WHITMAN Owner's Manual
Hide thumbs
Also See for WHITMAN:
- Owner's manual and installation manual (2 pages) ,
- Owner's manual (2 pages)
Table of Contents
Advertisement
W
HITMAN
READ AND SAVE THESE INSTRUCTIONS!
Safety and the proper operation of your Casablanca fan both require a thorough knowledge of the product and
proper installation. Therefore, before attempting to install and operate your Casablanca fan, read this Owner's
Manual completely and carefully. Retain this manual and other included documentation for future reference.
CAUTION: To avoid possible electrical shock, make certain that electricity is turned off at the circuit breaker
or fuse box before attempting any installation procedure.
Before You Start. . . . . . . . . . . . . . . . . . . . . . . . . . . . . . . . . . . . . . . . . . . . . . . . . . . . . . . . . . . . . . . . . . . . . . . . . 2
Safe Use . . . . . . . . . . . . . . . . . . . . . . . . . . . . . . . . . . . . . . . . . . . . . . . . . . . . . . . . . . . . . . . . . . . . . . . . . . . . . . 2
General Guidelines . . . . . . . . . . . . . . . . . . . . . . . . . . . . . . . . . . . . . . . . . . . . . . . . . . . . . . . . . . . . . . . . . . . . . . 3
Sloped Ceiling Installations . . . . . . . . . . . . . . . . . . . . . . . . . . . . . . . . . . . . . . . . . . . . . . . . . . . . . . . . . . . . . . . . 3
Getting Started. . . . . . . . . . . . . . . . . . . . . . . . . . . . . . . . . . . . . . . . . . . . . . . . . . . . . . . . . . . . . . . . . . . . . . . . . . 4
Crossbar Mounting Bracket Installation . . . . . . . . . . . . . . . . . . . . . . . . . . . . . . . . . . . . . . . . . . . . . . . . . . . . . . . 4
Lag Screw Installation . . . . . . . . . . . . . . . . . . . . . . . . . . . . . . . . . . . . . . . . . . . . . . . . . . . . . . . . . . . . . . . . . . . . 5
Canopy Installation . . . . . . . . . . . . . . . . . . . . . . . . . . . . . . . . . . . . . . . . . . . . . . . . . . . . . . . . . . . . . . . . . . . . . . 5
Fan Preparation . . . . . . . . . . . . . . . . . . . . . . . . . . . . . . . . . . . . . . . . . . . . . . . . . . . . . . . . . . . . . . . . . . . . . . . . . 6
Hanging the Fan . . . . . . . . . . . . . . . . . . . . . . . . . . . . . . . . . . . . . . . . . . . . . . . . . . . . . . . . . . . . . . . . . . . . . . . . 8
Canopy Electrical Connections . . . . . . . . . . . . . . . . . . . . . . . . . . . . . . . . . . . . . . . . . . . . . . . . . . . . . . . . . . . . . 8
Canopy Hatch Installation . . . . . . . . . . . . . . . . . . . . . . . . . . . . . . . . . . . . . . . . . . . . . . . . . . . . . . . . . . . . . . . . . 8
Blade Installation . . . . . . . . . . . . . . . . . . . . . . . . . . . . . . . . . . . . . . . . . . . . . . . . . . . . . . . . . . . . . . . . . . . . . . . . 9
Light Fixture Installation . . . . . . . . . . . . . . . . . . . . . . . . . . . . . . . . . . . . . . . . . . . . . . . . . . . . . . . . . . . . . . . . . . 10
Glass Installation . . . . . . . . . . . . . . . . . . . . . . . . . . . . . . . . . . . . . . . . . . . . . . . . . . . . . . . . . . . . . . . . . . . . . . . 12
PRIME•TOUCH ® CONTROL INSTALLATION
Control Bracket Installation . . . . . . . . . . . . . . . . . . . . . . . . . . . . . . . . . . . . . . . . . . . . . . . . . . . . . . . . . . . . . . . 13
Remote Operation . . . . . . . . . . . . . . . . . . . . . . . . . . . . . . . . . . . . . . . . . . . . . . . . . . . . . . . . . . . . . . . . . . . . . . 14
Changing Transmitter Frequency Setting . . . . . . . . . . . . . . . . . . . . . . . . . . . . . . . . . . . . . . . . . . . . . . . . . . . . 14
TROUBLESHOOTING TIPS . . . . . . . . . . . . . . . . . . . . . . . . . . . . . . . . . . . . . . . . . . . . . . . . . . . . . . . . . . . . . . . . 15
CARE RECOMMENDATIONS . . . . . . . . . . . . . . . . . . . . . . . . . . . . . . . . . . . . . . . . . . . . . . . . . . . . . . . . . . . . . . 16
PRODUCT SPECIFICATIONS . . . . . . . . . . . . . . . . . . . . . . . . . . . . . . . . . . . . . . . . . . . . . . . . . . . . . . . . . . . . . . 17
Owner's Manual
™
CONTENTS
CONTENTS
PN C2143001 AT0309
™
W
HITMAN
1
Advertisement
Table of Contents

Subscribe to Our Youtube Channel
Related Manuals for Casablanca WHITMAN


Summary of Contents for Casablanca WHITMAN
-
Page 1: Table Of Contents
HITMAN READ AND SAVE THESE INSTRUCTIONS! Safety and the proper operation of your Casablanca fan both require a thorough knowledge of the product and proper installation. Therefore, before attempting to install and operate your Casablanca fan, read this Owner’s Manual completely and carefully. Retain this manual and other included documentation for future reference. -
Page 2: Introduction Before You Start
• This fan is designed to be installed on an existing electrical outlet box. The outlet box must be UL Listed for ceiling fan installations. If it is not, a new box must be installed. Casablanca extension downrods and Sloped Ceiling Adapters (SCAs) are available for sloped or high ceiling installations. -
Page 3: Mounting Recommendations General Guidelines
HITMAN MOUNTING RECOMMENDATIONS GENERAL GUIDELINES Before mounting your Casablanca fan, read the following recommendations. The location of the fan, air circulation, and fan size are all important factors to consider before installation. Location Ceiling fans have practical uses in almost every room in your home. We suggest you follow these mounting recommendations as you decide where to install your Casablanca fan. -
Page 4: Fan Installation Getting Started
If you do not have an existing fi xture located where circuit breaker or fuse box), lower the old fi xture and you wish to place your Casablanca fan, an approved ceiling fi xture outlet box must be installed and wired. -
Page 5: Lag Screw Installation
Step 3. Attach the canopy to the crossbar mounting bracket with three of the 8-32 x 2 " long canopy screws and lock washers provided with your Casablanca fan. Tighten using the provided screwdriver until snug against the ceiling. NOTE: On sloped ceilings, align the canopy opening with the top or peak of the room. -
Page 6: Fan Preparation
FAN PREPARATION PERMA•LOCK™ HARDWARE AND TOOLS NEEDED (not to scale) Allen Wrench (5) 15-watt Pole Cover Uplight Bulbs 5" Perma•Lock™ Downrod and Screws (3) and Ball Assembly IMPORTANT SAFETY INFORMATION: PAPER MOTOR Before starting the installation of your SHIELD ceiling fan, install the threaded downrod into the motor coupling and lock the assembly. - Page 7 ™ HITMAN Step 5c. Tighten the set screw with the Allen wrench ALLEN as shown in Figure #4 to ensure safe operation of WRENCH your fan. If it is tight enough, you should not be able to turn the downrod counterclockwise with your hands. If in doubt, tighten the set screw with the Allen wrench until you cannot turn it any further.
-
Page 8: Hanging The Fan
HANGING THE FAN Step 7a. To hang the fan body in the canopy, hold the fan body fi rmly and insert the ball into the canopy opening. Check that no wires are pinched. Rotate BALL the fan body until the slot in the ball fi ts into the pin opposite the canopy opening. -
Page 9: Blade Installation
™ HITMAN BLADE INSTALLATION BLADE HARDWARE (not to scale) Blade Screws (21) Blade Ring Mounting Blade Iron Screws (11) Screws (5) Phillips Screwdriver Blade Ring Blade Badges (5) Blades (5) Blade Irons (5) Attach Blade Irons BLADEHOLDER BLADEHOLDER AND SCREWS Step 10. -
Page 10: Light Fixture Installation
LIGHT FIXTURE INSTALLATION HARDWARE (not to scale) Phillips Light Cover Board & Light Fixture Screws (3) Light Fixture Screwdriver Bottom Finial LOOSEN Light Assembly Installation SCREWS Step 13a. Locate the light cover board and unscrew the fi nial from the threaded rod. Set fi nial aside for glass installation in Step 14. - Page 11 ™ HITMAN Step 13b. Connect the wires of the motor to the wires of the light fi xture. Connect the BLUE wire from the motor to the BLUE wire of the light kit and connect the two WHITE wires together, as shown in Figure #3.
-
Page 12: Glass Installation
GLASS INSTALLATION HARDWARE (not to scale) Two-Piece Finial (2) 50-watt Halogen Bulbs Glass Shade Install Halogen Bulbs Step 14. Screw the two bulbs into the light fi xture as shown in Figure #1. IMPORTANT! When installing a halogen bulb, carefully cut off the end of the plastic sleeve the bulb comes in and hold the bulb by the plastic sleeve to screw it into the socket. -
Page 13: Control Bracket Installation
(1) This device may NOTICE: Changes or modifi cations not not cause interference, and (2) this device expressly approved in writing by Casablanca must accept any interference, including Fan Company may void the user’s authority interference that may cause undesired operation of the device. -
Page 14: Remote Operation
REMOTE OPERATION Fan Control REVERSE To start the fan, press the appropriate speed button to run the fan at the desired Send Signal speed. HIGH • = LOW speed •• = MED speed ••• = HIGH speed To turn off the fan, press the FAN OFF button. Airfl... -
Page 15: Troubleshooting Tips
® RIME• OUCH TROUBLESHOOTING TIPS Please refer to this troubleshooting guide before requesting service or contacting your dealer for assistance. PROBLEM POSSIBLE REMEDIES Fan will not start • Check the main circuit fuses, circuit breakers, and wall switch position. Check all wire connections. -
Page 16: Care Recommendations
Consult the dealer or an experienced radio/TV technician for help. Note: Any changes or modifi cations to the transmitter or receiver not expressly approved by Casablanca Fan Company may void one’s authority to operate this remote control.
Need help?
Do you have a question about the WHITMAN and is the answer not in the manual?
Questions and answers