
Subscribe to Our Youtube Channel
Related Manuals for Regency Ceiling Fans Akina


Summary of Contents for Regency Ceiling Fans Akina
- Page 1 Style that revolves around you. ’ • • eiling wner anual • a • kina 1/08 WARNING: Read and follow these instructions carefully and be mindful of all warnings shown throughout.
- Page 2 & O eneral nstallatiOn peratiOn nstruCtiOns mportant afeguardS 1. To ensure the success of the installation, be sure to read the instructions and review the diagrams thoroughly before beginning. 2. To avoid possible electrical shock, be sure electricity is turned off at the main power box before wiring. All electrical connections must be made in accordance with local codes, ordinances and/or the National Electric Code.
- Page 3 MpOrtant aFety reCautiOns Thank you for choosing a Regency Ceiling Fan. You have chosen the best! Your new ceiling fan has been designed to provide many years of service and enjoyment. Warnings: • Disconnect power by removing fuse or turning off circuit breaker before installing the fan and/or optional lighting.
- Page 4 npaCking 1. Unpack your fan and check the contents. Do not discard the carton. If warranty replacement or repair is ever necessary, the fan should be returned in original packing. Remove all parts and hardware. Do not lay motor housing on its side, or the decorative housing may shift, be bent or damaged.
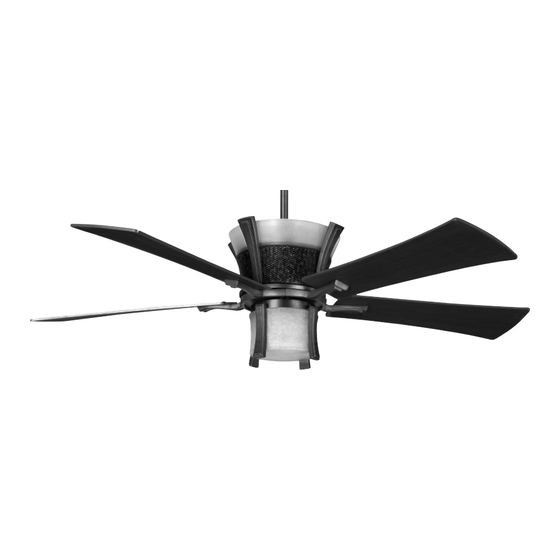
- Page 5 reparatiOn Parts identification on Uplights (on top of fan motor assembled fan housing) Collar Downrod Cover Blade Blade Housing reparatIon Verify that you have all parts before beginning the installation. Check foam insert closely for missing parts. Remove motor from packing. To avoid damage to finish, assemble motor on soft padded surface or use the original foam inset in motor box. Do not lay fan on its side as this could result in shifting of motor in decorative enclosure.
- Page 6 nstalling ttach plIght laSS 1. Remove the four uplight mounting screws and grommets (Fig. 1) 2. Install uplight glass to the fan body and resecure the four uplight mounting screws and grommets (Fig. 2) 3. Install the four E12 candelabra light bulbs into the sockets located on the fan body. (Fig. 3) Mounting Screw Grommet Uplight...
- Page 7 nstalling ttach ownrod 1. Carefully support fan body (motor) in its styrofoam packing with the mounting collar (where the wires come out) facing upward. 2. Remove ball from the downrod by loosening set screw in the side of the ball. Slide ball down and remove ball pin; remove ball.
- Page 8 nstalling the an COntinued WARNING: To avoid damaging the blade arms and blades, do not install them onto fan until fan is fastened to ceiling. 1. Lift ball/downrod/fan into hanging bracket opening. NOTE: The tab opposite hanging bracket opening should fit in slot on ball (Fig.
- Page 9 leCtriCal OnneCtiOns Be sure electricity is turned off at the main power box before wiring lectrIcal onnectIonS 1. Five wires are connected to the fan (Fig. 1). Black – this is the “hot” power to run fan. Orange - this is the “hot” power to operate the uplight Blue - this is the “hot”...
-
Page 10: B Lade A Ttachment
lade ttaChMent lade ttachment 1. Place fiber washer on screw. Insert this assembly through the blade and start the screw into the blade arm. Repeat this procedure without tightening the screw until all 3 screws have been started into the blade arm (Fig. 1). NOTE: Fans that have painted finishes may be packed with gaskets that can be used between the blade arm and blade to help prevent a clicking noise that may develop if blade screws loosen over time. - Page 11 ttaChing ight Ight nStallatIon 1. Attach the light kit base using the quick connects. Black wire to black wire, and white wire to white wire (Fig. 1). 2. Remove one screw from the motor light kit mounting area (Fig. 1). 3.
-
Page 12: Remote Control
eMOte OntrOl eneral nformatIon NOTE: For use with a standard remote control. Multiple code choices are included with your fan’s remote control in case: • you have more than one remote control fan and want them to respond only to their own remote control •... -
Page 13: Operation
peratiOn peratIng ButtonS on the ranSmItter HI – fan high speed MED – fan medium speed LOW – fan low speed FAN/OFF – fan speed off LIGHT – light brightness and off function for uplight FOR/REV – forward and reverse WARM MONTHS Forward (counterclockwise) •... -
Page 14: Care And Cleaning
are and leaning Periodic cleaning of your new ceiling fan is about the only maintenance that is needed. Only use a soft brush or lint free cloth to avoid scratching the finish. DO NOT use water when cleaning your ceiling fan. It could damage the motor or the wood blades, and/or create the possibility of electrical shock.
Need help?
Do you have a question about the Akina and is the answer not in the manual?
Questions and answers