Paradox Digiplex DGP-641 User Manual
Hide thumbs
Also See for Digiplex DGP-641:
- Reference and installation manual (44 pages) ,
- User quick reference manual (2 pages)
Table of Contents
Advertisement
Advertisement
Table of Contents

Related Manuals for Paradox Digiplex DGP-641


Summary of Contents for Paradox Digiplex DGP-641
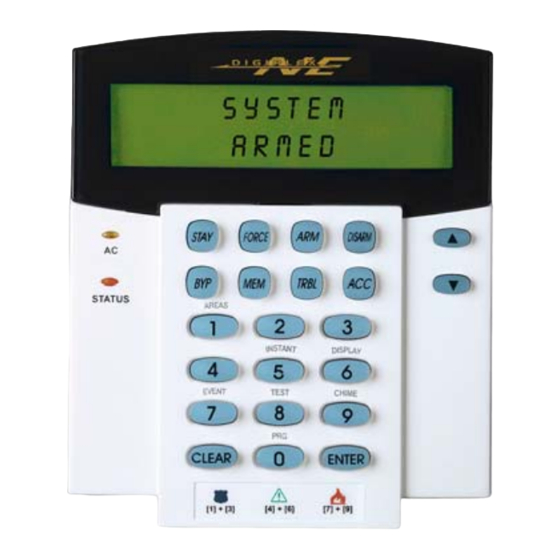
- Page 1 Digiplex LCD Keypad DGP-641 User’s Manual...
-
Page 2: Table Of Contents
1.0 TABLE OF CONTENTS INTRODUCTION ........... 6 1.1 Legend .............. 6 BASIC OPERATION ........7 2.1 Auditory Feedback (Beep Tones) ..... 8 2.2 Keypad Indicator Lights ........8 2.3 LCD Screen ............8 2.4 User Menu ............10 2.5 Partitioned System ........... 11 2.6 Area Status Display ......... - Page 3 ACCESS CODES ......... 26 5.1 Keypad Lock-out ..........26 5.2 Erasing Access Codes ........26 5.3 System Master Code ........27 5.4 User Access Codes ......... 27 TROUBLE DISPLAY ........33 6.1 Event Record Display ........38 ADDITIONAL FEATURES ......40 7.1 Programmable Outputs (PGMs) ......
- Page 4 TESTING AND MAINTENANCE ....51 9.1 Burglar Alarm Testing ........51 9.2 Fire Alarm Testing ..........51 9.3 System Maintenance ........51 9.4 System Test............52 SYSTEM CHECKLIST ......... 53 10.1 Zone Description..........53 10.2 Access Codes ..........56 10.3 Special Buttons and Features ......60 10.4 Other Information ..........
-
Page 5: Introduction
2.0 INTRODUCTION Your Digiplex™ Security System is an advanced technology security system that will provide you with reliable security protection and powerful features that are easy to use. The elegant and user-friendly Digiplex LCD Keypad will allow you easy access to your security system's functions and information at the touch of a button. -
Page 6: Basic Operation
3.0 BASIC OPERATION Everything you need to know about your security system is clearly displayed on the large LCD screen. The menus and the prompt on the LCD screen provide simple, step-by-step instructions on how to use your system and display what is occurring in your system. -
Page 7: Auditory Feedback (Beep Tones)
3.1 A UDITORY EEDBACK ONES When you enter information on the keypad, the keypad will guide you with beep tones to communicate acceptance or rejection of your entries. Confirmation Beep: When an operation (i.e. arming/disarming) is successfully entered or when the system switches to a new status/mode, the keypad emits an intermittent beep tone (“... -
Page 8: Normal Mode
3.3.1 Normal Mode When no actions are being performed on the keypad, the keypad will remain in Normal Mode as shown in Figure 2-2 on page 9 and will automatically display: •The current status of the zones for every area the keypad is assigned •The Alarm Memory Display (see section 5.3) if any alarms have occurred •The Trouble Display (see section 7.0) if any troubles are occurring... -
Page 9: User Menu
3.4 U Once you enter your User Access Code and are granted access to the system, the LCD screen will display the User Menu as shown in Figure 2-3. From this menu you can access various features and other menus. Depending on the User Options programmed on your User Access Code, you will have access to some or all of the features and menus in the User Menu. -
Page 10: Partitioned System
3.4.1 Multiple-action The Multiple-action feature permits you to complete more than one action after entering the User Menu. If your installer has enabled this feature, the LCD screen will return to the User Menu after each action so you may perform another action without having to re-enter your User Access Code. - Page 11 How do I see the status of the zones? 1) Enter [ ] then press the button corresponding to ACCESS CODE the area: = Area 1 = Area 3 = Area 2 = Area 4 2) Press to exit. In Area Status Display the following will scroll on the LCD screen: •...
-
Page 12: Arming
4.0 ARMING When the system is armed, the alarm system will respond to any breach in the zones according to the zone’s programming. For example, if someone opens a window that is armed, the alarm system will trigger the alarm and can alert your Security Company. 4.1 E ELAY IMER... -
Page 13: Stay Arming
How do I Regular Arm the system? 1) Enter your [ ACCESS CODE After Confirmation Beep, “Access Granted” should appear. 2) Press the button. If you have access to more than one area, press the area’s number, press the button for all areas, or use the buttons and press when the area you want to arm appears. -
Page 14: Instant Arming
4.3.1 Stay Arming with Delay Stay Arming with Delay functions like Stay Arming except the installer can program armed zones with an Entry Delay Timer. If these zones are accidently triggered, the timer will start to allow you time to disarm the area(s). How do I Stay Arm? 1) Enter your [ ACCESS CODE... -
Page 15: Force Arming
4.4.1 Instant Arming with Delay Instant Arming with Delay functions like Instant Arming except the installer can program certain armed zones within the protected area(s) with an Entry Delay Timer. If these zones are accidently triggered, the timer will start to allow you enough time to disarm the area(s). - Page 16 it as well. Only User Access Codes with the Force Arm option enabled can Force Arm the system. This feature is commonly used when a motion detector is protecting an area that is occupied by a keypad. During Force arming, the motion detector will remain unarmed until you exit the area that it protects.
-
Page 17: One-Touch Buttons
4.6 O OUCH UTTONS At the touch of a button you can view the Area Status Display (see section 3.6) for a Partitioned System (see section 3.5). Press and hold: Your installer can also program your system to respond to certain features with just a touch of a button. -
Page 18: Keyswitch Arming
4.7 K EYSWITCH RMING Your installer can add a keyswitch to arm and disarm your system. The keyswitch can be programmed to Regular, Stay, Force, or Instant Arm, and Disarm a specific area. The keyswitch will also be programmed by the installer to function as a Maintained or Momentary keyswitch. -
Page 19: Bypass Programming
How do I set the Auto-Arming timer? 1) Enter your [ ACCESS CODE After Confirmation Beep, “Access Granted” should appear. 2) Press the button. 3) Press the button. If you have access to more than one area, press the area’s number or use the buttons and press the button when the area you want to program appears... - Page 20 Bypassed zone(s) will be kept in memory until the area is armed. Once the area is disarmed, the system will unbypass the zones. To bypass a zone: • The zone must have the Bypass option programmed by the installer. • Your User Access Code must be programmed to enable the Bypass option.
- Page 21 4.9.2 Bypass Recall Bypass Recall reinstates all the zones that were bypassed the last time the system was armed. How do I activate Bypass Recall? 1) Enter your [ ACCESS CODE After Confirmation Beep, “Access Granted” should appear. 2) Press the button.
-
Page 22: Disarming
5.0 DISARMING When the system is disarmed, the alarm system deactivates the zones so the alarm will not be triggered if zones are breached. Any user can disarm the system unless their code has been assigned the Arm Only option. 5.1 E NTRY ELAY... - Page 23 How do I disarm the system? If you are disarming a Stay or Instant Armed area, go to step 2. 1) Enter through a designated entry. The keypad will beep and begin the Entry Delay Timer. 2) Enter your [ ACCESS CODE 3) Press the button.
-
Page 24: Alarm Memory Display
5.3 A LARM EMORY ISPLAY Your system will record all the alarms that occurred during the last armed period. If an alarm was triggered, the keypad will display “Alarms in Memory”. In case of a burglar alarm, leave the premises and call your Security Company from a safe place. -
Page 25: Access Codes
6.0 ACCESS CODES Access Codes allow access the system. These codes can be programmed to permit access to all or some features and areas. The installer will program User Access Codes to be four digits, six digits, or variable from one to six digits in length. Each digit can be any value between zero and nine. -
Page 26: System Master Code
6.3 S (Default 123456) YSTEM ASTER The System Master Code will give you access to all the features available on your system as well as the ability to add, modify, or delete any User Access Codes. We suggest that you change this code to prevent others from accessing and changing your options without authorization. - Page 27 If the keypad emits a Rejection Beep once you have completed all the steps, you may have chosen an existing User Code or the Master code used to modify or create the code does not have access to the User Options or Area Assignment programmed.
- Page 28 Figure 5-2: Programming User Access Codes Digiplex LCD Keypad’s 29...
- Page 29 Table 1: User Options Options on the User Access Codes that activate access to features. Press option on/off Option Description Master feature disabled. Master feature enabled. Modifies User Code only. Full Master feature enabled. Create or modify other User Codes, User Options, and Area Assignment according to its own User Options and Area Assignment.
- Page 30 Press option on/off Option Description Arm Only feature disabled. Arm Only feature enabled. Can arm assigned areas, but CANNOT disarm. Stay & Instant Arm feature disabled. Stay & Instant Arm feature enabled. Can Stay or Instant Arm the system Force Arm feature disabled. Force Arm feature enabled.
- Page 31 Table 2: Area Assignment In a Partitioned System the system can be divided into four distinct protected areas. Programming access to a specific area or areas is called Area Assignment. User Access Codes are only able to perform actions (arming, disarming, etc.) in the area(s) the code is assigned.
-
Page 32: Trouble Display
7.0 TROUBLE DISPLAY If your system is tampered with or experiences problems, the Trouble Display will appear on the LCD screen. Most of the trouble conditions can be programmed by your installer to be reported directly to your Security Company. A keypad will only display troubles that occur in the area(s) to which it has been assigned. - Page 33 7.0.1 Group 1: System AC Failure The control panel has detected a power failure. This means that your system is running on the back-up battery. This trouble can be programmed not to appear on the LCD screen when it occurs. The AC Light on your keypad will be turned off during a power failure.
- Page 34 7.0.2 Group 2: Communicator TLM (Telephone Line Monitor) The control panel is unable to access the telephone line. Fail to Communicate 1 Fail to Communicate 2 Fail to Communicate 3 Fail to Communicate 4 The control panel has tried all assigned telephone numbers and has failed to communicate with the Security Company.
- Page 35 AC Failure Module power failure. Battery Failure Module's battery is disconnected, needs to be recharged, or replaced. Supply Output Module has exceeded current limits. 7.0.4 Group 4: Bus Troubles Missing Keypad A keypad is no longer communicating with the control panel. Missing Module A device no longer communicating with the control panel.
- Page 36 7.0.6 Group 6: Zone Low Battery If a wireless device's battery needs to be replaced, the zone that it is assigned to will be displayed on the LCD screen. Also, the light on the device will flash to indicate this trouble. 7.0.7 Group 7: Zone Fault A wireless device is no longer communicating with its receiver or a Fire Loop connection trouble is occurring.
-
Page 37: Event Record Display
7.1 E VENT ECORD ISPLAY The Event Record Display will record the user-initiated actions that occurred in your system as well as any alarms or troubles. For example, when a valid code is entered, the User Access Code and the action taken (arm, disarm, etc.) is recorded. You have the choice of viewing the events in all the areas assigned to your User Access Code or by individual area. - Page 38 Once you have entered the Event Record Display, you can change the order that the Event Record screens (see Figure 6-1) appear by pressing the button. If you already know the number of the event you want to view, press the button and then enter the event's number.
-
Page 39: Additional Features
8.0 ADDITIONAL FEATURES 8.1 P (PGM ROGRAMMABLE UTPUTS Your Digiplex system includes five programmable outputs (PGMs) that can be programmed by your installer. A PGM triggers when a predetermined event or series of events occurs in your system. The PGMs can be programmed to reset smoke alarms, turn on light switches, open or close garage doors and much more. - Page 40 Figure 7-1: Modifying LCD screen settings Digiplex LCD Keypad’s 41...
-
Page 41: Set Time & Date
8.3 S & D If the wrong time and /or date are displayed on the Normal Mode screen, you can reset them. How do I reset the time and date? 1) Press the button 2) Press the button. 3) To change the time, place the underline under the number you want to change by using the button and enter the hour and minutes according to a 24-hour clock (i.e. - Page 42 Figure 7-2: Programming Chime Zones Digiplex LCD Keypad’s 43...
-
Page 43: Panic Alarms
8.5 P ANIC LARMS Your system can be programmed to send an alarm to your Security Company to request help from the police, a medical facility, the fire department, or anyone you wish when you press a pre-determined combination of buttons. Ask your installer about programming these features in your system. -
Page 44: Quick Function Buttons
8.6 Q UICK UNCTION UTTONS You will only need to use the Quick Function Buttons upon your installer or Security Company's request. Only the System Master Code or User Access Codes with the Master feature enabled will be able to access these functions. How do I access the Quick Function Buttons? 1) Enter your [ ACCESS CODE... -
Page 45: Fire And Burglar Alarms
9.0 FIRE AND BURGLAR ALARMS 9.1 S TANDARD During a fire alarm, the bell/siren emits an intermittent sound ) until silenced or reset. If the zone is a Standard BEEP BEEP BEEP Fire Zone, the system can immediately send an alert to your Security Company. - Page 46 What do I do if the fire alarm is accidentally triggered? 1) Press the button within 30 seconds of the alarm. 2) Clear the problem from the area. 3) If problem remains after 90 seconds, the alarm will sound again. Press again.
- Page 47 Figure 8-1: Delayed Fire Zone 48 User’s Manual...
-
Page 48: Fire Safety Tips
9.3 F AFETY How should you prepare in case of a fire in your home or business? 1) Remind everyone to escape first, then call for help. 2) Develop a fire escape plan and designate a meeting place outside. 3) Practice the escape plan frequently. 4) Plan two ways to escape from every room, if possible. -
Page 49: Home Fire Warning System
9.5 H ARNING YSTEM Household fires are especially dangerous at night. Fires produce smoke and deadly gases that can overcome occupants while they sleep. To warn against fire, smoke detectors should be installed outside each separate sleeping area in the immediate vicinity of the bedrooms and on each additional story of the family living unit, including basements. -
Page 50: Testing And Maintenance
10.0 TESTING AND MAINTENANCE 10.1 B URGLAR LARM ESTING Two people are needed to complete this test. One person will watch the LCD screen on the keypad while the other person walks around the protected area and open the zones (i.e. open the doors and window that are protected, walk in the path of the motion detectors, etc.). -
Page 51: System Test
10.4 S YSTEM Speak to your installer before conducting a system test since the system must be programmed to respond to the test instructions. It is normally recommended that you conduct the system test once a week, but contact your installer for instructions concerning your particular system. -
Page 52: System Checklist
11.0 SYSTEM CHECKLIST Important: Keep this information in a secure location. 11.1 Z ESCRIPTION Is this a Partitioned System? Area 1 = __________________________________________ Area 2 = __________________________________________ Area 3 = __________________________________________ Area 4 = __________________________________________ Place a indicate the options and area(s) enabled for that zone (if any). - Page 53 Area Entry Zone # and Byp Stay Force 24Hr. 2 3 4 Delay Description 09:___________ ____ 10:___________ ____ 11:___________ ____ 12:___________ ____ 13:___________ ____ 14:___________ ____ 15:___________ ____ 16:___________ ____ 17:___________ ____ 18:___________ ____ 19:___________ ____ 20:___________ ____ 21:___________ ____ 22:___________ ____ 23:___________...
- Page 54 Area Entry Zone # and Byp Stay Force 24Hr. 2 3 4 Delay Description 29:___________ ____ 30:___________ ____ 31:___________ ____ 32:___________ ____ 33:___________ ____ 34:___________ ____ 35:___________ ____ 36:___________ ____ 37:___________ ____ 38:___________ ____ 39:___________ ____ 40:___________ ____ 41:___________ ____ 42:___________ ____ 43:___________...
-
Page 55: Access Codes
Exit Delay: Area 1 is ___________ seconds. Area 2 is ___________ seconds. Area 3 is ___________ seconds. Area 4 is ___________ seconds. The entry delays appear in the Zone Description table. 11.2 A CCESS ODES For security reasons, write only the user’s name and not his or her access code. - Page 56 Keypad Area Full User #, Name Master Byp Stay Force Duress obeys 1 2 3 4 Master Only code _______ ___ _______ ___ _______ ___ _______ ___ _______ ___ _______ ___ _______ ___ _______ ___ _______ ___ _______ ___ _______ ___ _______ ___ _______ ___ _______ ___...
- Page 57 Keypad Area Full User #, Name Master Byp Stay Force Duress obeys 1 2 3 4 Master Only code _______ ___ _______ ___ _______ ___ _______ ___ _______ ___ _______ ___ _______ ___ _______ ___ _______ ___ _______ ___ _______ ___ _______ ___ _______ ___ _______ ___...
- Page 58 Keypad Area Full User #, Name Master Byp Stay Force Duress obeys 1 2 3 4 Master Only code _______ ___ _______ ___ _______ ___ _______ ___ _______ ___ _______ ___ _______ ___ _______ ___ _______ ___ _______ ___ _______ ___ _______ ___ _______ ___ _______ ___...
-
Page 59: Special Buttons And Features
11.3 S PECIAL UTTONS AND EATURES One-Touch Buttons: Place a if the One-Touch Button is activated. Stay Arm Bypass Programming Instant Arm Force Arm Keypad Settings Regular Arm Event Record Display Disarm Stay/Instant Arm Panic Alarms: Place a if the Panic Button is activated and if alarm is silent or audible. -
Page 60: Other Information
PGMs: PGM When this occurs: This is activated: __________________ __________________ __________________ __________________ __________________ __________________ __________________ __________________ __________________ __________________ 11.4 O THER NFORMATION Installed By:___________________ Date:_________________ Service provided by:_________________Tel:______________ Monitoring Station:_________________Tel:________________ Your account number is: ______________________________ Alarm transformer location:__________ on circuit #:__________ Location of Telephone Connections:______________________ Digiplex LCD Keypad’s 61... - Page 61 Warranty The Seller warrants its products to be free from defects in materials and workmanship under normal use for a period of one year. Except as specifically stated herein, all express or implied warranties whatsoever, statutory or otherwise, including without limitation, implied warranty...
Need help?
Do you have a question about the Digiplex DGP-641 and is the answer not in the manual?
Questions and answers