Table of Contents
Advertisement
Quick Links
Advertisement
Table of Contents

Related Manuals for Barco Coronis Fusion


Summary of Contents for Barco Coronis Fusion
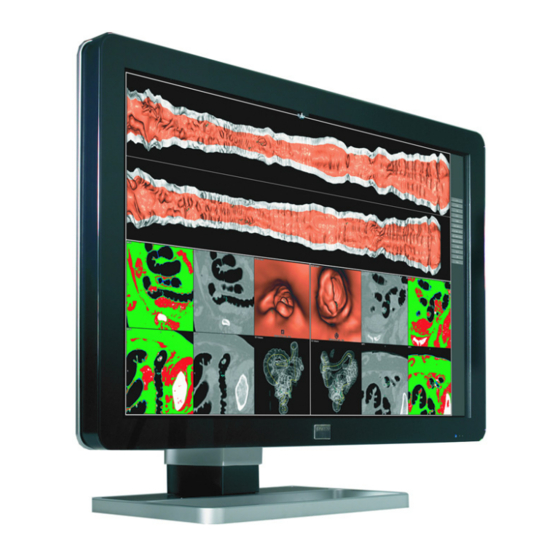
- Page 1 Coronis Fusion Getting Started Guide...
- Page 2 (This page intentionally left blank.)
-
Page 3: Copyright Notice
- graphical, electronic, or mechanical including photocopying, taping or information storage and retrieval systems - without written permission of Barco © 2007 Barco N.V. All rights reserved. -
Page 4: Table Of Contents
Table of Contents Table of Contents Preface....................5 Environmental information ............6 Safety Instructions ..............10 Explanation of symbols ............13 Getting to know the system............15 LED indicator ................15 Display controls............... 15 Rear view ................18 Connectors................19 Installing the system .............. -
Page 5: Preface
Barco N.V. or BarcoView, LLC., for use only under the specific terms of a software license agreement between Barco N.V. or BarcoView LLC. and the licensee. No other use, duplication, or disclosure of a Barco software product, in any form, is authorized. -
Page 6: Environmental Information
Preface television reception, which can be determined by turning the equipment off and on, the user is encouraged to try to correct the interference by one or more of the following measures: • Reorient or relocate the receiving antenna. • Increase the separation between the equipment and receiver. •... - Page 7 Preface laws. (Within this system, the backlight lamps in the monitor display contain mercury.) This equipment has required the extraction and use of natural resources for its production. It may contain hazardous substances for health and environment. In order to avoid the dissemination of those substances in the environment and to diminish the pressure on natural resources, we encourage you to use the appropriate take-back systems.
- Page 8 Preface Information for China ROHS compliance Table of toxic and hazardous substances/elements and their content, as required by China’s management methods for controlling pollution by electronic information products Toxic or hazardous Substances and Elements Part Name Cr6+ PBDE Metal parts Plastic parts PCB or PCBA LCD panel...
- Page 9 Preface...
-
Page 10: Safety Instructions
Preface Safety Instructions General Recommendations Read the safety and operating instructions before operating the display. Retain safety and operating instructions for future reference. Adhere to all warnings on the display and in the operating instructions manual. Follow all instructions for operation and use. Electrical shock Type of protection (electrical): Display with external power supply: Class I equipment... - Page 11 Preface • The medical approved DC power supply must be powered by the AC mains voltage. Power cords: • Utilize a UL-listed detachable power cord, 3-wire, type SJ or equivalent, 18 AWG min., rated 300 V min., provided with a hospital-grade type plug 5-15P configuration for 120V application, or 6-15P for 240V application.
- Page 12 Preface Operating precautions: How to avoid image retention Continuous operation of the display with the same image or static image elements may result in some image sticking on the LCD panel. To decrease the risk of image sticking (image retention): Switch on DPMS on display and PC: •...
-
Page 13: Explanation Of Symbols
Preface Explanation of symbols Symbols on the display and / or power supply On the display or power supply, you may find the following symbols (nonrestrictive list): Indicates compliance to the essential require- ments of the Directive 93/42/EEC Indicates compliance with Part 15 of the FCC rules (Class A or Class B) Indicates the display is approved according to the UL regulations... - Page 14 Preface Indicates the display serial no. Consult the operating instructions Indicates this apparatus must not be thrown in the trash but must be recycled, according to the European WEEE (Waste Electrical and Electronic Equipment) directive Symbols used throughout the manual: Warning: Risk of Caution: Risk of injury to human...
-
Page 15: Getting To Know The System
Getting to know the system Getting to know the system LED indicator The LED color indicates the display’s power status: Display is on (when enabled in the OSD). Green Display is in Standby power-saving mode. Orange Display is disconnected from the power or the LED’s on state is disabled in the OSD. - Page 16 Getting to know the system Figure 1: Touch keys Left/Down touch key To move down or decrease values in the OSD. Right/Up touch key To move up or increase values in the OSD. Enter touch key To display the OSD (on-screen display). In the OSD, this button acts as Enter button to make selections.
- Page 17 Getting to know the system Control wheel The control wheel can be pressed like a push button and rotated like a knob. It allows to put the display in stand-by, navigate through the on- screen display (OSD) menus and change values in the OSD. The control wheel is located at the bottom of the LCD panel.
-
Page 18: Rear View
Getting to know the system Rear view Figure 2: Rear view Connector compartment cover. Detach to get access to the signal connectors. (Not visible on drawing) Push-button to release the panel unit from the display stand. This button is located on the rear of the panel. -
Page 19: Connectors
Getting to know the system Display stand cover. Slide it upward and detach it before connecting the signal cables to route the cables neatly. After connecting the cables, re-attach the cover to hide the cables. Push-button to unlock the display height adjust mechanism. When the display is shipped, the display height mechanism is locked to prevent damage during shipping. - Page 20 Getting to know the system Figure 4: Connectors front “Left” DVI (digital) video input. See note below. 24 VDC power input. USB upstream connector (to PC). USB downstream connector. If the display’s USB upstream connector is connected to the PC USB bus, you can use the USB downstream connector to connect peripheral USB devices.
- Page 21 Getting to know the system Note: The Barco Coronis Fusion Display disposes of 2 video inputs. You can connect both video inputs or just one input. • When both inputs are used (DuoView), the signal on the “left” DVI connector (6) is shown on the left side of the screen and the signal on the “right”...
-
Page 22: Installing The System
Installing the system Installing the system Installation precautions Precautions • Keep your original packaging. It is designed for this display and is the ideal protection during transport. • Avoid reflections in the flat panel to reduce eye strain. • Make sure the surface, stand, arm or boom to bear the display is strong and stable enough to bear its weight. - Page 23 Installing the system Types of display controllers for Coronis Display Systems There are four different models of display controllers available for your B Display System. ARCO ORONIS USION Board Model VGA Jumper Recommended PCIe Slot MXRT 2100 ARCO ORONIS MXRT 5100 ARCO ORONIS MXRT 7100...
- Page 24 Installing the system x16 slot x8 slot x1 slot Figure 6: Examples of PCIe slots...
-
Page 25: Quick Installation
Installing the system Quick installation Experienced users and system administrators can follow these brief instructions for installing the display controller(s) for your B ARCO Display System in the shortest possible time. ORONIS USION To perform a quick installation CAUTION – Wear a grounded, protective ESD strap when handling or during installation of the display controller. -
Page 26: Detailed Installation
Installing the system Detailed installation The following instructions will take you step by step through the installation of the display controller(s) for your B ARCO ORONIS USION Display System. CAUTION – Wear a grounded, protective ESD strap when handling or during installation of the display controller. Electrostatic charges can damage the display controller. - Page 27 Installing the system Align the display controller(s) for your B ARCO ORONIS USION Display System with the slot(s) and press it(them) in firmly until the card(s) is(are) fully seated. Note: This step applies only to the MXRT 5100 and MXRT 7100. Connect the power cable to the 6-pin power connection on the graphics card.
- Page 28 Installing the system Connecting your Barco displays Figure 8: MXRT 2100 & B PCIe display controller Base- ARCO ORONIS plate Head 1 – DVI-I Connection Head 2 – DVI-I Connection Figure 9: MXRT 5100 and MXRT 7100 Baseplate Head 1 – DVI-I Connection...
-
Page 29: Connecting The Signal Cables
If you have properly installed your graphics card, the Windows start-up messages will appear once the boot procedure is finished. Your Barco display(s) will be running in a basic video mode at a default refresh rate. Higher resolutions and refresh rates, such as 1536x2048@60Hz, are not avail- able at this stage of the installation. - Page 30 Installing the system To remove the cover, gently lift the clips (2) at one of the handles of the connector cover to release that side of the cover. Then do the same at the other side of the cover. At last remove the cover.
- Page 31 Installing the system Figure 11: Signal cable connections • Connect Head1 of the graphic board to the “left” DVI connector (4) and connect Head2 to the “right” DVI connector (8). (“Left” and “Right” refer to their location for the user looking at the screen.) •...
- Page 32 Installing the system After routing the cables, re-attach the display stand cover. Startup the display. Note: When after startup you wish to change the screen resolution, try to do so in the display control panel on the computer. If you cannot select the desired resolution in the control panel, you need to select the desired resolution in the display OSD by means of the Preferred Input function in the Settings menu.
-
Page 33: Vesa-Mount Installation
Installing the system Vesa-mount installation Important: • Use an arm that is approved by VESA (according to the VESA 100 mm standard). • Use an arm that can support a weight of at least 25 kg (55.12 lbs). To attach the panel unit to an arm stand: Release the display panel from the display stand as follows: •... -
Page 34: Software Installation
Installing the system You should mount the panel in landscape position. Portrait position is not supported. Software installation This chapter will guide you through the installation of the drivers, software and documentation associated with your B ARCO ORONIS Display System or B Display(s). - Page 35 CD-ROM into your computer’s CD/DVD drive after the operating system has started. If your CD/DVD drive’s auto-run is not enabled or the Barco Product Installation Wizard does not start automatically, you can run the Barco Product Installation Wizard manually by following these steps: Click the Start button in the task bar.
- Page 36 Installing the system Click Yes to accept the terms of the Barco and ATI license agreements. The Barco setup wizard will continue with the installation only if you accept the terms of both license agreements. If you click No, the wizard will exit.
-
Page 37: Automated Display Configuration
Software should automatically detect your Barco displays and attach them to the desktop with the correct resolution. If the Barco Monitor Plug and Play Software fails to detect your Barco displays or fails to attach them to the desktop correctly please refer to the section, Display”... - Page 38 Remove Programs utility. This can be found in the Windows Control Panel. Note: When uninstalling the Barco MXRT drivers, the devices must be uninstalled in pairs. When the dialog box shown in figure 14 appears select all of the devices listed.
- Page 39 Installing the system Click Run. Click Browse and browse to the root directory of the B ARCO ORONIS USION Display System Installation CD-ROM. Click on the file, Setup.exe, and click Open. browse to the root directory of the location where you saved the contents of your B Display ARCO...
-
Page 40: Where To Get More Information
The online user guide is installed on the system PC during the system driver installation. To open the online user guide, select Start>Program Files>Barco>Documentation>Coronis online user guide from the Windows Start menu. The online user guide uses Java scripts to create the html pages. In Windows XP, SP2, it is possible that Internet Explorer blocks them for security reasons. - Page 41 Where to get more information • Select the Advanced tab • In the Security section, check the option Allow active content to run in files on My Computer...
-
Page 42: Troubleshooting
ORONIS USION account with administrator privileges. If you are using a color display in conjunction with your Barco grayscale display(s) or you have you should configure your desktop before setting the resolution of the your Barco grayscale display(s). Note: If you are using Barco Coronis Color displays and have selected the one of the two Static Gray palette modes for them, you should follow these guidelines also. - Page 43 True Color (32 bits per pixel). Even though this palette mode supports 32 bit True Color, Barco recommends that when using a using a color display in conjunction with your high- resolution grayscale display(s) that you still set the color display as the primary monitor of the Windows desktop.
- Page 44 Troubleshooting If you installed your B Display System drivers ARCO ORONIS USION in SingleView mode (default for Windows 2000) there will be one rectangle for the virtual display representing the two heads controlled by each Coronis display controller. If you installed your B Display System drivers ARCO ORONIS...
- Page 45 Troubleshooting Click Yes when asked, “Your desktop has been reconfigured. Do you want to keep these settings?” To set the resolution of the second display attached to the BarcoMed display controller you are working with, go back to the “Settings” tab of the “Display Properties Control Panel”. If necessary attach the second display you detached in step 2 above, by right clicking on the rectangle that represents it and selecting Attached.
-
Page 46: Technical Specifications
Technical specifications Technical specifications MDCC-6130: Item MDCC-6130 Picture panel TFT AM-LCD Native resolution 3280x2048 Color resolution 10 bits / sub-pixel Pixel Pitch 0.1995 mm (H) x 0.1995 mm (V) Active diagonal 771.44 mm (30.4 -inch) Display area (H x V) 654.36x408.58 (mm) Half contrast angle 110°... - Page 47 Technical specifications Item MDCC-6130 Power consumption • 90 VAC, calibrated, no USB load: 176 W • 230 VAC, calibrated, no USB load: 166 W • 90 VAC, max backlight, USB load: 326 W • 230 VAC, max backlight, USB load: 320 W Dimensions In perpendicular vertical position, highest (W x H x D)
-
Page 48: Warranty Statement
The warranty described herein shall not include the following: 2.1 Any hardware or software item procured from a source other than Barco or their official agent or distributor and integrated by Customer or a third party into Barco supplied equipment. - Page 49 If there is an indication that the equipment was used - even temporary - outside its specifications, Barco n.v. is entitled not to perform warranty repairs and terminate the warranty agreement. Any actions that have been taken by Barco n.v. in this respect, may be invoiced to the Customer at normal pricing.
- Page 50 8.2 Barco n.v. shall not be responsible for machine failure and/or its failure to render service or maintenance due to causes beyond its reasonable control.
- Page 51 Warranty Statement...
- Page 52 K5902015-00 November 2007 www.barco.com...
Need help?
Do you have a question about the Coronis Fusion and is the answer not in the manual?
Questions and answers